Topic

tent on bias


Forum Posting

A Membership is required to post in the forums. Login or become a member to post in the member forums!

Home Forums Gear Forums Make Your Own Gear tent on bias

Viewing 9 posts - 26 through 34 (of 34 total)
  • Author
    Posts
  • #3503850
    Jerry Adams
    BPL Member

    @retiredjerry

    Locale: Oregon and Washington

    One other thing, the edge of the tent actually flaps flat on the ground for a couple inches.  You can see the puddle of water:

    Where the tent stakes are, the edge of the tent is very close to right at ground level.  The edge of the tent is on the bias.  As a consequence, it has this flap.

    You can see I added a grosgrain loop on the right and put a loop of thin nylon cord through it.  I could use a stake to hold this and put a rock on top, that overlaps the edge of the tent by that flap distance, and then maybe stuff wouldn’t blow under the tent edge as has happened occasionally to me in the past.

    Or, maybe that flap is undesirable and it would be better to have a catenary curve with about 2 inches deflection.  Then it would pitch tight rather than with a flap.  Again, catenary curves are required when an edge is along the bias.  I think I’ll just ignore this though and use plan A – keeping stuff from blowing into the tent.

    #3503857
    Jerry Adams
    BPL Member

    @retiredjerry

    Locale: Oregon and Washington

    That RSBTR silpoly fabric is really good.  I set the tent up tight, and then it stayed tight over night even when it got cold and rainy.  With silnylon, I’ll wake up in the morning and the edges of the tent will droop down and it’s hard not to brush against them and get wet from condensation.

    I’ve use 1.5 oz/yd2 silnylon before and found this 1 oz/yd2 silpoly seems plenty strong enough.  And about the same amount difficult to sew because it’s thin and slippery.

    I lay out the edges of each piece with Sharpie Proven Permanent.  Then I do about 5 hand stitches on each edge – sewing through the line on each piece.  Then sew with the machine along the lines, keeping both pieces aligned sideways (needle should go through line on both pieces) and aligned lengthwise using the hand stitches – it’s easy to have one piece slip relative to the other.

    #3503862
    Jerry Adams
    BPL Member

    @retiredjerry

    Locale: Oregon and Washington

    It rained a couple nights and stayed dry inside.  I didn’t seal my seams.

    #3503894
    Nick Smolinske
    BPL Member

    @smo

    Locale: Rogue Panda Designs

    The knowledge that cat cuts are required along the bias but not along other edges is really useful, and fits with my experience – although I never thought of it that way. Seems like a great rule of thumb for tent planning.

    #3503924
    Mario Caceres
    BPL Member

    @mariocaceres

    Locale: San Francisco

    Thanks for sharing your project Jerry,  Looking at this picture I wonder if lowering the post a little would allow you to stretch the bottom a bit more (i.e get corners further apart)  and avoid that “flap” in the middle.


    #3503957
    Jerry Adams
    BPL Member

    @retiredjerry

    Locale: Oregon and Washington

    I’ll have to try that

    I just figured the fabric would stretch so I needed a taller pole.

    #3504650
    Jerry Adams
    BPL Member

    @retiredjerry

    Locale: Oregon and Washington

    I put 6 cm (2.5 inch) catenary curve using Roger’s spreadsheet that I modified http://www.backpackinglight.com/backpackinglight/images/jerryscatenary.xls.  I probably could have done 7.5 cm (3 inches).  I could also do a 1.5 cm (1/2 inch) catenary curve on the center of the side.  That would make it pitch a little more tight.

    Weight – 13.5 ounces.  10 ounces for fabric and 3.5 ounces for everything else including 1 gallon zipper top bag.  If I had made a rectangular pyramid it would have weighed another 3.5 ounces.

    I use a 0.433 inch Easton pole, 61.5 inches.  3 sections.  4.5 ounces.  0.433 is pretty small, maybe 0.65 would be better – 7.5 ounces.  Stakes are 3.5 ounces.


    #3504662
    Jerry Adams
    BPL Member

    @retiredjerry

    Locale: Oregon and Washington

    I’m not sure whether tent on bias is better.  It has that weird bend on the ridges.

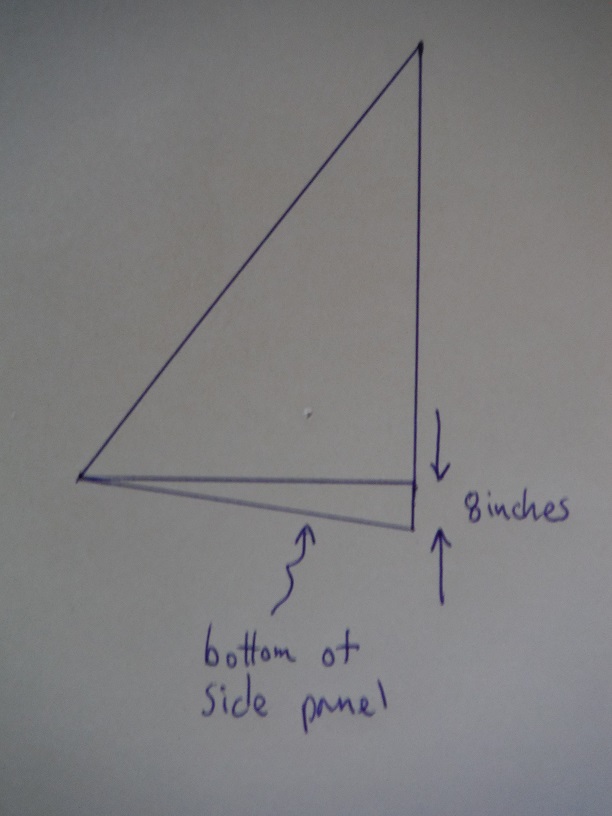
    It does result in all edges being on the ground, but you could accomplish that with tent laid out normally with an octagon shape as mentioned previously.  Or, lay out the side panels with the middle of each panel 8 inches longer:

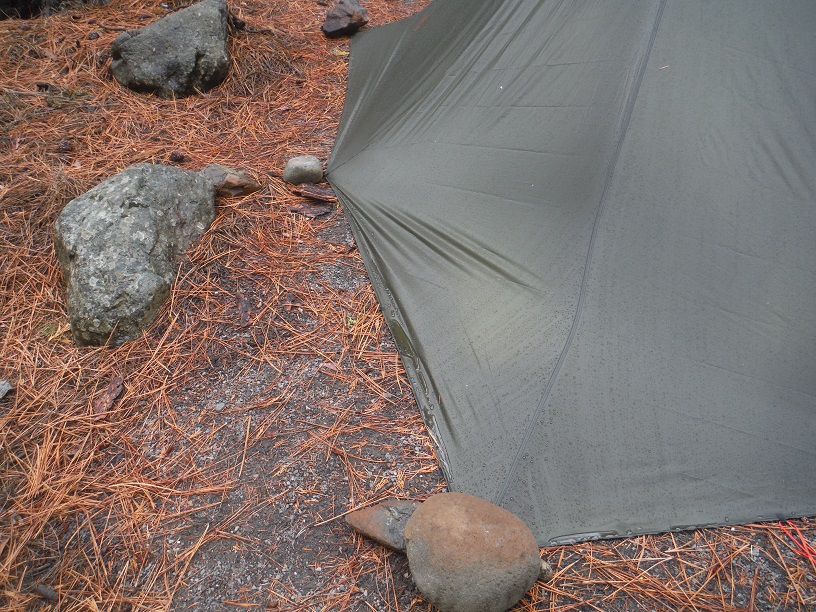
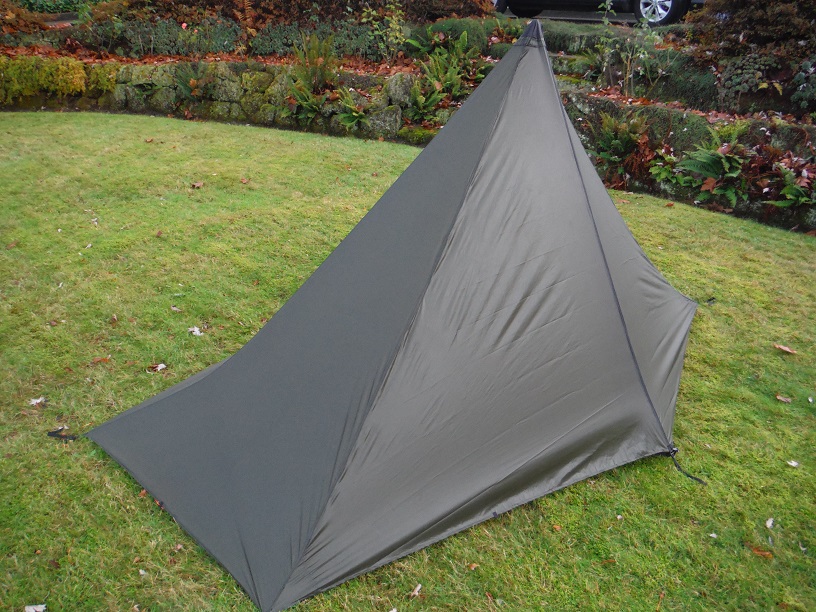
    With bias layout the sides have this flap against the ground as mentioned previously.  I tried a shorter pole as suggested but it made no difference.  If you look at the photo at the beginning of the thread of one side panel stretched out, you can see the two edges that go on the bias have large wrinkles which is what makes the edge flat.

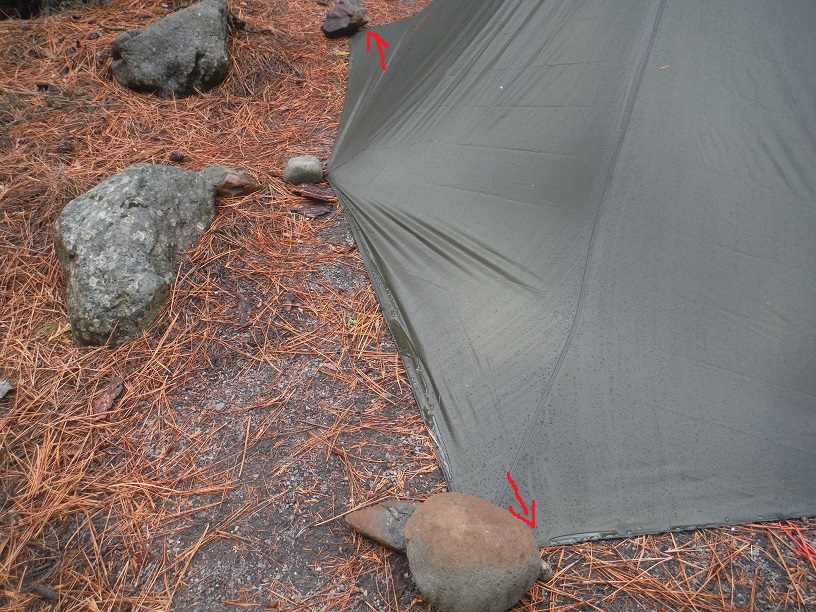
    Maybe this is a good thing.  Occasionally it gets very windy and stuff blows in under the edge of the tent.  If I put a grosgrain loop with nylon line in the center, and use that to pull out the tent and put a rock on top, I think that will prevent stuff  blowing under.

    After using a shorter pole, it occurs to me that the edge stretches out.  It was designed to be 114 inches long but it stretched to 120 inches.  But the ridge length is about the same as designed.  If I was doing a rectangular pyramid the center pole would have to be about 3 inches shorter to make up for this.  So, I should add 3 inches to the actual pole length and use that to calculate dimensions of panels of fabric.

    For the half pyramid with beak it doesn’t matter that much because of the geometry – you can just move in the two corners next to the beak – complicated to explain with words, easier to figure out when you’re doing it.  But next time I’ll add the 3 inches.

    When you set up the half pyramid with beak, first stake the two corners that are on the opposite side from the beak, then put in the pole, then stake out the beak.  This is like a three legged stool – the site doesn’t have to be flat.  And the bottom of the pole doesn’t have to be on the same plane as those three stakes – easier to understand if you’re actually doing it.

    Then, stake the other two corners.  These don’t have to be on the same plane either.  Tighten all the tent stake loops.  Put in the center stake at the rear.  The tent will pitch tighter if all the stakes and pole are on the same plane.

    After using a square mid, and this half mid + beak, the latter requires less area of ground, and is more tolerant of a non flat site.  And it saves 3.5 ounces.

    #3609550
    Jerry Adams
    BPL Member

    @retiredjerry

    Locale: Oregon and Washington

    I did a tent normal – not on the bias, and I think this works better

    You can lay out the panels in a way to eliminate the gap at the edge of the tent

    see https://backpackinglight.com/forums/topic/36355/page/2/#post-3609447

Viewing 9 posts - 26 through 34 (of 34 total)
  • You must be logged in to reply to this topic.
Forum Posting

A Membership is required to post in the forums. Login or become a member to post in the member forums!

Get the Newsletter

Get our free Handbook and Receive our weekly newsletter to see what's new at Backpacking Light!

Gear Research & Discovery Tools


Loading...