Topic
Soliciting feedback on prototype/practice pack
Forum Posting
A Membership is required to post in the forums. Login or become a member to post in the member forums!
Home › Forums › Gear Forums › Make Your Own Gear › Soliciting feedback on prototype/practice pack
- This topic has 3 replies, 2 voices, and was last updated 6 years, 1 month ago by
 Lester Moore.
-
AuthorPosts
-
Feb 28, 2018 at 5:04 am #3521242
Hi Everyone,
First off, I’ll echo others in thanking all those of you who take the time to share so much great info on gear making.
Second, golly this got long. Hopefully the minutiae below are appreciated rather than tedious.
I’ve completed a practice/prototype pack. I’d appreciate any general feedback on design, construction, etc., and I’ve got a few specific questions too.
Materials were 1.9 coated (gray) and 1.1 uncoated (green) ripstop nylon I got sort of cheap; ¼ (or 3 mm) spacer mesh. I used 3/8” foam for hip belt and scapular pads, and 1/8” foam for shoulders, but both hip belt and should strap construction included a layer of stiffer 1/8” foam I got at the local craft store. My sewing machine can’t handle 1/4+” of foam plus 2 layers of fabric. For the hip belt especially, I wanted to sew through more than just the thin ripstop when attaching the webbing, and the stiffer foam also provided a bit of structure to support the frame connection. The hip belt attaches to the pack via 2 hook and loop bits on the back panel that run through the upper daisy chain on the belt.
For the shoulder straps, I actually sewed the less stiff foam (gossamer gear’s 1/8” sleeping pad) between the nylon and spacer mesh, then used the 2-ruler trick to slide the stiffer foam into the resulting sleeve, between the softer foam and the nylon. This stiffer foam only ran about ½ the length of the strap, so it was a bit easier to slide it in and I think still provides adequate padding and structure where needed, and I ended up just being able to coax my machine into bar tacking through the double foam layer.
The actual pack will be VX21 for the bottom and back, VX07 elsewhere.
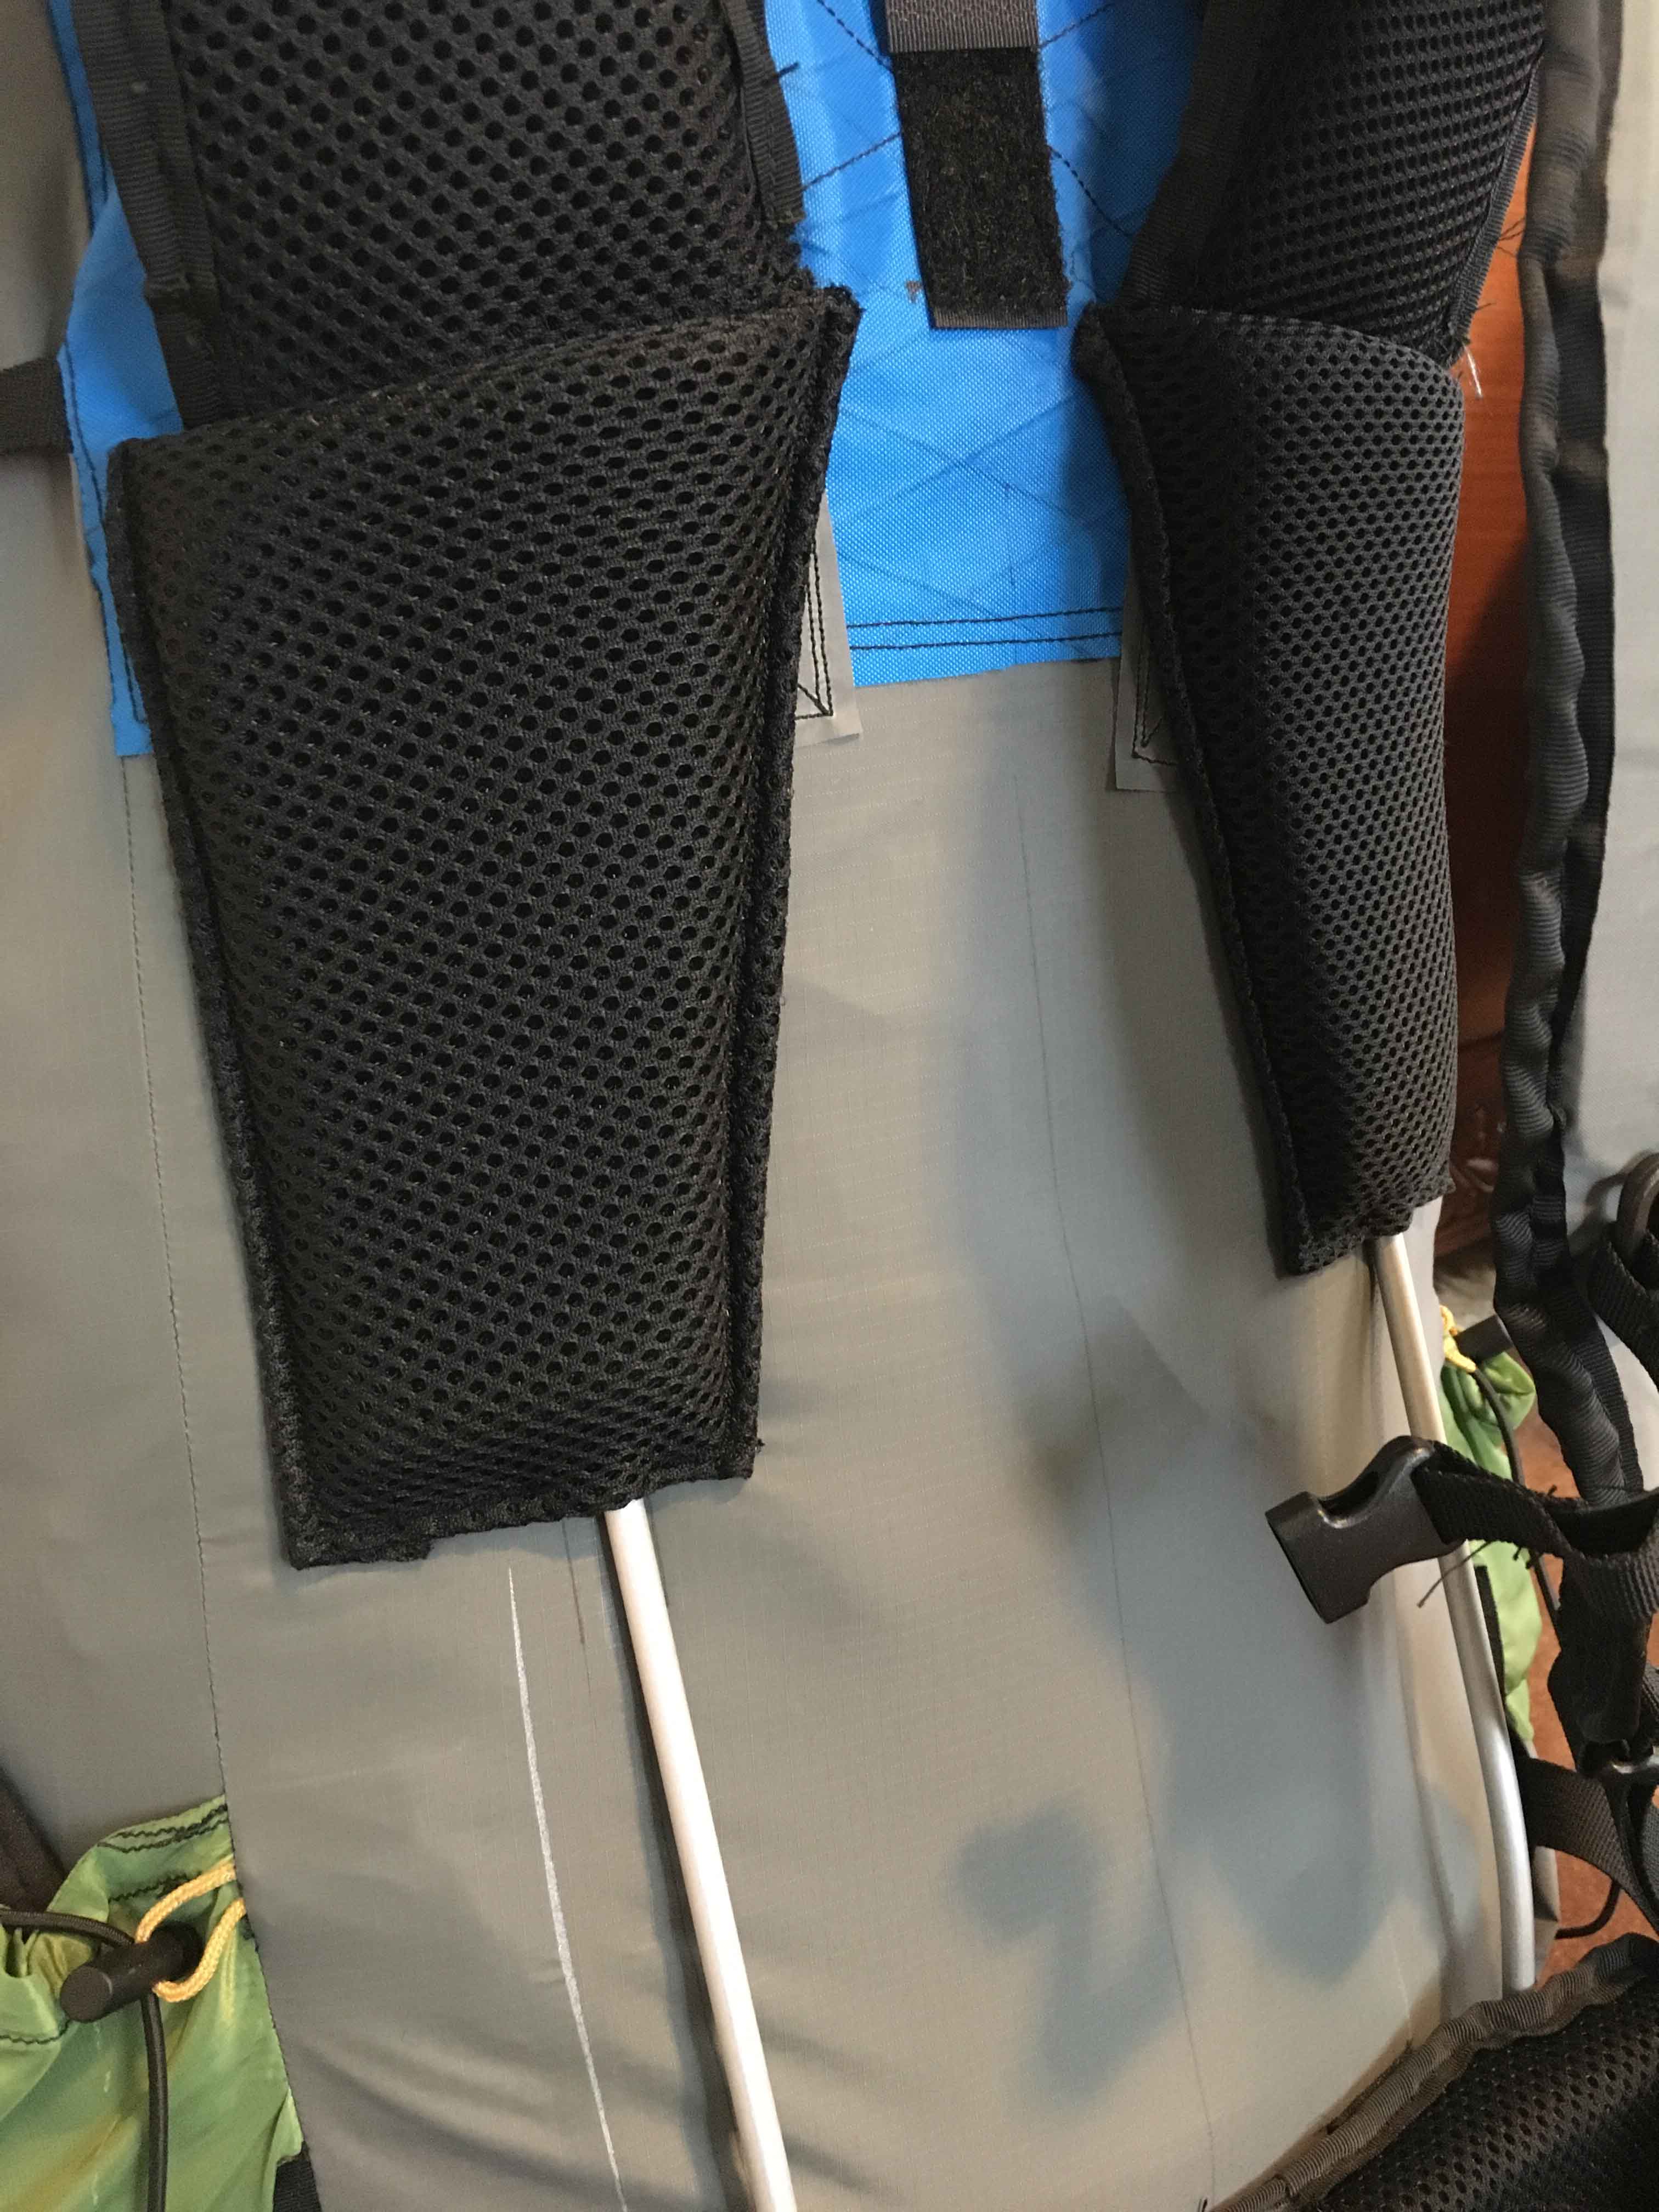
Frame is from Gossamer Gear, fixed at the top with 3 simple hook and loop foldover straps, slid through a channel I left when attaching the shoulder straps and scapular pads, and then into sleeves of folded over webbing on the hip belt.
I’ve hiked about 5 miles with the prototype and load weighing 18-20 lbs, including the large size Bear Vault. It feels really good; nice back ventilation, good weight distribution between hips and shoulders. I can feel the frame, but it isn’t uncomfortable, yet.
Total prototype weight is around 20 oz. It seems the volume ended up somewhere pretty close to that of my small size ULA Circuit.
The design was heavily inspired by the Circuit, which served me well for about 800 miles of the PCT in 2015 and several weekenders since. But there are a few aspects of that pack that I didn’t like/need and wanted to change (and to be clear, I don’t take credit for coming up with any of these solutions/changes; these are mostly things I’ve seen and liked on other packs, including other MYOGs here):
- Too much contact between the pack and my back. Solution: back contact only in the lumbar and scapular areas.
- Dry bag style roll top closure. The ability to roll and then snap side-release buckles either to each other or to compression straps seems excessive to me and I essentially never used that on the Circuit or on the Elemental Horizons Kalais that I used for ~1400 mi before the Circuit. For my purposes, it’s plenty sufficient to just do a casual roll/crumple of the loose extension collar and secure this bundle down with the single over-the-top strap. Solution: just a simple extension collar with a sleeve to maybe or maybe not run a draw string through.
- Fixed elastic top on the large front mesh pocket. I don’t like how this compresses the top of the pack all the time, and also at times I find the tight top of the pocket a little frustrating to get in and out of. Solution: the shock cord through the sleeve and cord locks at each end. The relatively long exposed portion of the shock cord is intended to do double duty as the top portion of the ice axe/trekking pole loop. However, being fixed, this is still a bit cumbersome, so on the next pack I plan to use some sort of cord lock and clip. So far the closest thing I can find to what I’d like is the Cyberian clip, but I’d prefer to go even simpler with just a standard cord lock with a hook. Anyone know of a source for such a product?
- Orientation of the over-the-top strap buckles; with the ladder lock/male side attached to the back side of the pack (at the haul loop) the loose tail needs to be dealt with each time the main compartment is accessed. Solution: flip the orientation so the loose tail can be tucked into the front mesh pocket and stay there even when the strap is unclipped.
- Permanently attached and very large hip belt pockets. Solution: Double daisy chain/MOLLE strips on the belt for modular pocket options (i.e. possible case for Sony a6300 with the 16-70 Zeiss lens).
- Weight. I think I can cut 10 oz with lighter material and without some of the extra do-dads on the ULA (shoulder strap D-rings, pull-tab thingies on the shoulder strap water bottle shock cords and ice axe loops).
- 2 frame pieces. Solution: using the Gossamer Gear frame instead.
Some specific elements of the Circuit that I wanted to retain:
- Overall size and shape.
- Arrangement of the strap attachment points of the suspension system, particularly the bottom of the shoulder straps which attach to the front-bottom corner or bend in the pack, inside the side pocket, rather than at the back-bottom corner. It seems to me this has a lot to do with how comfortably and securely the Circuit carries a load, providing both a bit of “active” compression to the bottom part of the load and helping to pull the bottom part of the load toward the hips.
- Overall layout and size of the side and front pockets, especially the big and accessible side pockets (the a6300 often rides there).
Some things I learned making the prototype/practice pack and other things I’m pondering in prep for making the real pack:
- I wanted a direct connection between the frame and hip belt. I realize this can be achieved with permanent hip belt attachment and frame piece run on the inside of the main compartment, but at least for this pack I wanted to have a removable hip belt. I don’t really ever plan on doing a belt-less trip, so I guess there isn’t a particularly compelling reason to have detachable hip belt. The whole frame sleeve system could certainly be simplified if the frame were on the inside. I guess I don’t really have a specific question here, but I’d be interested to hear some feedback from other pack makers on this.
- Rushing the sewing never really pays off (note the inside-out seem on the extension collar). Also, note that I forgot to include the haul loop when doing the collar, but I kind of like the temporary solution I came up with; if I end up keeping the frame on the outside, I’ll keep this haul loop and always have a bit of backup cord along.
- Am I likely see excessive rubbing/wear of the frame against the VX21 back panel? Should I add a dedicated sleeve of heavier material?
- Does using only 2 hook and loop straps for the hip belt attachment seem sufficient for long term durability? This may be moot if I end up permanently attaching the belt, but I’m still curious to see what folks think.
- It seems that construction would be simplified by not having a separate piece of fabric for the extension collar, but rather just cutting the back, side and front panels long enough to go the distance. Is there a good reason to stick with the separate piece of fabric?
Now the pics:

Thanks again for all the info already offered, and in advance for anything more.
Scott
Feb 28, 2018 at 5:50 pm #3521325Hi Scott – congrats on your first MYOG pack prototype. It looks like you did your homework on materials and features and you know what features you prefer and dislike. In regards to most of your questions, I’d say that if it works for you, and it’s structurally sound, then go for it.
For example, plenty of people prefer the simplicity of draw chord closures and dislike roll tops. While some hikers prefer airy backs, I prefer packs that conform snugly to the shape of one’s back from torso to shoulder, but both styles work. There are many workable ways to arranged hardware and embellishments on a pack to get the job done to your particular liking. Borrowing features from packs you have used and like is a great way to go.
The biggest thing to consider IMHO is structure and reinforcement strength – regardless of features. As long as the pack holds together in real use, you can either work around, modify or tolerate minor idiosyncrasies in the features.
Mar 1, 2018 at 4:53 pm #3521528Thanks Lester. And thanks for your detailed posts on pack-making.
Durability of construction is definitely the thing I’m most unsure of. It seems to me that the suspension system attachment points are the most-critical areas. I think I’ve got attachment at the top of the shoulder straps pretty well figured out (2.5″ tail box-x stitched to the back panel; the next pack will have reinforcement patch on the inside of the main compartment, rather than the outside).
I’m primarily still unsure about the hip belt attachment point. I wonder if just the 2 hook and loop straps (1″ wide) through the daisy chain loops on the belt will be enough.
Thanks again.
Scott
Mar 1, 2018 at 5:15 pm #3521532If you are sewing through VX21 (thick 210d fabric) for attaching the shoulder straps, you might consider adding a few short bar tacks right at the main seam (or close to it) at the inside and outside edges of the straps. At least two well-known and respected pack manufacturers do this, with a thicker thread for the bar tacks than the main pack (looks like at least a Tex 75 thread for the bar tacks). The X-box you’re making will likely ensure the straps will never come off the pack, but there is still a lot of tension between the strap attachment and the fabric above the strap. Depending on how much weight is carried in the pack, that main seam could open up a little if not reinforced. Hopefully some more experienced MYOGers will chime in about this – I’ve only experienced this issue on one of only 3 packs I’ve made, so not much experience.
As for your hip belt, no experience making a velcro-attached removable padded hip belt. Hopefully others here at BPL can provide some experienced insight, but my first instinct would be to have at least twice the surface area for the hook and loop attachment points.
-
AuthorPosts


- You must be logged in to reply to this topic.
Forum Posting
A Membership is required to post in the forums. Login or become a member to post in the member forums!
Our Community Posts are Moderated
Backpacking Light community posts are moderated and here to foster helpful and positive discussions about lightweight backpacking. Please be mindful of our values and boundaries and review our Community Guidelines prior to posting.
Get the Newsletter
Gear Research & Discovery Tools
- Browse our curated Gear Shop
- See the latest Gear Deals and Sales
- Our Recommendations
- Search for Gear on Sale with the Gear Finder
- Used Gear Swap
- Member Gear Reviews and BPL Gear Review Articles
- Browse by Gear Type or Brand.
