Topic

Resizing Photos: How To


Forum Posting

A Membership is required to post in the forums. Login or become a member to post in the member forums!

Home Forums Administration & Support Website & Forum Support Resizing Photos: How To

Viewing 11 posts - 1 through 11 (of 11 total)
  • Author
    Posts
  • #3445567
    Nick Gatel
    BPL Member

    @ngatel

    Locale: Southern California

    Okay, we cannot post a picture that is larger than 1MB. There are probably a couple reasons for this (1) photos stored on the server take up a lot of space and (2) numerous large photos in a post cause long load times… and we know people complain about slow load times.

    For the old people like me who prefer fountain pens, paper, and slide rules over today’s technology, here are a couple ways you can easily do this.

    FIRST: You probably do not want to re-size your original photos. I suggest you keep your originals in a folder and then copy all the photos to a new folder doing something like this:

    • folder 1 file name:  2017-01-15 Backpacking trip Anza Borrego
    • folder 2 file name:  2017-01-15 Backpacking trip Anza Borrego (smaller)

    MAC OS X

    • Right Click the photo you want to re-size
    • Click the “Quick Look” option
    • Click the “Open with Preview” button
    • Click “Tools” in the menu bar
    • Click “Adjust Size…” in the drop-down menu
    • Using the “Image Dimensions” window, use the pixels options
    • I recommend that you change the width to 800 pixels and the height will automatically resize if you check the “scale porportionally” box
    • Click OK

    Windows (I am using 8.1.1)

    • Open the program Paint, which is in the Windows Accessories folder
    • Using File and then Open from the menu bar choose the file you want to re-size
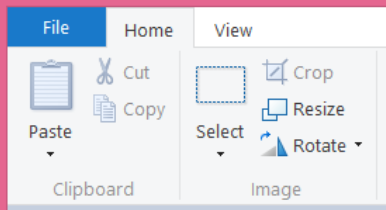
    • When the photo is open Click the “Resize” button in the Home Group menu bar

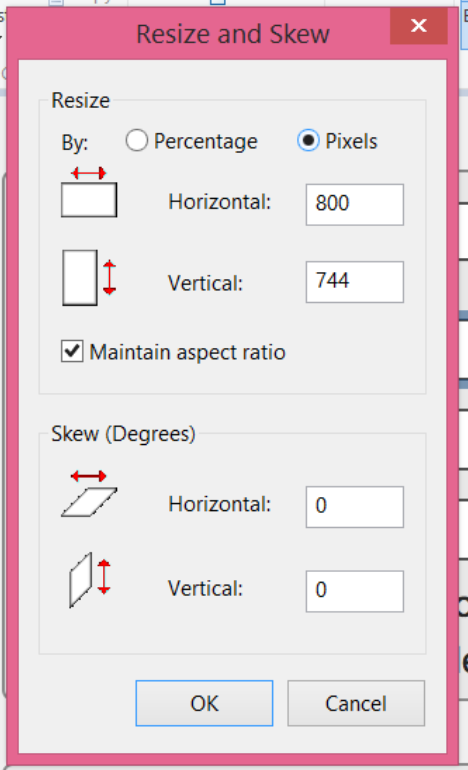
    • Click Resize by Pixel
    • I recommend 800 pixels for the width
    • Click “OK”

    Other thoughts…

    I have Mac that also runs Windows 8.1.1 on it. I rarely use either of these two methods to resize an image, but if I do, I use the Mac OS X method because it is quicker. Most of my pictures are taken with cameras that create RAW files that are between 20MB – 24MB. I usually edit the files in Lightroom. After editing a photo, I export the file as a JPEG to a folder using the file protocol suggested in the beginning of this post. I have set up Lightroom so it automatically resizes the longest dimension too 800 pixels. The reason I do this is because I upload photos to my blog and this is the easiest and quickest method for me. I have also found that the long side of a photo at 800 pixels gives me the best mix of load speed and image quality.

    #3445581
    Andy Berner
    BPL Member

    @berner9

    Locale: Michigan

    Thanks for posting this Nick.  Ive been trying to do this post a photo thing for a while.  lol.  Finally  figured it out.

    Doing the preview thing doesn’t work if you are bringing your photos up through the app “photos”.  I just get a spinning wheel of death. You gotta move the photos into a Finder folder.  Make one on the desktop or something.  Everything works like it should then! I love Macs and I hate them!

    #3445611
    Nick Gatel
    BPL Member

    @ngatel

    Locale: Southern California

    Andy, this is what I do.

    I move all the photos into a sub-folder from my camera or even my cell phone.

    Pictures (folder)

    —–> @@ Lightroom Processing

    ———-> 2016-12-25 Camping Trip Nor Calif

    ———-> 2017-01-15 Backpacking trip Anza Borrego

    Edited pictures go into a new sub-folder and the originals stay put in the @@ Lightroom sub-folder.

    Pictures (folder)

    —–> @@ Lightroom Processing

    ———-> 2016-12-25 Camping Trip Nor Calif

    ———-> 2017-01-15 Backpacking trip Anza Borrego

    —–> Trips

    ———-> Camping Trips

    —————> 2016-12-25 Camping Trip Nor Calif

    ———-> Backpacking Trips

    —————> 2017-01-15 Backpacking trip Anza Borrego

    Notice I use @@ Lightroom Processing as a file name because the @@ lets me always sort my folders with this at the top. Also, I always include the date as part of the sub-folder file name so I can sort in chronological order.

    I hear you on Finder for Mac. It is awful compared to Windows File Explorer. If I need to move files around I almost always use Windows File Explorer. On my Mac I can run Windows 8.1.1 in a separate Desktop while running Mac OS X on a different Desktop at the same time and all of this runs very quickly. When I switch programs whether they are Mac or Windows, all are in the Mac Task Bar. See below: at the right of the Task Bar, Excel and Adobe Acrobat for Windows are running concurrently with Mac OS, and I just click any open Windows program icon to quickly to go to that application.

    I have some Windows programs that are much more robust than the Mac versions, such as all the MS Office programs and Quicken. When I bought my Mac, Quicken for Mac was a no-go since I have been using Quicken for Windows since 1992, and before that on an Apple //. I also have Adobe CS2 in Windows and was not willing to buy the newer Big Bucks Mac version when I bought the Mac and I didn’t need to upgrade the Windows version to whatever the last one was — I think CS6.


    #3445613
    Jerry Adams
    BPL Member

    @retiredjerry

    Locale: Oregon and Washington

    I just, for example, rename the file “002”, to “002resize”

    For PC I use the program “paint” that comes with the computer.  Maybe not the best, but it’s convenient

    #3445617
    Nick Gatel
    BPL Member

    @ngatel

    Locale: Southern California

    Jerry,

    All that matters is you use something that works for you.

    Since I upload a lot of pictures to my blog, probably around 4,000 right now, my method works best for me.

    It reminds me of a guy who asked me the best way to organize files in a filing cabinet. I told him if he could find what he wanted quickly then that works. He was upset because some consultant told him the plastic file tabs should be at the back of the folder — not the front as he did it, and the consultant tried to get him to change how the files were organized, which would have been a big task. Unfortunately he hired the consultant to improve his business and make more money — and playing with files wasn’t going to make more money.

    #3445625
    Ken Thompson
    BPL Member

    @here

    Locale: Right there

    So many won’t take the time to do what was once unnecessary. You see how many less photos are getting posted. Trip reports and even Gear Swap have suffered as a consequence.  All this editing is of course much easier on a desktop, but those are in the minority here I’m guessing.


    #3445634
    Ben C
    BPL Member

    @alexdrewreed

    Locale: Kentucky

    I don’t think there is currently a way to do this within Google Photos unfortunately.  It looks like us Google Photos users will have to copy them somewhere else and then re-size.  I would like to do some trip reports but it’s hard to get motivated for this process.

    #3445635
    Kattt
    BPL Member

    @kattt

    For tablet users there are several apps available. Photo Compress is one of them ; make sure to save the original when promoted to .

    #3445651
    Nick Gatel
    BPL Member

    @ngatel

    Locale: Southern California

    I don’t think there is currently a way to do this within Google Photos unfortunately. It looks like us Google Photos users will have to copy them somewhere else and then re-size. I would like to do some trip reports but it’s hard to get motivated for this process.

    One of the reasons I have a blog. But if there is no way to re-size in Google Photos, I bet there is probably an app to do it — there seems to be an app for anything these days.

    I do a lot of trip reports on my blog but rarely even post a link here any more. Seems most people are more interested in reading about gear, or buying and selling gear on Gear Swap.

    If I owned an Internet forum I wouldn’t store user photos and I would also limit file sizes as I stated in the original post. But honestly, this file re-sizing is pretty simple stuff and in this day and age it should be basic knowledge in our computer/technology driven society. We retired senior citizens have a good excuse not to know how to do it, but a little time spent growing our personal knowledge and skill makes it easy.  This is why I started the thread.


    #3445674
    BlackHatGuy
    Spectator

    @sleeping

    Locale: The Cascades

    If you use Photos on the Mac, it’s quite easy to batch reduce your photos. Simply choose the photos in Photos, click File, then Export, then Export (N) Photos. I generally choose JPEG Quality – High and Size – Large, which reduces my iPhone photos (of around 1.5MB in size) to around 350 kb in size. Mess with the settings on your photos (one at a time) to get the right values for your photos, then batch export.

    Save the export to a folder on your hard drive, and upload to BPL from there. Your original photos in Photos aren’t touched.

    #3445703
    Nick Gatel
    BPL Member

    @ngatel

    Locale: Southern California

    Good tip, Doug. One thing about many software programs is they can do a lot but sometime you have to dig deep to find the gems.

Viewing 11 posts - 1 through 11 (of 11 total)
  • You must be logged in to reply to this topic.
Forum Posting

A Membership is required to post in the forums. Login or become a member to post in the member forums!

Get the Newsletter

Get our free Handbook and Receive our weekly newsletter to see what's new at Backpacking Light!

Gear Research & Discovery Tools


Loading...