Topic
Pots With Heat Exchangers
Forum Posting
A Membership is required to post in the forums. Login or become a member to post in the member forums!
Home › Forums › Gear Forums › Gear (General) › Pots With Heat Exchangers
- This topic has 295 replies, 3 voices, and was last updated 8 months, 2 weeks ago by
 DAN-Y.
-
AuthorPosts
-
Jan 19, 2018 at 9:28 pm #3513313
That’s a great hack Dan,
What is the weight, diameter, total height, double wall section height, of you hacked pot?
I like pots that have a lip on the top so the lid sits slightly inside the pot walls (this helps with any droplets on the lid going back inside the pot and not outside.). I know you have reshaped some pots to have a rib in the middle to accommodate caldera cones, so I assume whatever tool you use to do that can also be used to modify the top of your hack?.
Mario
Jan 19, 2018 at 10:06 pm #3513315another design characteristic is to have the lid such that if stuff falls on top of the lid, it will fall off the side, rather than into the pot
My Evernew Ti 900 ml is designed so stuff falls into the pot
Jan 19, 2018 at 11:27 pm #3513324The original lid will be used turned upside down and will perform just like the two of you guys have described. I will make a new one much lighter for my testing.
The modified pot now weighs 5 ounces. One ounce per cup of water and 2 ounces for the exchanger. :-)
The double wall section is 2 inches in height. Total height is 3-1/2 inches. Diameter is 5-1/8 inches.
 Jan 20, 2018 at 11:31 pm #3513453
Thanks for the specs Dan, curious to see what kind of boil test results you get with your hacked pot.
Jan 21, 2018 at 12:36 am #3513459I got a lid made today for it. Weighs in at 5 grams. I think I’ll be able to start testing tomorrow. I got a good feeling I’ll see some results that I have never realized were possible with alcohol. I’ll be using the same XL3 burner and the pot support from the Sterno Inferno.
Jan 22, 2018 at 5:19 am #3513650Dan,
I confess that at camp I just wiggle the JB pot HX fins in the snow to get some of the soot off. Ya can’t bang them on a tree or they will be ruined but I have tapped the center pf the pot on a small stump, avoiding the fins and it helps a bit. I may carry a small plastic brush stolen from my kitchen.
When I get home I actually use a brass brush (ACE Hardware) to scrub them clean.
Jan 22, 2018 at 10:08 pm #3513759Thank you Eric, you’ve got some good dry wood out your way to be able to clean your pot easily.
Some quick results of my recent tests using the XL# and the Sterno Inferno pot support. Not too shabby for a pot that weighs 5 oz. ;-)
1st test
75* wat 9 min boil 9 gr fuel used2nd
68* wat temp 8:45 min boil 10 gr fuel used3rd
63* wat temp 9 min boil 10 gr fuel used4th
57* deg wat 8:30 boil 11 gr fuel used.My first test used 9 grams because the burner was cold. The following tests, the burner was not cooled down and so it burned less efficient.
Jan 23, 2018 at 1:17 am #3513794Dan, How much water are you using in your boil tests?
Jan 23, 2018 at 1:28 am #35137962 cups
If I use 3, the efficiency will go up as usual. I used 2 cups because the majority of my tests are with 2 so I can easily see efficiency quickly.
Jan 23, 2018 at 2:09 am #3513801Dan, I believe I started with colder water (40-50F) and a longer burn time ~10 minutes in a plain old grease pot to hit around 3/8oz per burn.. Anyway, if you didn’t already notice, as the temp of the water decreases, the fuel consumption increases. This suggests you are bottoming out the heat absorption by the pot. I would suggest increasing burn time (by decreasing burner size) about 15% to slow the heat output. Of course, this would not be good at <40F ambient out camping. (The old Gemini stove works pretty well to adjust output, btw.)
Jan 23, 2018 at 2:32 am #3513805Dan, Also try to keep your stove “cooler” by minimizing any “Thermal Feedback” (which I would imagine is lower on a HE Pot, but still you probably have some). I would add a small carbon felt disc on top of your XL. Make the opening of the carbon felt disc the same size of the opening of the XL.
Jan 23, 2018 at 2:00 pm #3513862Thank you for the suggestions. I’ve used the carbon felt disc on other experiments and it does nicely at reducing thermal feedback.
1/3 ounce per 2 cups is pretty good for the size of the pot. It’s a an amazing engineering advancement in the HX fin development. I’m referring to the shroud that covers the fins and goes up the side of the pot and attaches to the pot. It protects the fins and flames and exchanges heat where it attaches to the pot. 3/8″ attaches to the pot and exchanges heat.
Let’s look at this pot as a fair weather pot used at sea level LOL. The pot is robust even with the top cut off. Let’s say it’s for car camping for morning drinks. ;-) The Starlyte XL3 burner behaved well inside the Sterno Inferno pot support that I used. I learned a lot, nothing ventured, nothing gained ;-)
Jan 23, 2018 at 7:29 pm #3513946Dan, at the low heats, you don’t need a heat exchanger. Just a flat bottom, lighter grease pot.
Jan 23, 2018 at 7:38 pm #3513948+1 Agreed!
Jan 23, 2018 at 7:45 pm #3513951James, I think the carbon felt discs help make the Starlyte XL stove more “stable”. I do not have the Starlyte XL but I do have the “Starlyte Simmer”, which has similar design, just smaller opening and lower fuel capacity than the XL. I have noticed that as the stove gets some “thermal feedback” from the pot it runs much hotter. This is particularly noticeable when dry baking or when using a conic screen.
I agree, in order to take advantage of pots with the HE feature one can go a bit hotter than pots without it. On the starlyte type of stoves you can fine tune the amount of output by increasing or reducing the size of the opening. The key is once one has found the right size opening for the pot, how to get the stove to run at the SAME output through out the burn, this is the role of the carbon felt disc, in my experience. I’ll post some pictures later on to illustrate how nicely the carbon felt discs work on this regard.
Jan 23, 2018 at 8:13 pm #3513957I agree with everyone.
I’ve had fun going through the motions with the pot and I’m well pleased with boiling 2 cups with 1/3 ounce of denatured. I also had great result boiling 4 cups in the pot before cutting it down.
Stove science is interesting.
Jan 24, 2018 at 7:39 am #3514087As promised, here some side by side pictures to show how the carbon felt helps keep the starlyte more “stable” by shielding it from “Thermal Feedback” from the pot.
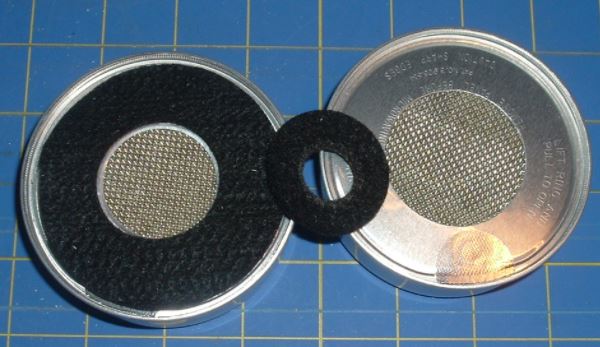
The set up: This is the “Starlyte Simmer”, which has an opening of about 1″ diameter (Similar to a one dollar coin). The carbon felt disc (which has the same opening) goes on top of the starlyte simmer and has a small piece of aluminum inner disk to slow down the deterioration of the carbon felt when exposed directly to the flame for extended periods of time. The other piece on the left is a small sleeve also of carbon felt to help insulate the outer walls of the starlyte. Basically we are insulating the top and the sides of the starlyte with carbon felt.

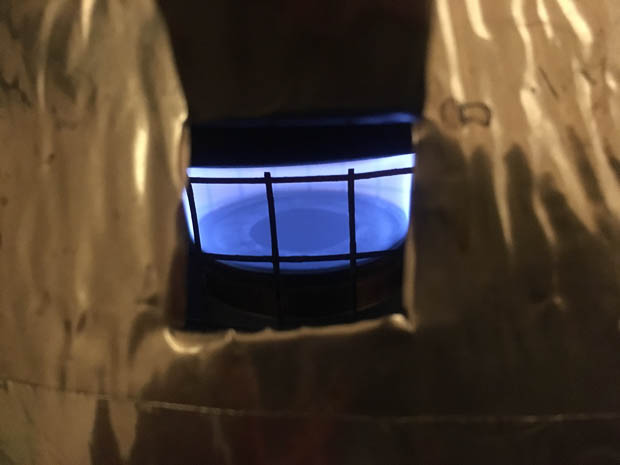
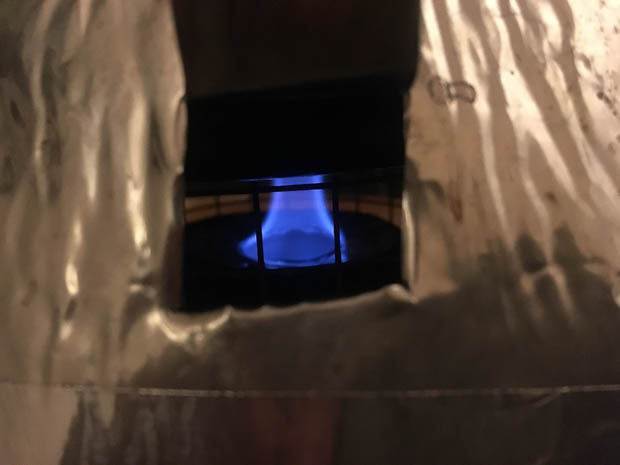
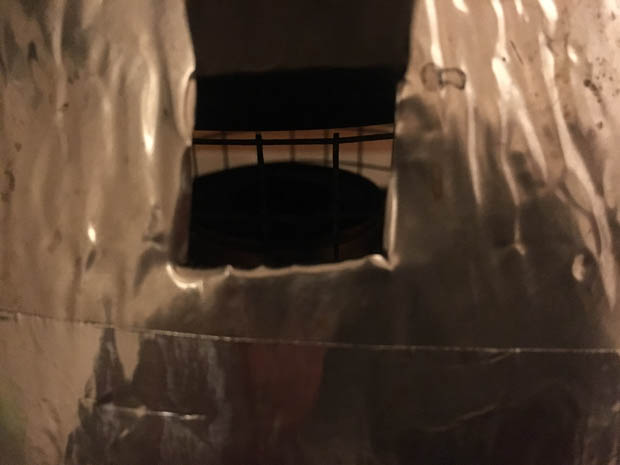
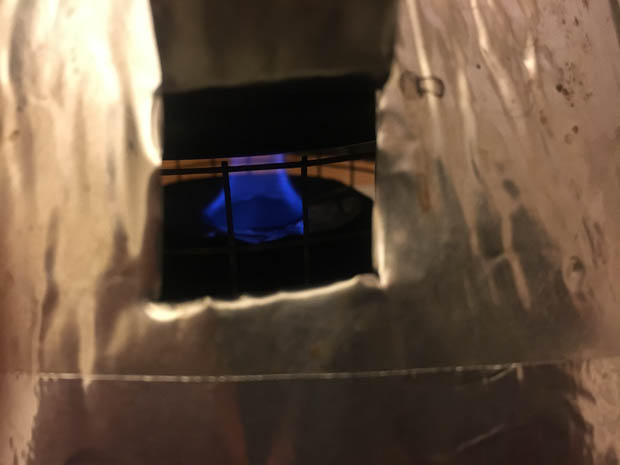
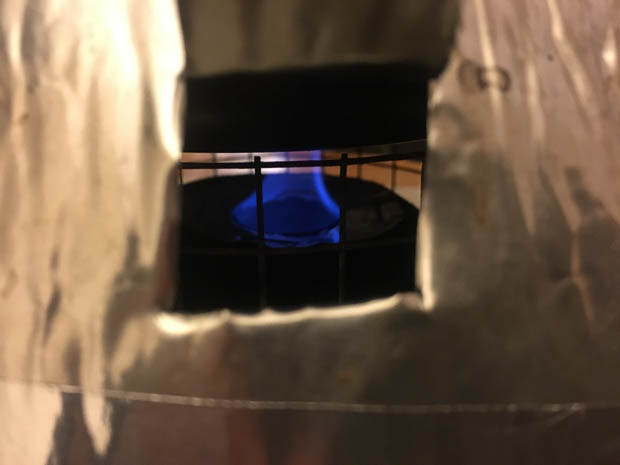
Now the side by side burn comparison. On the left side the stove without any carbon felt and on the right the same stove with the carbon felt “insulation”. In order to see what is going on inside my aluminum conic windscreen I have a small opening which I used to take the pictures shown below of the flame size throughout the burns.
Minute 1: The flames are about the same size, since at this early stage the stove is still pretty cool.


Minute 5. The flame on the scenario without any carbon felt starts to spread as the stove starts to warm up.


Minute 10. Notice how in left picture the opening of the stove (1inch diameter) is no longer the limiting factor of the flame, it has taken over the whole diameter of the stove. On the other side, the run with the carbon felt keeps pretty stable (same size flame):


At minute 14 the starlyte without the carbon felt “shields” is out, but I will keep showing the one with carbon felt.
Minute 30 (Sorry did not take minute 20):


Minute 41:


The starlyte with the carbon felt kept going for a few minutes more, but when I came back at minute 50 it was already out.
As we can see, the stove with the carbon felt kept the size of the flame very even throughout the burn, even though the stove had the same size opening and had the same distance to the pot bottom.
Jan 24, 2018 at 12:43 pm #3514097That seems like a significant result.
Jan 24, 2018 at 2:23 pm #3514106Thank you Mario, great photos.
When i designed the Starlyte XL4.5 I used the carbon felt in the same fashion as you have shown to prevent thermal feedback. As time passed I was able to build a smaller, lighter version, the XL3. This spring I’ll be able to produce the carbon felt version of the XL3.
It was back in Jan. 2015 that I started experimenting with the felt as a shield.
Here is a quote from my website bplite:
http://bplite.com/viewtopic.php?f=2&t=6290&sid=a1055b33444d24d3612da836d84c1b9c&start=40
Re: StarLyte XL 4.5
Postby zelph » Fri Jan 23, 2015 7:41 pmA carbon felt disc is placed over the stove to prevent thermal feedback. The disc is of a size that will allow the pot support to rest on the stove. The The simmer plug-in is used when wanting to simmer cook.
 Jan 24, 2018 at 2:32 pm #3514112
well done experiment
I like how it went out between minute 41 and minute 50, the perfect amount of attention devoted to this : )
Jan 24, 2018 at 6:15 pm #3514158Dan, thank you for all your stove experimenting and specially for sharing your findings with everybody here and in other forums. I have been a few times and read with interest some of the threads on your bplite but I missed the one you are linking above. However the first time I learned about the carbon felt disc as a simmering device was in your store when I was looking for simmer devices. I bought one and I liked it, but I noticed the opening quickly “grew” with use. This is when I experimented adding the inner aluminum disc which somehow slowed down the deterioration (aka increase in size) of the opening.
Jon Fong, whom is much knowledgeable than me, explained in a different thread why the inner aluminum disk worked. In his own words “..The flame front sits on top of the surface. So with Carbon felt, it sits on the top surface and reduces direct heat contact of the flame to the body of the stove. However; the flame being close to the carbon with degrade it over time. If you just add just a metal spacer, the heat will transfer through the base material to the stove. A better way is to use a carbon felt topped with a metal layer. The flame front will not contact and degrade the carbon as it will sit on top of the metal.
Jerry, actually that was over an hour of watching that thing like a hawk :-). 14+ minutes for the first run (without carbon felt) and 50 minutes for the second run (with carbon felt), not to mention risking my iphone camera by exposing it to unbelievable high temperatures…. the things one do in the sake of curiosity :-). Kidding aside, here are a couple of more pictures for anybody interested:.
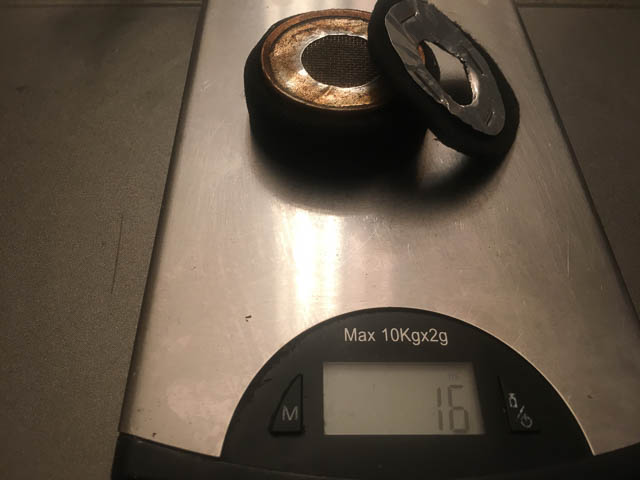
The carbon felt disc and outer ring only adds 3 grams to my 13 gram starlyte simmer. This picture also shows better the outer ring/sleeve insulating the starlyte walls.

And here a picture of my windscreen’s peek-a-boo hole. I can open it when I need to check what is going on inside my aluminum conic windscreen and close it to keep things hot and cozy inside the cone.
 Jan 24, 2018 at 8:51 pm #3514181
Dan,
Can a felt disc be used for a white gas stove like the MSR Universal, which has very little simmer capability?
(Will the flame be too hot even with an aluminum top on the felt disc?)
Jan 24, 2018 at 9:25 pm #3514190I would think you would always want the carbon felt to be smaller than the opening. You would only want to use it for simmer capability or increased efficiency. Take it off to increase thermal feedback and get a boil as quick as possible.
Jan 24, 2018 at 9:45 pm #3514192Ben, If you have the carbon felt disc opening smaller than the “starlyte simmer” opening, that area of the Carbon Felt will quickly “wear out” as the bottom part of it will be in direct contact with the flame. Carbon Felt is rated at 1700F, the alcohol stove flame runs at +/- 3400F (or 1910C), so when the carbon felt is directly exposed to the flame it “wears out”. Having the carbon felt basically “sandwiched” between two layers of metal (on the bottom the stove and on the top the additional aluminum ring) helps prevent the direct contact with the flame…. I think.
Eric, I’m not sure how would you use the carbon felt on the MSR universal. The carbon felt is basically to minimize “thermal feedback” on alcohol stoves. For remote stoves like the MSR universal, I’m not sure thermal feedback is a problem, is it?.
Jan 24, 2018 at 9:50 pm #3514195Can a felt disc be used for a white gas stove like the MSR Universal, which has very little simmer capability?
No.
Flame size is set by fuel supply. For an alky, fuel supply is influenced by thermal feedback – which is limited by the carbon felt. For a white gas stove the fuel supply is set by the needle valve (and the pressure in the tank).Cheers
-
AuthorPosts
- You must be logged in to reply to this topic.
Forum Posting
A Membership is required to post in the forums. Login or become a member to post in the member forums!
Trail Days Online! 2025 is this week:
Thursday, February 27 through Saturday, March 1 - Registration is Free.
Our Community Posts are Moderated
Backpacking Light community posts are moderated and here to foster helpful and positive discussions about lightweight backpacking. Please be mindful of our values and boundaries and review our Community Guidelines prior to posting.
Get the Newsletter
Gear Research & Discovery Tools
- Browse our curated Gear Shop
- See the latest Gear Deals and Sales
- Our Recommendations
- Search for Gear on Sale with the Gear Finder
- Used Gear Swap
- Member Gear Reviews and BPL Gear Review Articles
- Browse by Gear Type or Brand.


