Topic

My MYOG down quilt – I did it!


Forum Posting

A Membership is required to post in the forums. Login or become a member to post in the member forums!

Home Forums Gear Forums Make Your Own Gear My MYOG down quilt – I did it!

Viewing 18 posts - 1 through 18 (of 18 total)
  • Author
    Posts
  • #3691568
    Amber
    BPL Member

    @amberg


    A few months ago, I ordered enough down from Loose Goose Down Supply to make a top quilt and a 3/4 length hammock underquilt. Needing the UQ immediately, that’s what I made first.

    For my UQ, I used Argon 67 on the inside and Argon 90 for the outer shell. In practice, I found the Argon 90 to be more durable than I really needed, especially for a top quilt, so I decided to go with Argon 67 for the entire TQ. I knew that I wanted a TQ that could be used on the ground, as well as in my hammock, so I wanted to allow enough width for ground sleeping. I have a JRB quilt that’s 48” wide, and although I’m a 5”5, 125lb female, I’m also a side sleeper on the ground, and I’ve had a few chilly nights trying to keep that quilt wrapped around me.

    This quilt is the result of my 2nd attempt. My first shell was made from black and titanium gray Argon 67, but I botched the job, and some of the baffles ended up being very crooked. I also didn’t end up liking the way the full length vertical baffles looked, and I decided I prefer the HG Burrow style baffles if I wanted vertical baffles for a TQ.  I’ll probably turn the botched shell into a summer UQ later on. I couldn’t really afford another 5 yards of Argon, but I found enough Argon remnants on their site to have another go at it. By buying remnants, I couldn’t afford to be picky about the color, and the charcoal gray fabric was darker than I’d expected, quite a bit more so than the titanium gray. I don’t find this to be a big deal, I just had to be extra careful to keep from mixing up the black and charcoal shells as I went along.

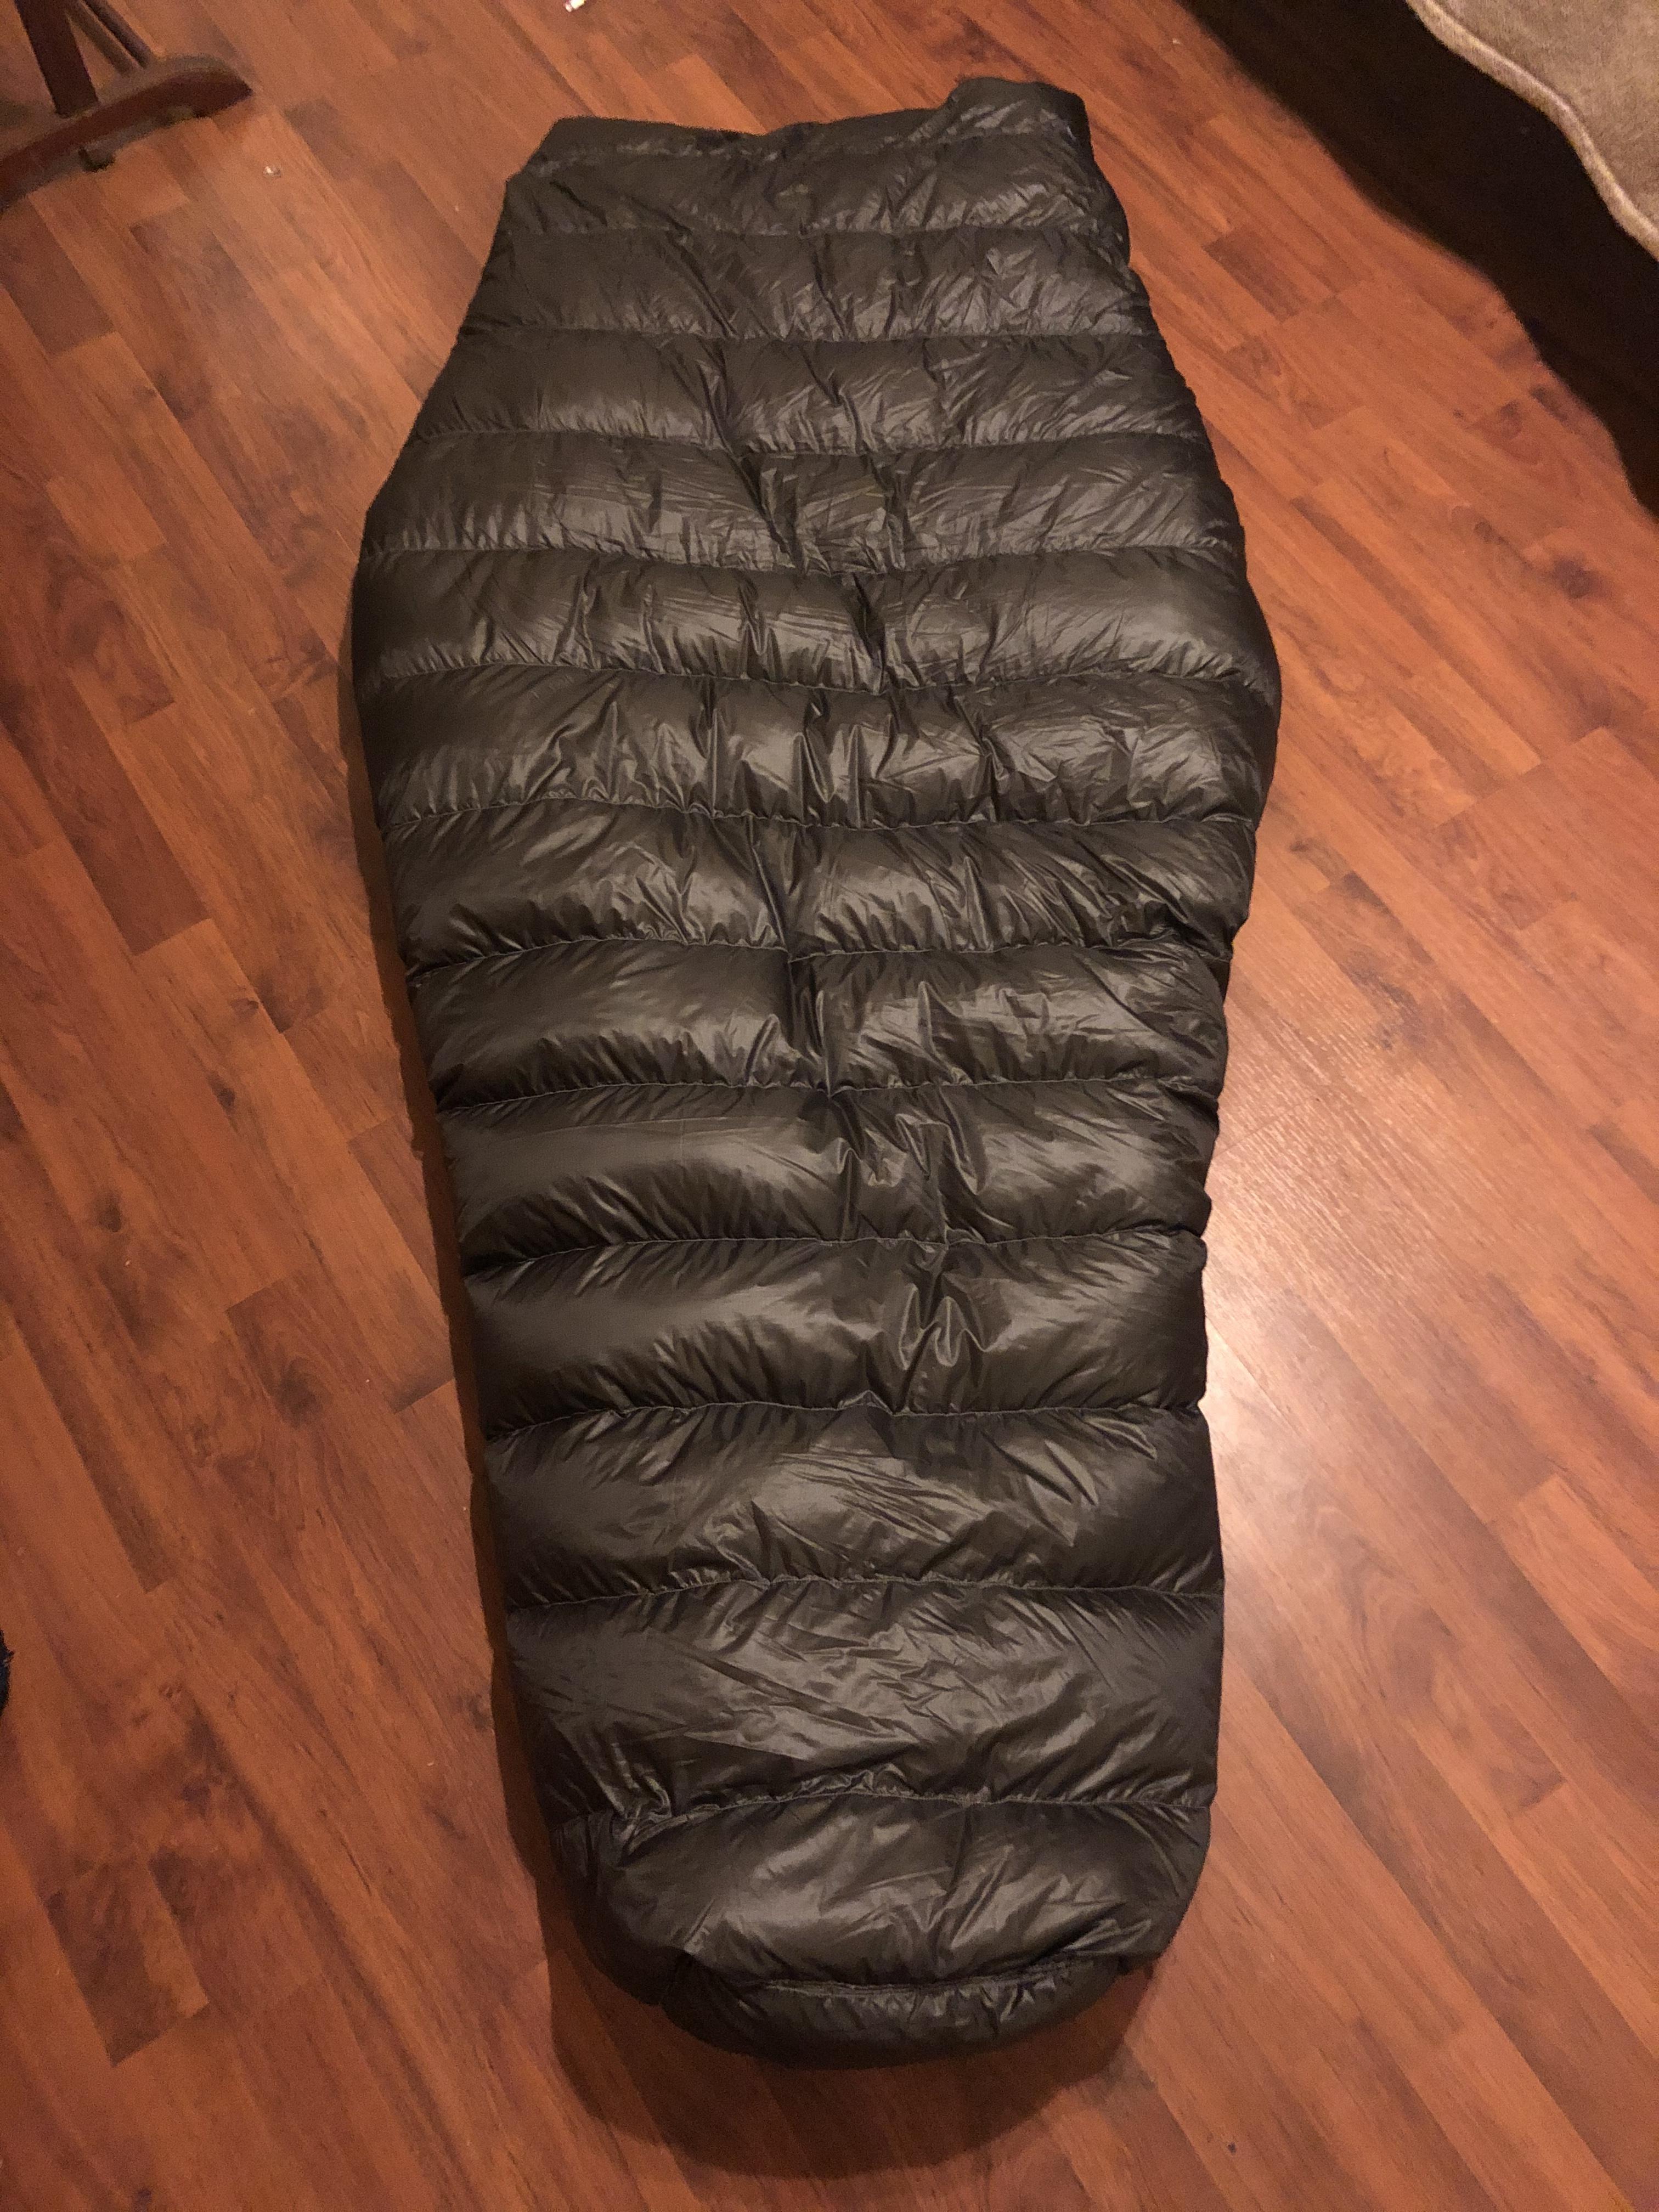
    Being fairly new at MYOG, I didn’t quite trust my skills to try two different styles of baffles in one quilt, so I went with all horizontal baffles. I’d wanted a fully integrated, sewn foot box, and I’d read the way a couple of other people on hammock forums had gone about this, but my brain wouldn’t cooperate long enough for me to fully comprehend  the process. By the time it finally clicked for me, I’d already decided to just sew in a separate pillow for the foot box, and it wasn’t worth the time or effort for me to go back and construct an integrated foot box. Besides, I think it’ll still be warmer than a drawcord end.

    The finished result is around 66” in length, long enough that I could just barely pull it over my head if I ever wanted to. It’s 50” wide at the top, with a half taper, and the foot box has a 42” circumference. I was going for more width than 50”, but I didn’t account for the loss due to loft. Regardless, I’ve still got 2 extra inches in width than I had with the JRB quilt. I used 11oz of 900FP down, then added another ounce or two of down from an old comforter. When I made my UQ, I used a differential cut and took the time to measure out the down for each chamber, but for this quilt, I didn’t bother with the differential cut, and I just eyeballed it, adding/subtracting down until it reached the loft I was trying for (between 2 and 2 1/2 inches).

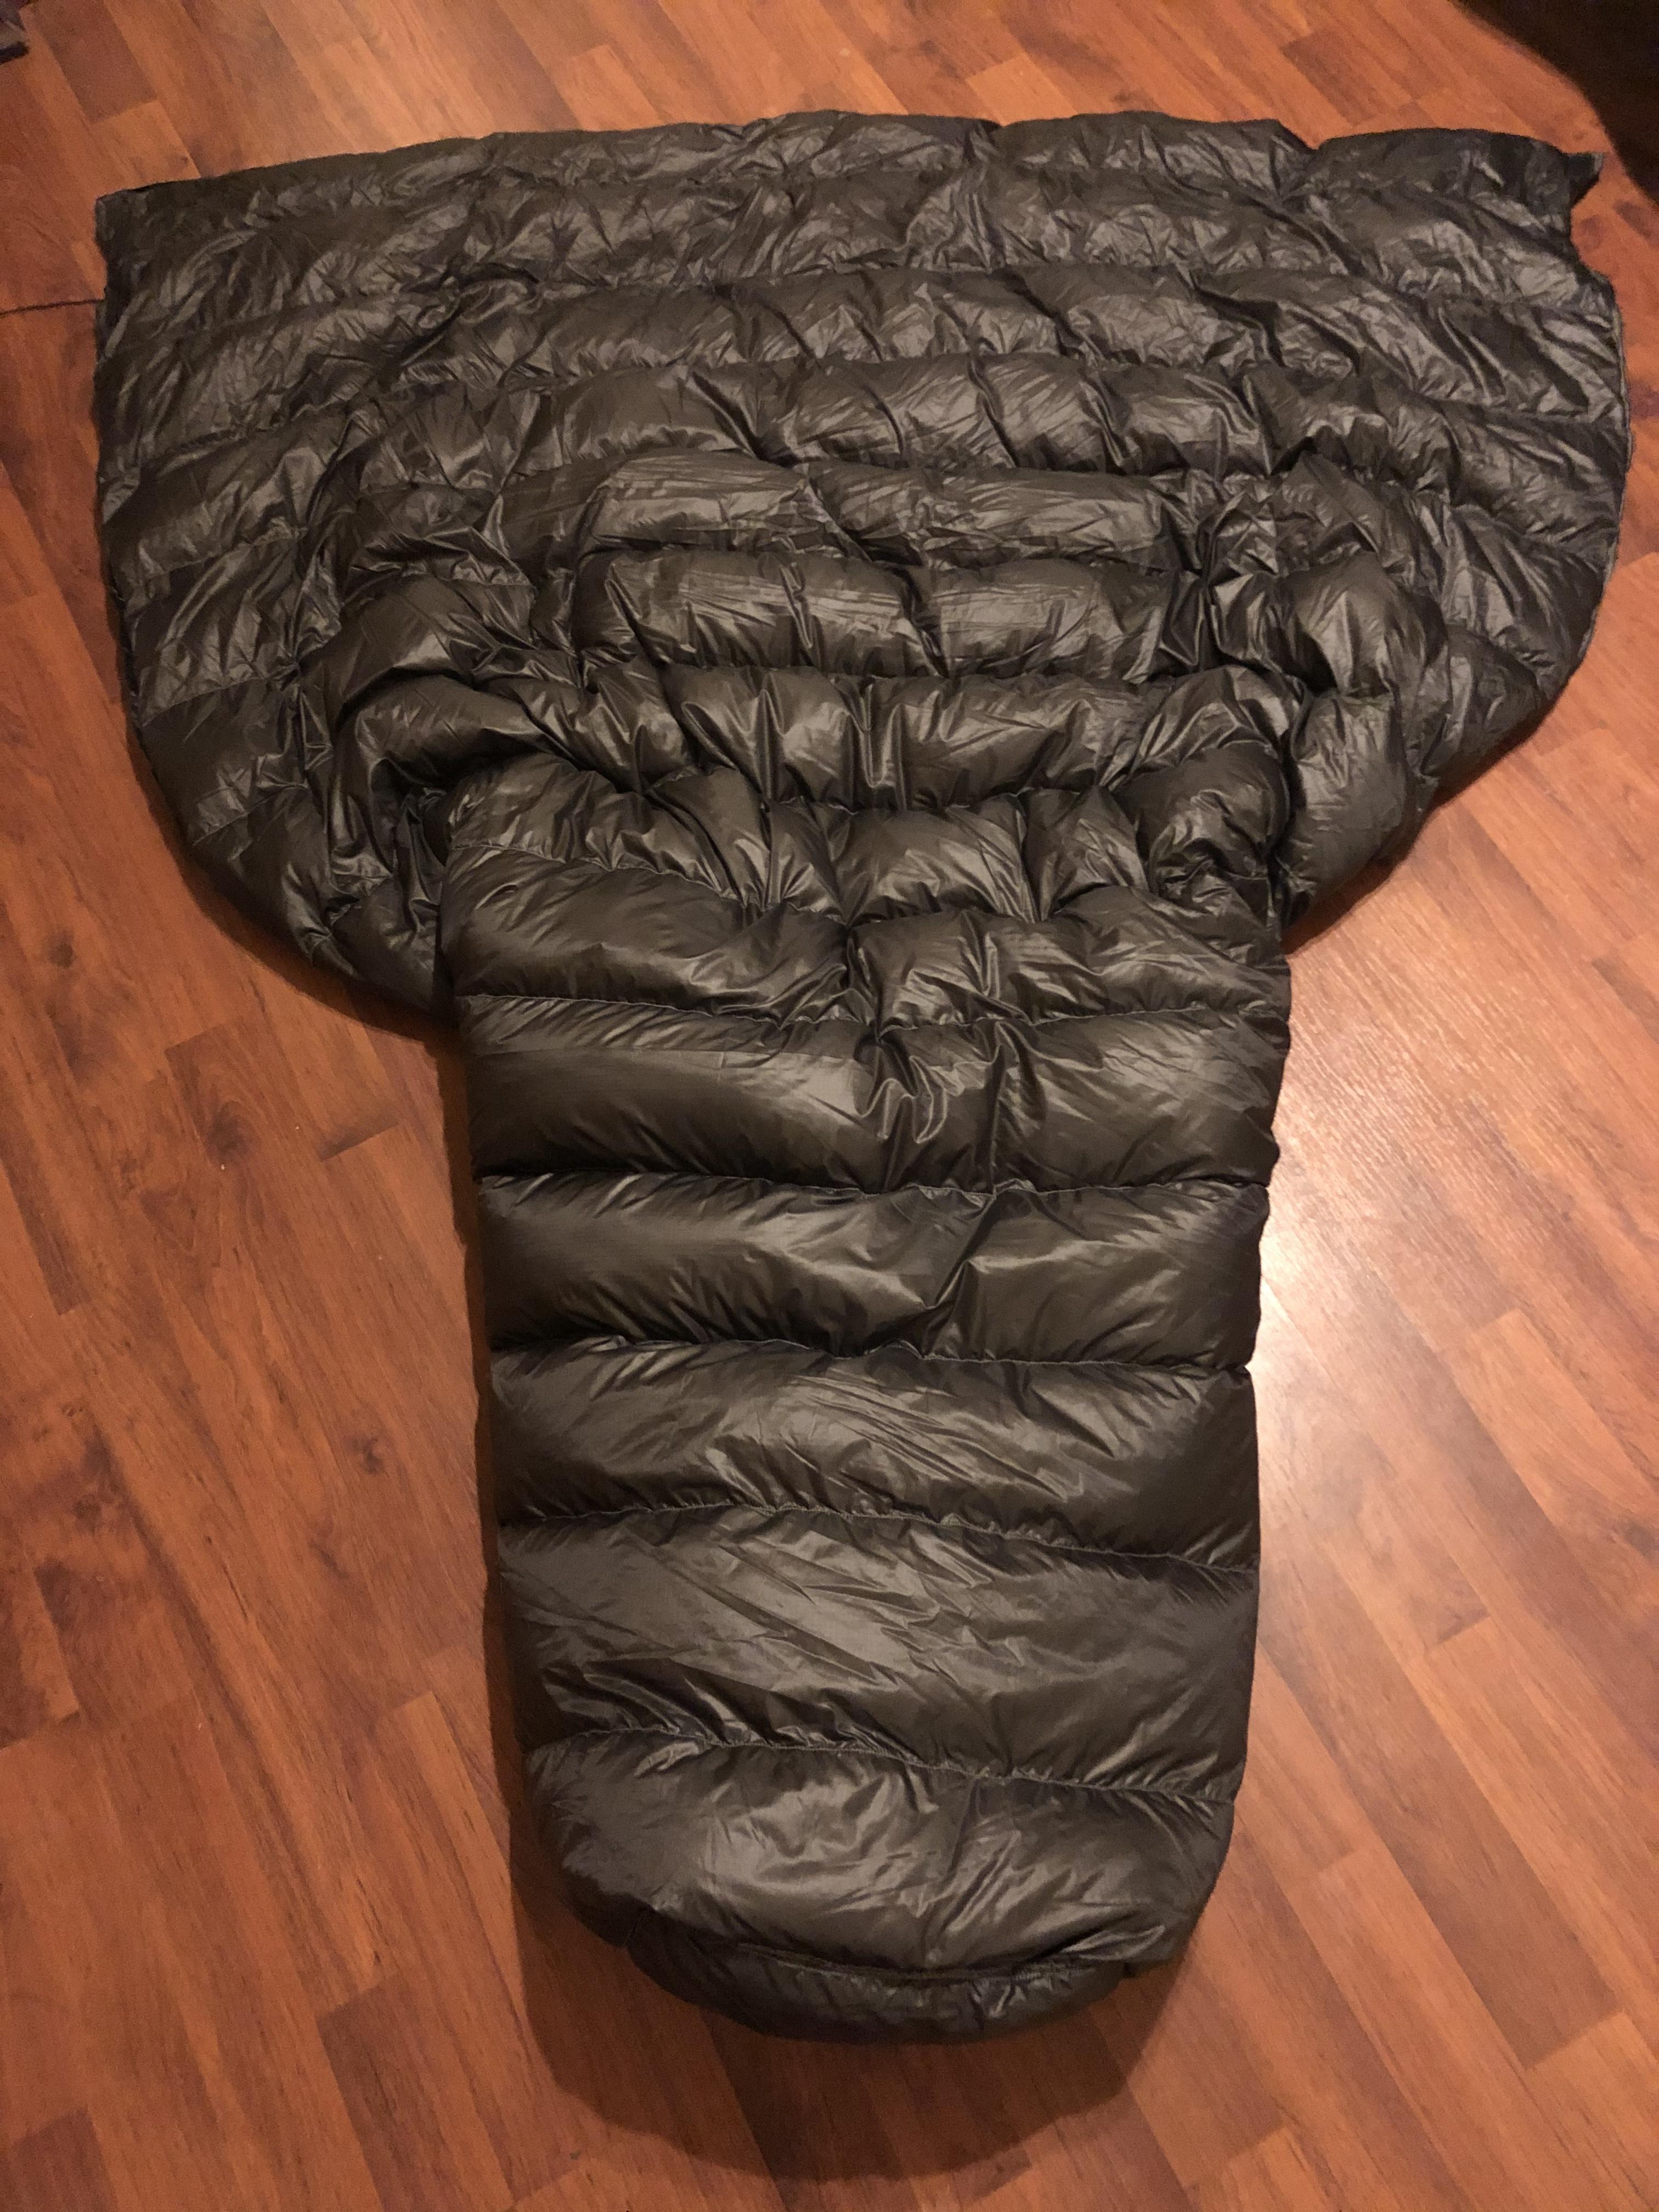
    I was inspired by another member’s MYOG quilt to put the drawcord for the neck end a few inches from the top edge, as I liked the idea of a pseudo draft collar. I put the drawcord channel on the inside, however, thinking that it wouldn’t compress the down as much as it would from the top, but in hindsight, I think it would probably work better on the top. After sewing in the foot box piece, I sewed the quilt up 20” in the back and added a triangle reinforcement with leftover Argon. I also sewed on 2 patches of Omnitape, 1 above the drawcord channel and 1 below, to seal the quilt around my neck.

    Overall, I’m extremely happy with the result. My stitching needs practice, but it’s without a doubt my best looking MYOG project yet. The Argon fabric feels silky smooth, and the whole thing weighs in at 16.7oz. It feels incredibly warm, and I can’t wait to try it out in the backyard to see how low it’ll go. Thanks for looking!

    #3691574
    BlackHatGuy
    Spectator

    @sleeping

    Locale: The Cascades

    Very nice job! Congrats!

    #3691590
    Jerry Adams
    BPL Member

    @retiredjerry

    Locale: Oregon and Washington

    yeah, that looks really nice

    a few seams that aren’t perfect don’t hurt functionality

    this can be addicting

    #3691591
    Bob Chiang
    BPL Member

    @bobchiang

    Great looking quilt!

    I’m not familiar with the HG Burrow quilt, what features of the baffles do you like?  Per your original thinking, it seems like a drawcord on the liner would be good to not compress the down.  Why do you now think a drawcord on the top would be better?

    Again, congrats on completing a great project.

    #3691600
    Amber
    BPL Member

    @amberg

    Thanks! Yes, I’m definitely going to need treatment for this addiction…I’m thinking another project maybe? Just ONE MORE! Lol
    <p style=”text-align: left;”>I was originally going with vertical baffles, since I felt that they would keep the down on top of me better, not shifting to either side as horizontal baffles would allow. On the other hand, horizontal baffles would keep it from shifting very FAR. The HG Burrow combines the two – vertical baffles along the torso with horizontal baffles near the feet. I’ll probably give it a try for my next quilt (yes, Jerry, the next one :D) and see if it’s really the best of both worlds like I think it might be.</p>
     The drawcord may do very well on the inside, I just couldn’t get it to snug up quite how I’d imagined, but I also used shock cord. I’m planning to swap it with regular drawcord and see if I like that better. My logic really does tell me that putting the drawcord channel inside is the ticket, but in pictures I’ve seen of Katabatic quilts, it looks like they do close to the same thing and put it on the outside as well. No doubt they know more about quilt design than I do, but I guess I’m hard headed with my logic.

    #3691607
    Jerry Adams
    BPL Member

    @retiredjerry

    Locale: Oregon and Washington

    I have a new quilt in mind

    16 ounces vs my current 24 ounces

    and a pack

    and a WPB jacket

    good covid projects

    #3691609
    Amber
    BPL Member

    @amberg

    I’ve been wanting to try a pack…maybe that’ll be the next project. It seems like it should be so simple – shoulder straps and hip belt to bag – but choosing the elements to suit my needs with all the great designs out there  – and then finding the best way of doing it – is very intimidating. Admittedly, that’s also part of what makes it so fun!

    #3691655
    Mark Ferwerda
    BPL Member

    @mnferwerda

    Locale: Maryland

    Congrats. As long as it keeps you warm, doesn’t matter how it looks!

    #3691660
    Bonzo
    BPL Member

    @bon-zo

    Locale: Virgo Supercluster

    Wow…that looks incredible!  I know you said some of the seams aren’t correct, but I can’t figure out which ones they are from your photo; I would be exceptionally happy if something I made came out so cleanly.

    Like you, I also want to make a pack… but I know literally nothing about machine sewing: I can mend things with hand stitching, but if I had to use a sewing machine I would probably end up sewing my hands to the fabric and breaking the machine in the process.  I would say that if you can make a down quilt, you can easily make a pack, though!  Get to it!

    #3691736
    Amber
    BPL Member

    @amberg

    Thank you. I admit that some of the stitching isn’t very clean on this quilt (there’s a reason I didn’t include close-ups!), but it was the first attempt that was pretty screwed up. I’d found it easier to use a chalk pen to mark my baffle lines on my UQ, but when I started my TQ, I couldn’t find it. I tried to sew on the baffles for my TQ without it, and I ended up with a couple of horribly crooked baffles. For the quilt in the photos, I bought a new chalk pen. Works better for me than pins or tape, apparently. And thank you, also, for your vote of confidence regarding the pack – it’s definitely on my to-do list!

    #3691757
    Michael B
    BPL Member

    @mikebergy

    With the amount of fill and the size you described, I bet that quilt will be quite cozy! Why do you think your shock cord at the head would’ve worked better on the top layer vs the bottom? I am planning out my next quilt (got quite cold on a hike this week!) – admittely I don’t see a reason for a draft collar as I normally have a buff around my neck, but I still planned to run a shock cord at the head and had planned to do it on the bottom layer for the same reason you mentioned. Nice job on the quilt, looks great.

    #3691814
    Matt
    BPL Member

    @mhr

    Locale: San Juan Mtns.

    Wabi-Sabi!

    Congrats.

    #3691871
    Amber
    BPL Member

    @amberg

    It’s definitely cozy! I haven’t taken it outside yet, but it makes me sweat indoors! I think it might just be the shock cord, itself, rather than the placement. I used a thinner shock cord (maybe 3/32), and it just doesn’t seem to snug up as well as the regular drawcord on my JRB. A little too stretchy, I think. I’m going to swap it out for thicker shock cord or a piece of zing it before I test it outside and see if I like that better.

    #3691955
    Michael B
    BPL Member

    @mikebergy

    I have some of that thinner schlock cord as well, and wondered if it might not be up to task. I’d not use Zing-It, as that may present a bit of a choking hazard or at the least, be somewhat difficult to deal with if it somehow gets knotted up in the night. I tend to just leave the shock cord tightened and I unclip it if I need to get out of it at night, or just stretch it over my head similar to getting out of a t-shirt. I’m mostly just lazy with the cordlocks 😁.

    #3693616
    Amber
    BPL Member

    @amberg

    It’s been awhile since I’ve actually used the top drawcord on a quilt – haven’t found it really necessary in a hammock. I don’t quite see a situation where I’d be in danger of strangling myself with it (I don’t toss and turn THAT much!), but I feel you on the lazy cord lock thing. On my JRB quilt, I could just pull up from the neck and the cord lock would just slide out of the way. That inspires me to keep it stretchy – maybe I was trying to cinch it down tighter than it needed to be.

    I finally got to take it for a test drive the last two nights, and it kept me comfortable in the lower 20s, but I was also wearing a light down jacket. In any case, I don’t have much occasion around here to take a quilt a lot lower than that, so it’ll work!

    #3693995
    Michael B
    BPL Member

    @mikebergy

    Nice! I hope to have similar comfort with my next quilt. Thanks for sharing your project, it inspired me to just go for it and make the down purchase rather than making another apex quilt. Not that I don’t like a good apex quilt, it is just a little less compressible than I want for my next pack setup.

    #3694190
    Craig B
    BPL Member

    @kurogane

    Hey, nice project.  You’re a legit MYOGer now.  I think most commercial quilts have the drawcord on the shell rather than the liner.  I know specifically that Nunatak does it that way.  I think it’s for comfort, as well as a better seal.  When you tighten the cord, you push in the down, which can fill in crevices underneath it kind of like a gasket.  Without the compressible stuff, you’re just left with the drawcord against fabric, and that could easily leave gaps over crevices.  Packs are not necessarily as simple as they seem if you want to get good load transfer to a hip belt.  But then again, many people here say they prefer a belt-less design, so maybe it won’t really matter to you.  With enough experimenting, you should be able to come up with something that works for you though….

    #3695974
    Amber
    BPL Member

    @amberg

    Michael – when it comes to quilts, I think I’d probably have a harder time with the Apex! At least with down, the only thing I had measure straight was the shell and baffles. I would’ve probably started with an Apex quilt first, but carrying two quilts for a hammock setup makes weight and compressibility a bigger priority for me. If you’ve already made an Apex quilt, then you’ll be able to nail this.

    Thanks, Craig! Yes, I have no illusions about the complexity of pack construction. The more I read and research, the more my head swims! Making a functional quilt is one thing, but I know I likely won’t end up with a functional pack on a first attempt – at least not one that’ll be capable of carrying much weight. A day pack might be in the near future, but for now I’m letting the pro’s handle the others!

Viewing 18 posts - 1 through 18 (of 18 total)
  • You must be logged in to reply to this topic.
Forum Posting

A Membership is required to post in the forums. Login or become a member to post in the member forums!

Get the Newsletter

Get our free Handbook and Receive our weekly newsletter to see what's new at Backpacking Light!

Gear Research & Discovery Tools


Loading...