Topic

My first DIY wind screen, made from 2 crowler cans.

Viewing 9 posts - 1 through 9 (of 9 total)
Max L. BPL Member
PostedSep 11, 2020 at 5:29 pm

Story below. Here’s my DIY wind screen made from 2 crowler cans. I spent about 8 hours one day, going thru 4 other cans with ideas that failed. They were all more complicated. When I got to this idea, I was like “Of course! Something simple!”

The windscreen rolled up in a 1 liter ziploc bag

Here it is packed in a 1 liter bag, weighing 30 grams.


The parts of my windscreen spread out.

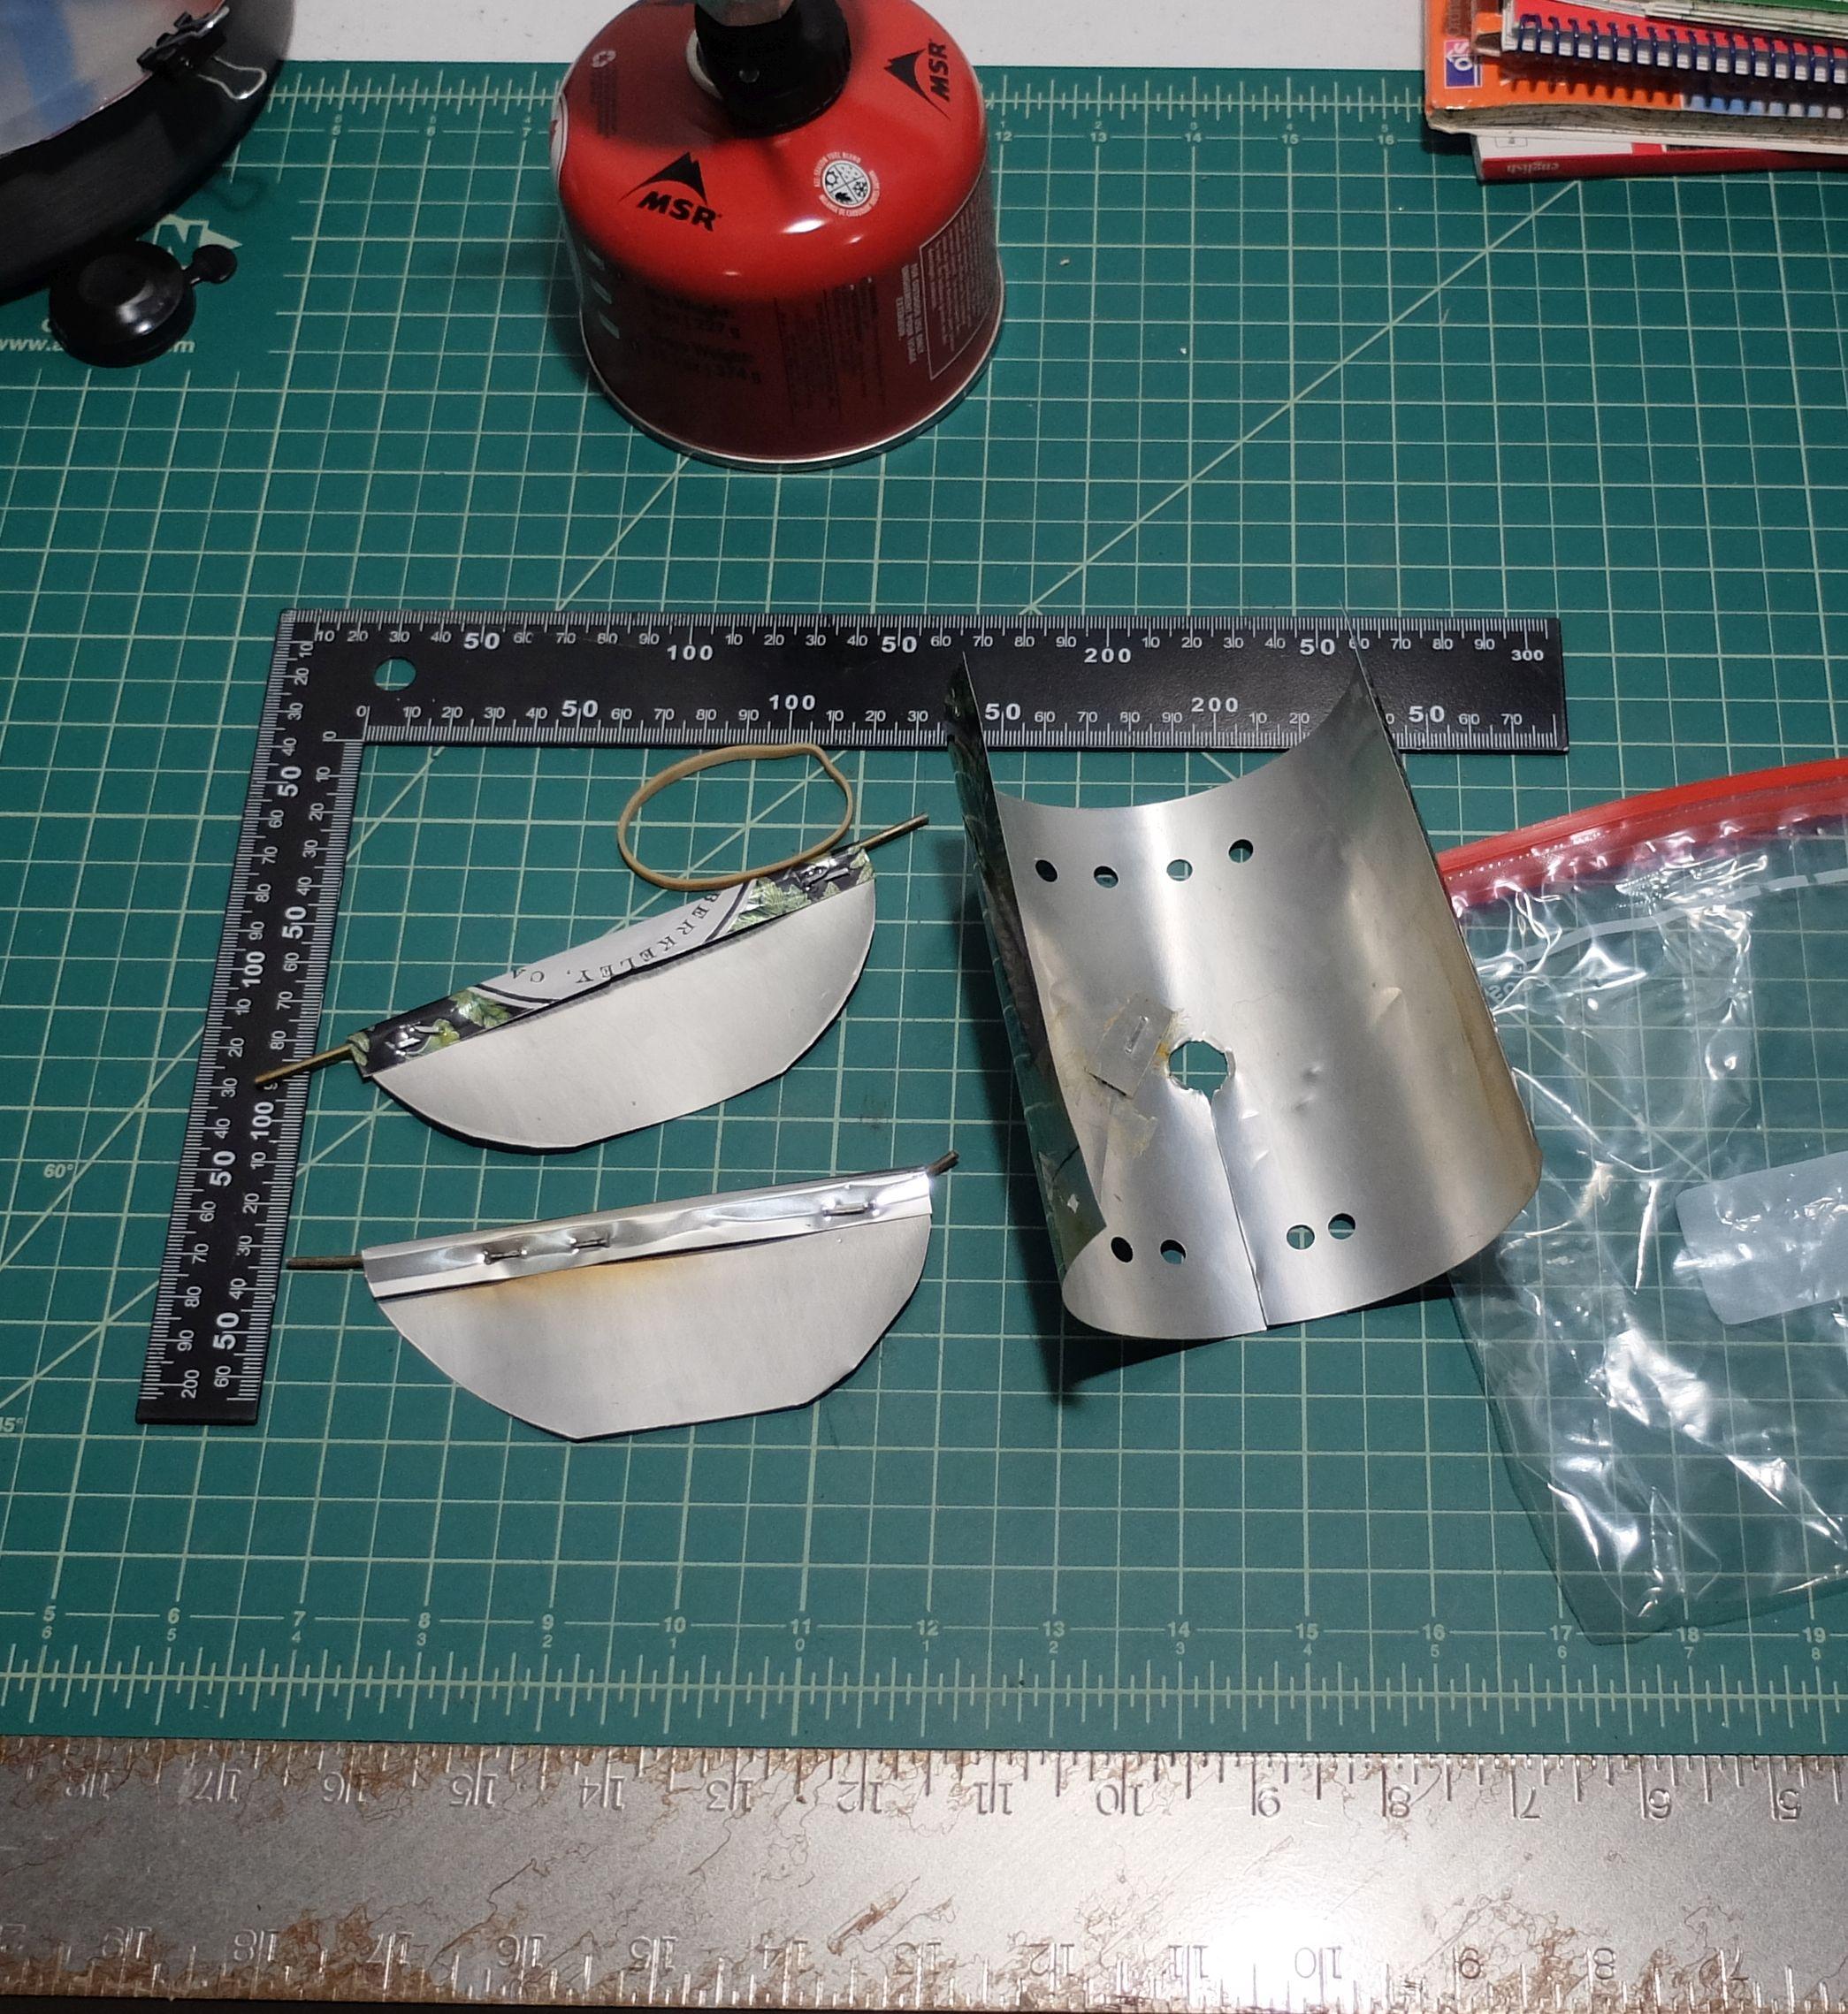
Here are the parts of my windscreen spread out. The 2 end pieces are folded over lengths of wire hanger and stapled to keep it snug.


The screen body slid onto my stove.

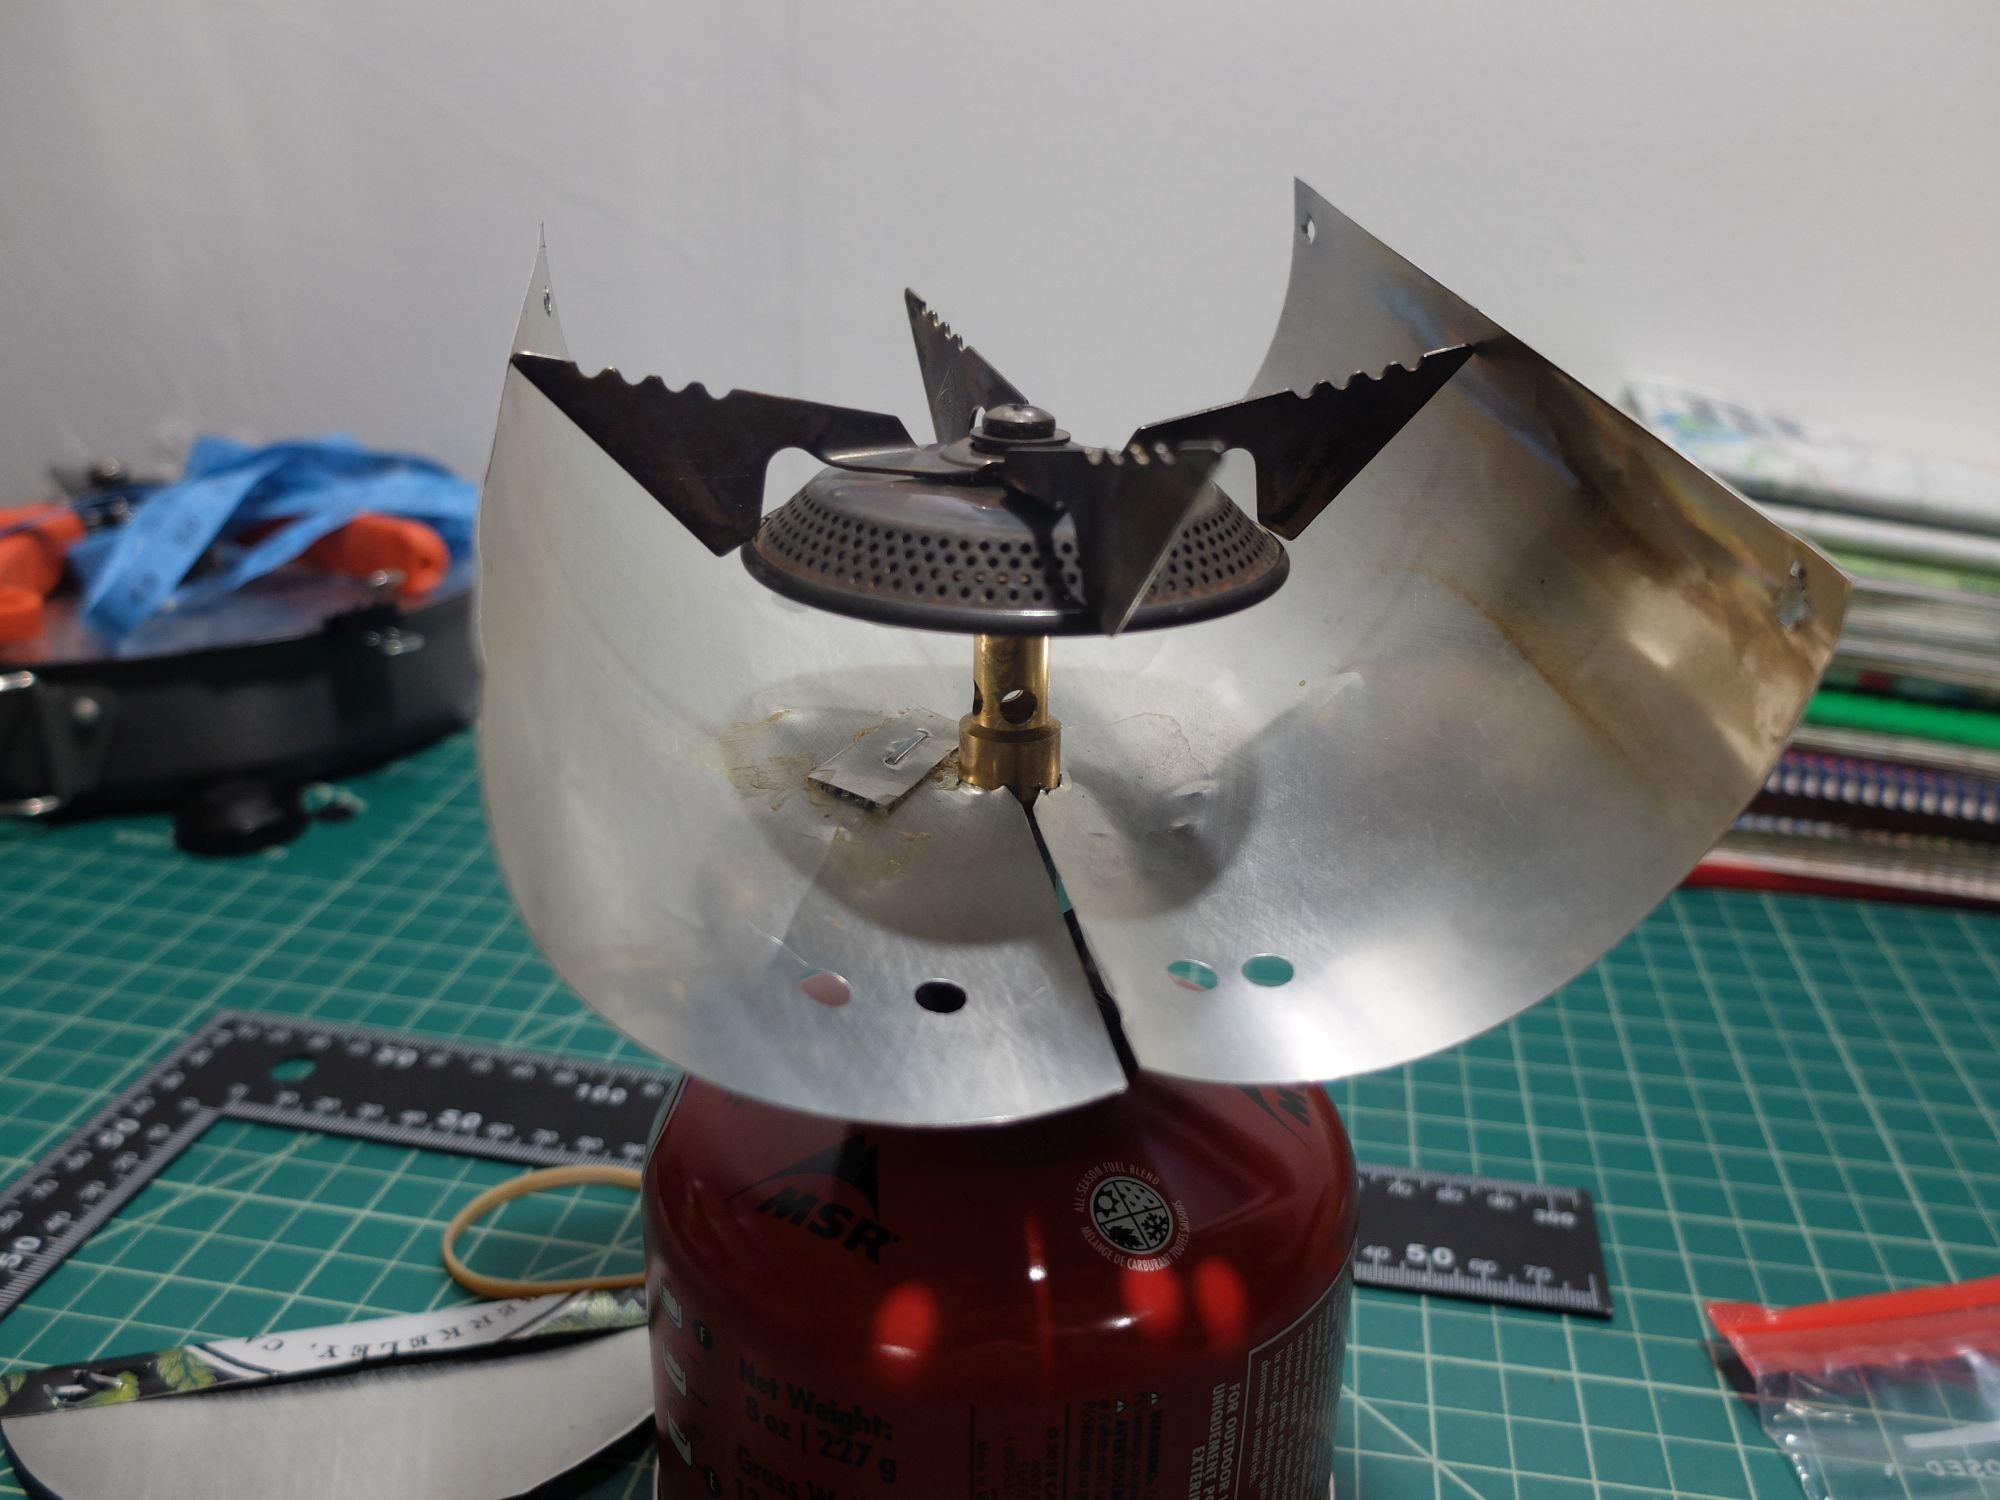
Here is the screen body slid onto the stove. You can see my first repair. I knew the aluminum would eventually tear, especially since I didn’t cut the hole in the center very smoothly. My first version only had one end. I punched a few holes in the bottom after adding the second end. No idea if it really needs them.


Assembled windscreen.

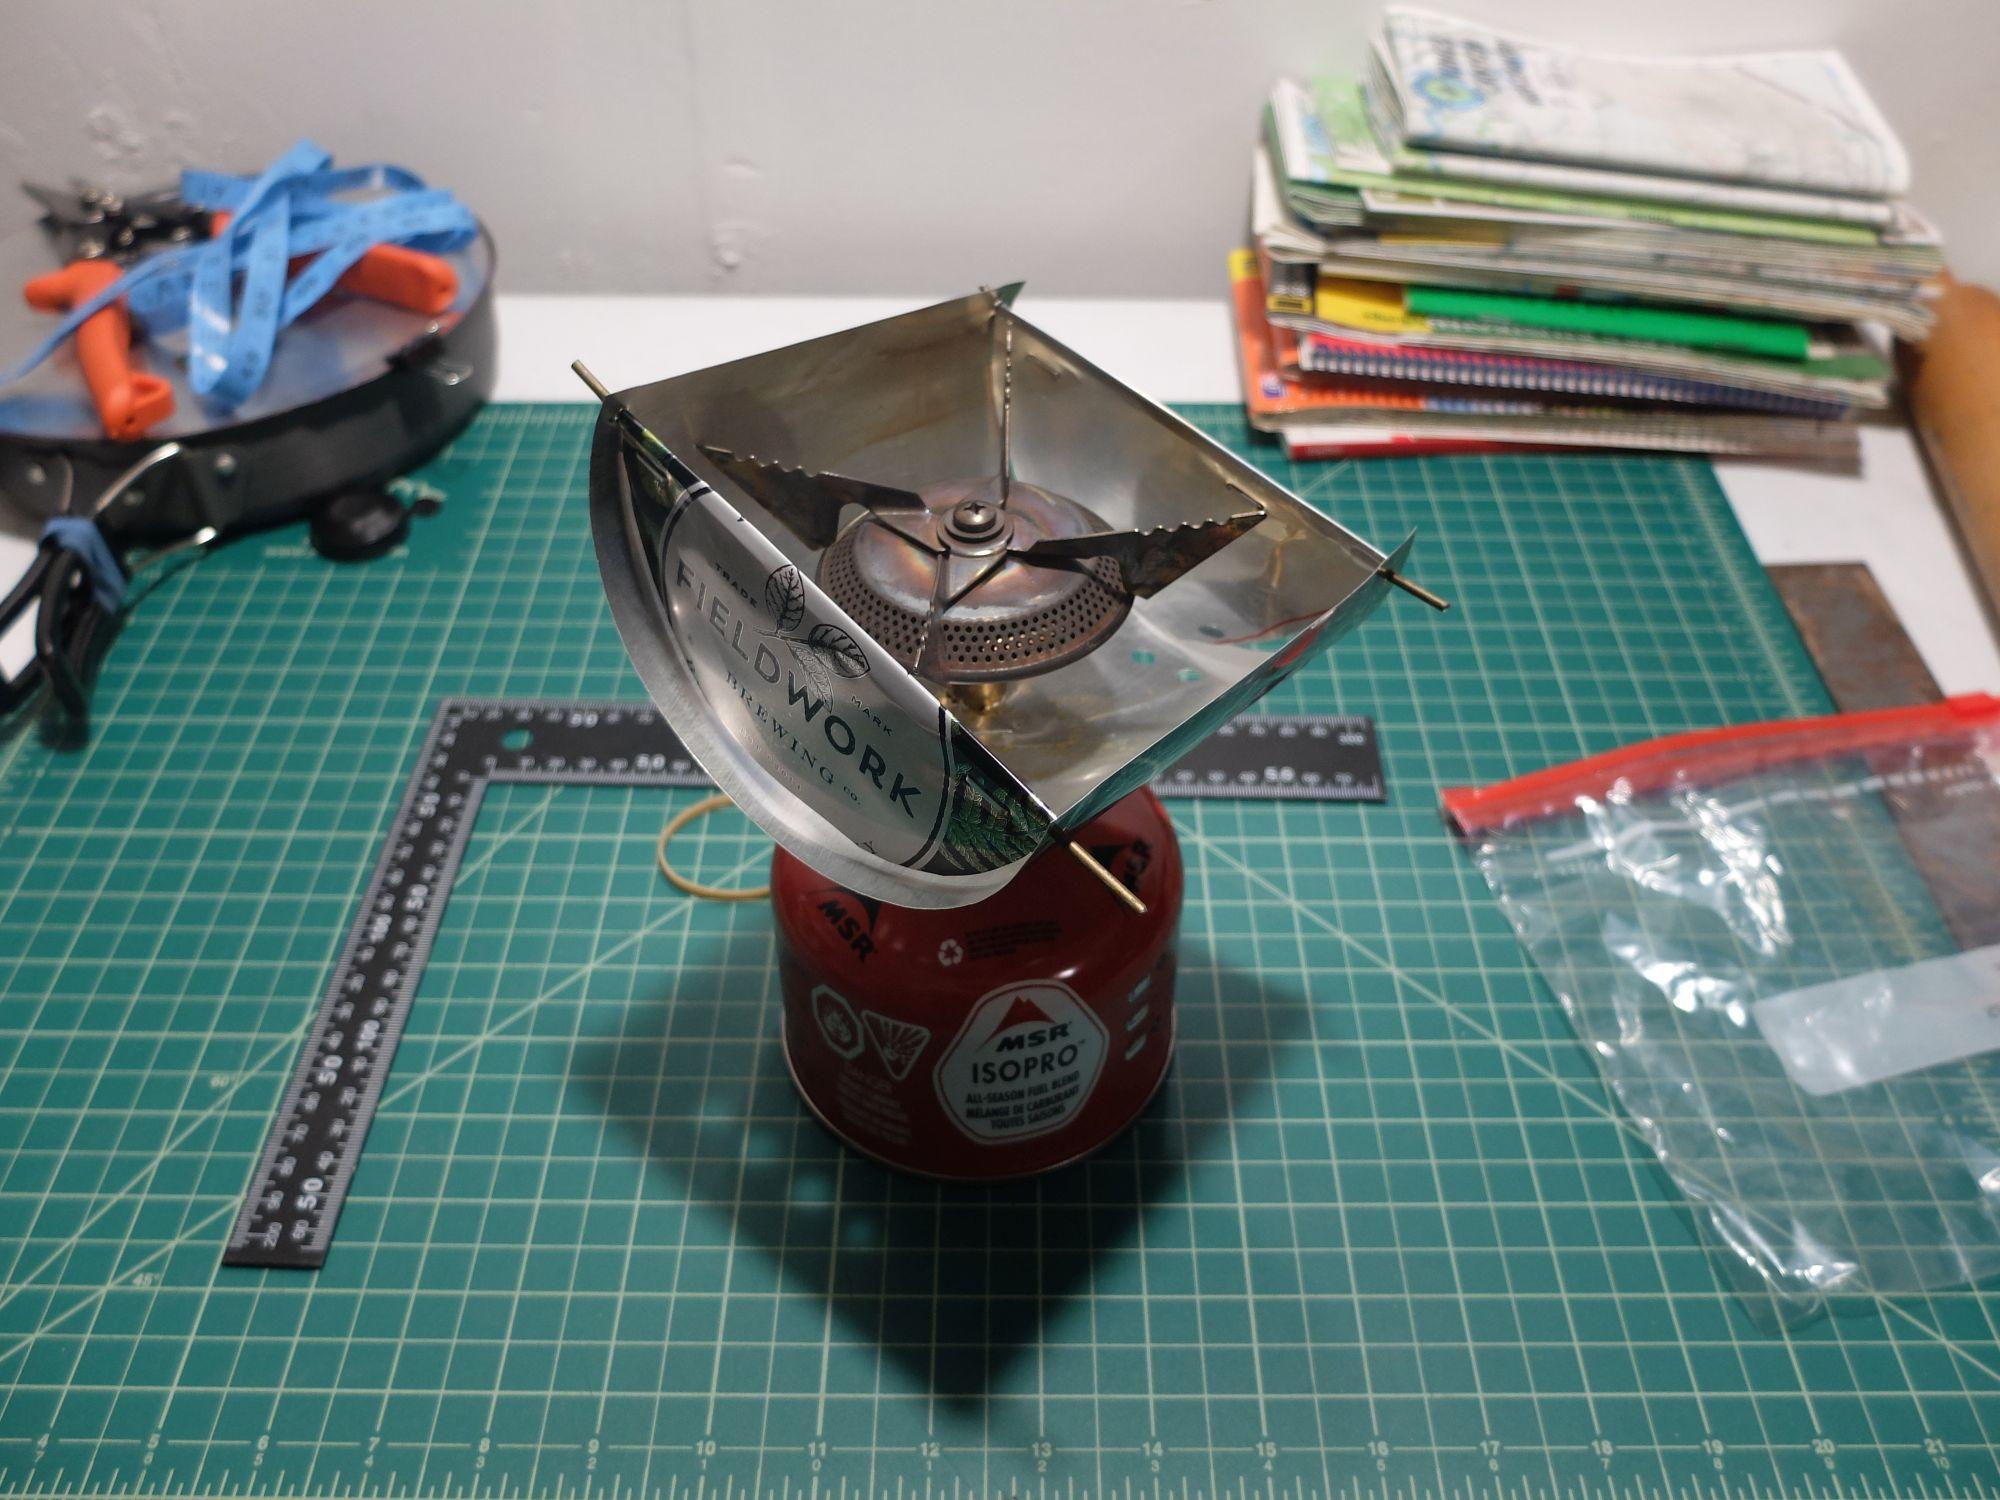
Assembled windscreen. It doesn’t sit level, but the pot will take care of that. The wire hanger ends poke thru the small holes. I was worried about the wire popping out during cooking, but when the flap is rotated into place, the body can’t pull out far enough let the fire fall out.


Pot on stove with screen.

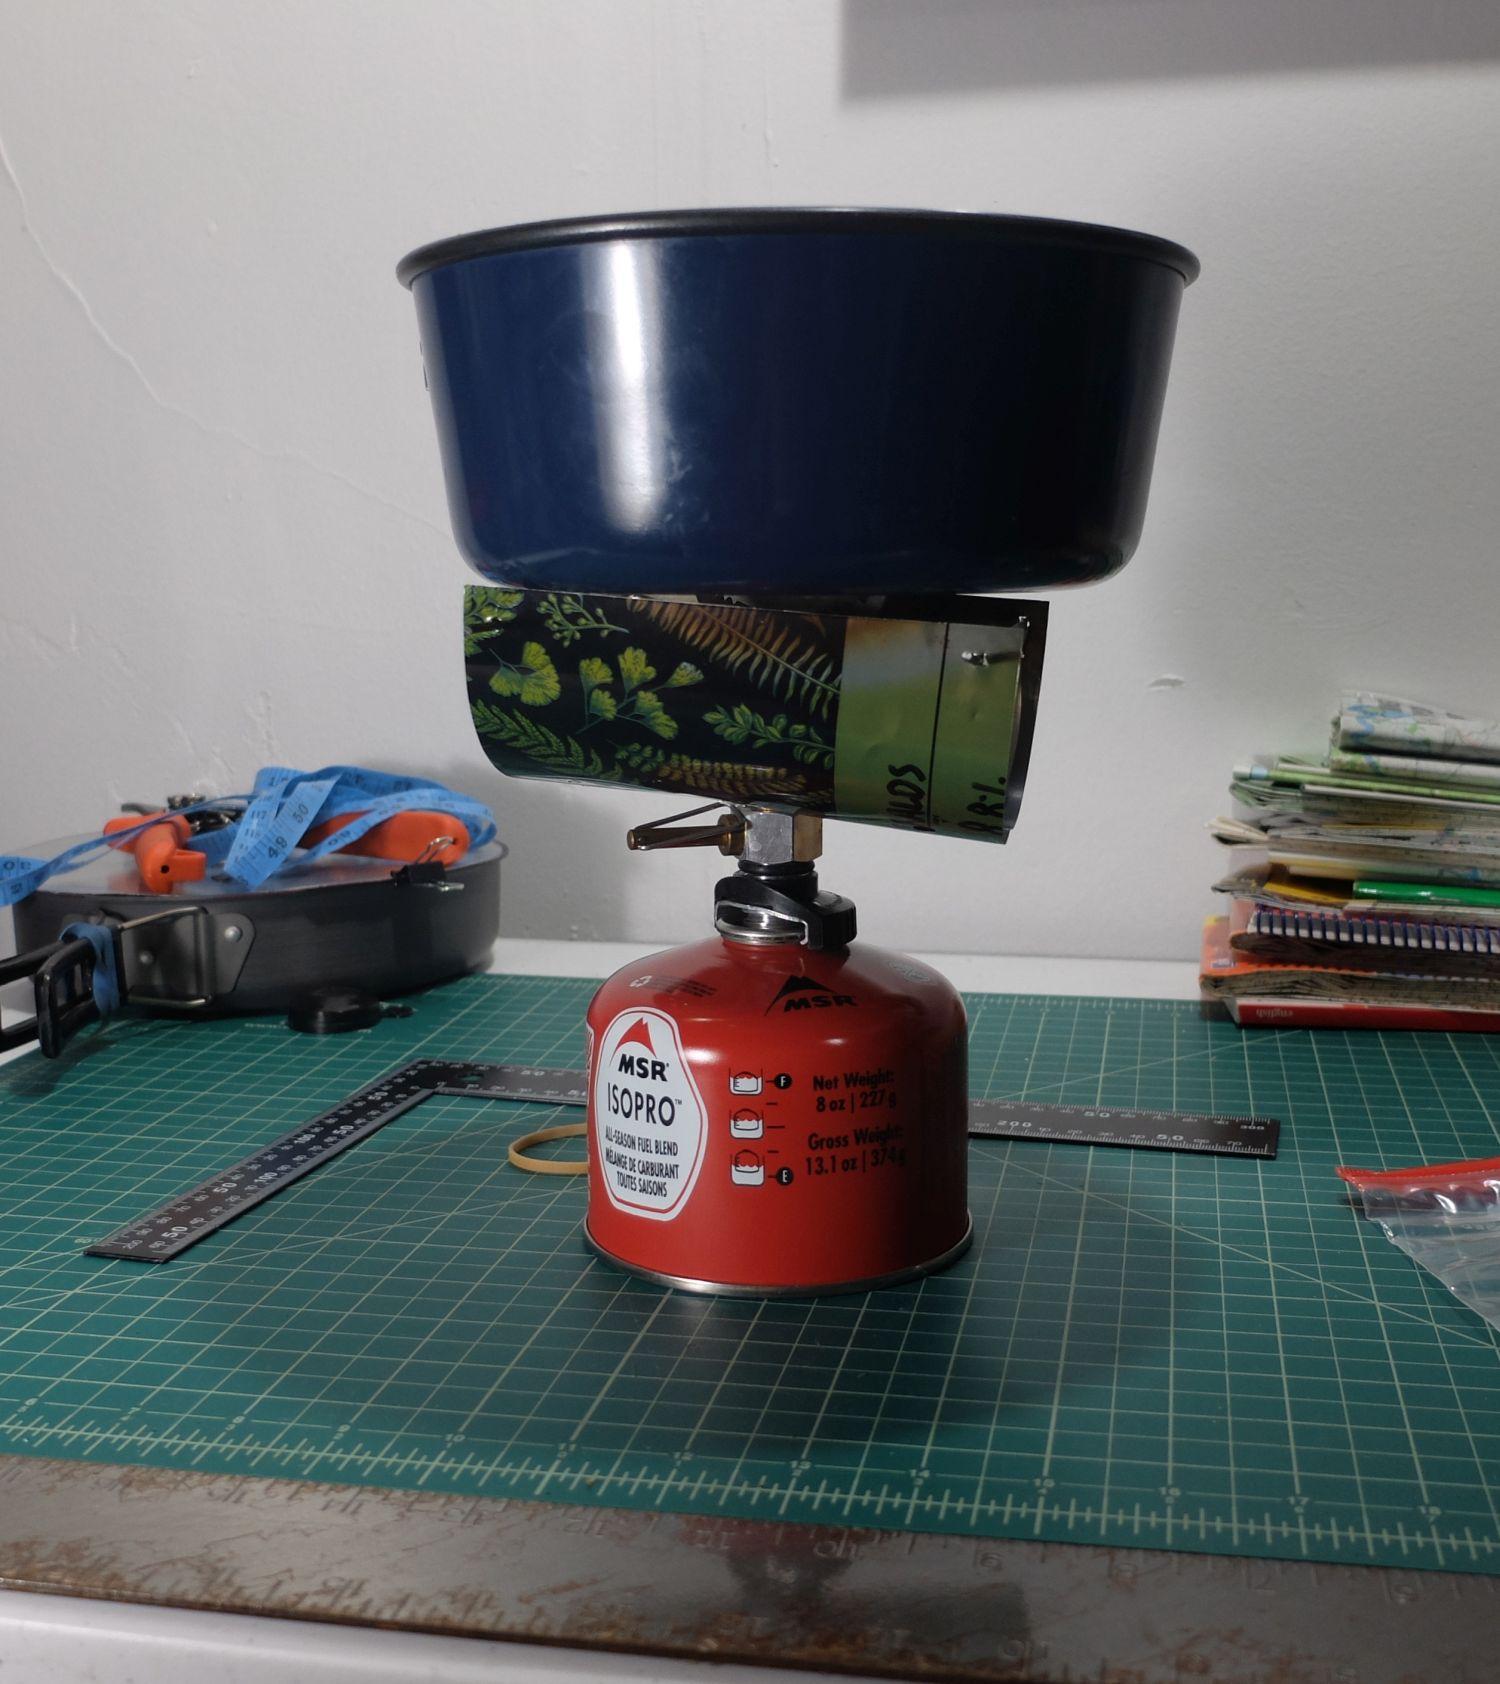
And finally a pot above the screen. It’s not quite tall enough to push up flush against the pot, but that’s how big the crowler cans are. I have some ideas for version 2, when this wears out, or I get bored some day after drinking for crowlers.


…and how I got to trying this in the first place: My first time backpacking with my now wife had calm weather and things cooked fine. It was pretty windy the second or third time, so we were trying to prop up our seat cushions, but mostly we had to hold them around the stove so the water would actually boil, or at least in less than 15 minutes. I don’t remember what I did the next couple times. We didn’t go backpacking for about 5 years, and then started again this summer. I remembered the wind and wanted something way better. I knew I didn’t want that canister to get hot, so I couldn’t tightly wrap the whole contraption. I did some searching online and found lots of samples that protected the stove, as well as hopefully reflecting more heat back up to the pot. That’s how I got to making my first MYOG.

PostedSep 11, 2020 at 9:19 pm

Thanks for taking the time to show us how you put it together. The curviture of the cans made me think of this design:

Max L. BPL Member
PostedSep 11, 2020 at 10:42 pm

You’re welcome! It was actually fun to write up and take pictures for sharing.

That bowl looks nicely compact and easy to use, but heavier. One of my attempts was making 4 bowl segments, but I couldn’t figure out an easy and secure way to attach them together and to the stove.

David Thomas BPL Member
PostedSep 11, 2020 at 11:40 pm

Nice.  Light.  Undoubtably helps reflect IR that would otherwise go down back towards the pot.

It might entrain some combustion gases back into the pre-mix ambient air inlets.  Keep an eye out for any yellow in the flame or soot on the pot and if so, give it more vent holes.

Try doing a liter of 70 degree water to a boil with and without the windscreen and weighing the canister to 0.1 grams (or 0.01 grams) before and after.  I suspect you’ll be 5-10% more fuel efficient, even in still air (and much better in a wind).  Try to have the stove throttle in the same, medium position for each run.  I pick a horizontal or vertical position of the valve handle for ease of repositioning.

Jerry Adams BPL Member
PostedSep 12, 2020 at 7:27 am

I like the cost of the project, a beer : )

That should work pretty good

Brian Devlin BPL Member
PostedSep 12, 2020 at 9:12 am

Fieldwork.  Yum.  Had some last night. Some kegs are making their way into Portland.

Max L. BPL Member
PostedSep 18, 2020 at 5:42 pm

@davidinkenai

I boiled some water in my garage and it looks like even without wind, the screen makes it more efficient. My kitchen scale only does whole grams, but according to it, I used 8g to boil without the screen and 7g with the screen on. The water started at 80° (garage “room temperature”).

Can anyone recommend a decent, low priced scale that does tenths of grams? It’s fun testing things and it’d be neat to know if the difference was closer to 0.5g or 1.5g, but not sure how much I want to spend on knowing that.

PostedSep 18, 2020 at 6:37 pm

An alternative methiod is to do multiple boils: 2 cup / 6 times.  Then calculate the overall results and normalize it back to 2 cups.  Hope that makes sense.

Jerry Adams BPL Member
PostedSep 18, 2020 at 6:39 pm

Amazon – digital jewelry scale

The delivery time can be weeks

Viewing 9 posts - 1 through 9 (of 9 total)
Loading...