The “pocket” in the fly isn’t particularly deep which makes for excellent headroom. They stay pretty secure but my Leki’s are a little slick on top. Just a little nub, say 5mm would work nicely I think.
Topic
Massdrop Announces Dan Durston X Mid Tent: 2 People, 2 hiking poles, 28 oz, $199
Become a member to post in the forums.
- This topic has 588 replies, 22 voices, and was last updated 6 years ago by
 .
.
Handle in the dirt, pointy end in the fabric just seems backwards. Looking forward to getting mine next week.
“What is it about the X-Mid peaks that make using the poles handle up significantly less secure?”
With a single pole mid you’ve got relatively steep walls descending from the peak on all sides, so the handle has no where to go even if it’s not connected to the fly. With a dual pole shelter you’ve got a ridgeline between the two poles, where plausibly the handle could slide down that ridgeline, so dual pole shelters are fundamentally less secure if you pitch handles up with no connection.
Some dual pole shelters get around this by using a ton of catenary cut (or inward cut) on the ridgeline. For example, compare the catenary cut on the Sierra Designs High Route vs the X-Mid:
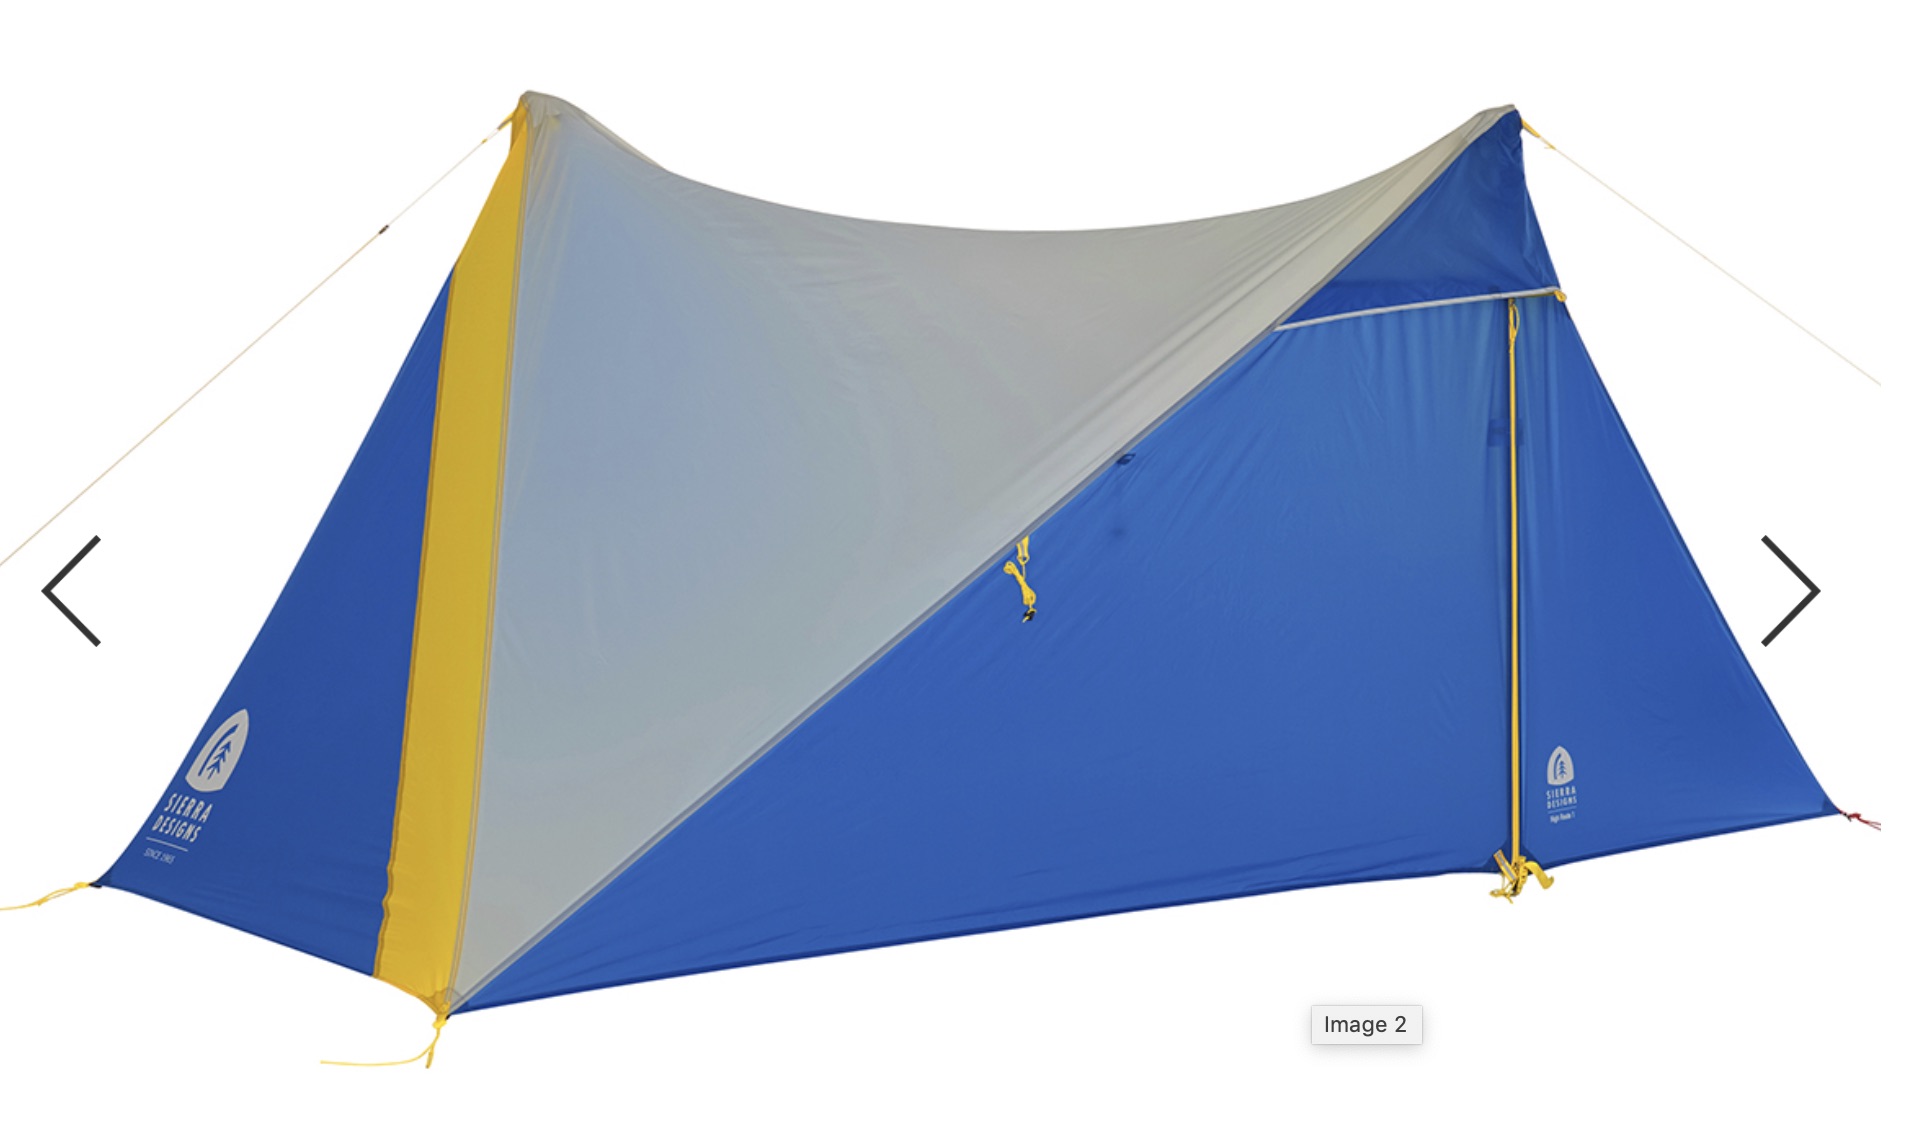
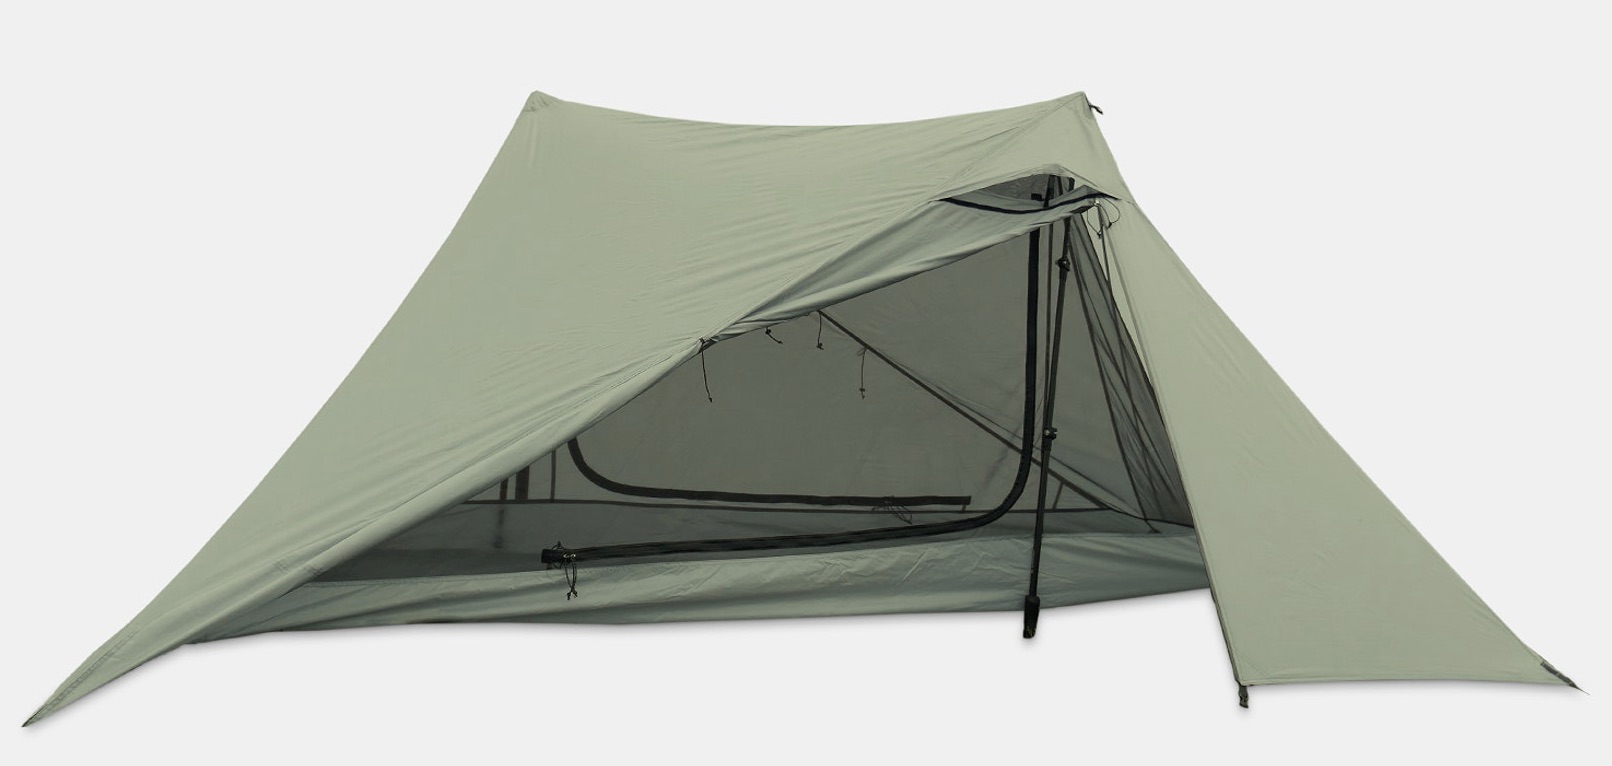
The High Route has massively more catenary cut which does partially alleviate the handle situation, but with the downside that it gives up a ton of headroom. The High Route and X-Mid both have 41″ high peaks in the inner tent (43″ fly peaks), so they look to have the same headroom on the specs sheet, but the X-Mid is actually about 4-6″ taller in the center where you need the headroom most.
My opinion is that catenary cut is commonly over-done on tents. I’m not sure why so many tents have so much of it, but if it’s for a more secure handles up pitch I don’t think that’s a great idea because it gives up so much headroom and it still isn’t 100% secure. I think it’s better to use just enough catenary cut to get a nice pitch, and then find other solutions for pole security. The best one is a tips up pole placement in grommets which is highly secure, but another good solution for those wanting handles up is those TarpTent handle adapters. They add some fiddle, but compared to opting for a tent with a ton of catenary cut, you get even greater security and a lot more headroom. Also you can just carry them and only use them in rare conditions where the weather is severe, to reduce the fiddling.
So the X-Mid works well for normal conditions with a simple handles up pitch. Then if you want to be prepared for seriously stormy conditions just plan to pitch tips up on rare occasions where the weather is severe, or bring also some of those handle adapters for severe weather.
…the X-Mid works well for normal conditions with a simple handles up pitch…for seriously stormy conditions just plan to pitch tips up.
Perfect! My thoughts exactly. Thanks for the confirmation Dan.
Yes, tips up is very secure. As was mentioned earlier, I wouldn’t give up the great headroom for a deeper fly pocket to hold a handle more securely – it’s a brilliant design as is. The two things I like about handle up is the ability to offset the pole at a fairly extreme angle with the tip securely in the ground and the handle securely in the fly pocket. Much of this preference has come from using a front entry trekking pole supported shelter and wanting a bigger entrance. In addition, with a smaller traditional mid it helped create more floor space and eliminated my knocking the pole down while rolling around in my sleep.
I do like the stress relief buckle on the zipper some have added, but have to admit that I rarely pull the zip all the way down in any shelter I have used when inside in my bag. I simply zip down to the last couple of inches with one hand and call it good.
Well, my X-Mid arrived on Thursday. and I of course proceeded to do all the usual things – I weighed all components, swapped out the cheesy stock stakes with MSR Groundhogs, and seam-sealed all exterior seams. I went with McNett’s silicone seam sealer, rather than trying to use 100% silicone and mineral spirits. The reason I did that was because the ding dong store people in the paint department had no clue as to which type of mineral spirits I needed, the unscented, the regular, or simple paint thinner. I was insecure as to how much of the McNett’s I needed, so I bought 4 tubes at REI, knowing that I could return any that I or my buddy Ron didn’t use. The thing is that I don’t want to drive into Boulder during Mem. Day weekend. With the Bolder Boulder 10K race and all the people in town, the town reaches the pinnacle of craziness. It turned out that one tube of the McNett sealer was exactly right to seal all of the tent’s seams, including those next to the fly zippers. I will leave the tent set up until tomorrow, to give it 48 hours for complete curing of the sealant. There will be no rain until Monday evening.
So here are my preliminary impressions of my sweet X-Mid: I am quite impressed with the construction quality. It looks like a pro did it, and not some wannabe Chinese outfit. I am impressed with all of the extra ways to stake down the entire bottom of the fly in the event of a serious storm. The stake loops don’t add much weight at all, but they could come in handy sometime.
Now, the function. I am 6′ 0″, and I have plenty of length for a 72″ pad (and likely a 78″ one). The width of the tent floor looks to be 34-36″ which will accommodate a 25″ pad. The true beauty of this tent is that there is a lot of functional head room, and the interior walls of the tent are pretty vertical. These things lend quite a spacious-feeling tent
I haven’t decided whether I will just carry 6 stakes – 4 for the fly, and 2 to stake out the vestibules (which could be used to reinforce the trekking poles in the event of high winds).
One question I have for the collective gurus here on BPL. It would be sweet to leave the inner tent clipped to the fly, for ease of later setup. I found that the tent and stakes can nicely fit inside a 4 L Sea-to-Summit Ultra-Sil stuff sack. Is there any reason that I can’t simply stuff everything into the bag? I’ve done this with other tents without issue. True, the fly and tent floor will crinkle up, but this smooths out with a taut pitch, especially after a light rain. This will greatly speed up the task of dealing with the tent in the morning.
Anyway, I think that Dan has come up with a real game-changer with this tent. I think he is the greatest BPL MYOGer, and I hope that he has a design patent on it. Like someone earlier mentioned, his mother must be very proud of him! Now we have to hope that he lives through the current BMWO adventure that he is taking on.
I see no reason to ever separate the inner from the fly – at least on a well-designed shelter.
Sure, some shelters do not permit that. But follow the logic: that just means they are not well-designed (imho).
Cheers
I don’t separate the two. All up in one go. Bingo, bango…….
Yesterday, after the morning dew dried in the sun, and I was sure that the sealer had completely cured, I folded the tent carefully on my patio table and slipped it into my S-to-S stuff sack. The final total weight is 2# 1.7 oz (955 g). I didn’t include the 2 extra guy line cords, I used a custom cuben stake bag (as I showed in an earlier post), and I swapped out the stock stakes with 6 MSR Groundhogs. I’m certain that in the field I will simply stuff it carefully into the stuff sack.
I guess that I missed the fact that both side entrances are identical. I somehow thought that there was only one fly door, and that you had to access the other side vestibule from inside the tent. This was a nice surprise, as it allows greater flexibility (and ventilation options). I can see that if I find myself sleeping on a slight head-to-foot incline, I could simply flip my bag over and sleep on the other side. Sweet option on a rainy night.
It turned out that the final trekking pole lengths, after adjusting them for maximum stability and head room, were exactly the length that I normally use while hiking. That is a total length of 48″ (122 cm). That was another sweet surprise. This is truly a no-fuss, high quality double wall 1-P tent.
The Drop packing slip described the tent as “Desert sage Massdrop X Dan Du” . So I have no choice but to fondly nickname it my Dandu tent (after DAN DUrston).
This might be the best US $200 I’ve ever spent on a piece of gear.
Gary – Thanks for all the information and insight. After hearing your thoughts, I am now triply excited about a 2P version.
I see no reason to ever separate the inner from the fly – at least on a well-designed shelter. Sure, some shelters do not permit that. But follow the logic: that just means they are not well-designed (imho).
I have a Tarptent Notch and Bowfin1. If the fly gets wet overnight and I don’t think I’ll be able to dry it out during the day, I’ll separate the fly from the inner to keep the inner dry. If I think I will be able to dry out during the day (lunch), I’ll roll them up together but I’ll separate them at lunch so they dry out much faster.
Gary,
Nice to hear you’re liking the tent, and thanks for sharing your thoughts and experiences. Indeed the factory does a really nice job with the construction.
For the seam sealing, are you aware that the tent is already seam taped so it doesn’t need to be seam sealed? I like seam sealing because it stops the water right at the outside instead of letting in soak into the threads/seams before getting stopped by the tape, but the tent is seam taped so it should do a good job keeping the water out as is.
With regards to leaving the inner connected, I normally keep them connected. If the fly is a bit wet, I still pack them up together and then I might have to use a towel or something to wipe any water that gets on the floor when they were packed up. If the fly is really wet though (e.g. it’s been raining), then I remove the inner to keep it dry. One tip here is that if you think you’ll want to disconnect these, you can connect the inner by clipping it to the grosgrain inside the corners instead of the D rings. That’ll stay connected when it’s pitched, but slides apart more easily during take down. I don’t do this if I’m leaving them connected since clipping to the grosgrain can come disconnected on it’s own when the tent isn’t pitched.
Either way, I normally roll the tent, rather than stuffing, because it fits into the sack easier. After unstaking it, I grab the two peaks and fold the tent in half (regardless of whether the inner is in there). Then I fold it a few more times to get it in a long, narrow strip that I then roll up. I also recommend closing the vents before packing, as otherwise the velcro can snag on the mesh and create pulls.
Thanks for this feedback, DanDu. And good work trekking in the Bob – I anxiously await everyone’s trip reports.
Just for grins, this morning I set up the tent again, this time to see just how long it would take to do so. From stuff sack to final pitch it took 12 minutes and 12 seconds. I don’t know how long it takes to set up my other tents, as I’ve never timed them. However, I expect that most would take longer than that. My Tarptent Contrail might be close though. I expect that the Mid will go up even quicker as I get to know it better, especially if I see a big rain cloud coming.
I had folded the tent like Dan suggested, and there were no significant wrinkles or creases on either the fly or the inner tent when I set it up this morning. I doubt that it would look quite as pretty if I had stuffed the tent into the stuff sack. I think the next step is for me to learn exactly how to fold it. I can envision that being a little difficult when doing it in the dirt in the morning.
Am I a geek or what?
Didn’t work out for me. On my Exped UL7LW pad with my 6’3” self and size 15 feet I had the netting touching my head and my right shoulder. Too bad as I liked plenty about it.
For Gary

my best time with the Contrail was 49 seconds.
Good work with the Contrail, Franco. You might remember schooling me on needing to have another guy line at the front of the tent, which takes a bit of time to stake out and adjust. Also, for me, I have to connect my 2 trekking poles in an inverted V configuration to support the entrance. But none of this really takes much time, actually, and I now expect it would take just 3-4 minutes total to set the Contrail up. I’ll check it out sometime.
I have had over 35 nights using my Contrail in often inclement weather conditions, and it never once failed me. The only time it had a problem was when the rain direction shifted and came in under the front beak. Not too serious, but some things in the tent got a bit wet.
But still, I feel that the X-Mid is superior to the Contrail in (1) being double wall, (2) being far more weather/wind-worthy with more ventilation options, (3) having 2 entry points and vestibules, and (4) providing greater head room.
OK, Franco, I couldn’t wait – my Contrail set-up time haunted me. So this morning I timed it, and it took me just under 9 minutes to get it set up just right. It took about a minute to connect the pole handles with silicone hair ties, then about 6.5 minutes to do the preliminary stake placement. After it was all basically set up, I then needed to re-stake everything to get the perfect pitch, which took about 1.5 minutes (maybe a wee bit less). So yes, the Contrail is likely a quicker setup. Keep in mind that I had to fiddle with a piece of polycryo to get it perfectly in place to protect the floor of my DanDu Mid inner tent. I expect that with a bit of practice, the DanDu could be setup in about 10 minutes. So, in my mind, the Contrail should be a slightly quicker setup, but functionally it’s pretty much a wash between the 2 tents.
Folks, I have a minor problem. I forgot to weigh my X-Mid fly before I sealed the outer seams with McNett Sil sealant. What I’d like to know is how much weight it adds after the sealant fully cures. My full weight, after swapping out the shepherd’s hook stakes with 6 MSR groundhogs, the stock stake sack with a MYOG cuben one, and a S-to-S ultra sil stuff sack for the stock stuff sack, comes in a bit higher than what everyone on Massdrop claims. Most people state that theirs’ come in at just below 2 pounds, whereas mine is 2# 1.72 oz. The above swap-outs added 1.42 oz. to the total weight, but I am wondering if the weight of the seam sealing added significant weight to the fly (like, maybe 1 to 1.5 ounces?). Does anyone have a reasonable guess?
Out of the box, my tent + fly, including the lines that came attached: 841 gm.
Fly, including lines that came attached: 557 gm.
Thanks, Bob. That provides me with a point of reference. But something doesn’t quite make sense here. The weight of my seam-sealed fly + the inner tent (without stuff sack and stakes and the extra cord) weighs 803 grams, as opposed to your 841 grams, a difference of 38 grams – no small difference at all. I can grant them a variation in production, but that seems like a significant weight difference, and I added the small weight of the seam sealant to mine.
Maybe I should just blow this off and go out and do some yard work. I obsess too much about grams sometimes…
Can you weigh just the fly now? Normally the flys are coming it at 540g plus or minus 15g. So if yours is 570g then it added an ounce.
The inner tents are pretty consistent at 280-285g, but the flys vary more because the coatings are a large portion of the weight so a +/- 10% difference in how thick they are applied could have a +/- 5% difference in the total fly weight which would be plus or minus 25g. Usually these are within 15g or plus/minus 3%.
You say yours is 803g (28.3oz) for the fly + Inner but then it’s 33.72 oz (956g) with the stakes and stuff sack, which is a gain of 153g or 5.4oz. That seems like a lot of weight for the two stuff sacks (20g?) and six groundhog stakes (12g x 6 = 72g).
Dan, that’s all the information I’ll need right now. Thanks for that. Yes, the two stuff sacks do come in at 20 gm, but the 6 MSR Groundhog stakes are 84.3 gm (2.97 oz). I will weigh the fly when I can, then compare it with your specs. I was kinda thinking that the sealant should add about one ounce to the fly. We shall soon see.
This is all fairly academic anyway. I am just thrilled to have a bombproof and roomy 1-P double wall that comes in at a bit less than 2# 2 oz.
Become a member to post in the forums.
advertisementYour privacy is protected: We do not transmit your user data to third-party ad platforms or advertisers, and we do not host third-party tracking pixels. Backpacking Light serves ads on its own custom, native, and internal platform.
 Pro-Grade Water RepellencyPolypropylene face fabrics: see the future of raingear.