Topic

grease pot baking experiments


Forum Posting

A Membership is required to post in the forums. Login or become a member to post in the member forums!

Home Forums General Forums Food, Hydration, and Nutrition grease pot baking experiments

Viewing 25 posts - 1 through 25 (of 28 total)
  • Author
    Posts
  • #3424441
    Matt Swider
    Spectator

    @sbslider

    Locale: Santa Barbara

    This is a continuation of a thread which I started in the gear forum, questioning the ability of an aluminum stanco grease pot to be used directly in the flame for for trail dry baking.  Even though I got feedback from some that said “no way Jose”, most agreed with my empirical results of “for sure”.  So far I have successfully baked a biscuit and a couple peanut butter cookies.  My discussion has morphed from gear focused to food focused, hence picking up the thread here.  For the previous discussion see https://backpackinglight.com/forums/topic/wondering-about-dry-baking-using-an-epicurean-stove-and-a-kmart-grease-pot/#post-3424405 .

    Now I am hoping to fine tune this a bit.  Jon Fong has done a lot of excellent in this area, but it is all focused on a pot in a pot.  I am trying to explore cooking done as James Marco suggested in the other thread, one pot only.  Yeah, I want to save a paltry couple ounces, but I also just want to explore a bit the art of the possible.  The primary goal of this is to support a three person through hike next summer, where this stove will be the bread/dessert stove.  For our main cooking, the grease pot is not big enough, and my partner has a fine setup.  But if we can add brownies for dessert, or heat water while the dinner pot is in use, or heat coffee water while the breakfast pot is in use, then taking my home made cone/grease pot with the epicurean stove, total weight of 5.8oz without fuel.

    I am experimenting with both coghlan’s fuel tabs and tea lights.  So far I have run 5 tests and here are the results.

    TEST 1:  1 1/2 cups of bisquick, 1/2 cup water, 1/8 cup each of dried milk, shredded cheese, and shelf stable bacon.  25 minutes on the heat, then set for 15 minutes, then threw it in my bike bag and rode to the beach.  Probably started eating it over an hour after the heat was removed.   Very good.  I think it could have used 5 minutes more on the heat, but still very good for a first attempt.  Bottom was definitely more done than the top, but not burned.  Used 2 coghlan’s tabs in the epicurean.

    TEST 2:  1+ cup of brownie mix with the called for oil and water, but left out the egg.  Think this was a mistake.  40 minutes on heat, 20 minute set.  Epic fail, top was goopy, bottom was burned.  Used 1 coghlan’s tab on the left overs from the previous burn, which was a fair amount.  Tablet was on end and was probably too high and got too much air, as the mixture was bubling hard most of the cook. This lead me to temporarily abandon trying to cook in just the grease pot.

    TEST 3:  1+ cup of brownie mix with the called for oil and water, but left out the egg.  Think this was a mistake.  Put the batter in a hand made kitchen aluminum foil pot.  pot was spaced up off the bottom with a 1/4″ or so strip of metal bent in a loop, then a piece of aluminum flashing on top.  The pot sat on the flashing.  1:34 minutes on heat using 4 tea lights, long rest before I checked it.  Bottom and sides were sort of caky, but top was still pretty gooey.   Still not what I am looking for.

    At this point I am thinking the lack of egg is killing me.  I don’t want to bring eggs, so I opt for 1T ground flax seed and 3T water as an egg substitute.

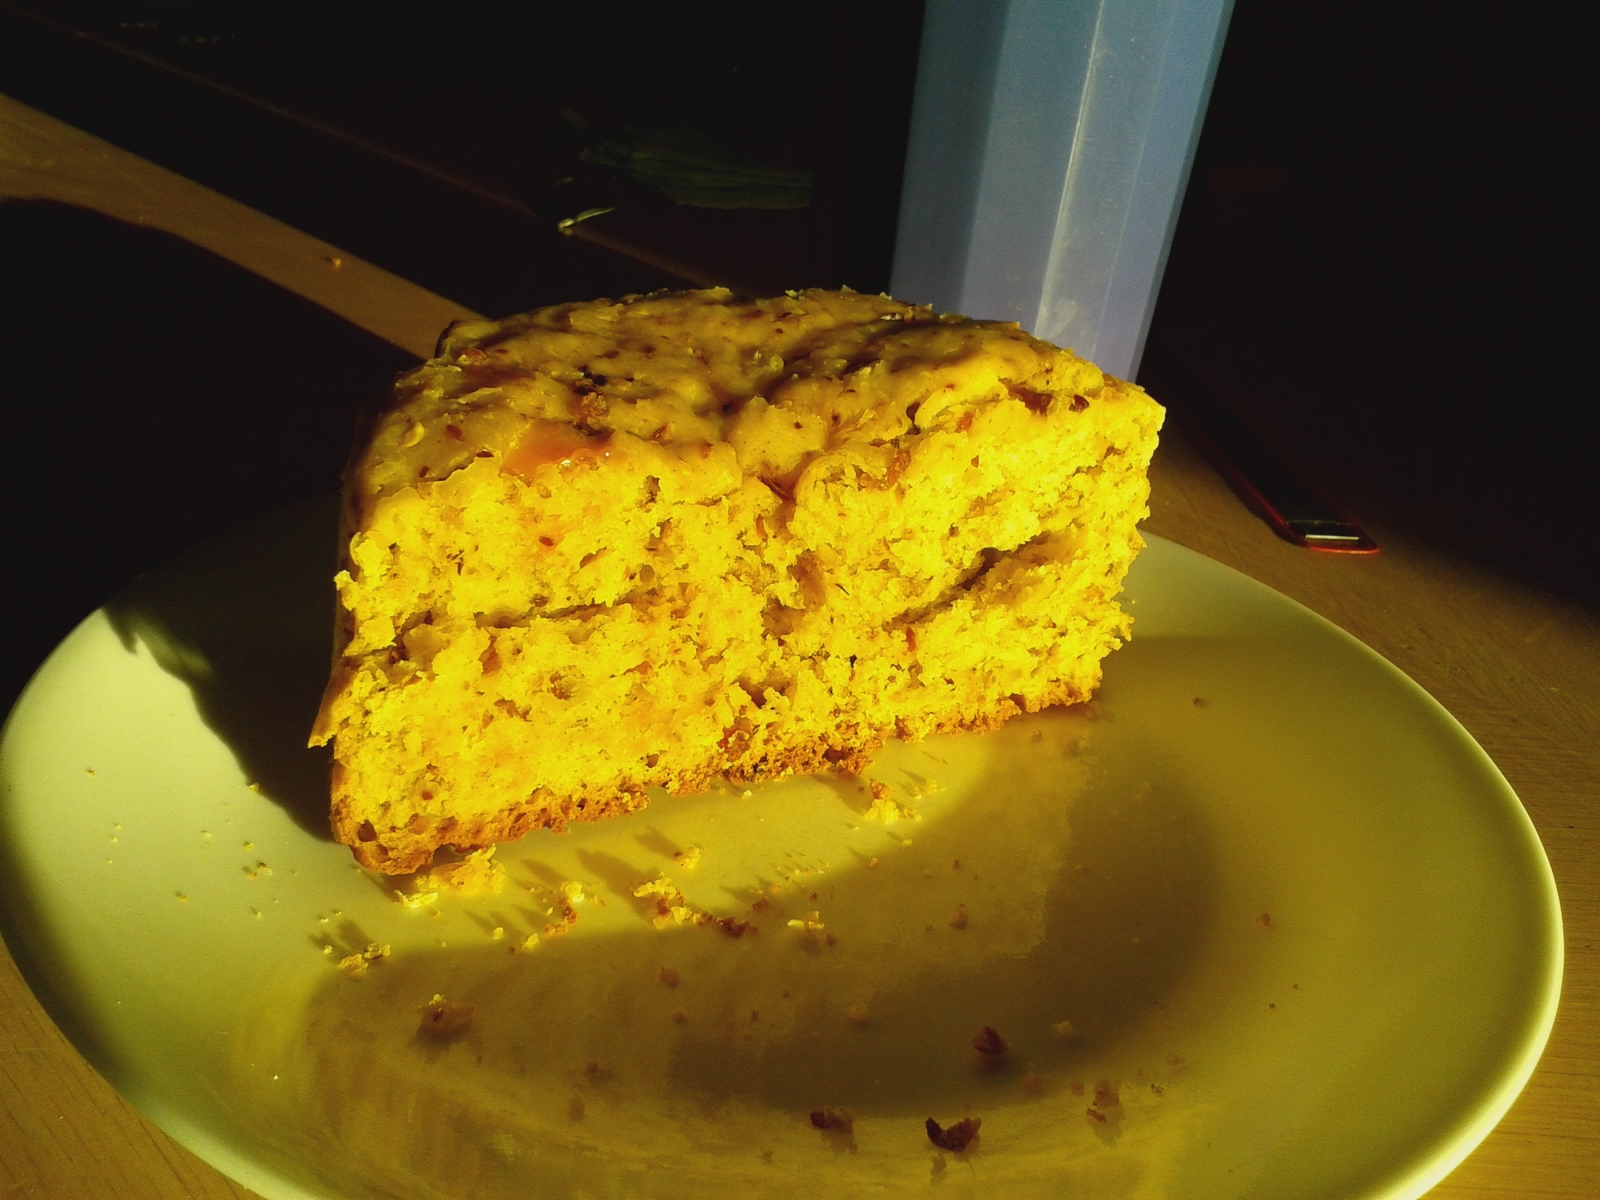
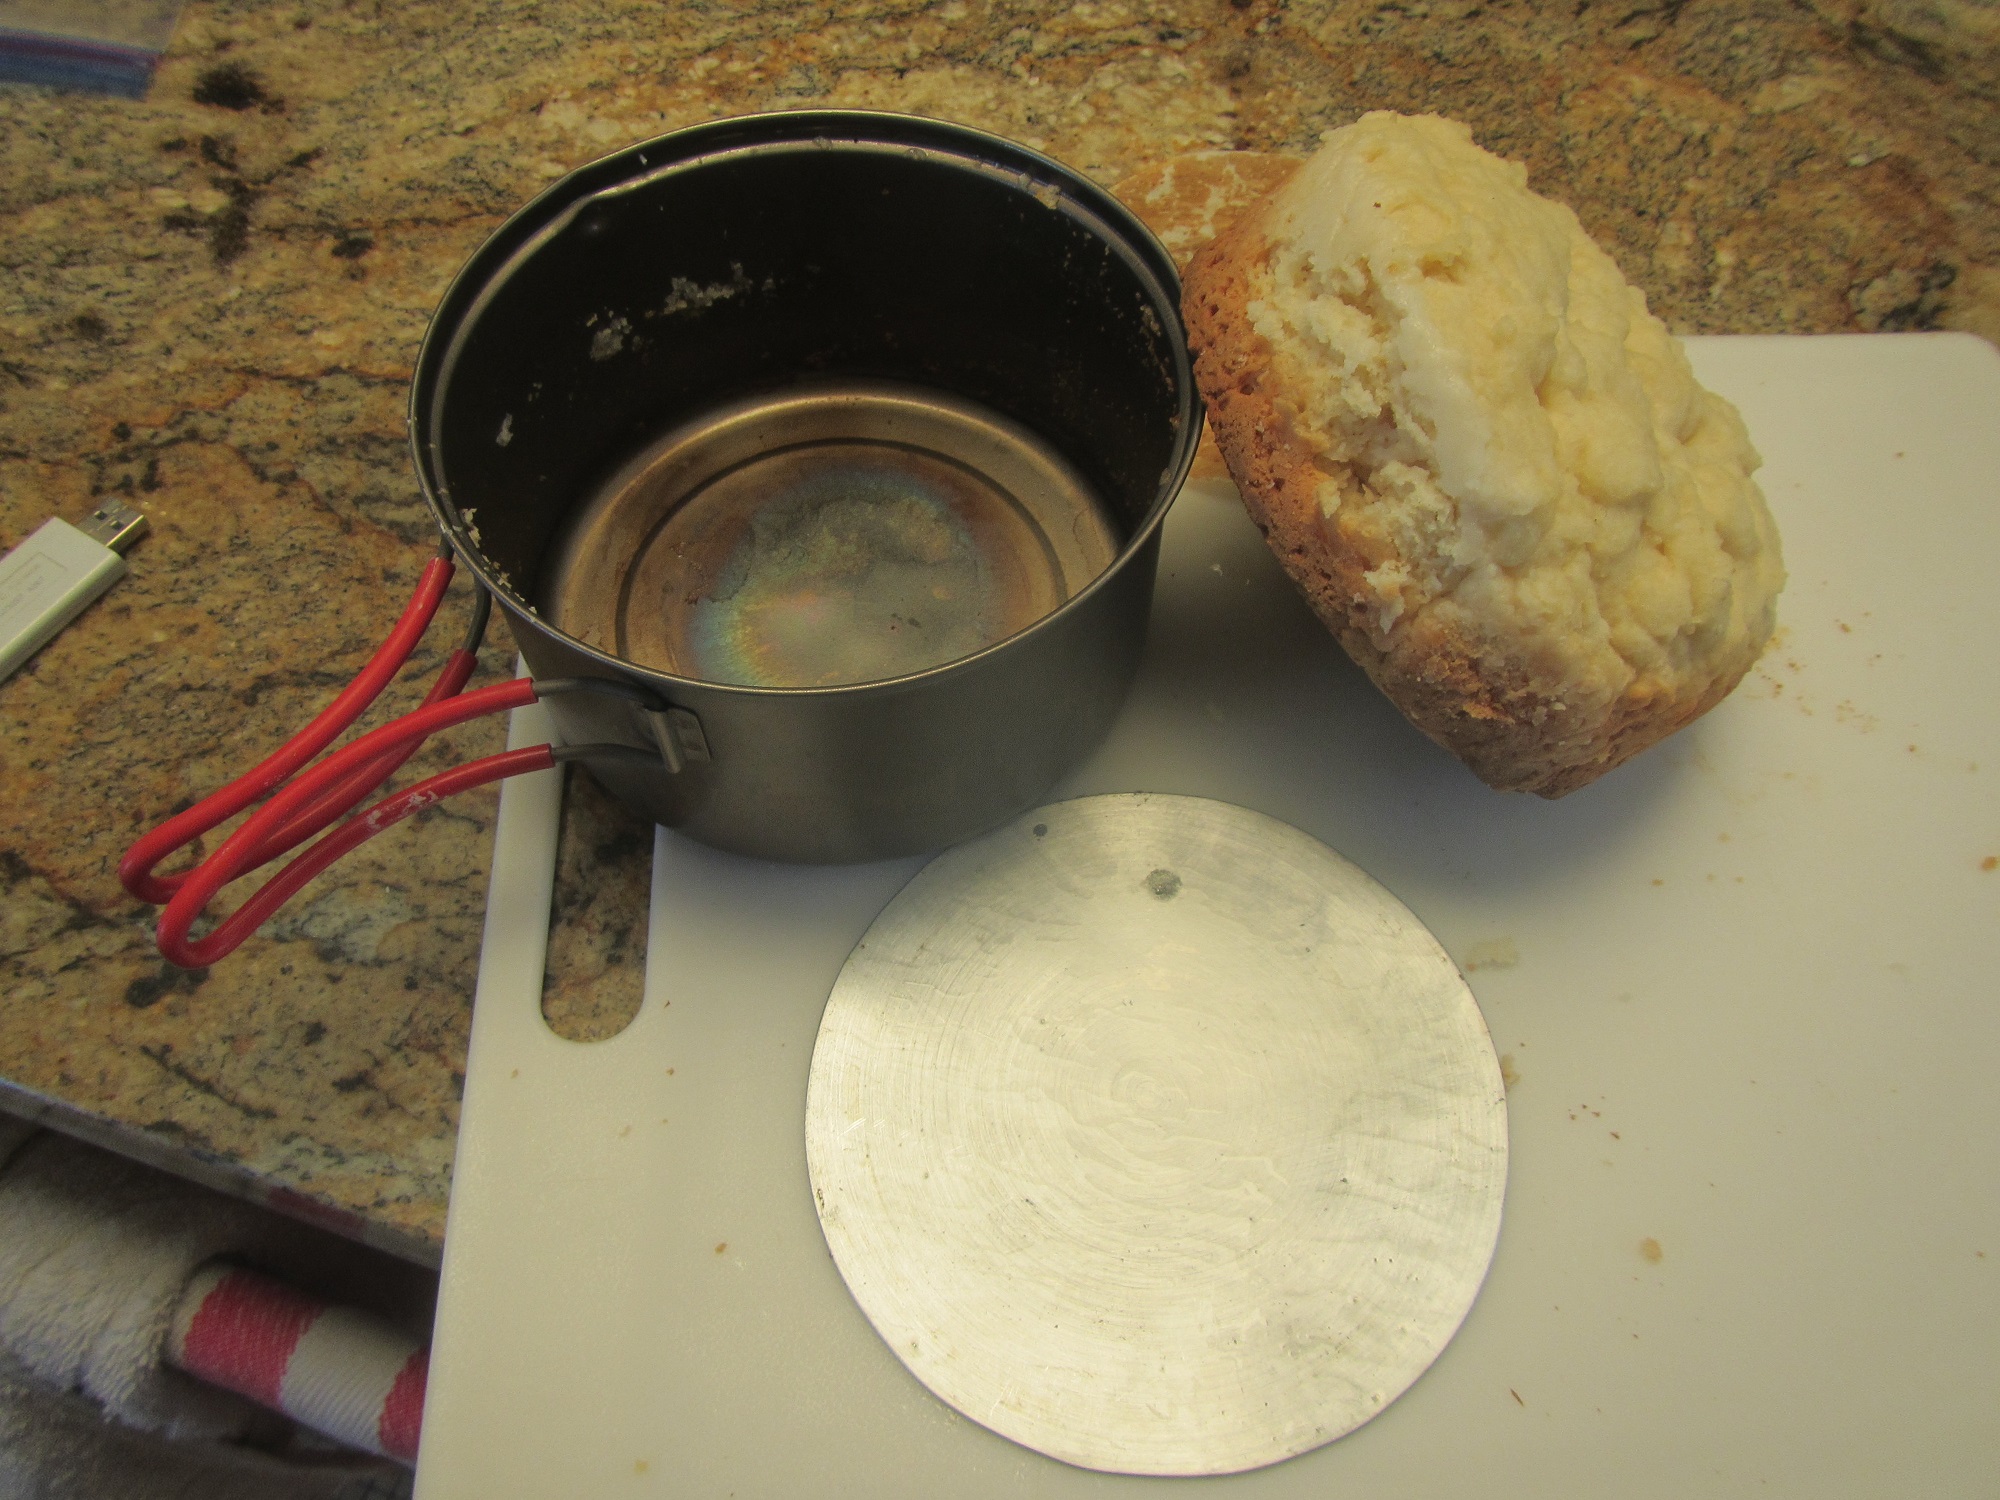
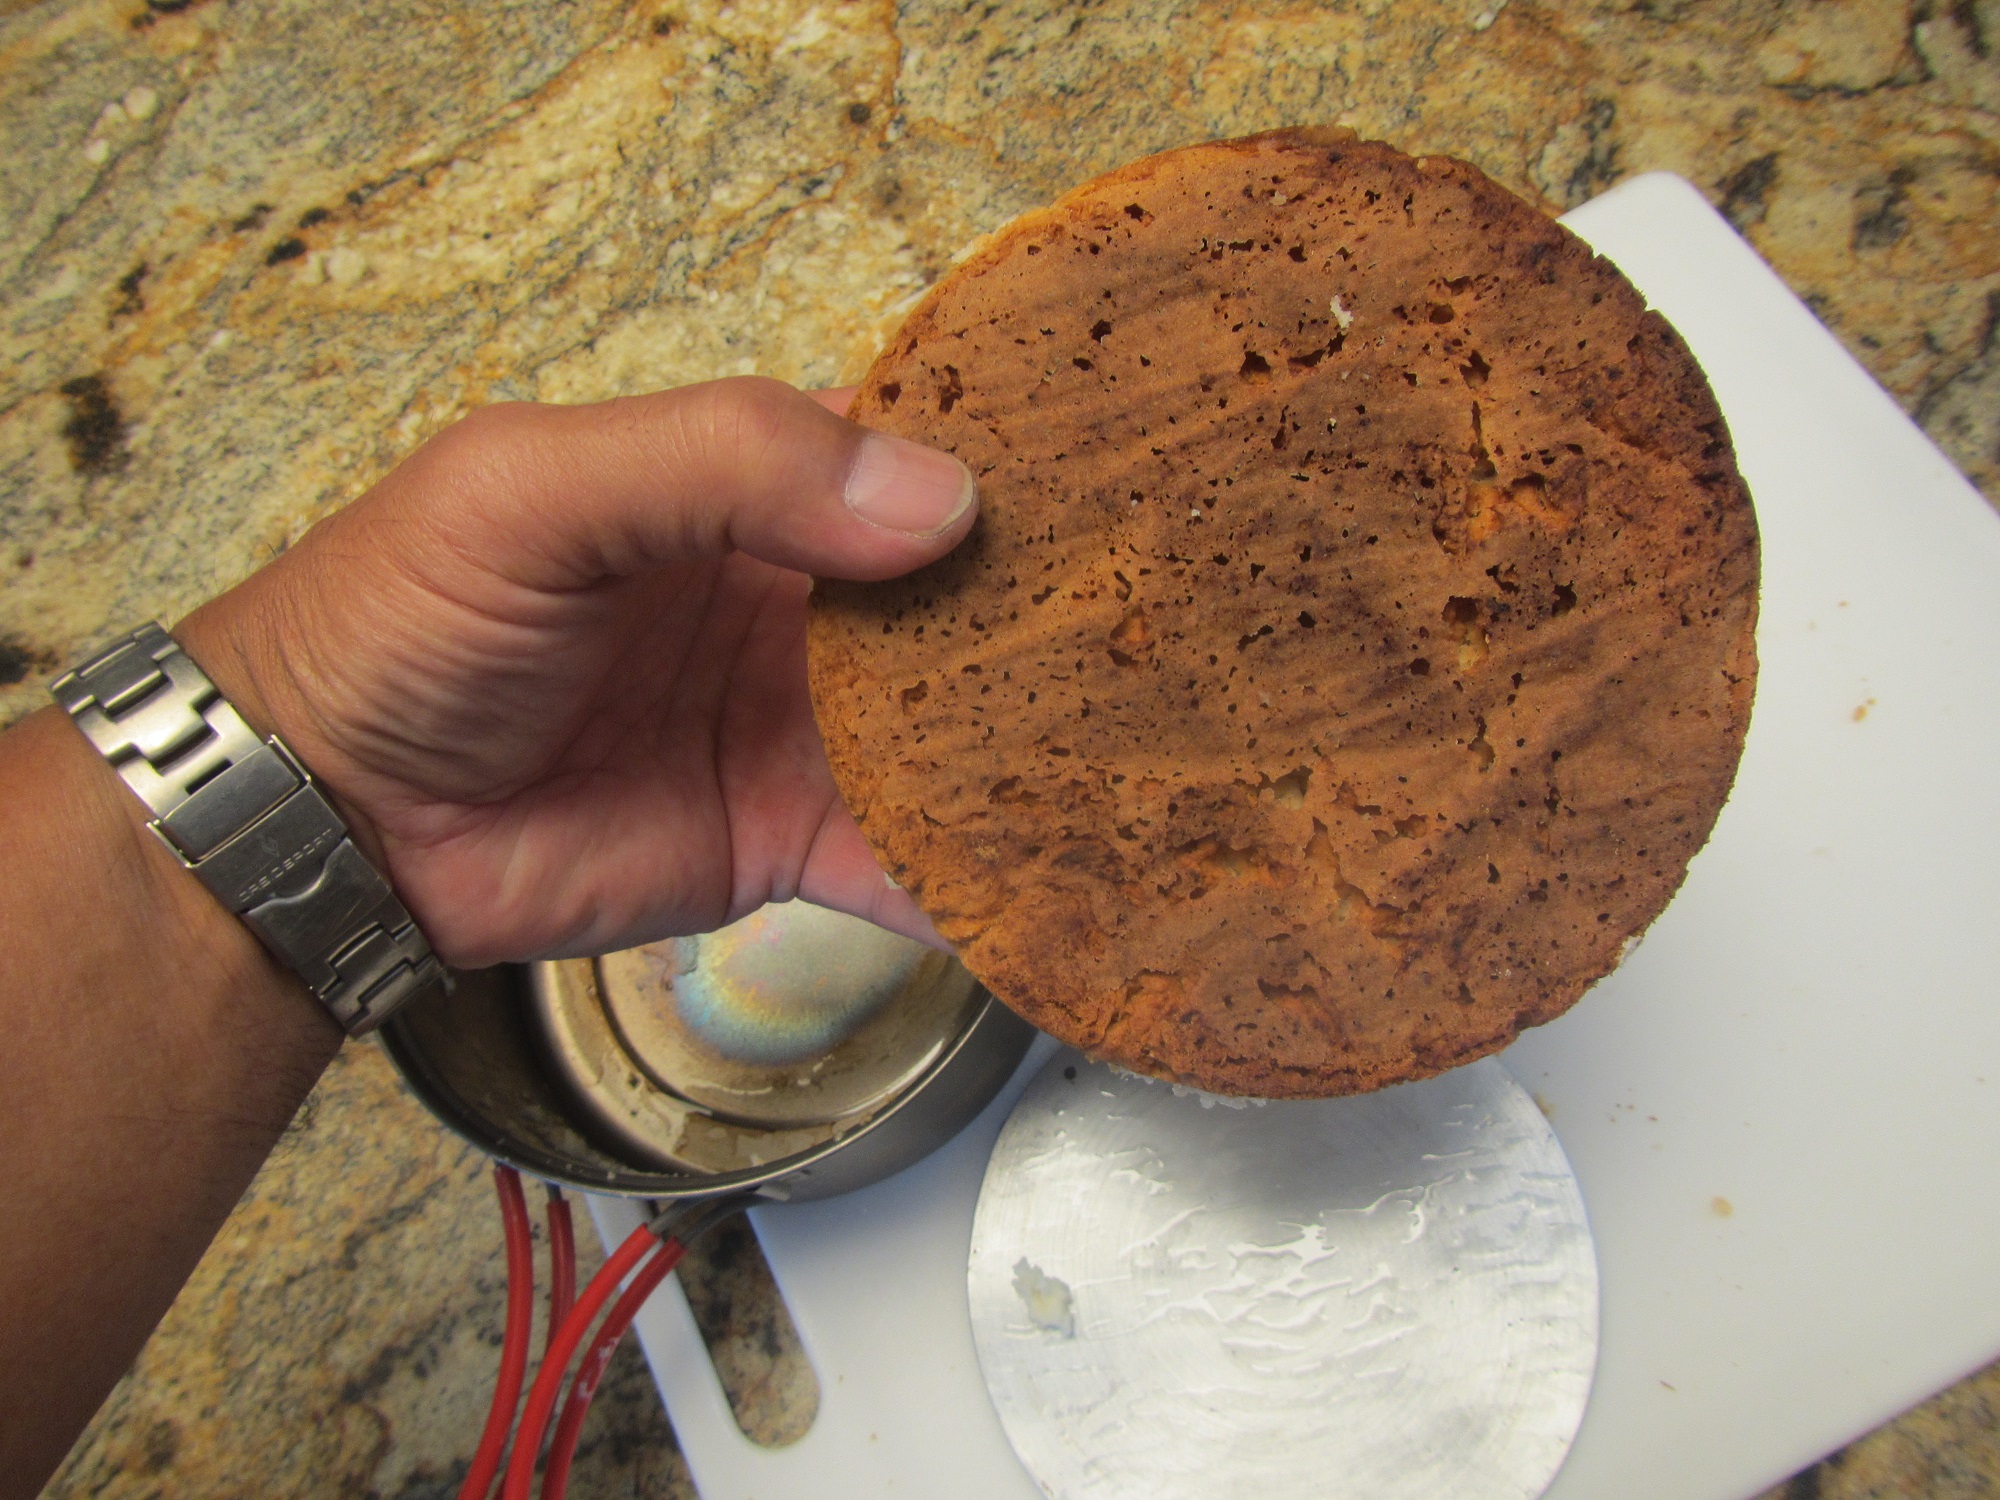
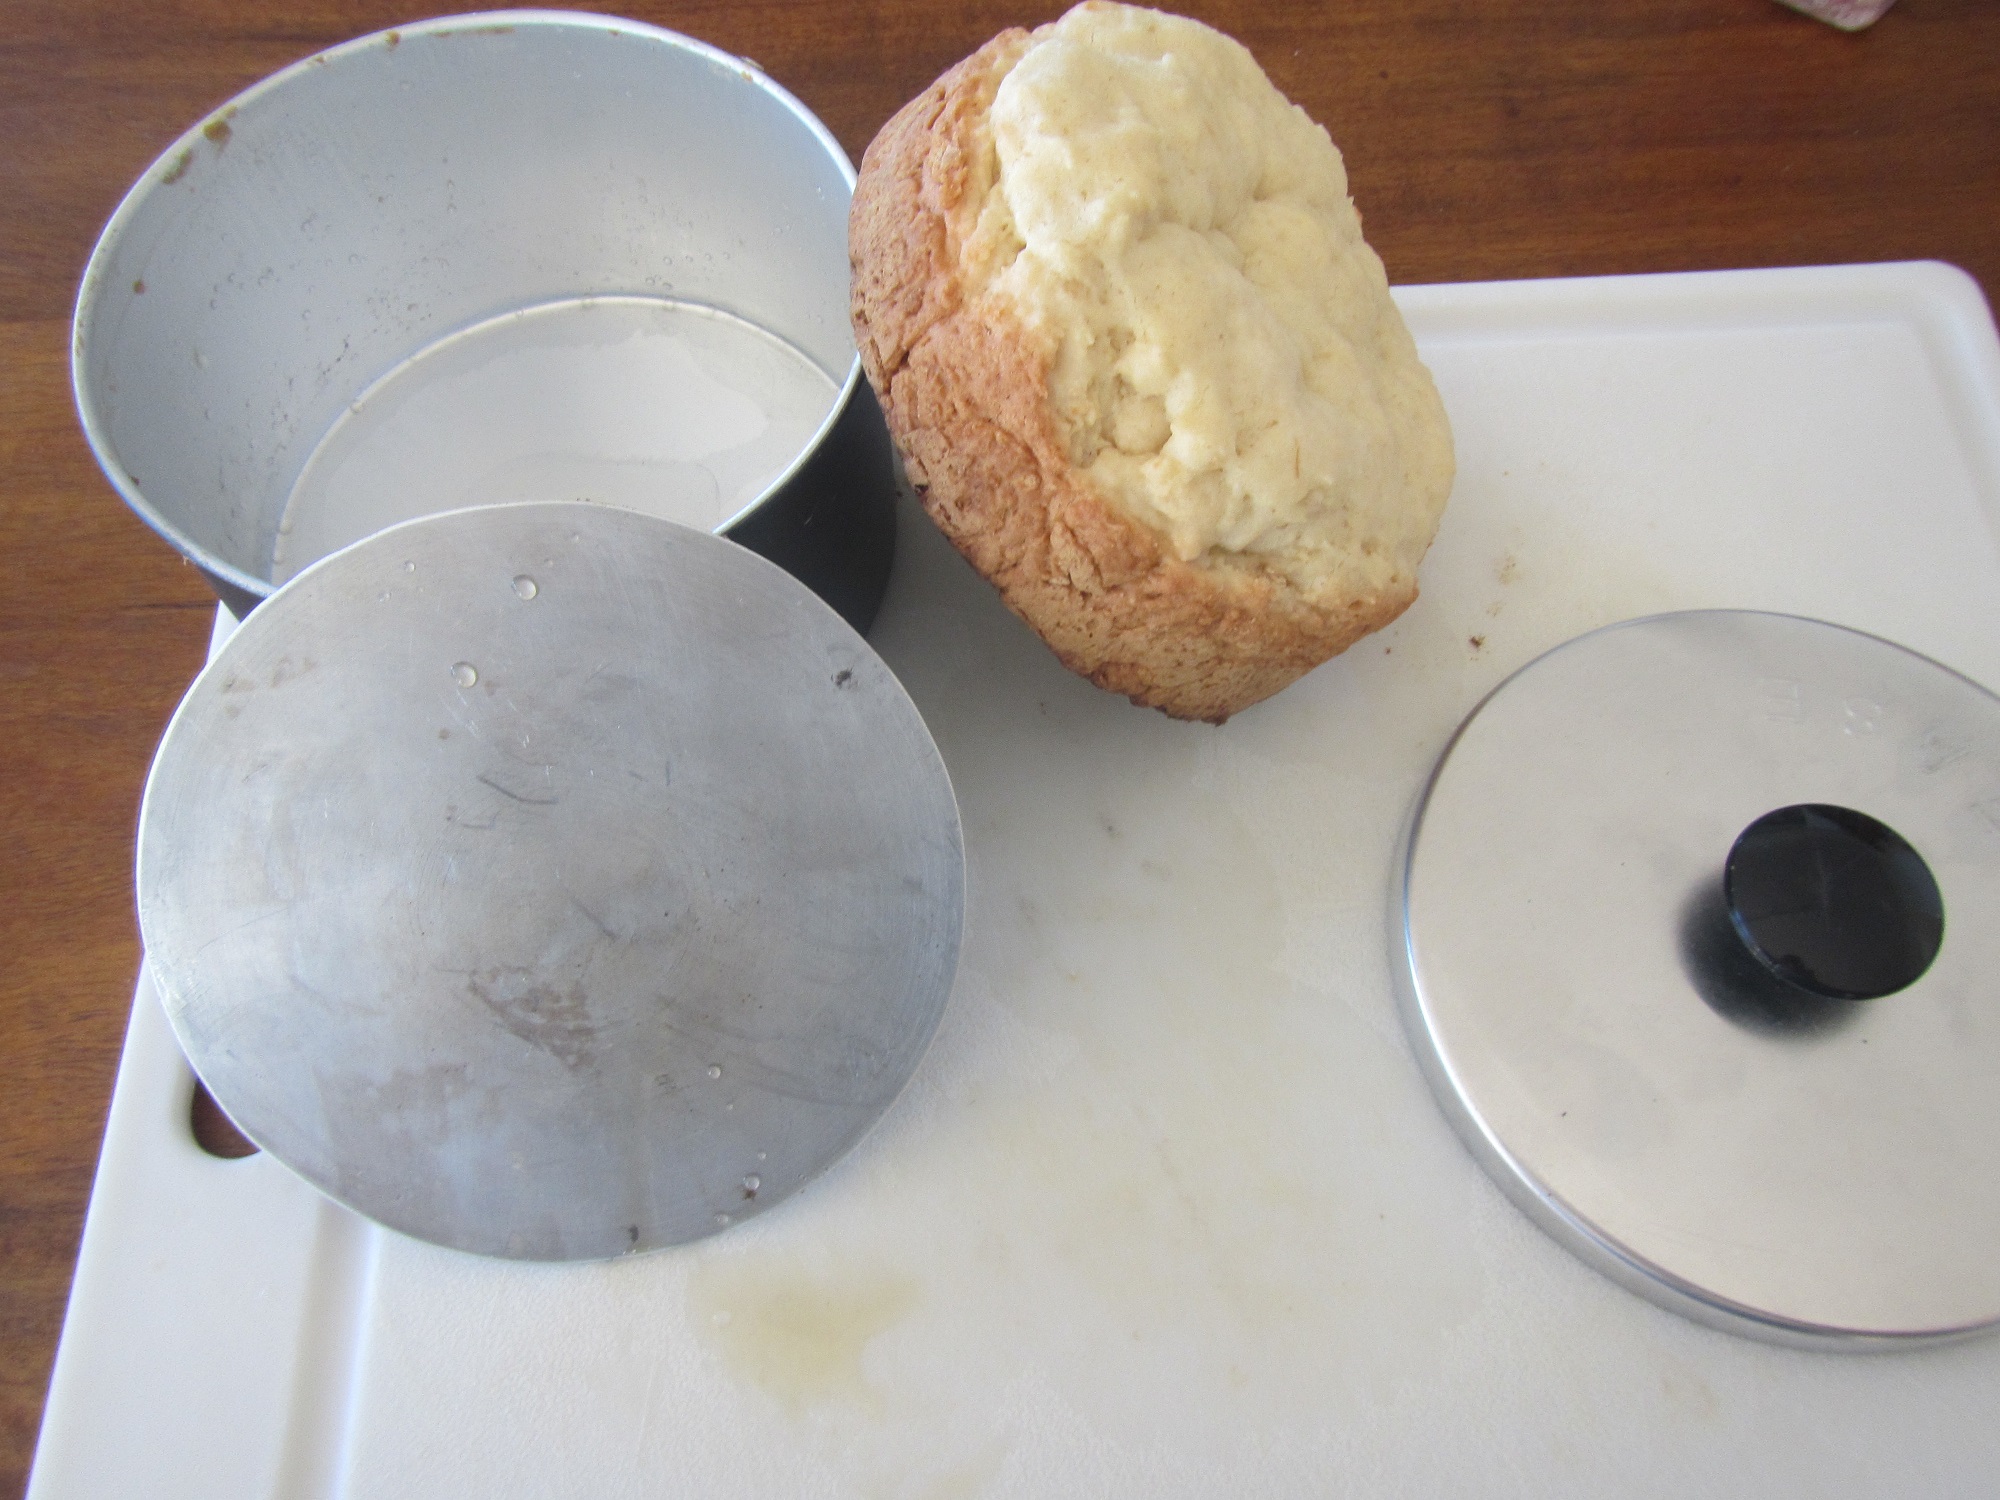
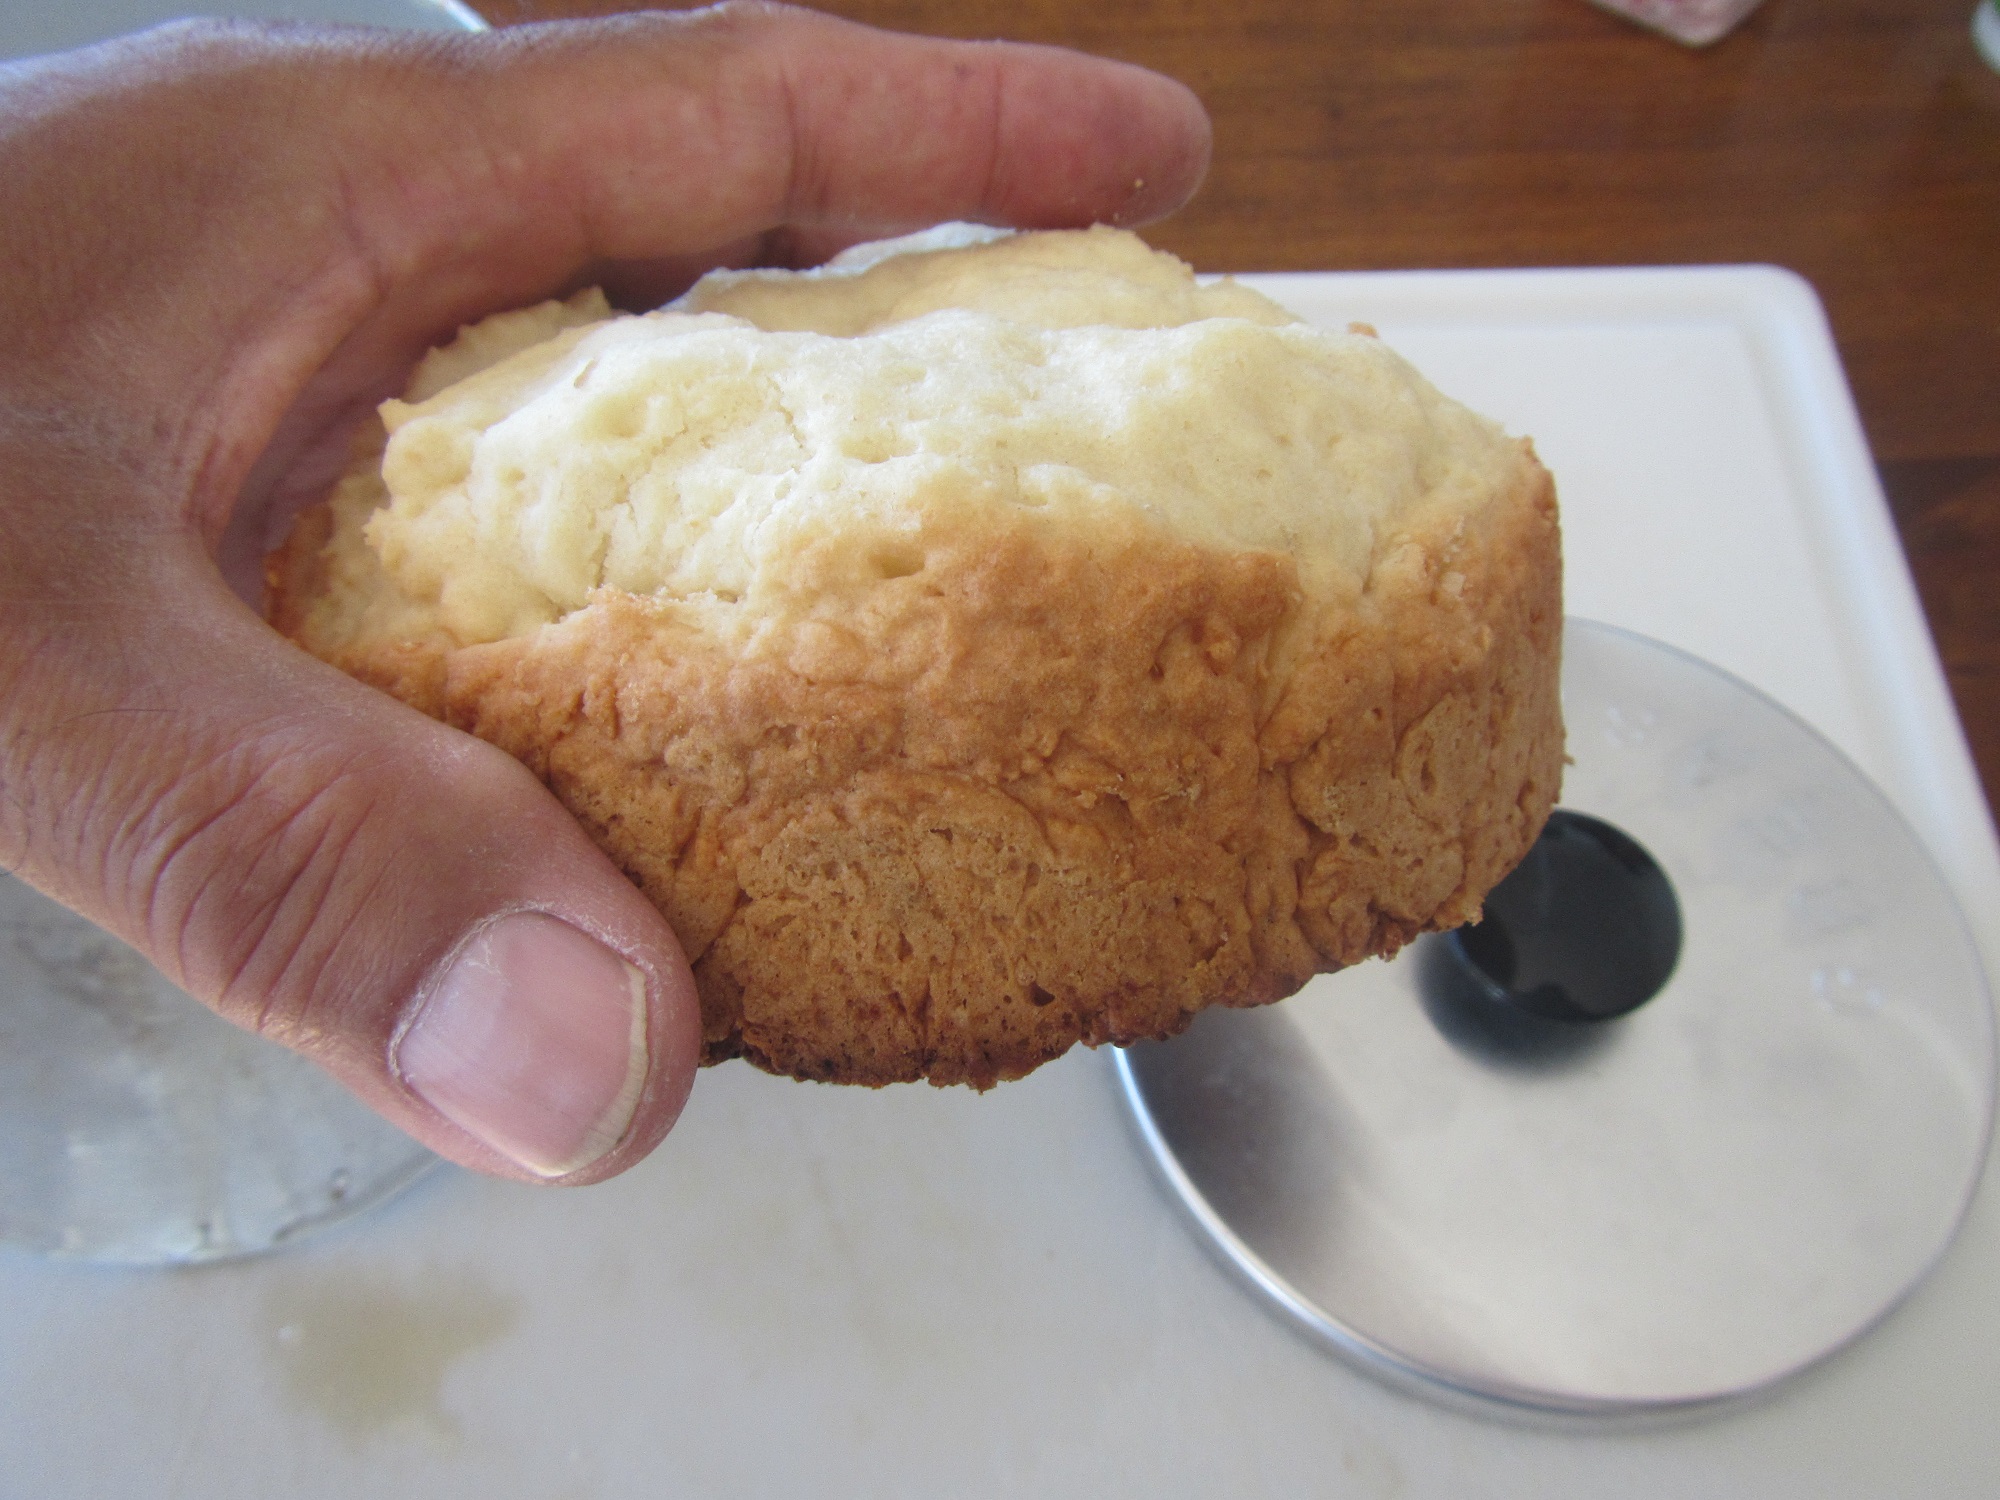
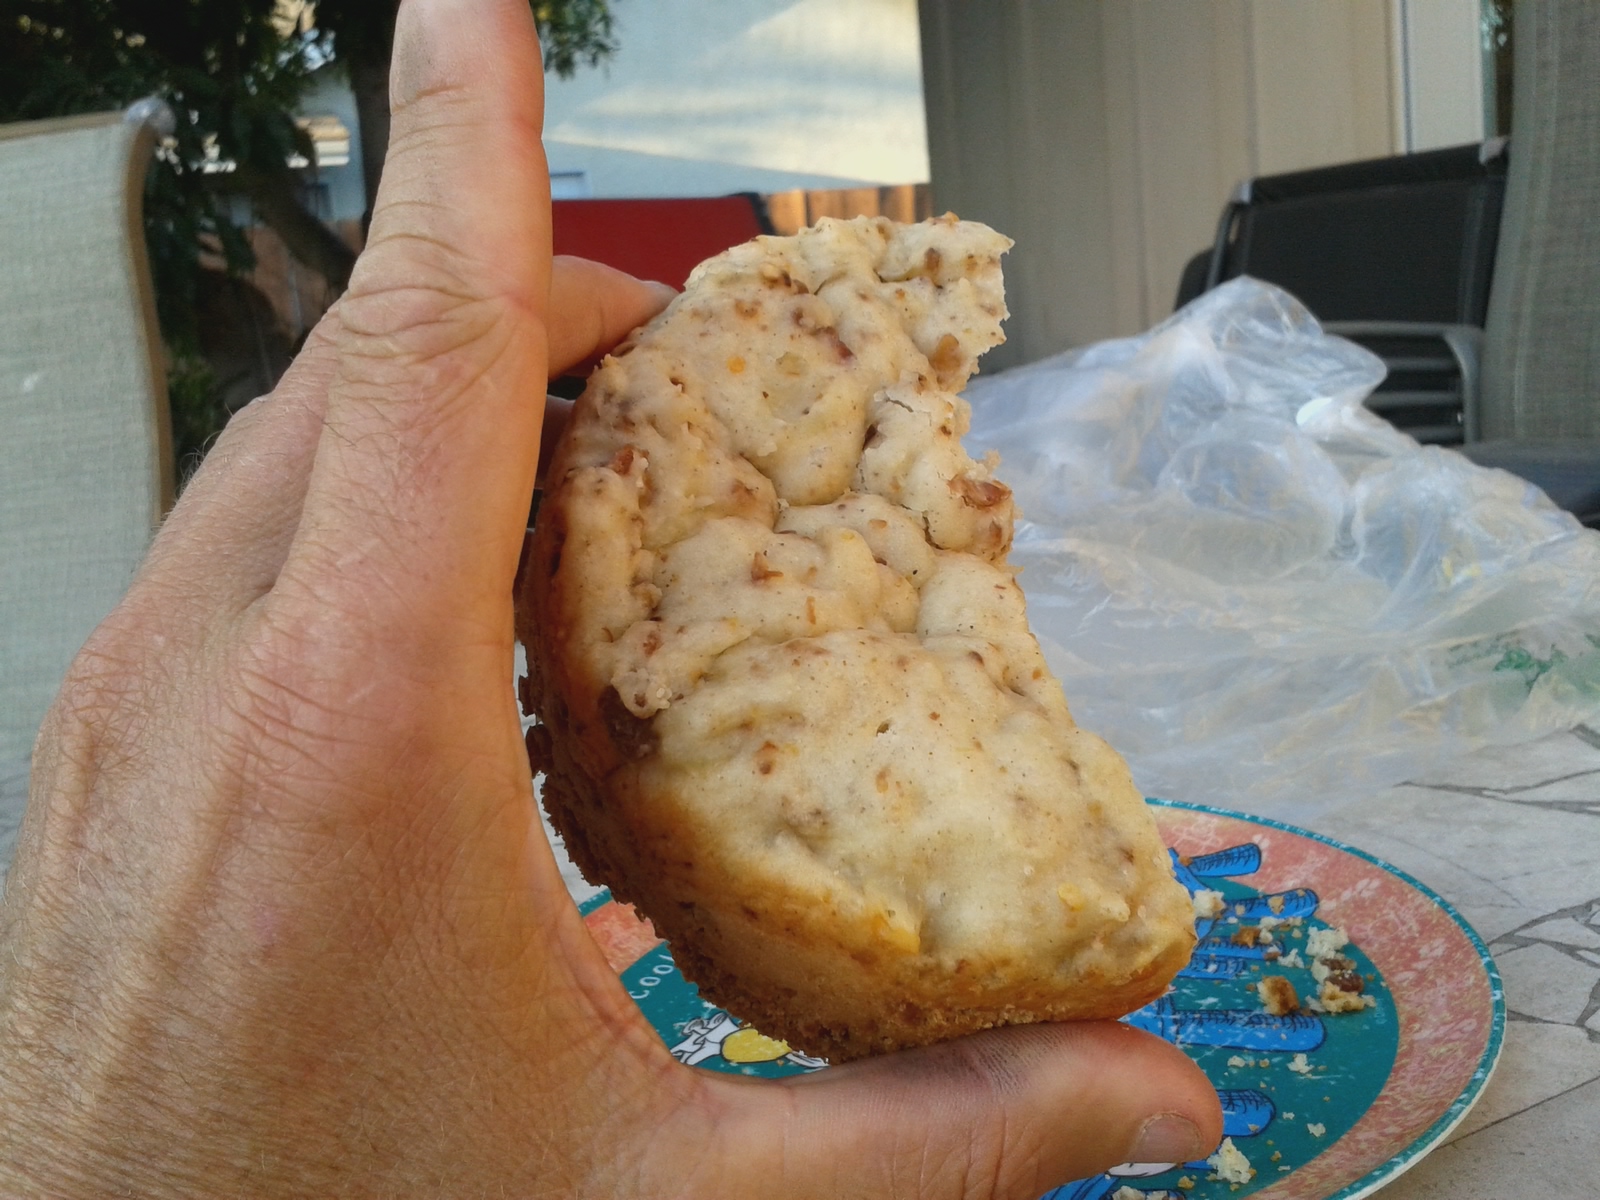
    TEST 4:  Peanut butter cookie mix.  Big package, but I make it all up and decide to cook 1/3 (200g) at a time with a 1/8 cup or so mini chocolate chips mixed in.  Cooked in the grease pot with 4 tea lights for 30 minutes, rested awhile (over an hour). Cookie was good, edges were cake like but the center was not as cooked as I would hope.  No burning, bottom and sides are browned.  All in all a keeper.  The tea lights are attractive in that they are clean, last a long time, and spread the heat out a bit.   The only down side I can see so far is storing the partially used tea lights and not breaking the burned wicks, and them blowing out and not noticing.  One of the went out twice during the long burn of test 3.  Better wind screening required I guess.

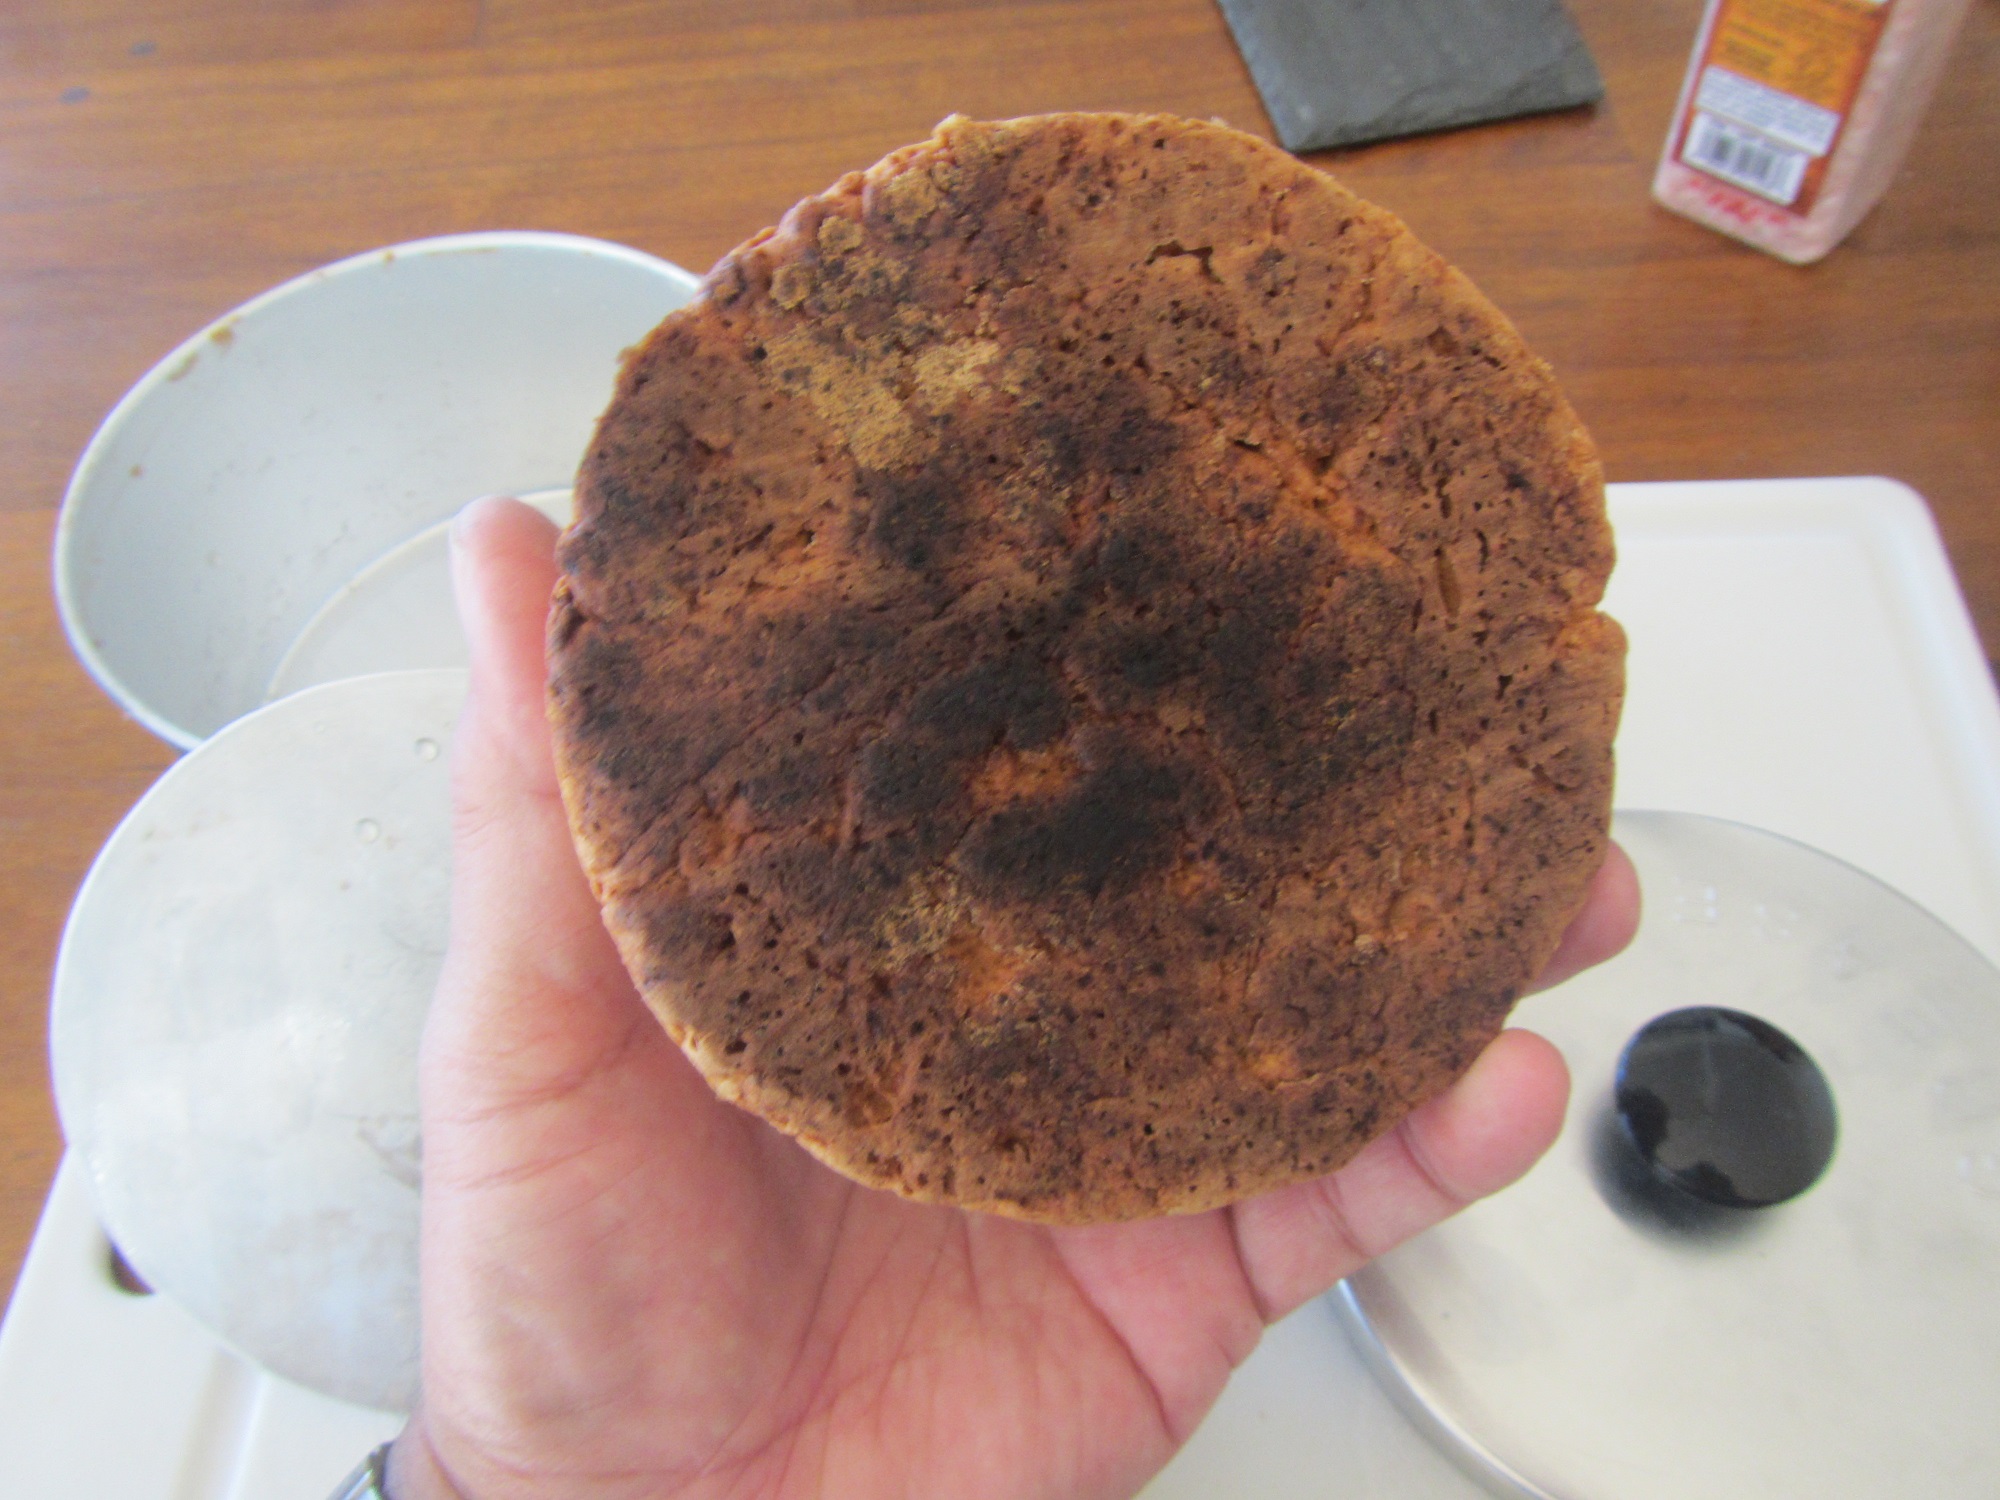
    TEST 5:  Second 200g of the cookie mix with added mini chocolate chips, cooked on the epicurean stove with 1 coghlans tab for 20 minutes, then added a second one.  Total cook time 40 minutes, rest 20 minutes.  This was a better overall cookie, more caky everywhere, but a decent sized burn spot on the bottom.  I have not eaten any of the burn yet, but I think I would pick this cookie over the first for the overall product.  But then again I don’t mind a little burn ,and this is just a bit, roughly half the area of the cookie bottom, but not penetrating much into the cookie.

    So for test 6, the last 1/3 of the peanut butter dough, I think I will try the tea lights one more time and go longer.  Maybe 35 min, maybe 40, we will see how it goes.

    #3424443
    Matt Swider
    Spectator

    @sbslider

    Locale: Santa Barbara

    Well I can’t edit the first post (surprise, not) but I will say the amount of burn in test 5 was a bit more than I imagined, now I am leaning toward test 4 being better.  Anyway, they are both good and definitely trail acceptable.  It does make me thing that the tea lights might be better for one pot cooking though.

    #3424446
    James Marco
    BPL Member

    @jamesdmarco

    Locale: Finger Lakes

    Yeah, eggs are needed. You can use powdered egg. Just add enough for the recipe and add them in. I usually cook biscuit mix with cocoa/sugar added (a packet of hot cocoa per cookie.) I take dried apples and blend them into a powder and add about 1/3 by volume to the biscuit mix for apple flavored cookies. I add strawberries, blueberries, blackberries, raspberries, mulberries and whatever else I stumble across in the wild. Out, they always taste good.  I make them small, though, which may contribute to my success.


    #3424449
    Matt Swider
    Spectator

    @sbslider

    Locale: Santa Barbara

    Great ideas James, I will definitely be branching out a bit more than my present simple experiments.  I like the idea of cocoa biscuit, it maybe easier to get right than the brownies I tried.

    I like my egg substitute so far, as it is pretty cheap and easy to carry.  Can use it at home for other things also.  I may get the Ova Easy powdered eggs eventually, but the milled flax was easy to find at the store.   I do not have any egg substitute presently.

    My focus is baking for 3 and not just one, so it does make for bigger batches to bake for sure.  So far the ideas I am trying are 200-300 calories per person to go with a dinner, either dessert type or bread.  Test 7 will be a Italian cheese bread to go with the lasagna we are having for dinner tonight.  On the trail I see it going with anything, but primarily was thinking of it with pesto noodles .  This was my favorite of the big three dinners we used on this years 9 dinner trip, beans, rice with fritos and cheese, and spicy thai peanut noodles being the close seconds.


    #3424450
    Matt Swider
    Spectator

    @sbslider

    Locale: Santa Barbara

    TEST 6:  Winner winner chicken dinner.  I made the last third of the peanut butter cookie dough with added mini chocolate chips using the 4 tea lights.  Total cook time 45 minutes, on heat, rest 15 minutes in cone off heat.  This looked just like test 5 on the top, but no burn on the bottom.  It definitely cooked slower outside in the breeze than earlier today during test 4.  I had used the tea lights but inside on my stove.  Regardless of differences, this was the best of the six tests so far.  We will have peanut butter cookies for awhile I am sure, but I got some good experience here.

    For single pot cooking for three people the tea lights win out.  Spreading the heating area over the bottom of the pan helps to minimize burn potential, and weight wise the fuel used is about half (or less?) what I would use with the coghlans tabs.  Used 7 g of wax for this bake, compared to using two 6g tabs for the previous one.  I did have some left over from the two tabs, but this is usually hard to burn and gets wasted.  I think for this situation I am sold on the tea lights.  I was able to keep them all burning in a breeze by blocking a few of the upwind air openings in my cone.  If it was really windy the tea lights could be a challenge, but only time will tell.

    For you number geeks out there I have baked for 3 hours using just 27g of fuel.  Less than an ounce of fuel for 3 hours, that is incredible!!

    #3424454
    James Marco
    BPL Member

    @jamesdmarco

    Locale: Finger Lakes

    Great!

    #3424460
    Matt Swider
    Spectator

    @sbslider

    Locale: Santa Barbara

    TEST 7:  Another bread recipe with the tea lights.  55 minutes!! much longer than with the 2 coghlans tabs.  Again 1.5 cups bisquick, but this had 2/3cu grated cheese and 2 T of grated Parmesan, so a fair amount more mass (should have weighed it).  Was not sure it was done but did not want to risk burning it (more?) so pulled it off and left it in the cone with a towel over it.  Rest 15 minutes til the rest of dinner was ready.   Bread was tasty, but a bit dense.  Next time I need to spread the batter out over the whole bottom, so it gets more surface area.  The recipe said to just plop it on the cooking sheet in an oval, and I did not make the step to adapt it to my setup.  Minor detail, as my wife said, “no one would complain if you made this on the trail”.

    The tea lights are on there last legs with almost 4 hours of burn time on them.  Two are down to less than 2g each, while the other two are at about 5g each.  Another possible disadvantage of using the tea lights on the trail, is carrying the wax from the nearly dead ones.  Or just feed it to newer ones more likely.

    I am wondering if the nearly used up tea lights was part of the slower cook time that the distance to the pot is a bit lower.  I guess until I have something to compare it to, like another test with the same recipe, this might just be reality, which is fine.

    I will try this recipe out again before using it on the trail, but it is another solid trail treat for sure.  No more testing today, we will see about tomorrow then.

    Matt

    #3424462
    DAN-Y/FANCEE FEEST
    Spectator

    @zelph2

    Mix one box angel food cake mix with one box chocolate cake mix. Mix together well. Use this mixture as your “cake mix”

    Use 3 tablespoons cake mix, 2 tablespoons water, mix well and then test bake using your heating method.

    (no eggs or oil used in mix)

    #3424463
    Matt Swider
    Spectator

    @sbslider

    Locale: Santa Barbara

    hmm, I am game but the quantity for a batch seems awful small and the water to mix ratio seems very high  compared to the mixes I have done thus far.

    Seems like quantity would barely cover the bottom of my pot, a bit over 1/4 cup.


    sounds sort of like this recipe for a mug https://www.duncanhines.com/recipes/cakes/Patti40/3-2-1-microwave-cake/

    or this : http://www.bplite.com/viewtopic.php?t=5537

    #3424477
    DAN-Y/FANCEE FEEST
    Spectator

    @zelph2

    I gave you a starting point. Increase as desired. The formular is derived from the microwave oven mix. I have used it with great results using the steam baking method. I wish you well on your quest:-)

    #3424518
    Matt Swider
    Spectator

    @sbslider

    Locale: Santa Barbara

    Sounds good, thanks for sharing Dan.

    #3424531
    DAN-Y/FANCEE FEEST
    Spectator

    @zelph2

    The mix can be found on page 21 of the bplite thread Pan bread and Muffins

    Read the entire page, good stuff there ;)

    http://bplite.com/viewtopic.php?f=20&t=523&p=49091&hilit=321+mix&sid=ae5563a664f0b4ef16e9f570a0f8be85#p41706

    #3424561
    Matt Swider
    Spectator

    @sbslider

    Locale: Santa Barbara

    I did check out the thread, looks like some good stuff in there.  I have not yet gone to the store to buy any more mixes, but I will be checking out the mix you suggested.  What I did do was stumble across Jon Fong’s bacon cheese biscuit recipe, so I gave that a whirl today.  Decide that 2″ was not likely the optimum distance for the tea lights to the bottom of the pot, so I raised them 1/2″ by using 4 empty tea light cups.  Super light.  What I did not realize until I was an hour + in was with 2oz of cheeze and 1/2 cup bacon this has more mass than any other item I have tried so far.

    TEST 8:  Another bread recipe with the tea lights.  1:22, as mentioned Jon Fong’s bacon cheese biscuit recipe.  It came out FANTASTIC!  It would have rose higher but I typically use the grease pot strainer as the lid with a bit of foil and the heat felt in , and the biscuit hit the top.  What I did different was to spread the mix in a little bowl, to maximize the contact of the mix with the pot.  The end product has a flat top, only because I limited the growth with the lid.  The bread came out perfect.  I don’t like as much heat as Jon, so next time I would go with 1/4 to 1/2 tablespoon of the red peppers, but it is very good.

    #3424588
    DAN-Y/FANCEE FEEST
    Spectator

    @zelph2

    “The primary goal of this is to support a three person through hike next summer, where this stove will be the bread/dessert stove. ”

    The grease pot is only big enough for 2 people that have unending patience. The 3rd person will have you strung up by the time you get the next batch going :-). An hour of cooking/baking time seems looooong.

    You have the patience of Jobe ;-)

    edit to say last recipe you added a bowl to the kit………..added some weight ;)

    #3424593
    Matt Swider
    Spectator

    @sbslider

    Locale: Santa Barbara

    Guess my original post was not so clear.  We will likely have a isobutane stove and a 2 quart pot for our main course.  This second stove is for either making a side dish or dessert in addition to our main course.  So far I made a 800 calorie cookie and a 1200 calorie bread that would be shared by 3 people who are also eating 600 – 700 calorie per person meal.  So that’s 800+ to 1100 calorie meal, consisting of a main course and a side of bread or dessert.  I think that will be enough calories for us for dinner, no second batch required.

    You got me on needing a bowl though.  I will likely need to splurge and bring a cut down yogurt container that weighs nearly an ounce.  We will take turns carrying it . . . ;-)

    All this practice is fun, and the guys on our bike ride today gobbled up the cookie samples I brought, so I am also spreading good will in the community.

    #3424613
    Matt Swider
    Spectator

    @sbslider

    Locale: Santa Barbara

    You do make a good point on the time still Dan.  I watched Jon’s video yesterday on baking a cake 3 ways.  Alcohol was 45 min, and tea lights were 1:15.  Makes me think that I could add one or two tea lights and decrease the time.  This would also increase the overall burn time of the candles I have.  Still have to eat through what I have before more experiments.  Also need to try the cake recipe, as that looks like a quick one.

    3-Way Chocolate Cake

    #3424869
    Matt Swider
    Spectator

    @sbslider

    Locale: Santa Barbara

    Read through this thread at lunch today, lots of good information in it.

    https://backpackinglight.com/forums/topic/i-have-the-gear-want-to-dry-bake-dont-want-to-melt-my-titanium/page/4/#comments

    Next test will require no calories, just test out my setup to see how many watts I am putting into my pot.

    #3424939
    Matt Swider
    Spectator

    @sbslider

    Locale: Santa Barbara

    Three water tests tonight.  TEST 9 was run with what was left with the tea lights after the last test, the one that lasted over an hour.  These were ones that were already really used before that hour plus run.  23F rise in 12 minutes, one tea light was out when the test was over.  So 36W, very low.  Assuming the one went out early on (which the data suggests as it was pretty linear with time) then 4 would have been about 50W.

    TEST 10 was run with brand new tea lights.  51 degree rise in 12 min, or estimated 78W.  After the test I put the pot on the counter and notice four black spots on the counter.  There were four thick black spots where the candle smoke collected on the pot and made a rather thick ashy mess.  Interestingly to me was the first 4 minutes of the test were 10 – 11 degree rise per minute, then after that more like 7 or 8 degrees.  If I used just the first 4 minutes of data it was a 29 degree rise in 4 minutes, more like 130W into the pot.

    Both test 9 and 10 were run with the candles 1/2″ closer to the pot then all the previous tests with tea lights or coghlans tabs.

    One more test with the newer candles (12 min of burn time) to see how they start out with the candles at “ground” level.  TEST 11  Very linear temp rise over ten minutes, and no soot on the pot bottom.  Rather puzzling is the soot from new candles only?  May never know.  51 degrees in 10 minutes, or higher wattage than when the candles were 1/2″ closer.  About 94W.

    Conclusions:  No need to raise new candles closer to the pot.  Old candles burn at a lower rate.  Unfortunately, I trimmed the wicks of these candles somewhere during the beginning of the testing, as I was concerned that handling would break the wicks off and the remaining wax would be unusable.  By a huge coincidence, I came across a box for jewelry today on my way to work that just fits four candles.  I think I can mod it so the wicks won’t be able to get damaged during handling.  I shudder to think how much it might weigh though . . . ;-)

    Looking forward to doing some baking with newer candles, and to ponder how to make the older ones more than just trash that I need to carry.

    #3424972
    Matt Swider
    Spectator

    @sbslider

    Locale: Santa Barbara

    TEST 12 – same 4 tealights from test 11 + 1 new one, 5 total.  Would have expected another 12 degree rise in 10 minutes, only got and additional 5 degrees.  56.3 degree rise in 10 minutes, or about 104W.  I will stick with the original 4 tealights for now.  Also figuring I will feed the wax from the nearly dead ones into the newer ones as they burn down, so I can use the remaining wax that way.

    #3425876
    Matt Swider
    Spectator

    @sbslider

    Locale: Santa Barbara

    TEST 13-15 – Two wins and another fail.  The wins were another peanut butter cookie, and corn bread from the Jiffy mix.  The fail was another brownie attempt that just did not work again.  Maybe all the oil in the brownies just does not work in this setup.  Everything else I have tried thus far is a winner.   The cookie takes 45 minutes and provides 800 calories.  The corn bread may have been done in 60 minutes, but I left it on for 70, and provides around 1000 calories.  Still need to try Dan’s anglefood cake mix, just have not yet gone out to get it.  It is definitely on the radar . . .

    #3425944
    Jon Fong / Flat Cat Gear
    BPL Member

    @jonfong

    Locale: FLAT CAT GEAR

    I have found that using lots of oil (per the recipe) to be problematic and extends the bake times by quite a bit. If I need to use oil, I only use 1 maybe 2 teaspoons at most.

    I have also found that using a minimal amount of water to work the best.

    One thing that you might consider in a one pot baking system is to add a flat aluminum disk to the inside ( bottom) of your pot. Best regards.

    #3425977
    Matt Swider
    Spectator

    @sbslider

    Locale: Santa Barbara

    Jon, I do recall having heard you state oil can be a problem in your videos.  I came across another video by Taos Stove where a brownie was cooked in a dual pot alcohol setup using Extra oil.  I do realize my single pot candle set up is a different animal for sure.  I have been successful baking peanut butter cookies with the prescribed tablespoon of oil per 200g of mix.  And I do try to minimize the liquids per your recommendation.  I have watched quite a few of your videos, and enjoy the easy to follow instruction.

    I find your comment about the aluminum disk an interesting one.  I had considered using something like this on the outside of the pot. but had no way of attaching it reliably.  I had not considered using it on the inside of the pot.  I don’t presently use coffee filters or parchment paper, as I find my baked good generally fall out of the pot, or come out after I run around the outside with a skewer or knife. Seems like a disc would require the use of something to prevent batter from going between the disc and pot bottom.   Please elaborate.

    thanks, Matt

    PS I will note that I have read much about dual pot cooking and know that a thicker pot contacting the item being baked (like fat daddies) will help to distribute the heat better and thus provide a better baked item.  I do find that the candles do a good job of distributing the heat on my rather thin grease pot.

    Part of my desire in experimenting is to see what is possible with a minimum amount of materials.  And just to learn more about cooking food away from home.  Thanks for providing your thoughts, I appreciate it and have learned a lot from your writing and videos.

    #3428715
    Jon Fong / Flat Cat Gear
    BPL Member

    @jonfong

    Locale: FLAT CAT GEAR

    I did a one pot baking experiment today.  I cut out an aluminum disk that just fit inside my pot (titanium).  I placed a disk of parchment paper over the aluminum insert and oiled the pan.  Since the volume of the pot was large, I mixed up a pretty big batch of biscuit mix (~1 1/2 cups dough and baked in an Evernew 1.3 liter pot.  I used the Epicurean stove (4 tealights will work  as well) and baked for about 50 minutes.  The biscuit came out pretty well.


    The disk was 0.045″ thick and weighed 48 grams (1.7 oz)

    1. The technique will probably work fine for flatter items like pizza and cookies
    2. It will probably work better with an aluminum pot as you should get better heat transfer up the sides
    3. To further even out the heat, a thicker plate could probably be used: 0.060″ to 0.090″

    Happy baking

    #3428758
    Jon Fong / Flat Cat Gear
    BPL Member

    @jonfong

    Locale: FLAT CAT GEAR

    Just to close things out, I re-ran the experiment using a Kmart Grease Pot.

    I myself would move up from a 0.045″ thick to a 0.060″ thick aluminum plate.  Other than that, one pot baking seems to work well with an aluminum pot.  My 2 cents.

    #3428771
    Matt Swider
    Spectator

    @sbslider

    Locale: Santa Barbara

    Hi Jon, thanks for running these tests.   I have run several more experiments, but none significantly different than the previous until yesterday.  It was only a mild change, going from 1.5 cups to 1 cup of mix for the cheesy bacon bread, and scaling the other ingredients accordingly.  This is actually a better size for what my ultimate goal is, which is around 800 calories.  The bread came out fantastic. It cooked for 45 minutes, set in pot for 15 after removed from the heat.  Likely could have cooked a bit, less but still came out great.

    Below are a few pictures for comparison, remember this is 1 cup of bisquick.

    When I use 1.5 cups of batter, the batter rises and touches the lid, which is the strainer that came with the grease pot, with a piece of carbon felt in it.  The loaf is about 2.5 tall for 1.5 cups bisquick.  I have on my list to my at 5″x3″ fat daddios pan for comparison.  I think the thicker pan would do a better job of heat spreading, but my grease pot does not do too bad a job.  I do try to spread the candles out a bit, and spread the dough over the whole bottom and up the sides as much as practical.  I don’t use paper either, just a bit of oil.  No problems getting the cooked product out of the pot either.  At least in my setup and 1 cup of mix I see no reason to add the additional disc.  Likely not for 1.5 cups either.

    My next goal is a loaf of your real bread, I will start with the basic recipe and go from there.  Hoping to do that tomorrow.

    I definitely appreciate you doing the tests you did with the aluminnum disc, and making a recommendation.

    thanks, Matt

Viewing 25 posts - 1 through 25 (of 28 total)
  • You must be logged in to reply to this topic.
Forum Posting

A Membership is required to post in the forums. Login or become a member to post in the member forums!

Get the Newsletter

Get our free Handbook and Receive our weekly newsletter to see what's new at Backpacking Light!

Gear Research & Discovery Tools


Loading...