Topic
custom Lite Trail cook Kit
Forum Posting
A Membership is required to post in the forums. Login or become a member to post in the member forums!
Home › Forums › Gear Forums › Gear (General) › custom Lite Trail cook Kit
- This topic has 337 replies, 53 voices, and was last updated 8 years, 2 months ago by
 Matthew / BPL.
-
AuthorPosts
-
Mar 26, 2016 at 10:25 am #3392000
A TD Sidewinder I owned in the past paired with an Evernew 600ml had holes punched in it where I could raise/lower the pot depending on the fuel I was using by inserting stakes. If memory serves, the system was optimized to burn solid fuel at the lowest, alcohol in the middle, and wood at the highest. I may be misremembering but I think that’s how it was set up.
One possible solution may be to skip the ridge line altogether and use stakes set at set intervals depending on what fuel you are using. To minimize the impact to the cone while y’all are trying to sort this out, you could use an unmodified pot with a silicone band while in testing phase, and then add the holes once you figure out what fuel works best at what height.
Stands to reason that this would simply the process and reduce man hours on the production side of things as well, so win win.
Mar 26, 2016 at 11:04 am #3392004“you could use an unmodified pot with a silicone band while in testing phase”
This is what I plan on doing instead of messing around making different height burners.
Mar 26, 2016 at 4:31 pm #3392065Ran a few more tests, a little more controlled. No wind, 65 degree air temp.
Test 1(alcohol): 13g, 2c 70 degree water. 10:00 to boil
Test 2(alcohol): 15g, 2c 70 degree water. 10:20 to boil
Test 3(esbit): 8g (2x4g pieces), 1.5cups 70 degree water–By 11:00, Water seemed to hold steady at about 195 degrees but wouldn’t quite reach a boil. Esbit continued to burn until 12:30. Esbit left very little residue in stove or on pot bottom.
Test 4(esbit): 12g (3x4g pieces), 1.5c 70 degree water– had a rolling boil at 8 minutes, with about 3grams(didn’t actually weigh it) of esbit remaining. I can’t really explain the improvement here, other than the stacked 3rd piece of esbit possibly creating a bigger/taller flame.
Test 5(esbit): Started with 11.8g (3 pieces), 1.5c 70 degree water– rolling boil at 8:30. This time I extinguished the remaining esbit and weighed it, 2grams. 9.8g net fuel burned.
So from these last two tests, +/-10g of esbit appears to bring 1.5c to a boil in around 8 minutes.
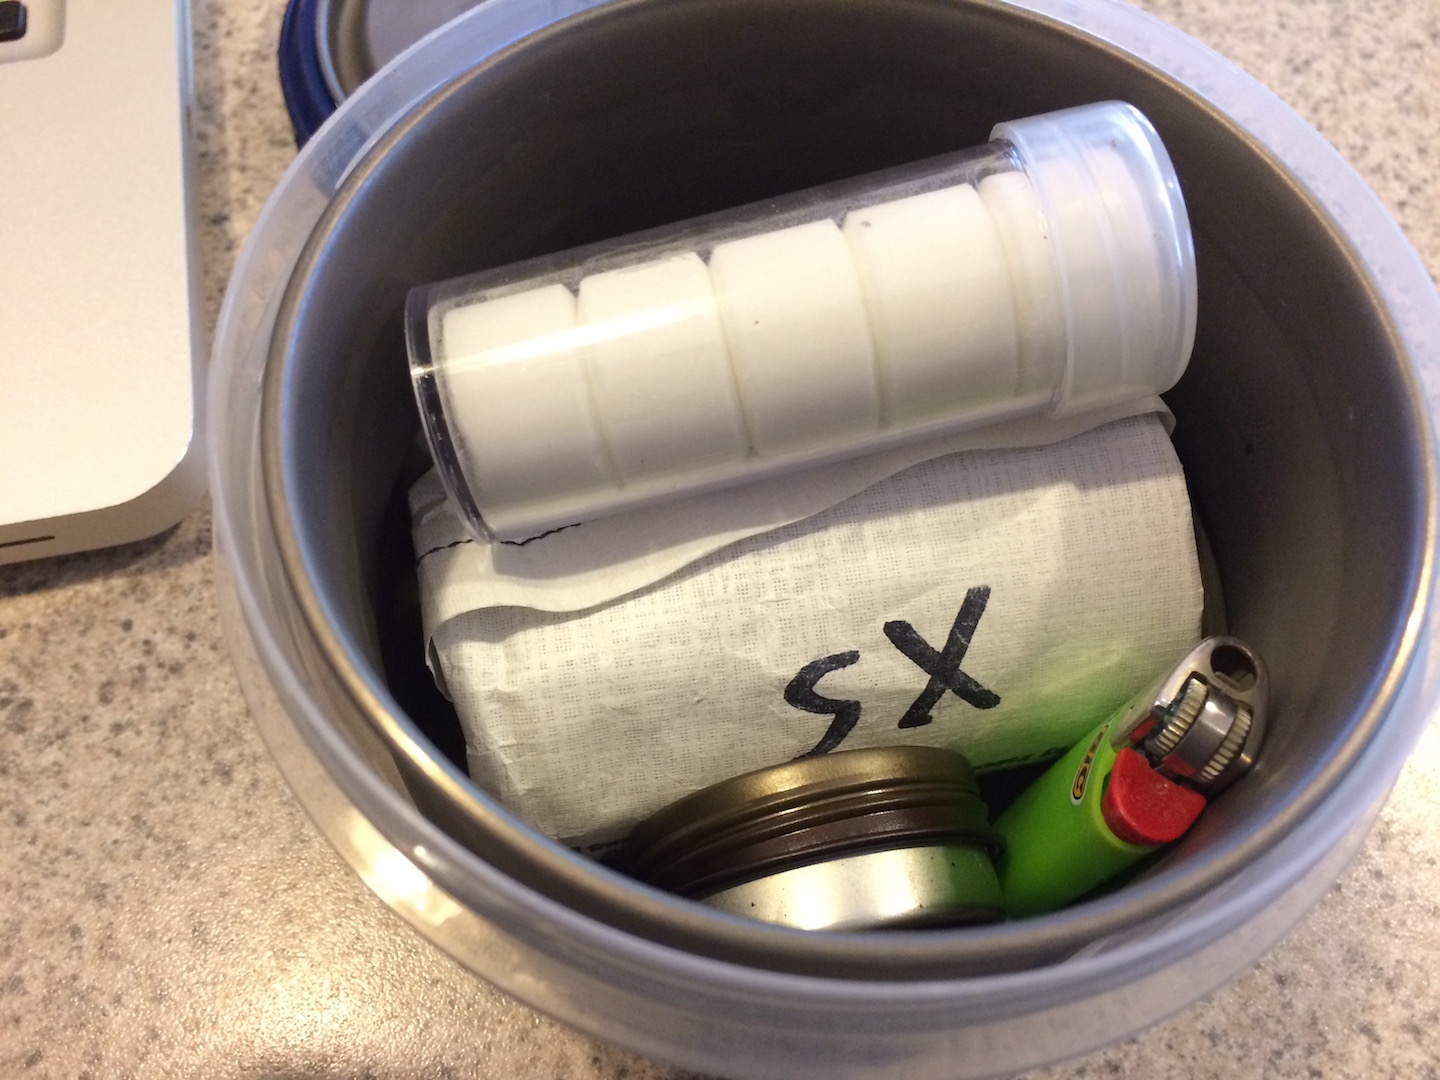
I am pretty happy with this performance, especially for a complete alcohol kit, fitting inside the pot, at 3.95oz. Since I will most likely use this for quick trips, I can store an ounce of fuel in the starlyte and another ounce in the bottle that fits within the wrapped cone, and have enough fuel for at least three 2 cup meals. Perfect for a weekender.
3/4c of water fills the pot to the top of the ridge.
So, I am curious– how are you removing your hot, full of boiling water pot without handles from the cone, while it sits over a still-burning stove? It was not very fun with the 2cup boil tests I did.
Mar 26, 2016 at 5:22 pm #3392072I donned one of my wool liner gloves that I carry on all trips and just pulled the pot with cone still attached off the burner.
Mar 26, 2016 at 7:33 pm #3392102Hey Dan – did you lose a Swiss card little knife? Or is this supposed to be in the bottle?
Mar 26, 2016 at 7:56 pm #3392108A note to all that received their kit: Inside the fuel bottle is a small, lightweight “Swiss” brand knife. At time of filling orders I noticed the silicone band was not staying tight to the walls of the pot so I sent the knife along as a substitute item. The pot grabber will not be included in the next batch.
Mar 27, 2016 at 7:25 am #3392158So, I am curious– how are you removing your hot, full of boiling water pot without handles from the cone, while it sits over a still-burning stove? It was not very fun with the 2cup boil tests I did.
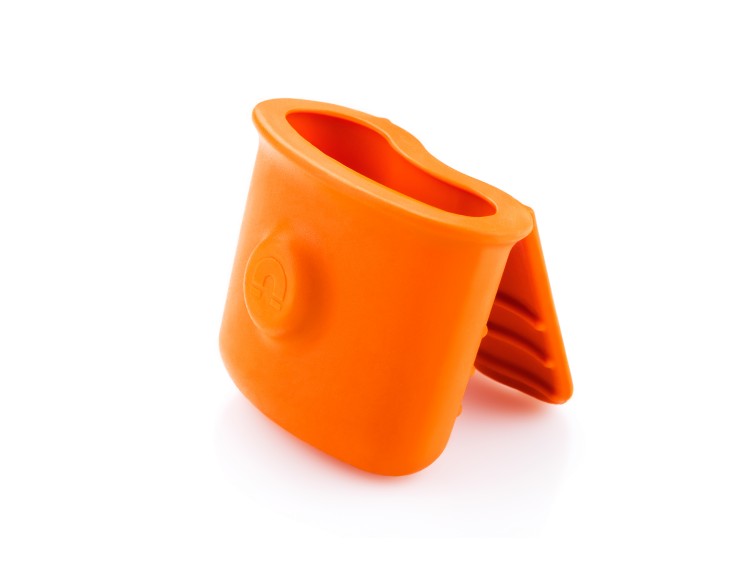
I’ve tried different things, but always seem to come back to this MSR Lite Lifter. Weighs 29.1g (1.03oz)
 Mar 27, 2016 at 9:13 am #3392177
I use the GSI MicroGripper … http://www.gsioutdoors.com/microgripper.html
I think mine weights 19-20g
 Mar 27, 2016 at 10:43 am #3392202
What’s so wrong about leaving the handles on? It seems like it would be lighter than these pot holding gadgets as well as being one less thing to lose. My 2 cents.
Mar 27, 2016 at 10:45 am #3392203What’s so wrong about leaving the handles on? It seems like it would be lighter than these pot holding gadgets as well as being one less thing to lose. My 2 cents.
Agreed.
Mar 27, 2016 at 10:50 am #3392204My Open Country 3-cupper doesn’t have handles.
On many pots the handles get really hot, and the silicone burns off when flames lick around the pot bottom and up the sides.
Mar 27, 2016 at 11:26 am #3392210MYOG pot gripper by the guy who did everything first here, Bill Fornshell
https://backpackinglight.com/forums/topic/2365/
or a wire bail handle
Mar 27, 2016 at 11:36 am #3392214What John says, Handles are lighter than a separate lifter and pack easier, can’t be lost, and are easier to hold/sip a hot drink from the pot.
Toaks 550lite with homemade flashing cone, silicone band and Zelph BGET burner
Mar 27, 2016 at 11:38 am #3392215Yes agreed handed on the pot would be the bees knees, but unfortionatly this kit doesn’t allow it. The handles are in the way of adding the ring to the pot. My kit has the cone cut for handles but by cutting the cone the pot with the ring slides through the cone so cutting the cone is not an option. With the pot in these kits, I just eagle claw it bare handed to move it off the burner or use a bandana over the top.
Mar 27, 2016 at 11:46 am #3392217A strip of carbon felt lifts a pot of this diameter off the stove with no problems at all. No need for “heavy” pot lifters.
Mar 27, 2016 at 1:03 pm #3392232MYOG pot gripper by the guy who did everything first here, Bill Fornshell
Now that is a superb piece of kit!
OK, you’re forcing my hand. Now I will have to produce a 10g version. ;^)
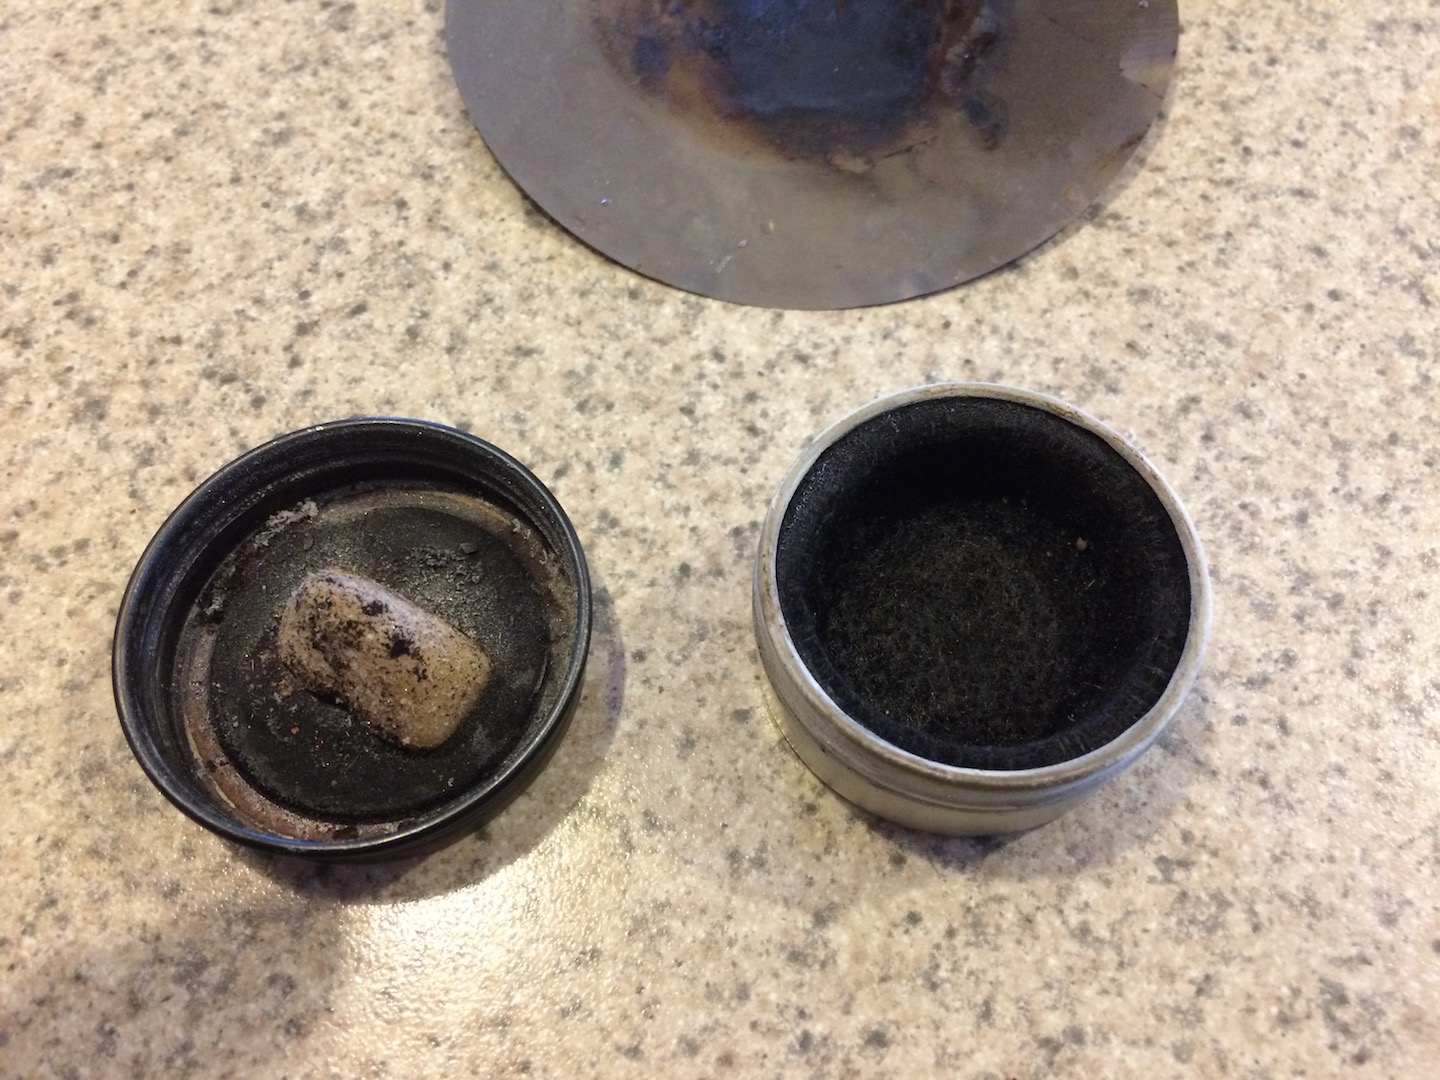
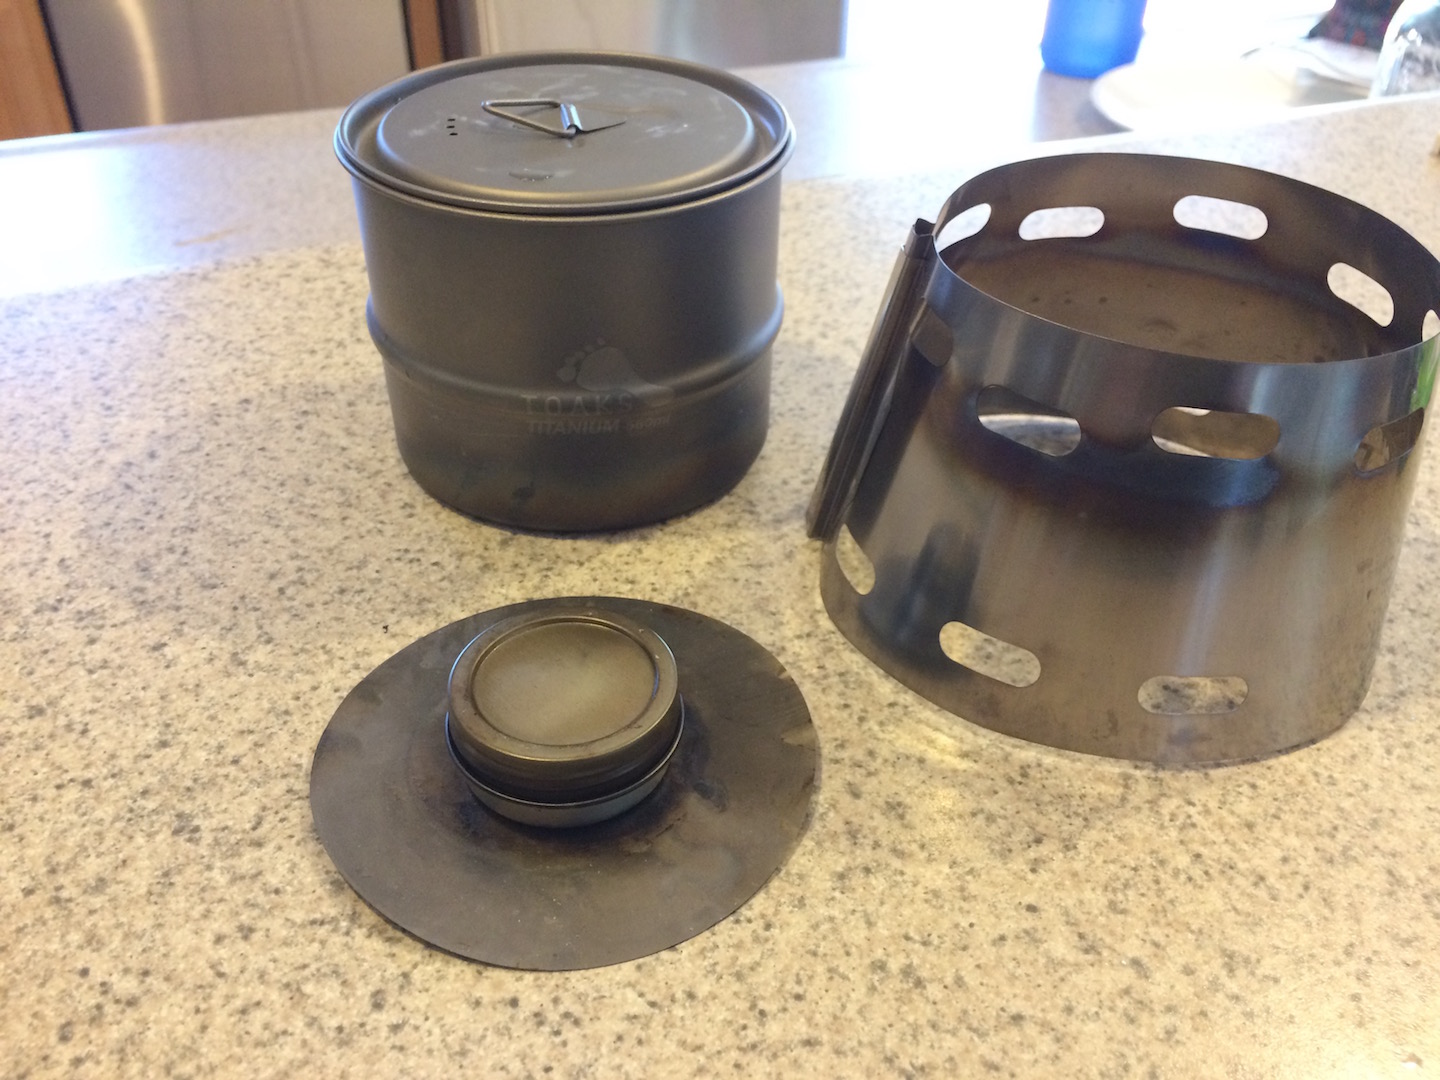
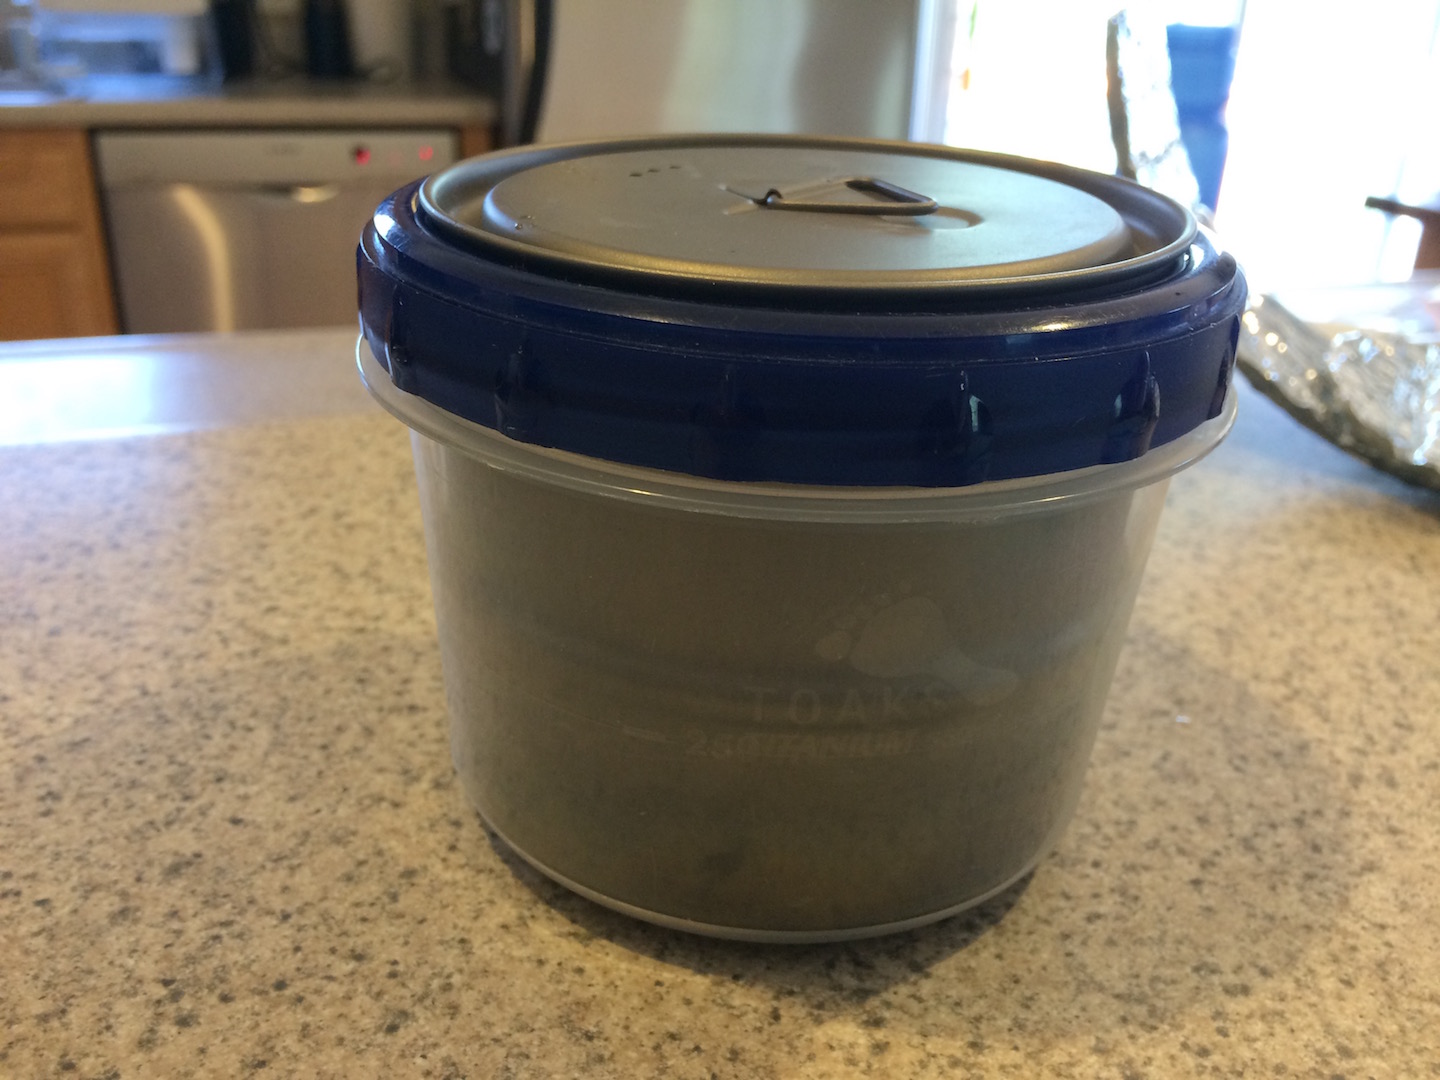
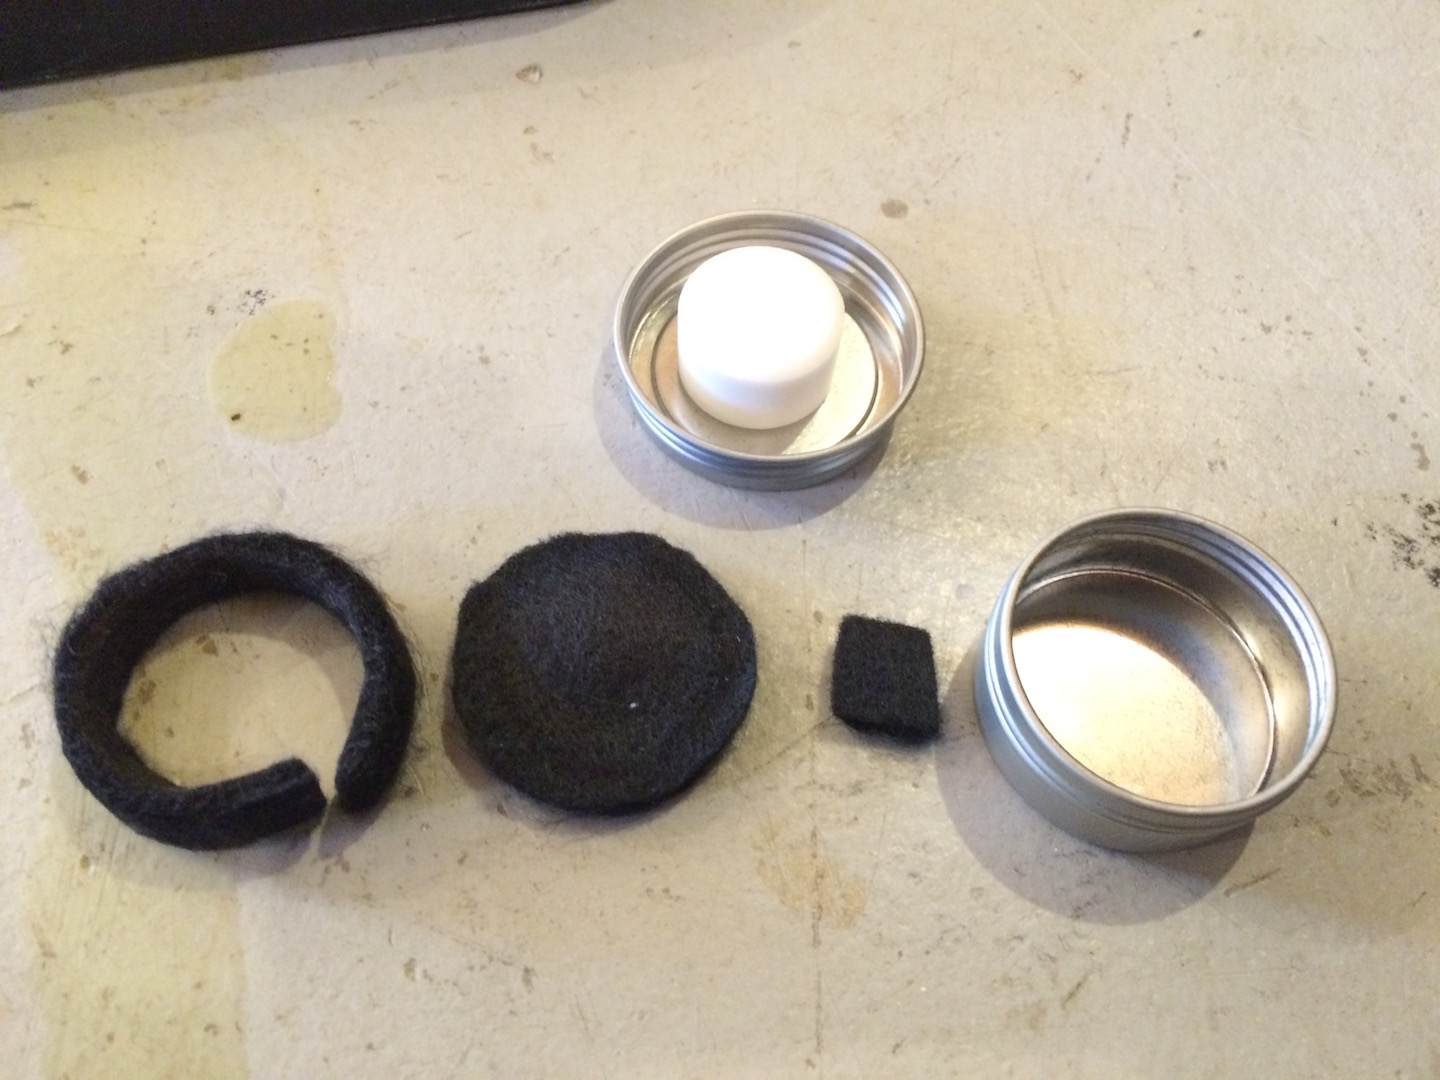
Mar 28, 2016 at 1:47 pm #3392453Ok now I’m in love! I had Dan make me a pot with the ring bead 1/2″ higher on the pot. I didn’t do this to make his kit more efficient. I did this to make it work better for my cook set. Dan makes awesome stoves that come with this kit, but I want it just a bit more simple. I made a stove that mimics qiwiz.net duel fuel burner but it uses a 1.7″ screw top jar from http://www.specialtybottle.com/metal-tin-containers/screw-top/1-2oz-tsc1-2 The stove holds 20ml of alcohol perfectly and a full sized Esbit tab on the lid (I only use half). The use of this stove allows the pot to be lower in the cone and is also the same burn hight as my solid fuel. The other reason I like the ring higher on the pot is now it fits in the Zip-loc screw top containers perfectly, what is a nice addition to this pot kit for food prep, this http://www.antigravitygear.com/shop/cozy-collection/antigravitygear-bowl-cozy/ Burning efficiency with Dans kit’s is actually a couple of seconds better but sometimes you give a little to get everything you want. I am super happy with this kit I have been trying to build this for over a year now. Thanks Dans for all the hard work to make this a reality. You can bill me now :)


 Mar 29, 2016 at 8:53 am #3392562
Kurt Suttell, I like happy/satisfied customers :-) What do you do with the left over esbit and do you find it hard to relight?
 Mar 29, 2016 at 9:06 am #3392568
Hey Dan, I use one Coghlan tab that gets my water hot enough for rehydrating a meal or a hot drink. Using the smaller Coghlan tab is nice because it uses the whole thing with nothing but ash leftover. If I did however have leftovers, I would just leave it stuck to the screw cap and screw it back on. If any solid fuel get on the fire felt it just burns off on the next alcohol cook. Relighting isn’t any easier than when lighting a fresh cube, Its always a PITA when windy.
Mar 29, 2016 at 12:06 pm #3392614Hey Kurt,
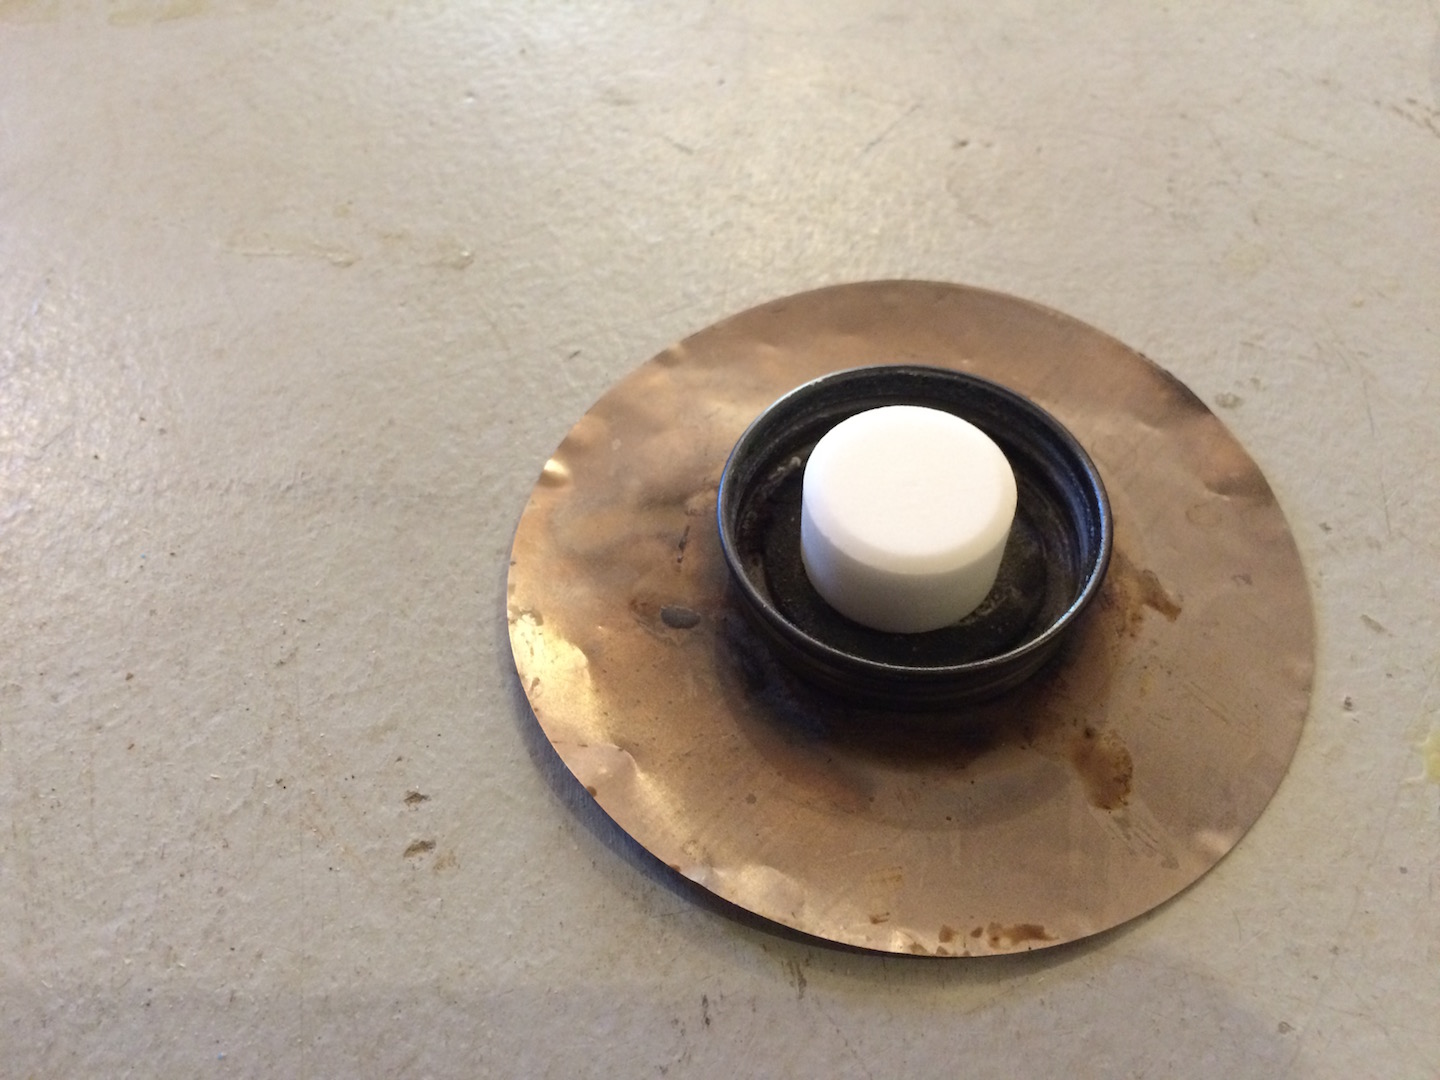
I’m interested in your combo burner. Do you use it in the solid mode with just the lid sitting on the ground or do you put it on top of something? And for the liquid mode, is it just the bottom sitting on the ground? Also, what’s in the burner, just a piece of carbon felt?
Thanks!
Mar 29, 2016 at 4:36 pm #3392670Hey DS, The burner is really simple to make just build in reverse order of the pic below with fire felt. As per the solid fuel yes just put it inside the cap. When burning in either stove, I use a piece of titanium for a ground shield shown in pic below.

 Apr 1, 2016 at 8:30 pm #3393407
I thought it would be a good idea to take a look at the kit that started all the changes that we’ve seen.
LiteTrail Titanium Solid Fuel Cook System
From Stick’s Blog
http://sticksblog.com/2013/06/30/litetrail-titanium-solid-fuel-cook-system/So, to get started, what does the LiteTrail solid fuel cook kit come with?
◾55o ml Ti Cook pot w/ Ti Lid (now w/ handles)
◾Ti Esbit Wing Stove
◾Ti Foil Windscreen (now w/ the ends tacked together)
◾Ti Foil Ground Protector/Heat Reflector
◾Cuben Fiber Stuff SackIf I remember correctly, my kit weighed 2.9 oz as delivered. However, since then, I have made a few changes so that this kit suits my own personal needs…
The first thing that I did was replace the “heavy” lid that came with the kit with a lighter weight, carbon fiber lid. I could have shaved even more weight by going with a piece of aluminum foil, however, I wanted to stick to the “durable” nature of this cook kit, so the aluminum foil didn’t make sense (to me). Total weight savings from the lid: 0.4 oz, or 10 grams. This brought my original kit with the replacement lid down to 2.5 oz total.
Next, I actually added weight back in. Yup… I decided that if I were going to use this kit with the intentions of actually cutting weight from my pack, then I needed to add weight to it… so I could use it as a mug too. To convert it to a mug, I needed to be able to hold onto it, as well as drink from it, when it is filled with a hot beverage. So, I added some Hot Lips and a DIY reflectix cozy to the mix. These 2 items added back those 0.4 oz that I had managed to drop by switching the lids, which brought me back to the original weight, but now it was truly multiuse. By doing this, I traded my 1.9 oz mug for 0.4 oz of accessories, which gave me a net savings of 1.5 oz!
One other small thing that I did was to make a tiny tyvek sleeve to store the Ti foil windscreen in. This sleeve doesn’t weigh in on my scales, so I’m not sure how much extra weight this actually added… all I can say is that it is very minimal. I will also admit that this sleeve is not necessary since the windscreen can be stored inside the cook pot without the sleeve, but I like the way it stores when rolled up, all tucked away inside the little sleeve. (Also, I feel like it helps to keep the circular shape a bit better, not that this is really an issue though).
Other than this, I added in a small, cut down piece of lightload towel so that I can dry the pot out afterwards, and a Mini Bic, since I prefer to light Esbit with a lighter rather than with matches.
With these small changes, the entire cook kit comes to a total weight of 3.4 oz, or 97 grams. I am perfectly happy with this weight, considering this is only half an oz heavier than my more fragile “SUL Cook Kit” but many times more durable!
And as a bonus, everything packs away inside the stuff sack all nice and tidy… and small!
So, all that aside, how does it actually work???
As I understand it, the way that kits similar to this one in volume is intended to be used, is to simply do 2 “boils.” Since the volume is minimal, it is very unlikely that one could boil enough water for both a meal and a hot drink at the same time in a 550 ml pot (although, some of the Packit Gourmet meals require very little water, so it is possible). The basic idea is to start with a single 14 gram Esbit tablet, light it and immediately set a full pot of water on the stove. Wait approximately 8 – 9 minutes for this to come to a (minimal) boil, then quickly pour that water off for the meal and quickly replace the pot back on the stove with enough water for a hot drink to warm over the remaining bit of Esbit. In my experience, this does work, however, when using water that is very cold, and/or when in windy conditions, it is almost a bit of a stretch.
The way that I have been using this setup and have been happy with, is to mix and match the 14 gram Esbit tablets with the 4 gram Esbit tablets. Also, being that I have moved to the Sawyer Squeeze water filter, it is not a problem to cook with filtered water, which means I personally don’t worry if my water doesn’t come to a complete, hard rolling boil.
My preference has been to use 1 – 1.5 of the 4 gram Esbit tablets if I am just heating enough water for a hot drink. In good conditions, with anything but icy cold water, I am fine just using a single 4 gram Esbit tablet. This gets the water hot enough for me to still have to sip at it in the beginning. (Worth noting too, is that if I drink my hot beverage slowly, then it will cool faster in this pot than if I were using a smaller mug.) However, if there is a good bit of wind present, or if the water is icy cold, then I will use a full 4 gram Esbit tablet, and then break another in half, which gives me a total of 6 grams of Esbit. Here again, I should still get at least that minimal boil.
At dinner time, if I am not heating water for both my meal and a drink, I am fine using 3 of the 4 gram Esbit tablets to heat a full pot of water. However, if I want both, I will just stick with a full 14 gram Esbit tablet and do the shuffle as I stated above.
http://sticksblog.com/2013/06/30/litetrail-titanium-solid-fuel-cook-system/Let me say first that the kit that I have now is slightly different from the kit that is now displayed on the LiteTrail site (linked above). I guess you could say that I have the “2nd gen” cook kit… When Jhaura first released this kit (1st gen), it came with a cook pot without handles, the ti wing Esbit stove without the Esbit tray, and a windscreen that needed to be secured together with paperclips. By the time that my wife had purchased mine (2nd gen), he had added the Esbit tray to the stove, and even had notches cut into the wings so that this specific pot rested on the stove very near perfect. The cook kit that is now available (3rd gen) ships with a pot that does have handles and a windscreen with ends that are spot welded together, which also has a notch cut out to accommodate the handles on the pot. (I would just like to add here, that I think I have the best version!) :)So, at this point, I am very happy with Jhaura’s cook kit. I will admit, I have thought about purchasing the available Caldera Cone for it since I feel pretty certain that the cone would increase the fuel efficiency at least a little, however, since it will not store inside the pot, I have been put off by it. (Who knows though… with my infatuation with cook kits, not to mention the cones themselves… I may pick it up one day anyway.) As well, the cone is significantly heavier than the supplied windscreen, which along with the storage issue is a bit more of a deal breaker for me.

So, in summary, I find this kit to be lightweight yet durable, and also fill my needs as both my cook pot and my drinking mug, yet still pack away small enough to require a minimal amount of real estate inside my pack. As well, being that it runs off of Esbit, and that I use both the 4 gram and the 14 gram tablets, I feel confident that I can pack the lightest amount of fuel possible (other than when using wood fires of course). And lets not forget how easy and safe using Esbit really is… I will admit that soot (and smell for some) is the downfall of this fuel source, but in my experience with this kit, the soot has been very minimal and what did collect on the bottom of the pot has been easily wiped off in the grass.
All-in-all, 2 huge thumbs up!
Thanks for stopping by!
~Stick~
Apr 6, 2016 at 12:55 pm #3394311champ! when will you let me pay for mine? RL
Apr 6, 2016 at 4:30 pm #3394373RL, I’ll send you an invoice in an hour or so :-) I’ve had to make more Brian Green Esbit Trays. I’m also including an esbitmizer with the kit. I found some on a shelf in the garage. Time to do some garage cleaning ;)
Dan
Apr 8, 2016 at 7:54 pm #3394923 -
AuthorPosts
- You must be logged in to reply to this topic.
Forum Posting
A Membership is required to post in the forums. Login or become a member to post in the member forums!
Trail Days Online! 2025 is this week:
Thursday, February 27 through Saturday, March 1 - Registration is Free.
Our Community Posts are Moderated
Backpacking Light community posts are moderated and here to foster helpful and positive discussions about lightweight backpacking. Please be mindful of our values and boundaries and review our Community Guidelines prior to posting.
Get the Newsletter
Gear Research & Discovery Tools
- Browse our curated Gear Shop
- See the latest Gear Deals and Sales
- Our Recommendations
- Search for Gear on Sale with the Gear Finder
- Used Gear Swap
- Member Gear Reviews and BPL Gear Review Articles
- Browse by Gear Type or Brand.


