Topic

1oz/yd2 Cuben Tarp-Shelter Prototype

  • This topic is empty.
Viewing 25 posts - 1 through 25 (of 40 total)
PostedJul 6, 2014 at 1:07 pm

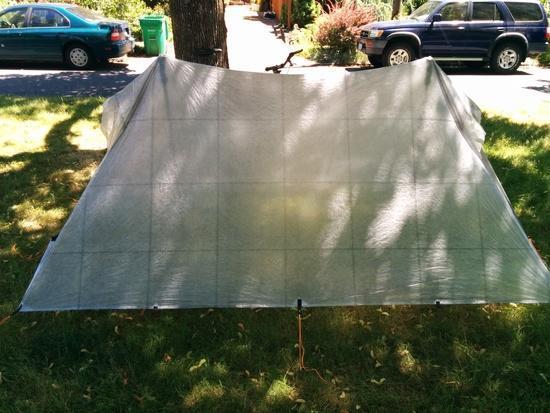
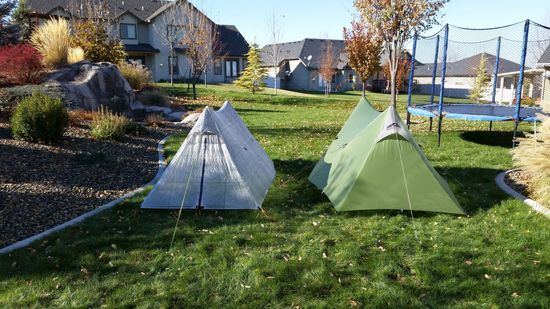
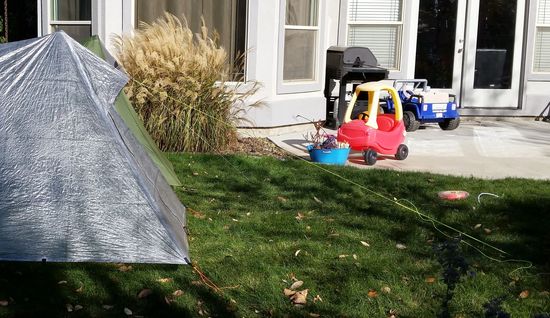
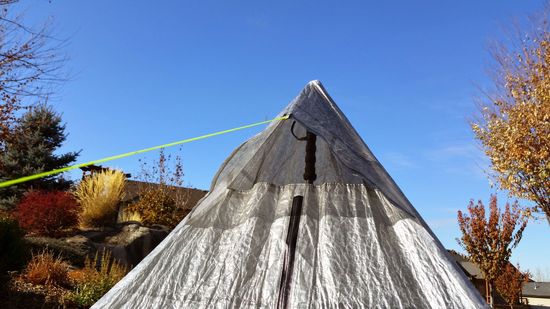
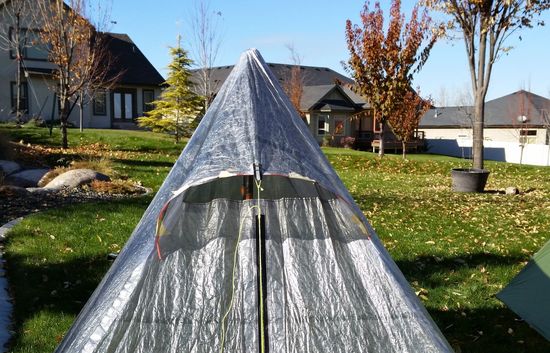
Hi all, Just about finished with another Cuben Shelter Prototype

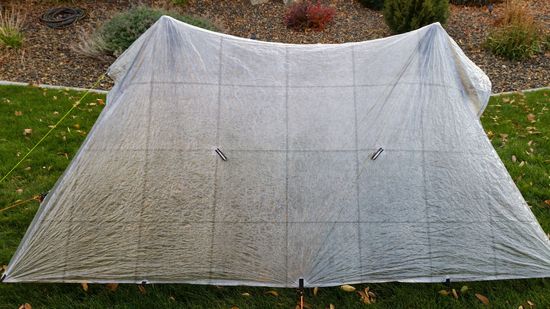
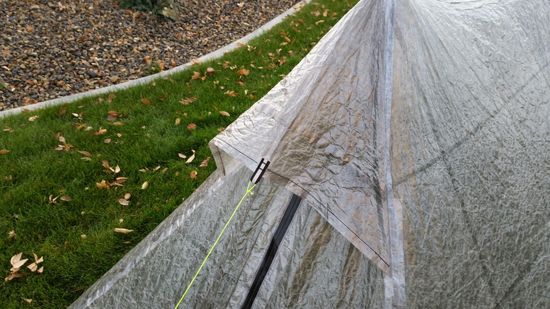
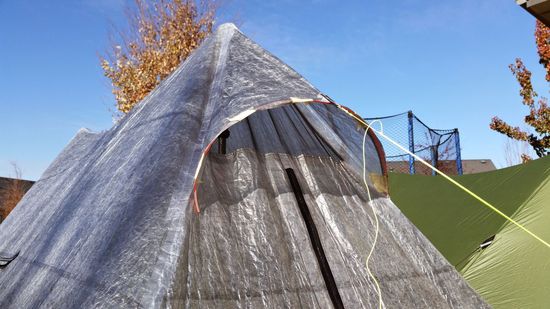
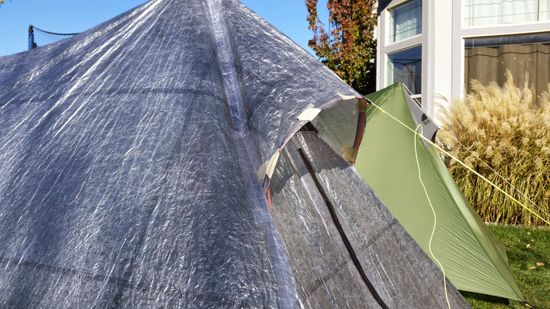
A 2-Person, 2-Pole, Catenary-ridged, Modified Pyramid. 8 Linelocs and 4 additional Webbing tieouts

Bonded Ridgeline and tie-out reinforcement, Sewn hem.
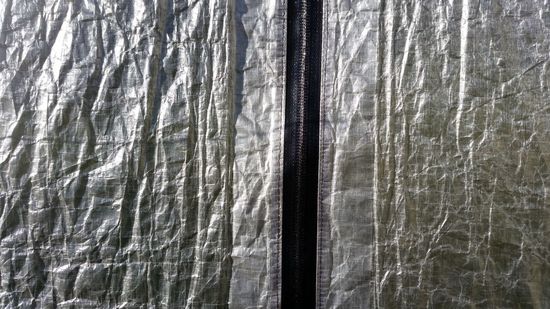
#5 YKK waterproof zipper for the door.

Last thing it needs(Should add less than 1oz) , is a wire-stiffener for the two window-vents. Though I'm going to camp a few nights in windy/exposed conditions without the stiffener to see how loud/flappy it gets.

Total weight without stakes/guylines is 13oz on the nose.

Cheers!

TT1TT2

Jesus Cardenas BPL Member
PostedJul 8, 2014 at 3:12 am

I was about to comment that it looks like a SL2. I love that tent, and I been looking for an alternative in cuben fiber.

How much did you spend on the process if you don't mind me asking?

PostedJul 8, 2014 at 7:59 am

From initial sketches/design to cutting the cuben, bonding the ridgeline, sewing windows, sewing zipper in, bonding front/rear/panels, bonding reinforcements and sewing hem/tieouts, completion took one full day. 8+ hours? That was including fiddling with design mid-process.

No inside pics, I'll have to set it up again after work later this week.

I chose 1oz Cuben for its higher durability. It has a thicker film than the .51 or .74 Cubens. I want this thing to last!

Cheers!

Bill Giles BPL Member
PostedJul 19, 2014 at 6:11 pm

What I have just started to use to stiffen fabric is plastic strapping, the kind used to hold heavy boxes together for shipping. I've thrown more of this stuff away than I care to think about, but now I've found a use for it. I've used some of this for roll top closures in stuff sacks and yesterday used some to reinforce the opening in a water bottle carrier for quart plastic bottles. What I've been using is embossed polypropylene strapping from McMaster-Carr Supply Co. I've bought some of what they call "Mini-Coils" which are 300 feet long, but not too terribly expensive. This stuff works very well to stiffen the edge of a piece of fabric and is fairly tolerant of bending. If you can find some pieces of plastic strapping laying around, it is well worth keeping.

PostedJul 20, 2014 at 7:14 am

Love the idea, what happens if they become creased while in storage? Does that affect their ability to act as a stiffener?

Bill Giles BPL Member
PostedJul 20, 2014 at 4:59 pm

As far as creases and kinks go, I think that any stiffener needs a bit of care to try to avoid kinking. The plastic stiffeners are reasonably and I think that a kink would be more easily straightened in a thin rectangular section than a round one. It's like straightening a tent stake, round sections are squirmy.

PostedOct 7, 2014 at 2:00 pm

I ran a length of single sided tape along both sides of the full length of the opening. Sewed the zipper to this as per usual zipper installation.

Hope that makes sense.

Cheers!

Carl Umland BPL Member
PostedOct 10, 2014 at 1:13 pm

That is a great looking shelter I really like my Golite S-L II. I've been wishing someone would come up with a Cuben Fiber design comparable to it. Consider adding one of my favorite features of the Golite S-L II, the mid panel side pull outs that give it inside shoulder clearance that isn't found in straight sided pup tents. I also pull out the center bottom side stake outs giving it a hexagonal floor shape.

Derrick Whit.e BPL Member
PostedOct 11, 2014 at 12:50 pm

Nathan

Just one more question. Uou say your bonded a hem on the cuben then sewed the zipper in; I assume then you sewed through the tape. Is that correct?

Thanks
Derrick

DGoggins BPL Member
PostedNov 12, 2014 at 9:26 pm

Ok, I'm the new owner of this tent, and really like it so far. It was still missing a few things and I wanted to mod it a bit, so ….I learned how to use a sewing machine. What a liberating experience! It really wasn't that hard to learn…and after quite a few practice runs I finally took a needle and thread to the shelter…but, I sure was sweating a bit the first time!

First, to answer a few questions:


@Carl
(chumland) – In the pictures that Nathan took, it does look like he pitched it where it was more rectangular. But, I have a sl2, and I simply pitched it exactly like I do the sl2 and it does have a hex. Not as much of one as the sl2, but that is a good thing (on both shelters its about 55" on the ends, and in the sl2 its 77" in the middle, whereas this shelter is 67"). Now…I can fit it in more narrow spaces (like between trees).

cbsl1

And..you are right about the mid panel tieouts! So, one of the first things I did was buy reflective grosgrain from diygearsupply. I then placed a 2×2" one sided tape on the panel, then bar tacked two tieout loops, just like my sl2 has. (just haven't added line to it yet)

cbsl2


@Derrick
(miku) – Yes, it was sewn through the tape with a single line of stitching. This looks like the only sewn line that wasn't taped over…which, would mean it would need to be taped or seam sealed, but its in a noncritical area (sleeping bag heads are behind the first pole, well away from the zipper), so I probably won't worry about it.

cbsl3

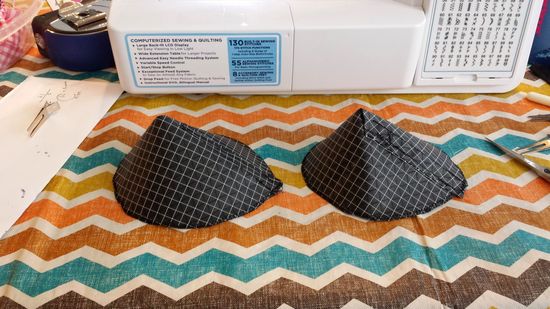
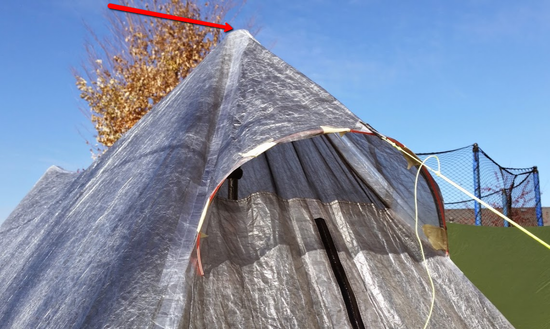
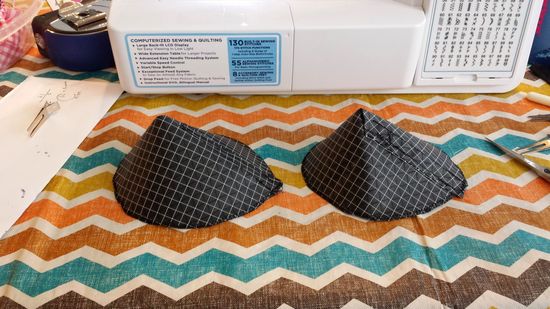
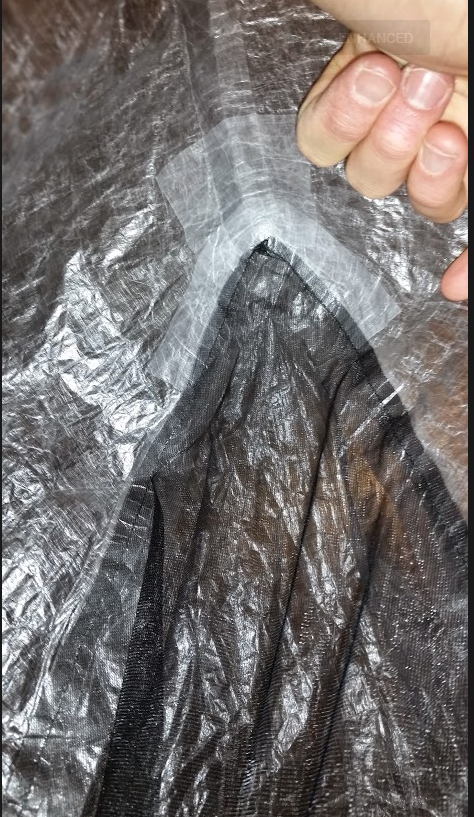
Next…the tarp is made of 1.0oz cuben fiber…and the two apex's have extra tape on them so I probably wouldn't have to worry about it, but I decided to make two dyneema x "cones" that would fit into the apexes. I think I'm just going to bar tack it on in one spot near the center instead of sewing all around it so there is less tape to put on the outside (i.e., one small piece of tape to seam seal the bar tack stitching). The cones are a bit asymmetrical by accident…but it actually turns out it makes it fit better in the apex.

cbsl4

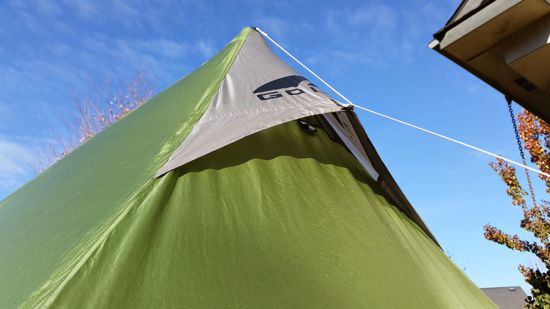
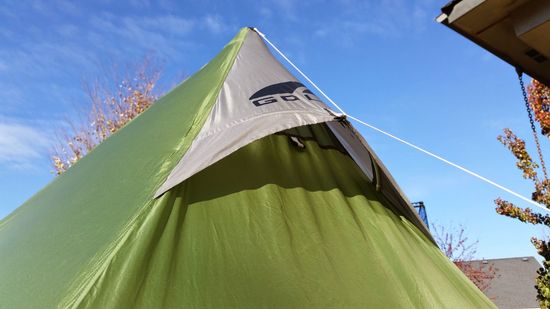
Then, the two vent areas were unfinished…the original creator hadn't decided exactly what he wanted to do to stiffen the vent. So, I was planning on doing exactly what my modded sl2 did..which was to run line from a top loop, through a lop on the vent, down to the ground ->

cbsl5

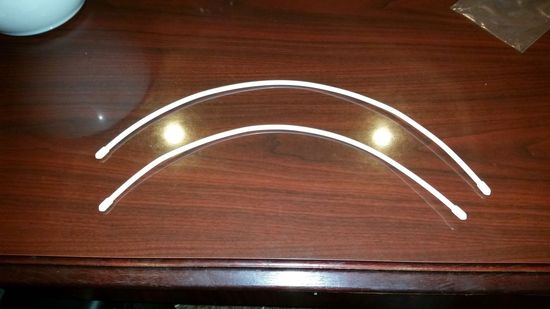
As an aside…any sl2 owner should do this. They can make a small cut to remove the two wire stiffeners ->

cbsl6

In total, they weigh 22 grams. In comparison to the line, they do little to increase the area of the vent window ->

cbsl7

By adding the line, you also get to further increase wind resistance and you can stiffen the ridgeline a bit by pulling the tarp in that direction. Not to mention that you could run the line upwards to tie to a tree instead of using a trekking pole (just remove the line from the vent window first), though I really see a 5% possibility of ever doing that.

Anyway….so with the cuben tarp…I did a double folded hem, which….wow, cuben really is a lot easier to work with than silnylon….it holds a fold very well. Its behaves more like paper than cloth. And added a tieout loop ->

cbsl8

Which….is now why I'm making this post. So….after adding the loop and putting some line on it….I readily see that the vent material on the cuben tarp is much larger than the sl2's. To make it taut…the line would have to be pulled out much, much farther (even in the picture below its not 100% taut) ->

cbsl15

If I bring it closer…the middle is taut (i.e., it still pulls down on the ridgeline), but the sides are "flappy"

cbsl10

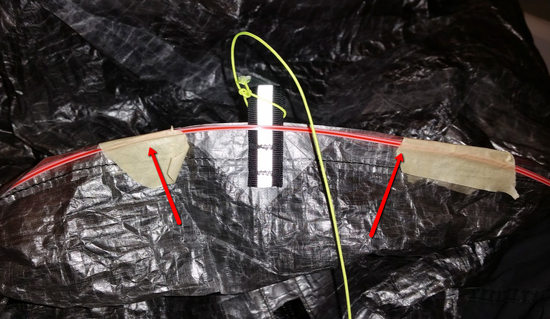
I then thought to try Tim Marhsall's idea with weed wacker line, and luckily I have some heavy duty line. Compared to 11 grams for a golite wire stiffener, the wacker line weighs 4g, and seems like it can easily bounce back from being bent. Here I just taped it on ->

cbsl12

cbsl16

cbsl14

Now…is there such a thing as having too large of a vent window? I.e., it would be great for low wind/high condensation times to promote more air flow….and I think it has enough of a "roof" to not permit rain, even wind driven rain, but what about times of high wind? I'm thinking of maybe make it so its fairly easy to remove the stiffener and have some mechanism for "closing" the vent…even if its just do the line straight down to the ground or something…any ideas or thoughts of different vent options?

J-L BPL Member
PostedNov 13, 2014 at 9:24 am

I would honestly just get rid of the vent completely and save the weight and bulk. I do not think a vent that size does anything noticeable, i.e. in situations where you are likely to have condensation, those vents are not going to make a noticeable difference.

You have a drip-free door entrance. In light/no-wind, open the door or crack the zipper for ventilation. In high winds, ventilation isn't needed.

Ryan Smith BPL Member
PostedNov 13, 2014 at 1:41 pm

"I do not think a vent that size does anything noticeable"

I have always thought that as well. When you look at how small vents are in comparison to the shelter they can't help much. Plus, bug netting will very easily hold in a certain amount of warmth and vapor so they're not even moving as much air as people think. YMMV

PS – An easy way to close the vent would be to tape Velcro onto the vent flap and canopy. Zpacks sells some. Would handle some fairly high winds.

Ryan

PostedNov 13, 2014 at 4:35 pm

Vent size..
I beg to differ.
I had two almost identical (weather wise) nights one with the vents of my Scarp closed tight (by mistake…) the other with those vents open as well as the small bottom end vents un zipped.
The first night the fly was soaked on the inside with drips forming in the top section, my sleeping bag was damp.
The second night the fly had very minor condensation on top and my bag was dry.
It has to do with the chimney effect.
Note that the Scarp vents are smaller than the ones in this thread.
Here is the tent with the vents shut the first morning (hard to see but the fly IS wet on the underside)
Scarp all zipped up

John
re your SL2 mod, I suggest that the guyline from the apex should be a straight line not bent, to lift the vent, because the way you have it the vent stitching is under stress.
So add a small shock cord from vent to guyline .
I'll post a photo after lunch.

After lunch…
something like this :
Vent guyout

DGoggins BPL Member
PostedNov 13, 2014 at 10:00 pm

@Franco

Thank you for the idea, and taking the time to take a picture. I see exactly what you mean….instead of looping the guyline through the "vent loop", have it be attached via another line, so no unnecessary stress is placed on it. Excellent idea.

Since the vents are already on the tarp, I would prefer leaving them…especially since I can't think of a clean way of removing the cuben material of the vent, cutting it, and retaping and have it look good…

I do appreciate the idea of using zpack's Velcro as a vent closer in high wind, though I do try and shy away from using Velcro whenever possible. Not sure if there are many other options though besides Velcro or just taking the vent guyline right near the tent so its pointing straight down.

DGoggins BPL Member
PostedNov 20, 2014 at 4:43 pm

Ok, project got hung up a bit after thinking about the best way to handle the next two issues.

So, the two "cones" of the mid are a bit tricky to sew into. I am currently planning on adding a bar tacked loop on the top here ->

loop1

But part of me doesn't want to…b/c I don't think I'll be able to get a clean looking bar tack, plus I'm hesitant to add stitching to the ridgeline. That would mean that the guyline/vent is now taking all of the tension, which…can be fine b/c tension is pulled from the top cone straight down the loop, then straight to the stake, but I'm worried the vent itself might not take much strain (so, I would just have a tieout just to keep the vent open but not really to put much pressure on the ridgeline).

Anyway….if I do add a loop, I would then put a 1"x2" piece of one sided cuben tape on the stitching on the inside of the tarp, and I assume that would seal it well enough (I see that is what zpacks does on their cuben shelters).

Next, I have the two dyneema x cones I spent time making ->

cbsl4

But again…now I was planning on just making just two bar tacks to quickly attach it…but then I still don't want to add much stitching to the ridgeline, and I don't want to sew the circumference to it b/c that is a lot of stitching to seal. So if I do attach it….it is just going to kind of "hang" in there and probably not be what I'm looking for.

The original creator of the tarp thought that I shouldn't need any reinforcement there in the cone. Its not so much reinforcement, but adding abrasion resistance. Its made of 1.0z cuben, and the cone already has cuben tape on it as well.

loop3

But what do you think of this? Why don't I just add either gorilla tape or normal duct tape , like a 4×4" patch of it to the cone area for the abrasion reistance. I can always take the tape off later, clean it up with some cleaner like goo gone, and reapply some if necessary. I could even add a "smooth" side where I stick duct tape to itself so the duct tape doesn't attach to the mesh and damage it. What about that?

Lastly….I think it would be cool if I could make the weed wacker cord removable just like the MLD vents are made. I would make two slits here ->

loop2

I.e., far enough away so I can easily take out and put back in the cord, but not too close that it starts just bending there between the two slits.

The idea here is to have the cord be in the hem. Anyway, I was thinking of just adding another 1-2 pieces of one sided tape as a reinforcement, and then just cutting a slit. The problem is….how to cut a slit where it doesn't go through the last piece (uppermost piece) of the hem. Also….worried that a cut slit might eventually deform enough even with tape reinforcement. A small metal grommet would be cool..but again, I only want it to go through one side of the hem, not both, and it would have to be very small. Any other ideas or should I just move forward with a simple slit?

PostedNov 20, 2014 at 10:31 pm

I would be very wary of adding tape to cuben that I later planned to remove. I have read reports of tape stripping the mylar from cuben.
Could you attach the cones with double sided tape instead of sewing?

Tim Marshall BPL Member
PostedNov 21, 2014 at 12:35 am

Just glue the cones in, much cleaner way to add it after its all sewn up.

-Tim

Viewing 25 posts - 1 through 25 (of 40 total)
Loading...