Topic
Carbon Felt Simmer Pad
Forum Posting
A Membership is required to post in the forums. Login or become a member to post in the member forums!
Home › Forums › Commerce › Gear Deals › Carbon Felt Simmer Pad
- This topic has 28 replies, 10 voices, and was last updated 6 years, 2 months ago by
 DAN-Y/FANCEE FEEST.
-
AuthorPosts
-
Feb 17, 2014 at 6:52 am #1313407
Carbon Felt Simmer Pad
Use this device to make your StarLyte burners and Companion Burner simmer for real cooking and baking needs.
User friendly, just place over lit burner as seen in this video: http://www.youtube.com/watch?v=TavizGeeD6Y
For more information and video view this thread at Backpackinglight.com :
Carbon Felt Simmer for StarLyte and Caldera Cone Thread
One low price for members at Backpackinglight.com Exclusive introductory offer.
You get one simmer pad for only:
$5.00 + $2.00 shipping
Carbon Felt Simmer Pad Paypal Button
 Feb 18, 2014 at 4:46 pm #2074853
These simmer pads should work on flatcatgear open burners with the vane swirls. The one in his avatar. They should work with all open type burners.
I use the term "burner" as the part that supplies the heat. Once the burner has a pot support attached it becomes a "stove" A stove with integrated pot support such as the StarLyte Stove.
Apr 20, 2016 at 5:48 pm #3397108Resurrecting this thread because I’m a johnny-come-lately and was just trying to bake with a new Batchstovez baking kit I got this week. I tried both the Fancee Feest stove with simmer ring and Batchstovez BS1.1 stove in simmer mode – and both flared up. After reading this and some related threads here on BPL, I understand now about the thermal feedback. The Batchstovez kit came with a carbon felt windscreen, so with that stove I can see I need to give it a little more room to keep the stove from overheating.
My question relates to baking in the caldera cones. I have never used the 12-10 stove, and instead got a Starlyte that I planned to use with it instead. I also got the simmer pad from Dan – maybe it was part of the BPL introductory offer. Now I see Dan is selling a regular starlyte, a modified starlyte and a dedicated simmer starlyte. Dan or others, how does the carbon felt simmer pad work compared to these different stoves in a caldera cone – better, worse, the same? I’ve also seen a Demeter video where she dry bakes with a starlyte and a metal DIY simmer ring. I would think the DIY simmer ring (and the different smaller opening starlytes could still suffer from thermal feedback that Dan said the carbon pad helped prevent. Is there some downside to the carbon felt simmer pad I’m missing?
I know I need to try this myself, but figured it was discussed earlier, and maybe there is an update I haven’t stumbled upon.
Thanks in advance,
Bob (slbear)
Apr 20, 2016 at 8:04 pm #3397127A customer said the carbon felt simmer ring was starting to deteriorate/melt/shrink around the hole so I discontinued selling them. In my continued testing of the simmer ring I found it to be true what was reported. Direct flame on the felt causes deterioration. That’s why minibulldesign sells replacement wicks for his remote fueled stoves is my educated guess ;)
Make simmer rings out carbon felt for your own use is a good project. They will last long enough to get some good simmering/baking done. Reinforce the area around the hole by using high temp silicone to adhere an aluminum disc around the hole to prevent deterioration. Keep the flame from touching the felt.
I only had one person contact me about the problem and that’s one too many ;)
The newest Starlyte design for the Toaks550 kits behaves well inside the confinement of the small Caldera Cone.
Caution to all that use the Modified Starlyte in the Caldera Cones. DO NOT over fill. One ounce max. If you overfill, use centrifugal force to remove excess fuel.
DIY cones have to have the correct intake and exhaust holes for the Starlyte to perform correctly.
Apr 21, 2016 at 11:47 pm #3397332Hey Dan,
Do you recommend NOT un-modifying the Starlyte when used with the CC?
Thanks.
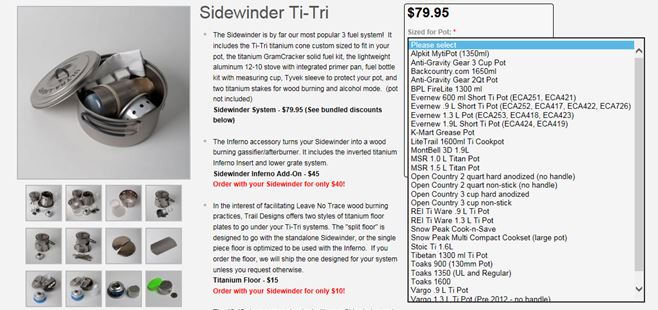
Apr 22, 2016 at 6:38 am #3397350Jorge, I have read on other forums that many use the un-modified starlyfes in caldera cones. Trail Designs offers the StarLyte with CC that are made to fit your desired pot. Look at the list of pot sizes they will make a cone to fit:
The unmodified works well with larger pots up to a certain volume size.
The Modified was meant to be used with pots with volumes of 2 cups.
Apr 22, 2016 at 10:54 am #3397411Thanks Dan! Yeah, I got the 1.3L Evernew Sidewinder kit last year, w/the Starlyte and I “un-modified” it (without damaging the ring, so I can still throw it on top and use it for simmering if needed), but wanted to hear your opinion.
Apr 22, 2016 at 11:48 am #3397422I’ve got the Evernew 1.3L pot with the Tri-Ti Sidewinder and a Snow Peak Mini-solo with the Tri-Ti Fissure – not sure if I will keep both long term. I have never used the 12-10 and don’t have the simmer ring. I used a couple of esbit stoves: Gram Cracker from TD (just to boil) and Epicurean from Flat Cat Gear (boiling and baking). Both worked great with the Evernew/Sidewinder.
For my trip this weekend I plan to take the Evernew/Sidewinder and have both the 12-10 and a Starlyte that I “modified myself” with a small disk of Ti foil – outside cut with a shop scissors and inside hole with a series of hole punches. It looks more like the simmer starlyte than the modified version that I think TD is showing on their website, but my goal was to try dry baking with this DIY modified Starlyte.
I’m learning this step by step, but I would think for boiling water, given the size of the 1.3L pot and decent volume of the of the CC for this pot, that the standard Starlyte would work better than the modified versions. If I was using the Snow Peak mini-solo pot with a Tri-Ti Fissure cone, I’m not sure. The water volume may be less and the pot diameter is a lot less (< 4 in. vs 5.9 in.), but the pot sits a lot higher above the stove, so the internal air volume is still significant inside the cone – and the thermal feedback from the pot should be less (because it’s smaller and higher). That’s not to say it doesn’t get hot in there.
The comments here are great. I have too many cook kits and like to bounce around between them depending on the trip. I’m using alcohol so this thread save me a lot of testing – that I don’t have time to do. I’d like to get the kits dialed in so I can pick one and pack it without mixing and matching components – even if it requires separate stoves for boiling or baking.
Since I often take an esbit tab as backup, if I don’t like the way the DIY modified Starlyte bakes, I may just plan to use the Epicurean with esbit for baking as I know that works great.
Apr 22, 2016 at 1:35 pm #3397452Bob, I have one carbon felt simmer disc left I could send no charge. You located in San Diego and also need a knob for a DIY pot lid?
I have made some awesome baked goods using the steam bake method. If I were taking two kids on an adventure I would investigate doing “large” muffins as seen in this thread:
http://bplite.com/viewtopic.php?f=20&t=523&sid=f42af921f836b3264a68a7b1c1073e24
There is a lot of good info in that thread if you are a DIY-selfer.
Apr 22, 2016 at 2:04 pm #3397462Hi Dan,
thanks for the replies and the link. I have yet to try steam baking.
You actually sent me a knob with an order last May. I had forgotten that, but thank you again for that generosity and the offer now. I used that on yet another cook kit my son uses in scouts. I’m probably good on both knobs and felt for the time being, but always appreciate the offer.
Best -Bob
Apr 22, 2016 at 2:11 pm #3397463Love the pics in that thread, but it’s a long one! I need to bake something easy first for lunch to build up my strength, then a nap in the hammock, and then maybe get back to this rings of sweet goodness story from bplite.
Apr 22, 2016 at 2:42 pm #3397470Thanks for the replies everyone!
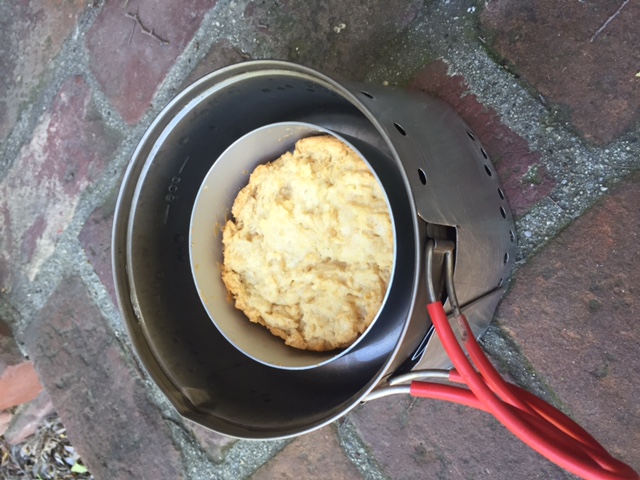
Apr 23, 2016 at 5:43 pm #3397620Funny that this thread was resurrected because after recently going to the SoCal GGG and seeing Don Amundson’s Flatcat dry baking set up I wanted to try it. My normal set up is a modified starlyte, MYOG caldera cone dubbed “caldera clone” by another bpl’er and a 900 ml short pot. I bought a 4″ Fat Daddio bake pan off amazon and cut off the lip. Then bought a piece of carbon felt from eBay. I cut the felt to fit over the starlyte stove and cut a hole roughly the size of a dime. I baked a biscuit and it came out perfect although it took about 50 mins. The stove continued to simmer for another 20 mins. I think I need to make the hole a little bigger to speed up the process. I used 1 oz of alcohol. I’ll probably make a simmer “cover” from Ti foil in the future.Apr 23, 2016 at 10:18 pm #3397654Did a bake test today with my mini solo caldera cone and my diy modified starlyte.
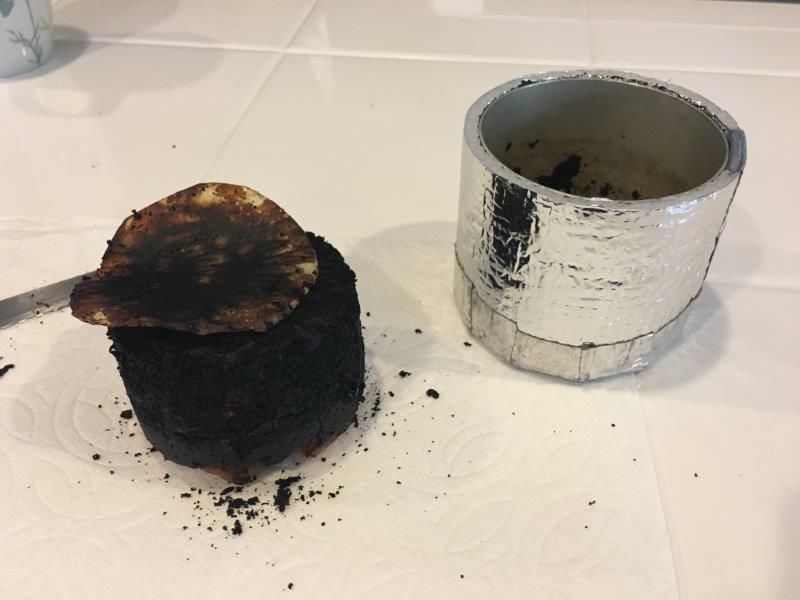
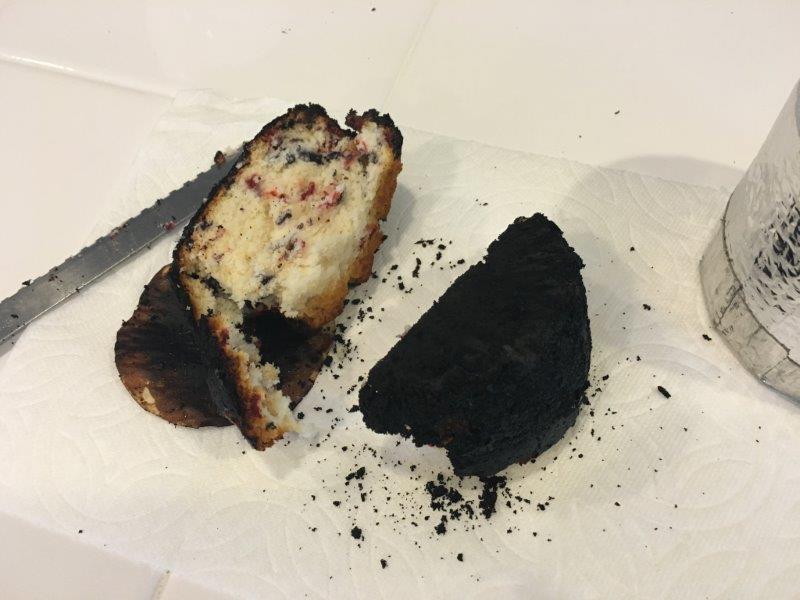
I used 1 oz of fuel and it burned quickly, less than 14 minutes and left a lot of soot all over the pot. The sides of the muffin were burned, or should I say charred. Edible but a fail by most standards. I used ghee, which may be a factor, but I expected the stove to cook lower and slower.
Jon from Flat Cat told me that alcohol baking doesn’t work in smaller confines as well as esbit, but I thought the height of this cone would provide enough volume to give it a try.
Btw…i still ate the muffin, but I can’t get some if the charred remains off the inside walls of the fat daddios baking dish.
I’ll post pictures soon.
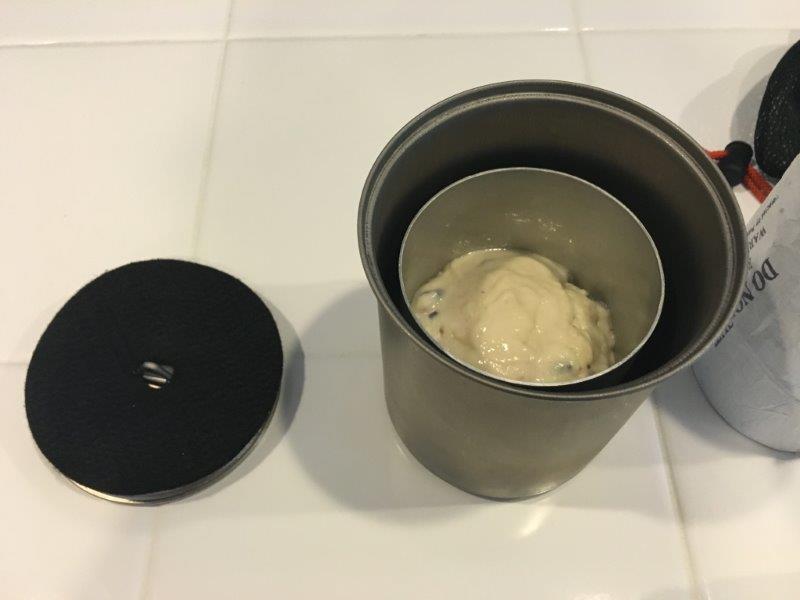
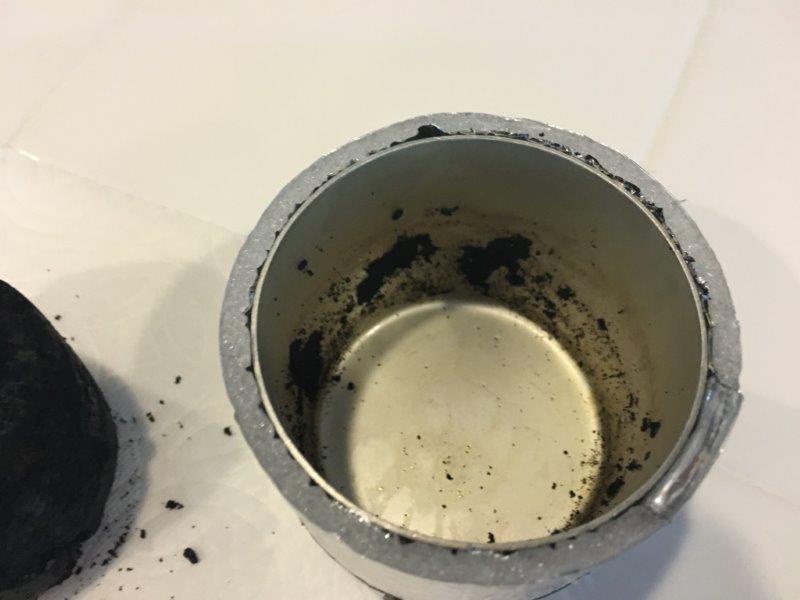
Apr 23, 2016 at 10:42 pm #3397659one ounce for DIY modified Starlyte. Baking ring standoff to the side
Muffin mixed in a 3″ Fat Daddios baking dish – inside the mini solo pot
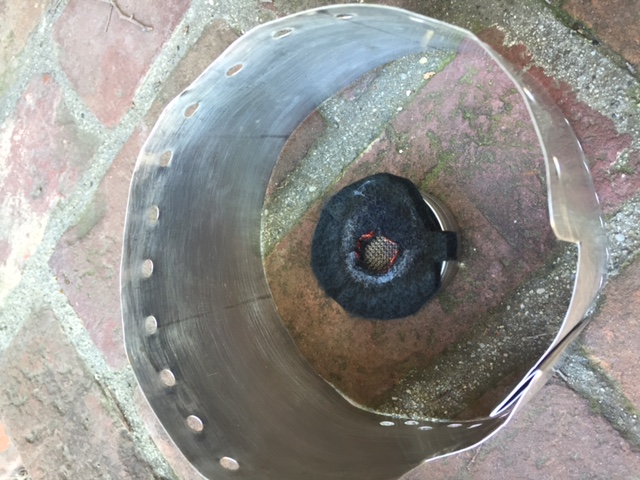
Here’s the cone setup ready to go
Fast burn, but initial peak is looking good!
I didn’t take a pic of the sooty pot. As mentioned the 1 oz burned in less than 14 minutes. Here’s what came out
Charred but edible.
My poor baking dish – may never be the same (but notice the awesome DIY cozy.
I figured out how to fit the cone inside the baking dish on top and cozy from the bottom and that fits perfectly in the pot, so as long as I can get the pot clean enough to bake again, and the starlyte stove to cook slower (or buy the 12-10 baking ring? – or just use Jon’s Epicurean?) this kit will be trail ready.
Thanks for any additional advice.
Bob (slbear)
Apr 24, 2016 at 12:39 am #3397666Bob,
im just starting to experiment with baking. No question though, you need to slow down the burn of your fuel. 30 mins is usually good from what I understand. My biscuit came out perfectly with my starlyte stuff and MYOG Carbon felt simmer adapter. Did you use the carbon felt in your pic?
Don
Apr 24, 2016 at 8:14 am #3397693Don & Bob,
One thing that would help to understand the differences is the measure the “burn volume”. This would be the height from the ground to the bottom of the pot/mug time the area of the windscreen (PI*diameter^2/4). This volume can make a difference. Picture the difference between a 100 watt light bulb in a 1 cubic foot box and a 1/10 cubic foot box. A windscreen for a 900 ml pot is much large than one for a mug. I have found that cooking systems with smaller burn volumes tend to provide too much thermal feedback to alcohol stoves. My 2 cents.
Apr 24, 2016 at 9:51 am #3397708Hi Don,
I did put the felt pad on top of the pot lid – not on the stove, as Dan had been saying he’s switched over to the different Starlytes. Maybe the ring in my DIY modified Starlyte is still too big. I will note that I have two Starlytes and both came from Dan – one for each CC setup. The DIY portion is the inserted burn ring/reducer, and Dan’s look much better than this from the photos. I also have (from Dan) a Fancee Feest and simmer ring, BGET and Esbitimizer and small wood knob for my DIY pot lid he sent with one of the orders. All great stuff, but I’m wondering if this is the right application for this Starlyte – even modified.
Is it too late to suggest I shouldn’t over-analyze this? I totally get what Jon is saying. The CC for the Mini-Solo pot is narrow, but tall. The pot diameter is small and it is further away from the ground than in my other Evernew 1.3/CC setup so I thought thermal feedback would be less. Sure – I can estimate the volume of both. It will take less time than experimenting – but experimenting/testing is really the ticket I’m sure.
Is the sooty pot and <14 minute burn time a sure sign of an overheating stove? I can try a smaller opening for my DIY mod. Anyone have a similar experience where this made a significant difference?
Thanks all for the feedback,
Bob (slbear)
Apr 24, 2016 at 1:11 pm #3397735A quick suggestion. Reduce the oxygen around the starlyte just as the epicurean reduces it. Somewhere at bplite there is a thread with photos of a small cat food can cut down insize to make the StarLyte Stove simmer. The simmer ring for the Fancee Feest does the same thing. I’ll be back later with a photo of the simmer can for the starlyte.
Apr 24, 2016 at 1:51 pm #3397744Apr 24, 2016 at 3:21 pm #3397756Bob & Don,
It helps if you understand that dry baking is significantly different than simmering water. When you boil water, the bottom of the pot max out at 212 F maybe a tad higher due to heat transfer dynamics of the pot. When we dry bake (using the Epicurean Stove), we try to limit the pot temperature to 500 F to 600 F (the pan temperature will be ~350 F). Therefore the heat transfer (conductive/convective/radiant) is much higher. Since Esbit is more of a sublimation process, it has a greater tolerance to this gradient. Alcohol stoves are much more sensitive. When we bake using alcohol, we elevate the pot an additional 2-3 inches above the normal position to reduce the thermal feedback. I believe that what Bob is experiencing is a huge thermal runaway situation: as the pot gets hotter, the alcohol vaporization rate increases heating the pot up even hotter in a continuous loop. I have accidentally melted aluminum windscreens in the early days of baking.
Bread will brown when the sugars reach ~350F, to burn, it has to be a lot higher. The dangers of running your cooking system that hot it that you can distort a steel or titanium pot (oilcan) or anneal an aluminum one.
Hope that helps
Apr 26, 2016 at 11:00 am #3398093Dry Baking with Shug

Simmer Ring for the Fancee Feest Stove
Jun 10, 2016 at 12:51 pm #3408156bought a 4″ Fat Daddio bake pan off amazon and cut off the lip
This may be a dumb question, but what did you use to cut off the lip? I bought the same one but it is too wide for my 12cm Imusa pot due to the lip.
Jun 10, 2016 at 6:10 pm #3408193what did you use to cut off the lip
I cut the lip off of mine using a Dremel with a heavy-duty cut-off disc.
Took a while…
Jun 18, 2016 at 7:11 am #3409519When steam baking, the water is brought to a boil and then after a predetermined time it goes into a short dry mode(all water has evaporated) and continues to brown the sides and bottom. This type of baking is mush faster than dry baking. As we know, it takes time and practice. The more we bake, the better the cake :-)
-
AuthorPosts

 Funny that this thread was resurrected because after recently going to the SoCal GGG and seeing Don Amundson’s Flatcat dry baking set up I wanted to try it. My normal set up is a modified starlyte, MYOG caldera cone dubbed “caldera clone” by another bpl’er and a 900 ml short pot. I bought a 4″ Fat Daddio bake pan off amazon and cut off the lip. Then bought a piece of carbon felt from eBay. I cut the felt to fit over the starlyte stove and cut a hole roughly the size of a dime. I baked a biscuit and it came out perfect although it took about 50 mins. The stove continued to simmer for another 20 mins. I think I need to make the hole a little bigger to speed up the process. I used 1 oz of alcohol. I’ll probably make a simmer “cover” from Ti foil in the future.


- You must be logged in to reply to this topic.
Forum Posting
A Membership is required to post in the forums. Login or become a member to post in the member forums!
Our Community Posts are Moderated
Backpacking Light community posts are moderated and here to foster helpful and positive discussions about lightweight backpacking. Please be mindful of our values and boundaries and review our Community Guidelines prior to posting.
Get the Newsletter
Gear Research & Discovery Tools
- Browse our curated Gear Shop
- See the latest Gear Deals and Sales
- Our Recommendations
- Search for Gear on Sale with the Gear Finder
- Used Gear Swap
- Member Gear Reviews and BPL Gear Review Articles
- Browse by Gear Type or Brand.
