To make a modified 12-10 or chimney style stove:
1) Take the bottom parts of two cans,cutting them about 1-1/4" long. The taller the better, but there is just soo much room under a caldera cone. Take a third can and ream it around one piece. This will overlap the two pieces together. This will make the shell of a 2" stove. A little tall, but a compromise between low and high heat on the completed stove.
2) Punch 16 1/4" holes along the bottom edge of one can, about 1/4" above the bottom. Punch these from the outside to the inside to eliminate any burrs. Sand this clean to prevent the paint from sticking as it gets hot. This becomes the base. Keep the holes regularly spaced. This will help with the simmer ring later on. If you don't plan to cook with it, you can skip this step.
3) Take a small strip about 1-1/2" tall. This becomes the chimney/well. I simply roll and notch the piece into a circle. It should match the inner ring of the stove. On the top edge, punch a series of 15 holes, or, as many as is possible, near the top edge, this should be about 1/8" below the top edge.
4) With a good spade bit, in a handle for hand work, punch a hole in the top can, centered and about 1-3/8" diameter. This will leave the inner ring and a small flange. Really, you only need to etch a fairly deep scratch, then cut segments out with a utility knife.
5) Put the chimney into the rim of the bottom can, adding enough JB Weld to the bottom rim to seal the bottom of the chimney. Put the top on and press the two together untill the chimney just snugs into both rims.
6) Fireproof tape the outside joint with a 1/2" piece of aluminum tape.
7) Using JB Weld, apply glue to the "center" seam in the chimney, and, insure that the bottom is well sealed. The chimney makes the fuel well. Let it dry thuroughly. If you don't plan to cook with it, you are done.
8) The simmer ring can be made by taking the top strip, about 3/4" wide, from the top of one of the cans. This should be reamed out with a third can to stretch it to a loose fit around the stove. DO NOT cut this strip. It should be a single ring from the can! Cut from inside to outside else it will stick in operation!
9) Fitting the ring just over the holes, mark the center of each hole. Punch holes about 1/8" up, leaving a comleted hole matching your stove holes. The holes need to be punched from the inside to the outside to prevent any burring from catching on the stove!! Put the ring onto the stove. The ring should slide freely! Carefully sandpaper out any burrs or rough spots.
10) With aluminum tape (about 1/4" wide) wrap three layers aroung the bottom of the stove, about 1/8" below the existing holes in the stove. You can trim any excess width later on, or, with a needle nose pliers, crimp folds into the excess tape to round the corner over the bottom.
Let the ring slide down to the tape. To open the stove (high), simply line up the holes. It will burn for about 7-8 minutes, but, you need to adjust the amount of fuel you use to the volume of water to be boiled. The simmer ring should slide around easily with a toothpick, twig or spoon handle. It may stick a little at first, because of the adhesive on the tape. Coat with talc if it does. Closing the holes (low) should allow about a 15-20 minute burn with 1 to 1-1/2 ounce of alcohol.
A shut off can be made from a third can to instantly turn the stove off, if needed.
Pressing too hard during assembly will cause the inner chimney to crush…not good.
jdm
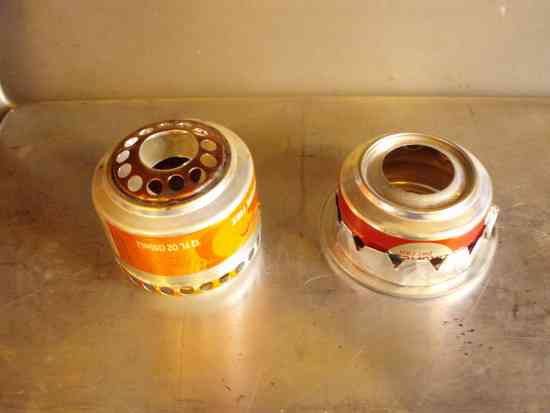
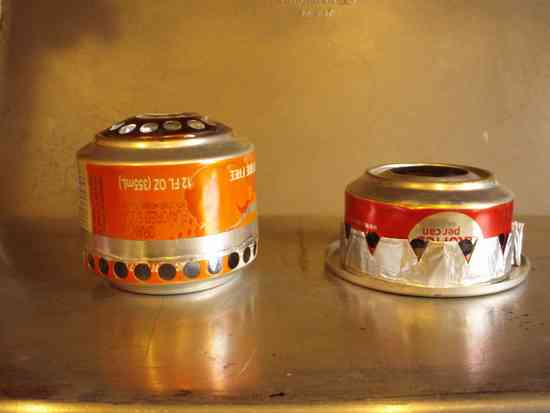
Note: I seem to have lost the pictures from the stove build. I thought they were uploaded here, but apparently not. These are sort of similar and show a simmer ring and a second type of stove.

Note that the first stove is similar, but taller. I have a couple pots I use in the Caldera Cone. The "Simmer Ring on the 12-10 is just aluminum foil