Topic

Bivy Plans – Checking on materials

  • This topic is empty.
Viewing 25 posts - 26 through 50 (of 58 total)
John Donewar BPL Member
PostedJan 19, 2013 at 9:33 am

Tyler,

If you want downpour protection when it's needed I'd suggest going a little longer than 9' in length.

With your bivy's length at 8' you might want to add some length to the tarp to take care of "splash" from the ground in a real downpour. I'd also "scrounge" every bit of width out of that 64" width by folding over a 1/2" two times on the hemmed edges. If you do this on both sides you could have 1/2" hemmed edges and a 5' 2" width. 2" may not sound like much but in a real "floater" you'll be glad it's there.

Tie outs, 3 on the narrow "ends" & dependent upon your length one or two space evenly on both of the long sides. This would give you 3 or 4 tie outs on each side if you include the ones on the corners of the tarp from the original 3 on each of the narrow "ends" that I spoke of earlier.

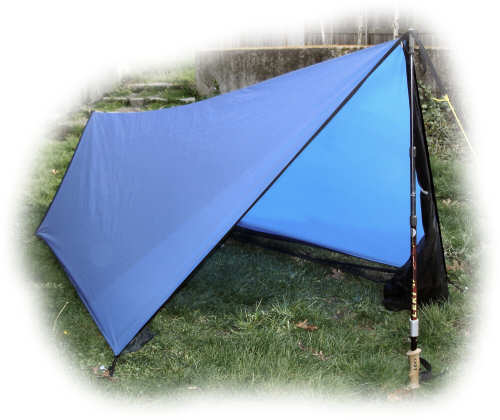
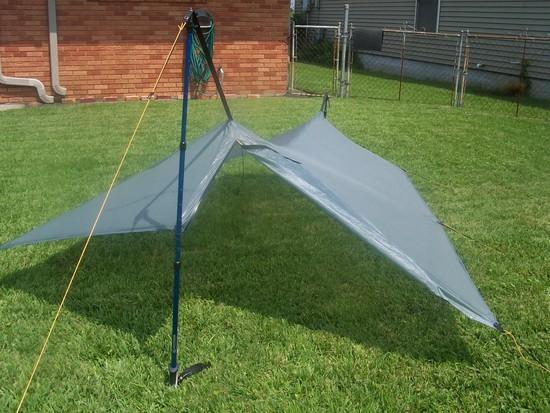
;-)” height=”336″ src=”https://dpcr19kltm61a.cloudfront.net/backpackinglight/user_uploads/1358616303_74338.jpg” width=”448″ />

If you ever want to set it up in a Monk Tarp configuration you'll need a tie out in the center of one of the long sides.

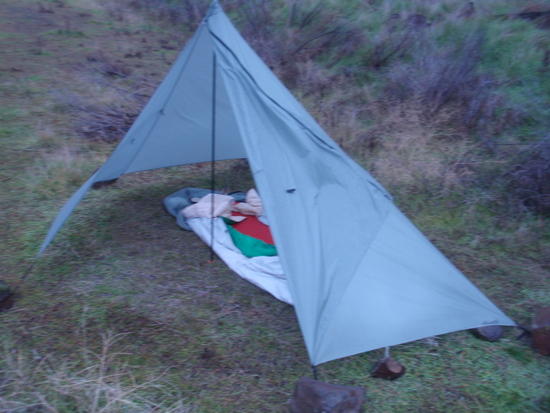
;-)” height=”375″ src=”https://dpcr19kltm61a.cloudfront.net/backpackinglight/user_uploads/1358616784_74339.jpg” width=”500″ />

BTW your MYOG bivy turned out great!

Do you have a final weight?

Party On,

Newton
PostedJan 20, 2013 at 1:24 pm

I second that the bivy looks great. Roomy but not wasteful. If I ever get around to making another, that's how I'll do it.

I haven't made a tarp yet just because I have the GoLite poncho and that's 15 D fabric, lighter than I'll find at an affordable price. I like its distribution of tieouts; corners plus the middle of the sides leaves me with plenty of pitch options. So that's what I recommend.

-Jeff

Tyler Miller BPL Member
PostedJan 20, 2013 at 8:36 pm

Thanks! I was going for something that would offer some flexibility if I need to store some gear inside for the night.

As for the tarp – These are a few setups I would love to have the flexibility for.
Modified lean-to
Half Pyramid

So how long would my tarp need to be? Bivy length + 2 feet?
And how many tie-outs do I really need? 13 seems to be the most flexible without overkill – 5 on the long sides, 3 on the short sides, 1 in the center (corners counted twice).

EDIT – I see the setup I used in the pictures has 17 tie-outs.

John Donewar BPL Member
PostedJan 20, 2013 at 8:57 pm

"So how long would my tarp need to be? Bivy length + 2 feet?"

Tyler it's relatively easy to figure.

Do the string thing.

Lay your bivy out on the ground and using mason line and some sticks "mock up" the proposed shape of your tarp over your bivy. This gives you the opportunity to adjust height and width and length inexpensively. Think of it as "drawing the edges of your tarp" using the string instead of a pencil.

When you are happy with the "drawing of your pitch" measure what you see in front of you and size your tarp accordingly.

I'm guessing that the one in the picture in your post is an 8' x 10' tarp with 2' spacing on the tie outs on the small edge.

Party On,

Newton

Jerry Adams BPL Member
PostedJan 21, 2013 at 4:29 pm

Nice looking bivy!

Flat tarp? – use cheap materials so after you decide there's too much rain blowing under the edges and you go to a tarp/tent that goes pretty close to the ground all the way around, you won't have wasted a lot of money on the flat tarp materials.

(half humorous)

Tyler Miller BPL Member
PostedJan 24, 2013 at 6:43 pm

Those who use flat tarps – would a 62" wide sil tarp offer enough protection if the wind and rain pick up? My bivy is 47" at it's widest.

Those who use tarp tents – would it be overkill to make a tarp tent without a floor or mesh, and use my bivy underneath? My only concern would be more weight over a flat tarp.

Once I get a better idea of what I need (flat tarp or tarp tent), I'll use the string method to mock up a final plan.

Also…

I bought a scale! The bivy weighs in at 8.8 oz.

Jerry Adams BPL Member
PostedJan 24, 2013 at 7:50 pm

I use bivy under floorless tarp tent and it works good. If the weather is good I don't bother setting up tent.

With raised edge flat tarp, if for example, the edge is a foot off the ground, I like to be a foot back from the edge to avoid rain splash.

Tyler Miller BPL Member
PostedJan 25, 2013 at 12:19 pm

I've looked at the dimensions and did a quick mock-up of what it would look like to have my bivy under a 62" wide tarp and it's not going to happen. I think it would be foolish to rely on that if conditions turned for the worst…especially since I'm new to tarps.

If I cut my raw silnylon in half and used a flat felled seam, I could end up with a 10' x 6' tarp. I would use it as 6' wide, 10' long.

It's either this or order some more materials to make a tarptent. Back to the drawing board…

Jamie Shortt BPL Member
PostedJan 26, 2013 at 9:04 am

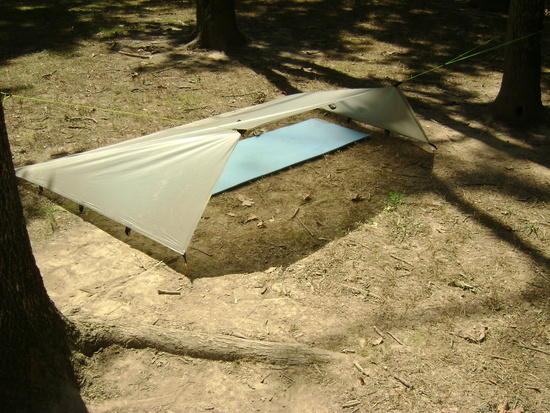
I haven't read the entire thread but did catch the familiar shot of my backyard (thanks Newton) so I had to reply.

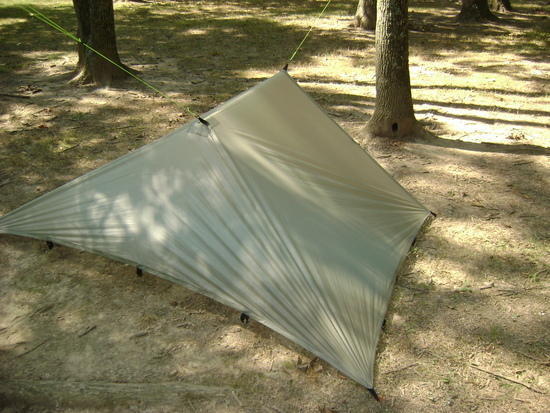
Tyler it sounds like your bivy is on the large size so adjust what I say appropriately. I have good number of nights in the lytw8 bivy and bivy's of similar size under a flat 5 x 8 tarp or 5 x 8 poncho tarp. On several occasions I did see rain that did include windy conditions. Never did I get wet from the rain. I setup my tarp just like the picture that Newton posted. That picture is a setup in my back yard so it is not from an actual trip but it is the way I pretty much setup all my tarps. With respect to rain from the sides…I set my tarps up extremely close to the ground. This does not give much room to situp or manuever around, but I am mostly sleeping so it doesn't matter. What this does do is protect me from weather.

If you look at the picture the tarp touches the ground in the rear and is only inches above the ground up front. Even if rain were coming from a 45 degree angle its only going to enter say 6 inches from one side. If rain is blowing like that I can slide to the edge other edge if need be, but not sure I've ever needed to do that. I generally keep my shoes near the top and do recall moving them to keep them out of the rain.

The only real exposure you have is rain coming from the front. You will want to watch out for this and try to predict wind direction before setting up the tarp. I have noticed this and I simply slide the bivy back towards the lower end if wind changes direction and blows into the front. Some people may not like the need to adjust your position depending on the weather. To me it is actually part of the fun. Approaching nature with minimal dependcy on gear and using my brain to adapt to any situation. This is just what I like. The majority of backpackers probably prefer less adaptation…setup and forget it. If this is more your strategy then yes I would argue for a larger tarp design or a tarp tent.

What I have found to be a great compromise is a trapezoid tarpt. It provide a little extra room up front, taking the width from the rear. More like this….9 feet long, 6 feet wide in front and 4 feet wide in rear can be made from 3 yards of silnylon.

Not sure if this rambling helps or not. Regardless, I think you will have a magnified outdor experience using gear you made yourself. Nice job.

Jamie

Tyler Miller BPL Member
PostedJan 26, 2013 at 10:54 am

Jamie, your ramblings are much appreciated. Where in NC do you live?

And which picture are you referring to? The first or second one Newton posted?

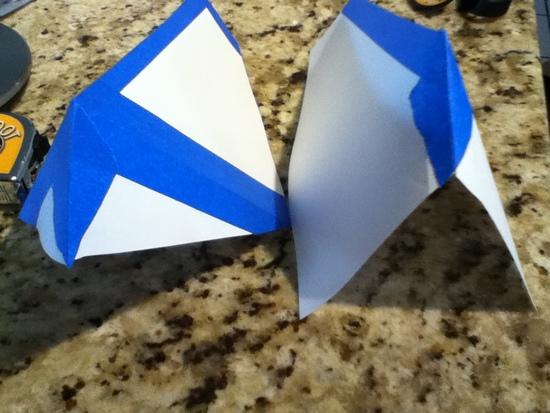
You hit the nail on the head with a trapezoid. Here's a few pictures of what I'm thinking. Still debating on beaks. Here's two ideas I have with design.

First idea – cutting material from the head and foot, flipping it, and sewing it back on to increase the ridgeline length. Another advantage is the trekking pole in front would be inside the tarp without sacraficing usable floor length. There's a lot more sewing and sealing going on here. Not sure if it's worth it, but it does provide maximum coverage. The foot-end beak could be overkill.
Beak option 1.1
Beak option 1.2

Second idea – cut an angle from the top where the two panels join at the head end, sew back together to form beak. This is a little less coverage, but much less sewing/sealing. Another disadvantage is the trekking pole sits further back into the tarp. Coverage should be good though.
Beak option 2

Side by side:
Both beak options

And would it benefit me to cut down my bivy so I can make a slightly smaller tarp? I'm okay doing that.

John Donewar BPL Member
PostedJan 26, 2013 at 11:14 am

Tyler,

It was the first small A frame pitched tarp. Hover over it with you mouse and you'll see the note referring to Jamie.

IMHO beaks aren't worth it. What I prefer is to extend the ridge line of a shaped catenary cut tarp out 12" to 18" leaving the front and rear tie outs "swept back" towards the middle of the tarp. It's similar to what is done with the Nightwing tarp from Six Moon Designs.

Nightwing Tarp

You get the benefit of a beak without having to crawl on your belly to get under your shelter.

Face the foot end of your tarp into the prevailing wind. Think of it as an umbrella for your bivy.

Party On,

Newton

Tyler Miller BPL Member
PostedJan 26, 2013 at 2:12 pm

I made a Nightwing recently per the specs on SMD. It turned out to be a hack job. Great design, though!

I just spent the last few hours with scale models of my raw material and came up with what I think will be the final product. Gotta love lazy saturdays…and gotta love finishing in time to see NC State beat down on UNC! GO PACK!

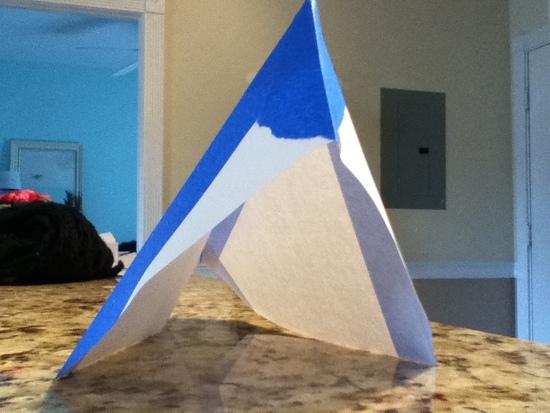
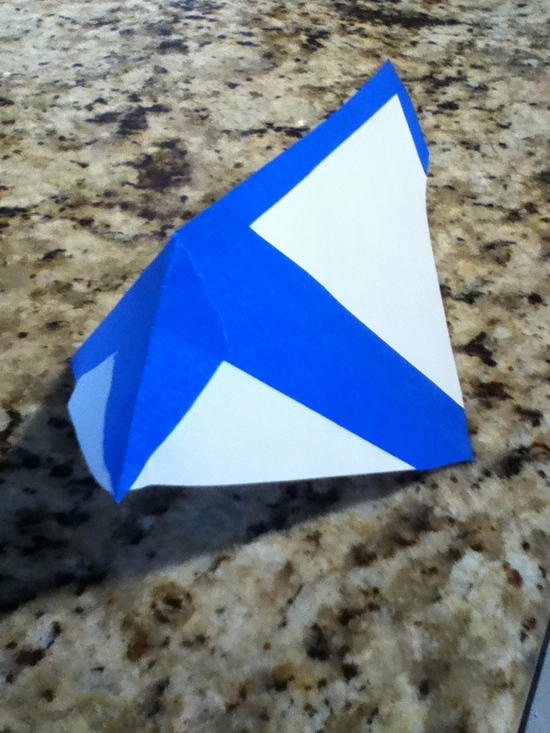
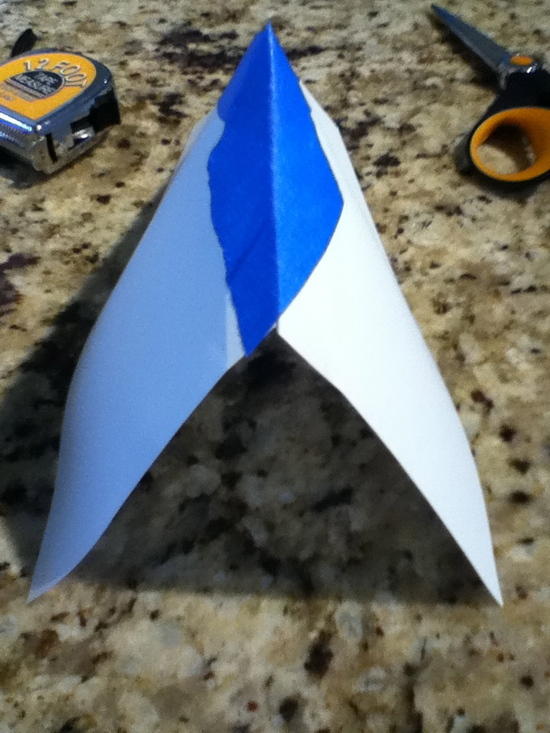
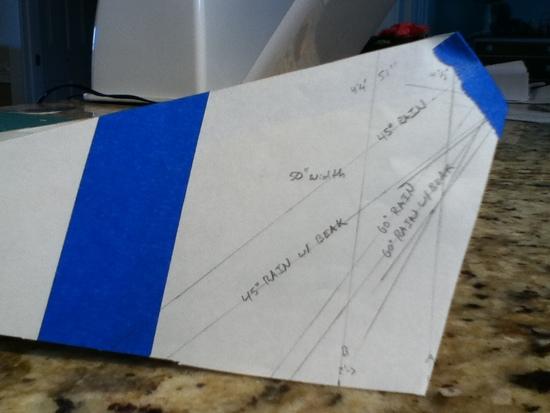
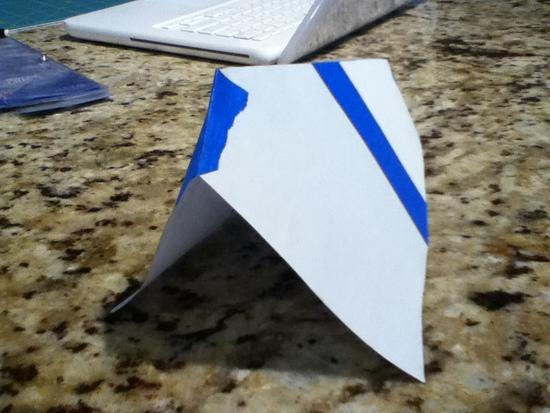
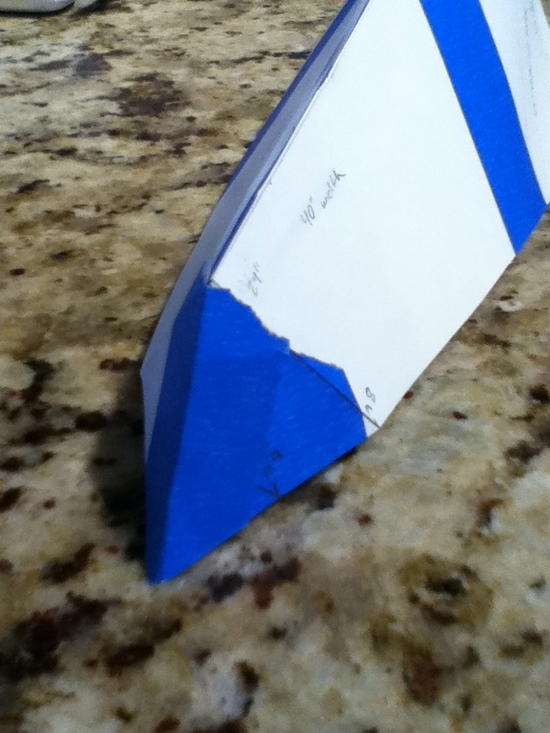
Anyway…the Fightwing has 8' (length) of floor space and isn't going to be roomy by any standards, but it should work! (fingers crossed). Also, I played around with different "rain angles" with and without a beak, and found a small beak to actually be somewhat beneficial since the overhang on each end is only 1'. 45 degrees was optimal.

Protactor skills – checked "rain angles" before I cut the paper.
Fightwing 1

Here's the front. Should be a tight fit!
Fightwing 2

The foot-end. I do plan on closing it off in some fashion – preferably without having to sew the doors on and instead use the existing material. Shouldn't be hard. I might even let it be open closer to the ground for ventilation. This would allow me to scoot closer to the foot end if for some reason the wind switches.
Fightwing 2

Now to build the scale template.

Jerry Adams BPL Member
PostedJan 26, 2013 at 3:32 pm

That must be a zipper

That works pretty good.

I have evolved to "half pyramid":

half pyramid

Then there's no contortions getting into bed,…

Tyler Miller BPL Member
PostedJan 26, 2013 at 4:11 pm

Good stuff! My beak won't be that big since I'm limited with the material I have…but I'll work that into the plans if possible.

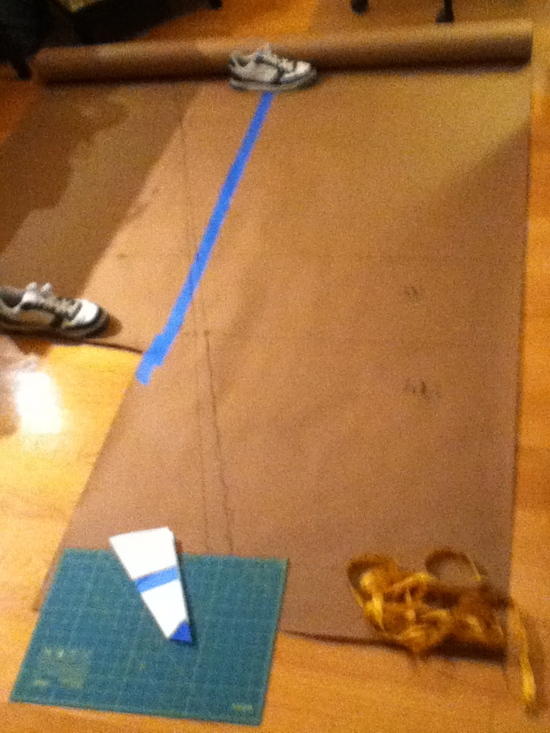
Template underway.
Template in progress

Lance M BPL Member
PostedJan 26, 2013 at 4:27 pm

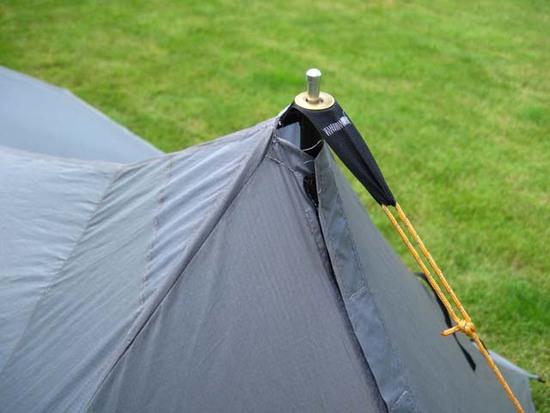
Here’s another style that allows different pole options and can be retrofitted to a finished tarp:

Peak 026

More info from previous forum thread here.

Hope this is useful.

Tyler Miller BPL Member
PostedJan 26, 2013 at 4:56 pm

Very useful. Thanks!

Any good info on how to make a catenary curve? Not sure if I need one, but I know it will add strength to the ridgeline.

PostedJan 26, 2013 at 9:08 pm

If you’re a member (which I see you’re not), there is a great article that includes a downloadable tool for calculating catenary curves. Honestly, for those new to UL, the membership fee is more than worth it. But if that’s too much for you, I bet you could find something for free with a simple internet search.

I’d say a big plus one on doing the cat curve though. It was a bit of work on my tarp, but it was totally worth the extra time. I learned a lot more doing it too.

Also, on the beaks, I pitch my tarp high enough that it hasn’t been too much of a problem, but I still have Newton’s mod in mind in case I get tired of the lower entry some day.

Jerry Adams BPL Member
PostedJan 26, 2013 at 9:26 pm

I wrote article that includes Excel spreadsheet for calculating catenary curve

http://www.backpackinglight.com/cgi-bin/backpackinglight/myog_silnylon_floorless_2-person_tent.html

Which is stolen from an article Roger did with minor improvements

But you have to be a member, sorry

Several people used this and reported back with success

Basically, you make a straight line. Make a mark every 2 inches. The spreadsheet tells how far to measure off the straightline for each mark for where the cat curve line is.

You can either measure the fabric directly or make a template out of stiff material and then trace using it.

Another way that hasn't worked quite as well for me, is to take a heavy yet flexible line, suspend from two points so it droops the amount you wish, and then trace along that line.

Maybe 2 inches of droop for an 8 foot length.

That article had some other info that people said was useful.

John Donewar BPL Member
PostedJan 26, 2013 at 9:30 pm

Tyler,

Info on making a catenary curve can be found at…

http://www.wvi.com/~ulmyog/

…by clicking on the third menu item. It'sthe best and easiest to use that I have found.

Plug in the length of your ridge line, then plug in the degree of severity, hit enter and the largest degree of deflection is displayed along with a table of defections at points along the ridge line and a profile view.

If you are using Chrome as a browser you may have to click enable editing to be able to insert your values.

I used brown paper to make a pattern of the profile and then transferred it to my two panels of material. I cut out the profile and then sewed a flat felled seam on my catenary curved ridge line.

A bigger number plugged into the severity block results in a smaller deflection.

Party On,

Newton

Jerry Adams BPL Member
PostedJan 26, 2013 at 9:44 pm

That's it – good John

One thing about using brown paper for a template, is it tends to bend a little which will make the amount of catenary deflection more or less. If it bends differently for the two sides, they won't match.

I've done a few recently and just don't bother with the template, just measure directly on the fabric.

PostedJan 26, 2013 at 9:44 pm

I would agree with Jerry on the 2" deflection. I did three on my tarp, and that feels like too much. If I did it again, I'd probably go with something like 2" or so.

Jamie Shortt BPL Member
PostedJan 27, 2013 at 4:54 am

Tyler, I’m about 20 miles outside of Raleigh, I’m a Hokie, but living near NC State lets me route for the Pack so I was happy with last nights win.

As Newton said, he credited the first pic to me. That’s my fence in the back ground.

I like where you are going with the design. Here is a link to my basic trapezoid tarp that uses a cat ridgeline…

LytW8 Cuben Tarp

click the instructions link for details on the cat cut. I use a 3″ deflection which is a lot. I’m real happy with how tight it sets up, but 3″ does take out 6″ of width from the middle of the tarp… 2″ would be a good compromise.

Jamie

John Donewar BPL Member
PostedJan 27, 2013 at 5:24 am

+1 for "I would agree with Jerry on the 2" deflection."

We all seem to be in full agreement on the amount of deflection.

My amount of deflection was 2 9/16" over a 120" ridge line.

FWIW using the Catenary Curve Spreadsheet 2 9/16" of deflection over a 120" ridge line works out to a degree of severity factor of 700.

Use the spreadsheet and play around with the numbers. Trig is not my strong suit by any stretch of the imagination. After doing some quick and crude math my "rule of thumb" deflection factor works out to .25625" per foot of ridge line.

FWIW 9/16" equals .5625". 2.5625" / 10' = .25625" of deflection per foot of total ridge line length. Apply the deflection to the center and work out to "0" at the ends. Use the spreadsheet to get the deflection along the other points of the curve.

Sorry for the math lesson so early in the morning. ;-)

Party On,

Newton

John Donewar BPL Member
PostedJan 27, 2013 at 6:21 am

Jerry said;

"One thing about using brown paper for a template, is it tends to bend a little which will make the amount of catenary deflection more or less. If it bends differently for the two sides, they won't match."

The way that I solved this problem was to vertically (approximately 90 degrees in relation to the seam) pin my brown paper template in place on each piece of material. Making sure to keep everything as flat as possible, I used a sharpie to trace the "cut" line along the edge of the template/pattern onto the material. All that is left then is to cut carefully down the line from one end to the other on both pieces of material.

Due to the curved nature of the seam some bunching of the material is inevitable but my flat felled seam turned out to be just that when finished, flat! ;-)

Party On,

Newton

Viewing 25 posts - 26 through 50 (of 58 total)
Loading...