Topic

Bivy Plans – Checking on materials

  • This topic is empty.
Viewing 25 posts - 1 through 25 (of 58 total)
Tyler Miller BPL Member
PostedJan 1, 2013 at 5:15 pm

I'd love some input here. I'm planning on making my first bivy, based on the lytw8 design, to be used under a 5'x9' flat sil tarp – http://www.lytw8.com/uploads/LytW8_Simple_Bivy_Design.pdf

Edited to reflect input given so far.

Here's my plan
-6" high wall on the head end
-8" high wall at the foot end
-mesh across the entire head area, starting with where it tapers off at the shoulders
-silnylon bottom
-no sealing to help with breathability (and since I'll have it under a tarp
-one shock cord to keep the net off my face
-zipper across the chest and down the left side for an easier entry

todd BPL Member
PostedJan 1, 2013 at 6:56 pm

1 – Not sure about the bivy length, but I'm 6'1" and I didn't like having to crawl under a 5×9.
4 – run the zipper across and ~24-30" down one side
5 – The process for a bathtub should work for both
6 – I wouldn't add tieouts to the foot of a bivy for fear of them tearing out. If your pad is inside it, then you'll really have to thrash around to move the foot end much

Please post pics when you're done!

Todd

Tyler Miller BPL Member
PostedJan 1, 2013 at 7:50 pm

Thanks! I'll be sure to post photos when I'm done.

Question about fabric for the top layer – does 1.1 ripstop work well here? I want it to be breathable to reduce condensation, but water resistant enough to keep my bag safe from dew and splashes.

Like I said, it wont be a standalone bivy. I'll have a tarp – either a MYOG Nightwing (cat-cut A-frame) or I might make a 5×9 sil tarp….but not likely.

Jerry Adams BPL Member
PostedJan 1, 2013 at 7:55 pm

I like the zipper down the middle lengthwise, about half way. Although I haven't heard too many others with this configuration so this may be too far out.

Sew the four corners to make your bottom like a bathtub floor. Then sew the top to it, sort of like the shingles of a house, so any water will flow out, onto the ground, rather than into the bivy.

Jerry Adams BPL Member
PostedJan 1, 2013 at 8:02 pm

If you want to make it lightweight, 1.1 ounce is sort of heavy.

Nobul from http://www.titaniumgoat.com/index.html is fairly cheap, very lightweight, and somewhat water resistant

M50 is also very lightweight, from thruhiker.com, may be more water resistant, but more expensive

Tyler Miller BPL Member
PostedJan 2, 2013 at 5:55 am

Bottom: 3 yards of silnylon 2nds – ~1.4 oz/yd
Top: 2 yards of nobul1 – .67 oz/yd
Zipper – 5' of #3 w/ 1 double pull
Mesh – using some scrap 0.9 oz/yd netting
Mesh tie-out – 3/8" gross grain w/ techline for a tieout

Do you guys find it necessary to have a tie-out on the mesh to keep it off your face? I'm sure this is just preference, but I'd love to hear some.

Edit – zipper along diameter, starting at the head and going ~5' down the right side.

Jerry Adams BPL Member
PostedJan 2, 2013 at 7:50 am

Oh, by the way, your 2nds sil-nylon will leak water a little on the bottom.

If you're sleeping on a pad, the bottom of it will get damp. If you just set on it something light, e,g, a flashlight, that might be okay. Maybe some sil-nylon batches are better.

One solution is to use the "Shield" sil-nylon from thru-hiker.com

Another is to take mineral spirits : silicone maybe 10:1, it takes maybe 10 minutes of occasional stirring to get it completely dissolved, then paint the entire interior bottom. This will also seal any seams. Let it cure for 24 hours, or even several days. It's find of stinky the first 12 hours or so.

I've tried both successfully

robert v BPL Member
PostedJan 2, 2013 at 7:52 am

My bivy, that was made for me, has a zipper that starts above my head and goes half way down the side along the seam. That way it is just a zipper along the seam. Easy in and out and seems like it would be easier to sew that way.

Tyler Miller BPL Member
PostedJan 2, 2013 at 8:27 am

I'll change my order to get some sil 1sts, but I'm ordering from Backwoodsdaydreamer. Their sil 1sts are said to have a HH of 1000mm or greater. Is the Shield Sil from Thru Hiker a better choice? I hate to pay for three shipping charges. I ordered the nobul1 from TiGoat.

Jerry Adams BPL Member
PostedJan 2, 2013 at 8:32 am

I forget what HH of Shield is. Richard measured it. Maybe 2000?

I know what you mean about shipping charges.

All I know is the experience I gave.

If you get 1sts instead of 2nds it may be better

If you find that it leaks unacceptably, then you can then coat it

Tyler Miller BPL Member
PostedJan 2, 2013 at 10:01 am

How does this sound instead:

Bottom: 3 yards of silnylon 1sts – ~1.4 oz/yd
Top: 2 yards of nobul1 – .67 oz/yd
Zipper – 5' of #3 w/ 1 double pull
Mesh – using some scrap 0.9 oz/yd netting

No tie outs. I realized I wont need it since I sleep predominantly on my side.

PostedJan 2, 2013 at 10:13 am

Tie-outs won't rip out if you use a length of shock-cord between the tie-out and the stake.

Tyler Miller BPL Member
PostedJan 2, 2013 at 10:51 am

Yeah I was going to do that, but I figured I don't need any tie-outs. If that changes I can easily add that on.

PostedJan 2, 2013 at 12:29 pm

Having made a Lytw8 bivy, here's my 2 cents:

I'm taller than Jamie and use a Long bag, so I added (I think) 6" to the pattern length. Good call there; I'm very happy with the length. To keep my costs down by not needing to order another yard of fabric, I lengthened the mesh and head section of nylon by 3" each to achieve that 6". If I were to do this over, I'd add all 6" to the mesh. I get condensation inside when it's all closed up because of bugs. No bugs, I now sleep with the mesh underneath my bag's hood so all my breath dissipates.

I did the chest entry and extended it as one piece down the side by about 30". Definitely a good idea; sometimes I wish I had made it even longer down the side.

I did not add anything to the width, but I wish I had added a few inches, at least in the chest area. I can read and write in my journal inside the bivy with it closed up, but it's kinda tight. A little more circumference would make that easier. I'm not a big shouldered guy, so if you are, add even more.

I didn't bother with any tieouts beyond the one on the mesh to pull it away from my face. I figure I won't be leaving it while I go gallivanting about the hills, so it will always have weight to pin it down in place. My tieout is on the mesh, but another on the nylon would be nice.

I have size 14 feet, so I made the folded corners on the feet 10" (5" sil, 5" breathable). The head I think I made 8" (4" sil, 4" breathable), but maybe it was 6". I could check if you're curious.

Lastly, if you haven't ordered materials yet, I vote that you just make this one as cost effective as possible. I used seconds of everything I could and used NoSeeUm mesh instead of NanoSeeUm mesh. Haven't had any problems with water seepage through the sil 2nds, but I am always careful about site selection. I toy with the thought of ordering the absolute lightest materials from different shops to make my ultimate bivy and to get it under 4 ounces, but I have a hard time justifying that expense. I'm more than happy with my "heavy" 6.5 ounce bivy that cost a quarter of what a 4 ouncer would cost.

I posted mine in the original thread; it isn't anything special in there compared to the others:
http://www.backpackinglight.com/cgi-bin/backpackinglight/forums/thread_display.html?forum_thread_id=44617&disable_pagination=1

-Jeff

Robert Burke BPL Member
PostedJan 2, 2013 at 1:17 pm

Quick question. Have any of you made your own Tyvek bivy? I was thinking of making a tyvek with a side zip for winter tarp use. I have been practicing with my sewing machine on tyvek envelopes and have come to the decision, I am going to use a bonding agent or tape.

Do any of you recommend a Tyvek bonding agent and source of Tyvek? Are all Tyvek's created equal?

Tyler Miller BPL Member
PostedJan 11, 2013 at 7:59 pm

I've got my materials and I'll start cutting tomorrow AM. I have a LW Exped Synmat UL 7 (77.5" x 26" x 2.8"). If I'm 6'3'' with size 12 feet, sleeping in my LW UL7 in a long/regular width 20* EE RevelationX. I want to make sure I cut enough to fit the pad and not be constricted.

Here's my plan:

Floor: 1.1 sil 1sts
96" long
34" wide and 8" high at the head
30" wide and 10" high at the foot
38" wide at the chest

Top: Nobul1 + mesh + zipper
70" nobul1 + 26" mesh


@Jeff
J – could you check on your specs on the head and foot end?

Jerry Adams BPL Member
PostedJan 11, 2013 at 9:48 pm

You could get a sheet of cheap plastic from the home improvement store and make one the size you're think about. Use tape to close it up. Put your pad, sleeping bag, and you inside and roll around a little to simulate use to see if it's the right size.

PostedJan 16, 2013 at 12:02 pm

The foot end of my bivy is indeed 10 inches tall, 5" of sil and 5" of breathable nylon. The head end is 6" tall, 3" of sil and 3" of breathable. When you figure in the drape and stretch, it's enough room on both ends for me.

-Jeff

Tyler Miller BPL Member
PostedJan 16, 2013 at 12:21 pm

No worries. Thanks! It's been slow-going with the build. So far I have the top and bottom fabric and mesh cut, but nothing is sewn.

I'm going to sew the mesh to the top panel with a flat felled seam – I've done a few of those, so that should be easy.

Any tips for sewing the zipper? Never done that.

And once the zipper is on, do I sew a single stitch along the perimeter to join the rest of the top and bottom? I'll do this all inside out so the exterior looks clean when I'm done.

Lastly, with the bathtub bottom/top – I was planning on sewing the corners as my last step. My thought is that there could be a slight discrepancy and it might not line up perfectly if I sew the corners prior. Let me know if I should in fact sew the corners prior to sewing the top and bottom together.

Thanks!

PostedJan 16, 2013 at 9:59 pm

about the zipper: my generic advice is think real hard about how it works, with all the folds involved.

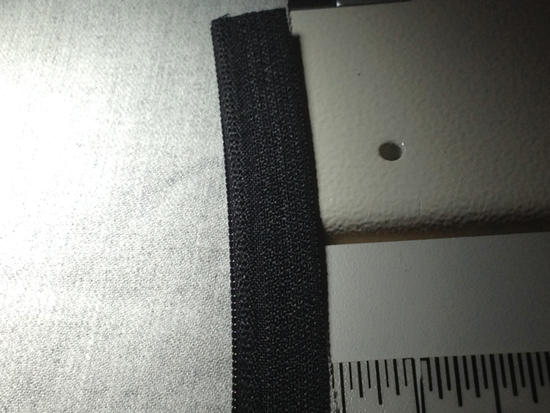
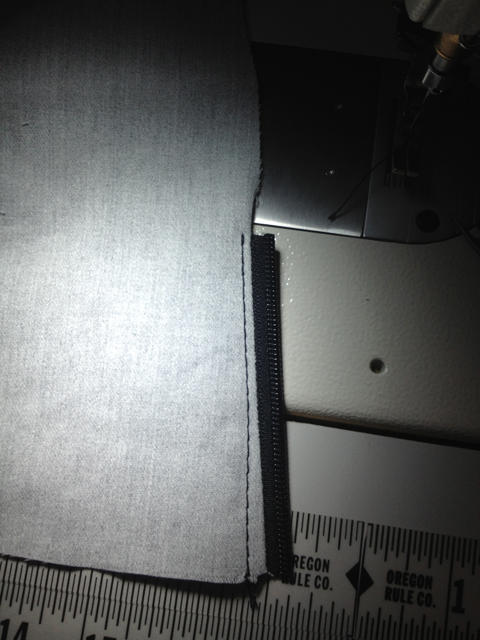
Assuming there's no flap over it, the easiest way to do a good job is to put the right side of the zipper to the right side of the fabric, matching the edge of the tape to the edge of the fabric, with teeth inside:zip 1

Stich, then fold so the teeth are in the gap and stitch again:zip 2

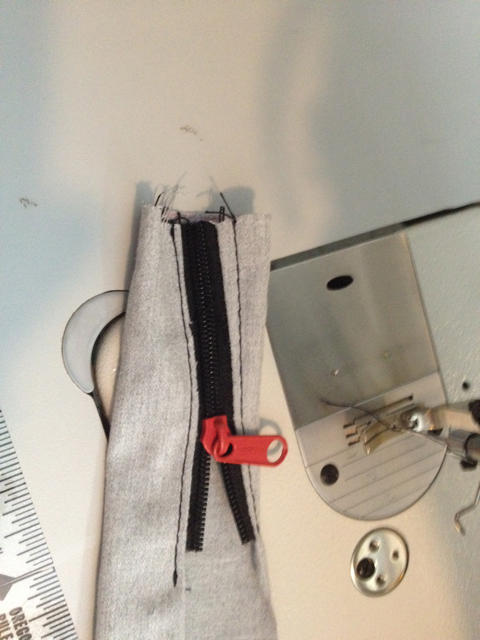
Do the same on the other side, and install a slider:zip 3

If there is a flap, you can do pretty much the same thing, either inserting a seperate flap piece between the shell and zip, or by offsetting the zip teeth from the edge before doing the top stitching.

Tyler Miller BPL Member
PostedJan 18, 2013 at 9:19 pm

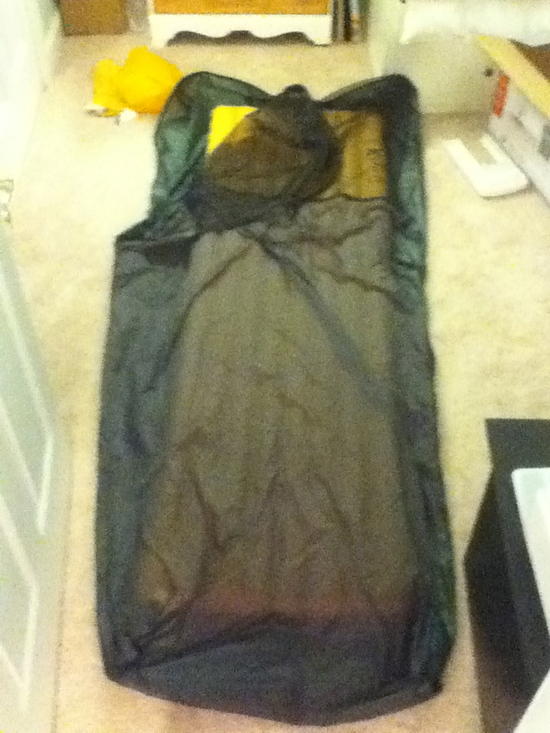
Thanks for all the help! I just finished! Once the fabric was cut, it didn't take me more than 2-3 hours to do all the stitching. More (and better) photos to come, but here's a quick one with my Synmat UL 7 LW. Goodnight!

Bivy Photo 1

John Donewar BPL Member
PostedJan 19, 2013 at 4:17 am

Tyler,

Get some rest as it seems you were up late putting the final touches on you bivy.

I can't wait for the posting of the "More (and better) photos".

Party On,

Newton

Tyler Miller BPL Member
PostedJan 19, 2013 at 8:30 am

I'm really pleased with it overall. I can see a few areas where I could improve next time I build one, but seeing as this was my first time sewing zipper (without a zipper foot too), I think it turned out great.

Here's a few pictures:

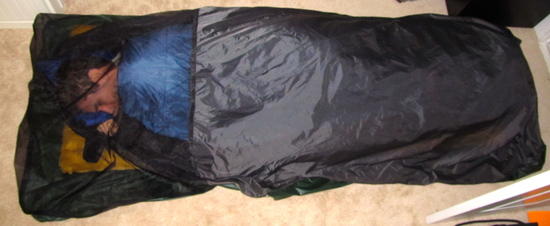
I'm 6'3'' and I feel like this is plenty of room. Getting in and out is really easy. I have the zipper going 2' across the top and 3' down the right side.
Bivy with me inside

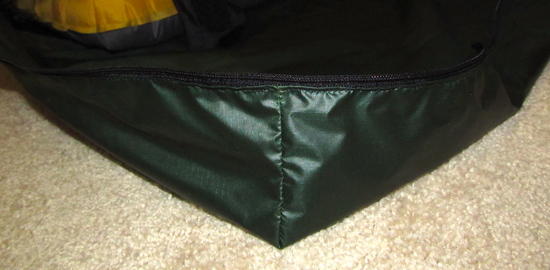
Head-end zipper and bathtub floor detail.
Bivy head zipper detail

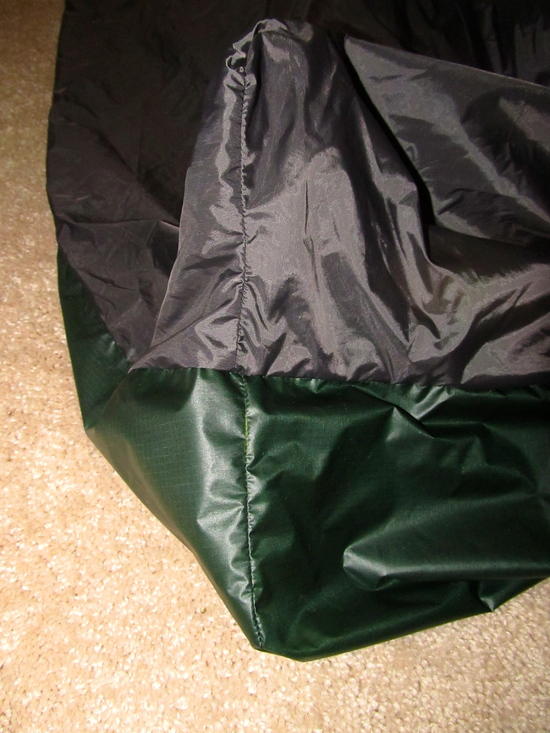
Foot-end detail. I had to increase the height of the "bathtub" on the top piece because it turned out to be a little wider than the floor…but no big deal. My plan was 6" high at the foot, and 10" high at the head. I think it turned out to be around 7" high at the foot and maybe 8" or 9" at the head.
Bivy foot detail

Tyler Miller BPL Member
PostedJan 19, 2013 at 8:51 am

So my next step is to make a flat tarp to cover this bivy, which measures approx. 96" x 47" at it's longest/widest.

I have roughly 150" x 64" of Sil to work with for the tarp and my thought is to make it 5' x 9' after reading through posts on here.

My only question – How many tie-off points do I need? I'll be using it with up to 2 trekking poles and want enough variation to go from dew protection to downpour cover. I'll probably bring along an extra groundcloth if I anticipate lots of rain.

Would 5 across, 3 down, and 1 in the center be sufficient?

Viewing 25 posts - 1 through 25 (of 58 total)
Loading...