Topic

Tarp Tie Out Logic Check


Forum Posting

A Membership is required to post in the forums. Login or become a member to post in the member forums!

Home Forums Gear Forums Make Your Own Gear Tarp Tie Out Logic Check

  • This topic is empty.
Viewing 25 posts - 26 through 50 (of 76 total)
  • Author
    Posts
  • #1816974
    Karple T
    BPL Member

    @ctracyverizon

    Locale: Mid-Alantic

    I don't know if any of you folks are sailors but I have been sailing all my life and my father owned a sail loft in Hawaii when I was growing up there.

    I would recommend going to a sail loft and seeing how they make their clue and tack on small high performance sails.

    Check out this video and you'll see some of what I'm talking about.
    http://www.youtube.com/watch?v=5c2eJSafE3M

    You will get some great ideas from seeing what modern sail makers are doing. They have the same criteria. Be as light as possible while maximizing strength and durability.

    Cheers,
    craig

    #1816975
    drowning in spam
    Member

    @leaftye

    Locale: SoCal

    Craig, if you don't already know, a designer at CubicTech used to make sails.

    #1816985
    Karple T
    BPL Member

    @ctracyverizon

    Locale: Mid-Alantic

    I know the story : )

    It is 50 % to 70% lighter than Kevlar, four times more durable than Kevlar, and lasts as long as Spectra.

    Let this blow your minds! How would you like to have them make your tarp.

    http://www.youtube.com/watch?v=jKwV6F3_Hl4&feature=related

    Cheers,
    Craig

    Edit:
    To Jerry below – The material in the video is not cuban but it would work for it. He double side tapes the pieces together and then tapes them to the sail and then sews them on.

    #1816993
    Jerry Adams
    BPL Member

    @retiredjerry

    Locale: Oregon and Washington

    Interesting Video, Craig.

    He taped, then sewed his main seams. He taped/sewed many pieces of cuben together to make his sail.

    For the "tarp tieout" he had maybe 6 thicknesses for the "tarp tieout" (grommet in his case). No need for that. The failure in Steve's test wasn't the grosgrain/cuben connection. If you have a grommet, maybe you need more thicknesses.

    The tieout to main body connection was a circular piece. He didn't do fingers or stars.

    Another thing he said was the best seam was when you're sewing at maximum speed. I'll have to investigate that.

    Another thing hes said was you can never use too much tape. He did several parallel pieces at places.

    And I really appreciate Steve Evan's stuff.

    Don't let one harsh sounding comment affect you.

    Someone can always find criticisms or improvements to any test.

    I think you should get one of those super-high speed cameras they use to analyze explosions. They only cost $100,000…

    #1817029
    Daryl and Daryl
    BPL Member

    @lyrad1

    Locale: Pacific Northwest, USA, Earth

    I watched the videos Craig posted. Very informative. I'd love to have a sewing set up like the individual shown in the how to do it video.

    It was fun to see how the ideas we have been discussing here actually get implemented. For example, early in the North Sail video, there was a quick flash of finger like strips being laminated to a sail. Looked a lot like David's mock-up with more strips.

    Jerry I too noticed that the "how to do it" guy made reference to a lot of high speed seams. I wasn't sure of his intent in that comment. He may have meant that a lot of seams were good or that some benefit arises from making the seams at high speed.

    I also noticed that the how to do it guy was fairly causual about cutting the fabric. When sewing tents I sometimes get up tight about marking and cutting fabric. Watching him encourages me to relax a bit on this issue.

    Good info coming from this thread. Responses have exceeded my expectations.

    #1817043
    Jerry Adams
    BPL Member

    @retiredjerry

    Locale: Oregon and Washington

    "For example, early in the North Sail video, there was a quick flash of finger like strips being laminated to a sail. Looked a lot like David's mock-up with more strips."

    But the fingers overlapped at the corner where the grommet goes to make multiple layers. This makes it more difficult for the grommet to pull out. This isn't an issue for a sewn grosgrain, based on Steve's test, it failed at the main tent fabric right next to the reinforcement.

    The actual junction between the reinforcement and the main tent was a circular shape.

    So, it would be just as good to have a single layer circular reinforcement.

    In Steve's video, the reinforcement was straight. Maybe it would hold up a little better if it was circular.

    Another idea – have a reinforcement on both sides of the main fabric. Then, when it failed, it would stay more in shear.

    And another video of Steve's is how to make Cuben tarp, which is more directly applicable to making tarp if anyone hasn't seen it http://www.suluk46.com/RandD%20-%20RD7%20Cuben%20Fiber%20Tarp.html

    #1817069
    Daryl and Daryl
    BPL Member

    @lyrad1

    Locale: Pacific Northwest, USA, Earth

    If we combine David, Eugene and Jerry's's observations/ideas and apply them to Steve's test we might be able to increase the breaking strength in Steve's experiment with no additional weight.

    (1) Use 2 or 3 layers of .33 cuben fabric, feathered out as Eugene showed. Steve used heavier cuben for the reinforcement piece.

    (2) Reposition the nylon loop per David's observation.

    (3) Round the edge of the reinforcement patch where it meets the parent fabric, per Jerry's suggestion.

    (4) Add reinforcement patches to both sides of the parent fabric (Jerry).

    Any other ideas for possibly improving the strenth of the tie out shown in Steve's link without increasing the weight?

    I like working with one sided tapes for reinforcements. They are quick and easy to apply and produce a firm bond between reinforcement patch and parent fabric. Unfortunatly most of them are heavy. For example adhesive backed insignia cloth weighs 3+ ounces per square yard. The ideal product would be adhesive backed .33 cuben but I doubt that it exists.

    #1817122
    David Olsen
    Spectator

    @oware

    Locale: Steptoe Butte

    "I like working with one sided tapes for reinforcements. They are quick and easy to apply and produce a firm bond between reinforcement patch and parent fabric. Unfortunatly most of them are heavy. For example adhesive backed insignia cloth weighs 3+ ounces per square yard. The ideal product would be adhesive backed .33 cuben but I doubt that it exists."

    Cubic Tech sells .7 for about $1 per foot 1" wide. Otherwise make your own with double sided and .33.

    #1817128
    Daryl and Daryl
    BPL Member

    @lyrad1

    Locale: Pacific Northwest, USA, Earth

    David,

    The .7 stuff looks good.

    Here are a couple other options I got when I googled adhesive backed mylar tape:

    here

    here

    Daryl

    #1817145
    Daryl and Daryl
    BPL Member

    @lyrad1

    Locale: Pacific Northwest, USA, Earth

    Here's an easy way to test two tarp tie outs to see which one performs better.

    here

    here

    I simply put a stick through each loop and pulled until one gave out.

    I don't get any numerical ratings of things but it shows me which of two options is stronger. As I improve my technique I can stage these one on one battles and ultimately come up with the winner. Quick and dirty and kind of fun.

    #1817154
    David Thomas
    BPL Member

    @davidinkenai

    Locale: North Woods. Far North.

    Daryl: I like it. Much as I lust for numerical data, that rig certainly lets you test methods against each other quickly. If you do it on a longer piece of material, the winner of the first round is already in place to challange the next contender.

    #1817171
    David Olsen
    Spectator

    @oware

    Locale: Steptoe Butte

    Here are some posted awhile back using similar measurement techniques. Used a spring
    scale for a bit more info.

    cuben 1 vs sil before.jpg
    cuben 1 vs sil before

    cuben 1 vs sil center seam.jpg

    cuben 1 vs sil center seamcuben 1 vs sil failure 42 lbs.jpg

    cuben 1 vs sil failure 42 lbscuben 1 vs sil tieout detail b.jpg

    cuben 1 vs sil tieout detail b

    cuben 1 vs sil tieout detail.jpg

    What I learned from this is that an unreinforced tie out on either the cuben .5 or
    the silnylon 30d type 66 held while the nylon thread , sil and cuben with a single seam
    all failed at roughly the same time.

    #1817266
    Jim Colten
    BPL Member

    @jcolten

    Locale: MN

    Jim,
    Thanks for the offer to ask your son.
    Daryl

    caveat: my adviser has no experience with cuben fiber material (HDPE/mylar laminate) … just lots with composites using kevlar, fiberglass and carbon fiber with epoxy resins.

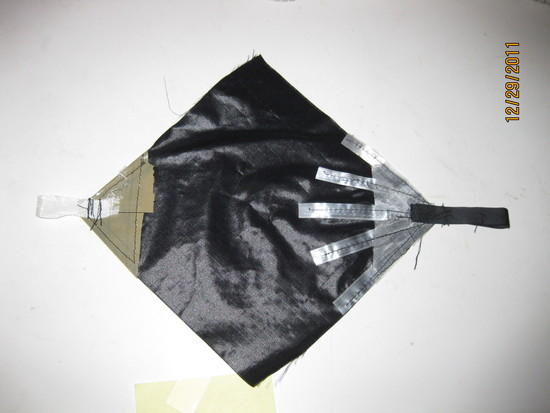
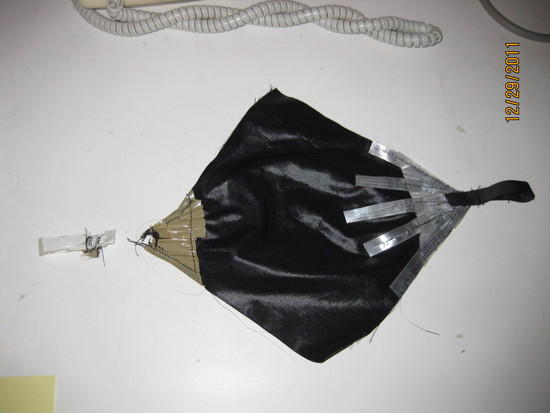
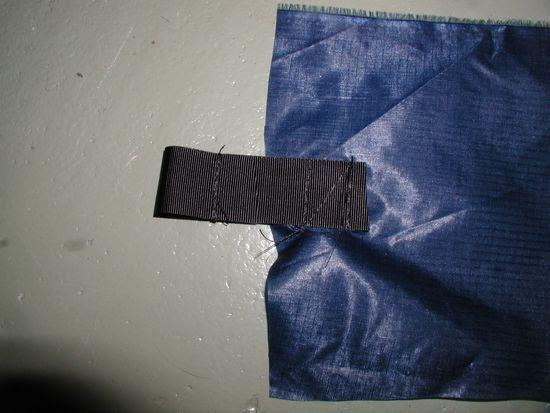
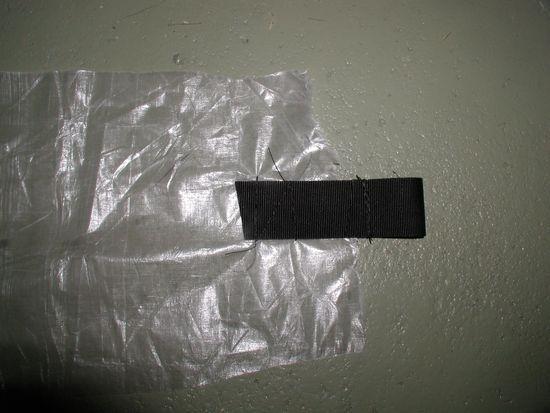
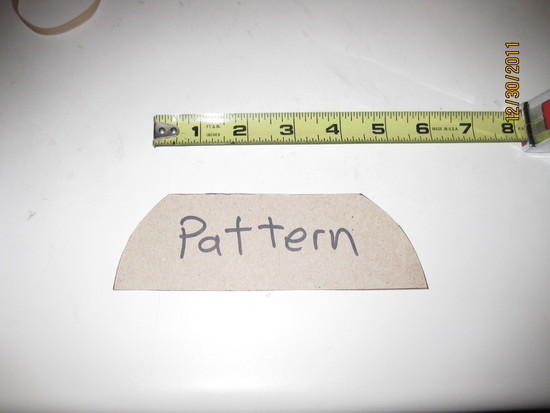
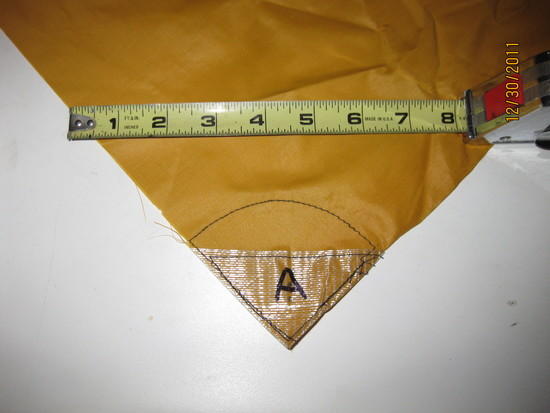
    The question I posed: "If I do a decent job of gluing a reinforcing patch to the corner of a tarp and then stress it with some load will a larger patch mean a lower concentration of stress at the boundary by virtue of the boundary being longer?"

    His unequivocal answer: Yes

    But he then qualified the answer with by saying that you can sometimes create a failure on the larger patch with less load than on the smaller by varying the circumstances … direction of the load, elasticity of the materials (cuben fiber is more elastic on the bias than parallel to the fibers) and other factors. But all other things being equal, the larger patch will produce a stronger corner.

    Also, since there's failure modes other than just the fabric failure the best arrangement is one where all parts of the corner have about the same breaking load. SO, a very large patch might avoid fabric failure at the boundary of the patch because it is weaker and fails first at the stitch lines where the webbing is sewn on. So then you beef up the area where it is stitched enough and the failures happen elsewhere. The best solution is one that is balanced and "strong enough" with the lowest weight or cost.

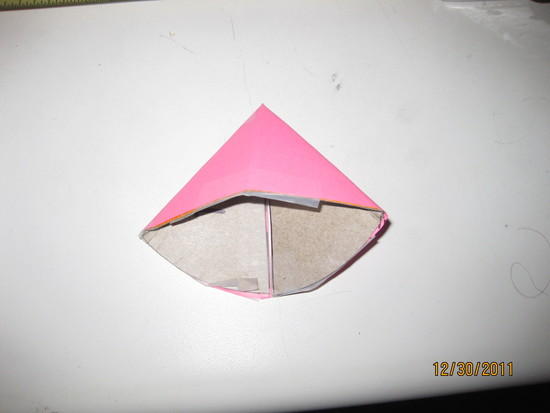
    Regarding multi-layer corner patches he advocates the "upside-down wedding cake" layup. Like this:

    corner
    _____________________
    ___________ tarp fabric ↓
    ===============================================

    or for many layers, an interleaved layup:

    corner
    _______________________
    ______________
    ___________________
    __________ tarp fabric ↓
    ===============================================

    But he doesn't recall seeing that when using fewer than 5 layers

    #1817287
    David Olsen
    Spectator

    @oware

    Locale: Steptoe Butte

    If then your cord is just a bit weaker than the tie out, failure will be easily field
    repairable. Sort of like those darn shear pins on my snow blower I keep needing to replace. At least I don't have to replace a clutch or motor.

    #1817377
    Daniel Sandström
    Spectator

    @sandstrom-dj

    I'm so good.

    http://www.backpackinglight.com/cgi-bin/backpackinglight/forums/thread_display.html?forum_thread_id=50440

    No just joking. :) But I do think reinforcement patches should be rounded as a sharp corner will concentrate forces. The feng shui of engineering…

    I did my reincforcement patches round, on both sides so that totals to three layers at the tieout points. Patches glued to the tarp and then sewed along the edge. The x-box stitch is as large as possible, to distribute the load. Don't really agree with Ron Bell of MLD on this one, he said to just stitch along the edge – though I might be wrong. The main tieouts (8) are halv and 1/4 of a circle while the four reserve side tieouts are the leftovers, "inverse" circles. Not sure witch holds up better, but I like them all. Have not had any sign of failiure yet.

    Edit:

    PS. Everyone seems to hail "cuben fiber fabric" as a whole. Do people overlook the fact that, Yes the cuben fiber itself is very strong, we seldom see that break, but the mylar isn't as strong. It's the mylar that fails.

    #1817404
    Jerry Adams
    BPL Member

    @retiredjerry

    Locale: Oregon and Washington

    "The x-box stitch is as large as possible, to distribute the load. Don't really agree with Ron Bell of MLD on this one, he said to just stitch along the edge – though I might be wrong."

    The failure was at the junction between reinforcement and main fabric, or maybe it was just in main fabric.

    So, stitches that connect grosgrain to reinforcement isn't critical. Stitch along the edge, x-box, zigzag – probably any of those are just as good.

    #1817469
    Daryl and Daryl
    BPL Member

    @lyrad1

    Locale: Pacific Northwest, USA, Earth

    Daniel,

    Thanks for the link.

    "Have not had any sign of failiure yet."

    So it looks like the 5 minute epoxy you used is holding. That's good news as it is readily available.

    Daryl

    #1817474
    David Olsen
    Spectator

    @oware

    Locale: Steptoe Butte

    Sewing above the hem adds strength.

    Notice where the fabric tore on the first test-
    along the hem. Then when reinforced with extra fabric the grommet pulled from the fabric
    rather than tear at the hem.

    The z tack spread out the force and held in both cases without reinforcement.

    There are a bunch of other factors involved too.
    Kind and weight of thread
    Size and kind of needle
    Stitch length and pattern
    Bias, Kind of fabric, stretch,size and shape of reinforcements as mentioned

    Testing will sort out what works well enough and beyond which is just
    unneeded labor.

    Tie out test gromet vs sewn

    Tie out test, grommet vs z tack over hem stitch on type 66

    silTie out test reinforced gromet vs z tack over hem stitch

    Tie out test, reinforced grommet vs z tack over hem stitch on type 66

    copyright Dave Olsen, Oware

    #1817494
    Tim Zen
    Spectator

    @asdzxc57

    Locale: MI

    <del></del>

    #1817495
    Daryl and Daryl
    BPL Member

    @lyrad1

    Locale: Pacific Northwest, USA, Earth

    David,

    I like your line:

    "Testing will sort out what works well enough and beyond which is just
    unneeded labor."

    It is good for me to keep this in mind as I tinker away.

    Daryl

    #1817747
    Daryl and Daryl
    BPL Member

    @lyrad1

    Locale: Pacific Northwest, USA, Earth

    This reinforcement is a 2" wide by about 6" long piece of strapping tape that wraps around a square tarp corner. It feels very secure and incorporates many/most of the ideas we have been discussing here. I think I'm getting close to the "good enough" stage of this project.

    here

    here

    here

    Details

    The "pattern" photo shows the shape of the single piece of 2" wide and 6" long tape used to wrap the corner of the tarp.

    The puke yellow piece = parent fabric.

    The whitish piece = the reinforcement made from 2" wide strapping tape. When the tape is wrapped arouind the tarp corner it forms a flattened cone. One side of the flattened cone has a straight edge. The other side of the flattened cone has a curved edge and extends about an inch further onto the parent fabric than the straight edge on the other side of the fabric. Heres a photo of the carboard pattern as it would be shaped if it were wrapped around the corner of the parent fabric like the strapping tape. In the photo one side of the pattern is pink and the other side is cardboard colored.

    here

    "A" = one side.

    "B" = other side.

    Black stitching allows you to see the shape of the other side from each side.

    Reinforcement is two layers thick at the corner then transitions to 1 layer thick for about the last inch or so.

    Final boundary of reinforcement patch is rounded.

    Very easy to apply. This is the first time I tried it and it came out close to perfect. Only takes a few minutes.

    Could be used for any width of reinforcement tape or fabric. You just need to make a new pattern which is very easy.

    It is a little hard to grasp by just looking at the photos. It will be much clearer if you make one yourself. You can do so in just a few minutes. I've spent much more time writing this post than I did creating the reinforcement.

    #1817753
    Bob Gross
    BPL Member

    @b-g-2-2

    Locale: Silicon Valley

    Strapping tape has good strong fibers, but is the adhesive that permanent?

    Most of the stuff that I have would slide off on a hot day.

    –B.G.–

    #1817767
    Daryl and Daryl
    BPL Member

    @lyrad1

    Locale: Pacific Northwest, USA, Earth

    Bob,

    I used strap tape to illustrate the concept but it isn't my first choice.

    Based upon the ideas discussed so far my preferred material would be 2" wide .33 ounce adhesive backed cuben fiber tape….but I don't think it exists. As pointed out in some of the earlier posts, however, there are some adhesive backed cuben fiber tapes that are pretty close to this ideal.

    Having said that…..I actually have a myog tent that is 10 years old and still has the strap tape on the seams that I applied when I made it. The tape is sewed also.

    Daryl

    #1817769
    Sam Farrington
    BPL Member

    @scfhome

    Locale: Chocorua NH, USA

    So for the corners, is it to be the straight or the rounded inner edge?

    Theory: If the inner edge is rounded, to be equidistant at all points from the stress point, the force will be more evenly distributed than with the straight edge, triangular-shaped patch. Do you think?

    #1817793
    Daryl and Daryl
    BPL Member

    @lyrad1

    Locale: Pacific Northwest, USA, Earth

    Samuel,

    It is both.

    That is one piece of tape wrapped around both sides of the fabric at the corner. I think I need another couple of photos.

    Daryl

Viewing 25 posts - 26 through 50 (of 76 total)
  • You must be logged in to reply to this topic.
Forum Posting

A Membership is required to post in the forums. Login or become a member to post in the member forums!

Get the Newsletter

Get our free Handbook and Receive our weekly newsletter to see what's new at Backpacking Light!

Gear Research & Discovery Tools


Loading...