Hey!
I outline my plans for my pyramid below. Please take a look if you think I am missing something or if I am doing something you don't recommend. I'm using the article Jerry wrote to figure out the calculations, what I need to buy and how to put everything together: http://www.backpackinglight.com/cgi-bin/backpackinglight/myog_silnylon_floorless_2-person_tent.html
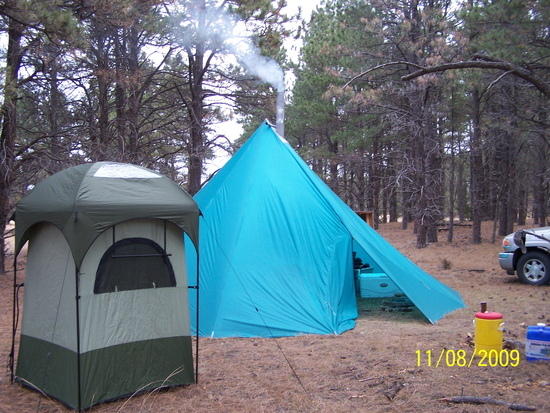
Dimensions: 10'x10' Pyramid
Pole Height: 72"
Dimensions of Each of the 8 Pieces: Height: 96.69", Width: 60", Diagonal: 108.74" (this was calculated using a 2" perimeter air gap and assuming the silnylon will stretch 2")
– My plan is to have 8 stake loops for the tent (using the stake loop design from the article). Four for the corners, and one for the middle of each side (one of which is the door).
– I will use a #8 coil zipper that will be about 81.5" in length from the bottom for the door.
– I will use a piece of 200D Oxford for reinforcing the apex that will hold the pole.
– For stability I want to use five larger stakes for the corners and the door (maybe MSR Ground Hogs???) and then lightweight titanium stakes for the remaining sides.
– I plan on strapping two trekking poles together for the center pole.
– In most cases, I envision pitching the pyramid so that there is a 2" air gap.
– I will attach NoSeeum perimeter netting that is 12" wide.
I am not quite sure what I am going to do about a floor and whether or not I am going to attach the floor to the pyramid. I have plenty of silnylon to make a floor…I'm just concerned that it will be way too slippery .
I'm going to be following the instructions in the article exactly for sewing everything together.
Assuming there is no issues with this (that you guys can see), I'll go ahead and order everything else this week and probably start putting things together in 2-4 weeks. I couldn't do this without the help from you guys (articles and useful posts)! Thanks.