Topic

Two Ounce Pack Frame


Forum Posting

A Membership is required to post in the forums. Login or become a member to post in the member forums!

Home Forums Gear Forums Make Your Own Gear Two Ounce Pack Frame

  • This topic is empty.
Viewing 5 posts - 26 through 30 (of 30 total)
  • Author
    Posts
  • #1800770
    Daryl and Daryl
    BPL Member

    @lyrad1

    Locale: Pacific Northwest, USA, Earth

    Some recent discussions about light frame packs (in the gear forum) prompts me to update this thread with photos and info for the latest version of my lightweight frame pack.

    It has about 50 liters of volume and weighs less than 13 ounces (front and back bags, frame, waist belt). Additional items can be lashed to the aluminum top bar.

    I replaced the time tested 1.9 ounce uncoated nylon with 1.1 ounce uncoated nylon for this version. Haven't used it enough to say how this lighter fabric will hold up over time but it has done well with 30 lbs of groceries so far. .

    Back bag is attached to frame by two top corner loops and velcro on the bottom two corners. Can be taken off and on the frame quickly and easily.

    I used an envelope shape instead of the more typical box shape for the back bag. This envelope is 2 feet wide and 30" tall when flat.

    Top of both front and back bags has a drawstring closure.

    Waist belt is 3" wide unpadded nylon webbing. To improve fit I removed a small triangle of webbing from the back center of the belt. This allows it to contour better around my hips. So far…very comfortable.

    I inserted a fairly stiff piece of 24" X 30" blue cell foam inside back bag. I also sleep on the foam. It can stay in the pack while sleeping on it.

    The blue foam does a lot for the pack. (1)It shields the pack contents from my sweaty back and it cushions my back where the pack touches it. (2)It stiffens the back bag and helps it maintain its shape. (3)It holds the pack open while filling so I can just throw things into it. (4)It starts off flat when the pack is empty but bends around the contents as I fill the pack. This auto adjustment makes the pack ride well, even when only partially full. Don't need cinch straps.

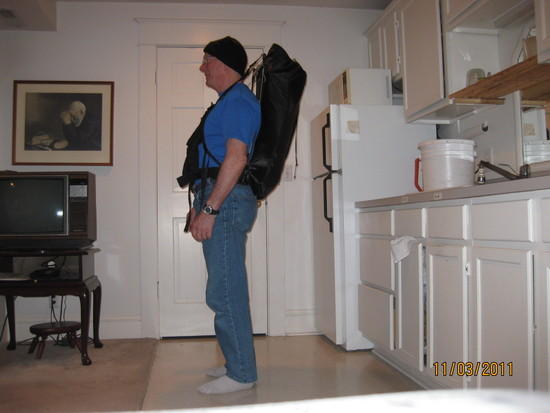
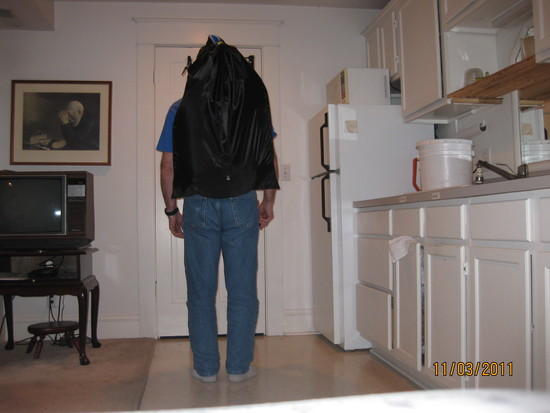
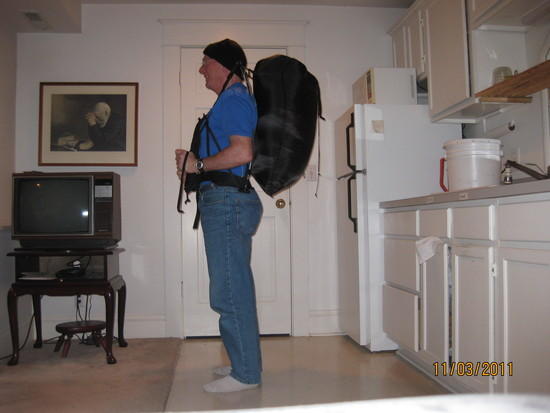
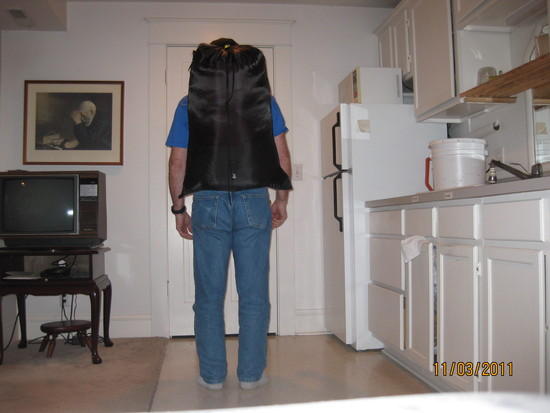
    For these photos I left the front bag empty. It would normally be filled with about 5 lbs of stuff.

    Photos show 2 shots each of empty pack, partially filled pack and full pack.

    here

    here

    here

    here

    here

    here

    #1800773
    Diplomatic Mike
    Member

    @mikefaedundee

    Locale: Under a bush in Scotland

    You could earn some cash by renting advertising space on the pack! :)

    #1800925
    Daryl and Daryl
    BPL Member

    @lyrad1

    Locale: Pacific Northwest, USA, Earth

    Mike,

    Good idea. I was also thinking solar collector…..particularly when empty.

    Daryl

    #1800946
    ziff house
    Member

    @mrultralite

    I used my packs based on the same overall principal this summer, First trip was a little dicey as some of my joins needed strenghtening, and my attempt at using cuben as webbing did not always work out, but overall its a very comfortable design. both my packs got a some ''adjustments' but are now pretty bombproof. Having the weight off the shoulders is wonderfull, and i find there is still some weight on the upper front which is just as well as i'm not sure having all the weight on the hips or any one place is a good idea. As it stands i have very even distribution. I found that after several hours a little adjustment and the weight would just disappear.
    one pack is not much larger than a daypack but i can do 2 nights with a 10-12 lb load. Its an odd duck though,very specialized, i'm not sure it would be good with +20 lbs say, too much hip load and most would roll over laughing that i'm worried about 10lbs. But i find that after a long day even 10 lbs gets uncomfortable especially with say a simple daypack.

    #1804024
    Daryl and Daryl
    BPL Member

    @lyrad1

    Locale: Pacific Northwest, USA, Earth

    I've been getting a few questions about contruction details of this pack. For efficiency I'll address some of the details here. If you are not actually making one of these this will probably not interest you.

    Here's a link to some photos showing details of my latest pack.

    here

    The small machine screw you see in the top corners of the frame are from McMasterCarr. They are 4-40 size, stainless(18-8), pan head, phillips, 3/4" long with matching nylon insert locking nuts.

    The 5/8" buckles sticking out of the top corners are where I attach the front bag to the frame.

    The string (100 lb kite string)you see goes from the top corners of the frame to loops on the waist belt. It is cinched tight and holds the frame together.

    The back bag has two loops that simply go over the top corners of the frame. Two velcro loops lower down then go around the vertical members of the pack frame. The front and back bags can both be removed from the frame without taking the frame apart.

    The two 1/2" wide webs coming from the waist belt attach to my front bag bottom (or to shoulder straps if you use them).

    The 1/2" webs coming from the waist belt and the top corners of the frame are run through the T fittings and then knotted. The thickness of the web makes for a nice snug fit for the spar within the 1/2" nylon Ts.

    The 5/8" aluminum top bar makes a good handle to lift the pack. I dimpled the ends a little to encourage it to stay on the nylon T. You could also use a carbon fiber cross top bar and run it inside the T instead of over it. The aluminum bar can be drilled for shoulder straps or but the carbon fiber spars won't tolerate it.

    Enjoy.

Viewing 5 posts - 26 through 30 (of 30 total)
  • You must be logged in to reply to this topic.
Forum Posting

A Membership is required to post in the forums. Login or become a member to post in the member forums!

Get the Newsletter

Get our free Handbook and Receive our weekly newsletter to see what's new at Backpacking Light!

Gear Research & Discovery Tools


Loading...