Please note that these recipes haven't been through the final edit phase for wording but they have been tested quite thoroughly.
About Dates: Do not use the cooking dates that traditionally come in a brick for this. You want high quality dates such as medjool or honey dates that are loosely packed.
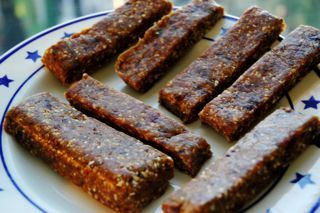
Date, Pecan, Blueberry and Ginger Bars
©2009/2010 Another Fork in the Trail
Makes 8 to 10 bars
The first time I made date bars was when I was a young girl taking a 4-H outdoor living course. As an adult, I wanted to add a little something to the recipe and I've always loved candied ginger. It gives these a nice bite, which livens the tastebuds.
1 cup dates such as medjool or honey dates
3/4 cup pecans
1/4 cup dried blueberries
1/8 cup candied ginger, chopped
Pulse the dates in a food processor until you have a thick paste. Toast the pecans, if desired, in a dry non-stick frying pan over medium heat just until they start to become fragrant. Be careful that you do not burn them. Add to the dates and pulse to chop the nuts. Remove the container from the food processor and take out the blade. Stir in the dried blueberries and candied ginger. Line a square baking pan with plastic wrap and press the mixture firmly into the pan. Refrigerate for an hour and then turn out onto a cutting board. Remove the wrap and cut into 8 to 10 bars. Wrap each bar in plastic wrap and reshape by pressing each side on a flat surface if desired.
Tip: Wipe your knife with a hot water soaked paper towel between cuts to prevent it from sticking. You can reuse the piece of wrap you lined the pan with to wrap your bars.
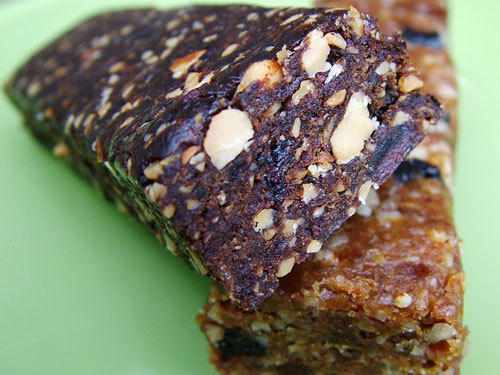
Spiced Date, Cherry, Almond and Carob Bars
©2009/2010 Another Fork in the Trail
Makes 8 to 10 bars
This version of my date bars was inspired by the Mayan Hot Chocolate in my first book, A Fork in the Trail. I love the little bit of background spice from the cayenne. Just make sure you use it sparingly or your camp mates may be in for a surprise!
1 cup dates such as medjool or honey dates
1/2 cup dried cherries
1/8 cup carob or cocoa powder
1/8 teaspoon cinnamon
a tiny pinch of cayenne pepper, to taste
3/4 cup whole salted almonds
Pulse the dates in a food processor with 1/4 cup of the dried cherries, carob powder and spices until the mixture is ground to a thick paste. Toast the almonds, if desired, in a dry non-stick frying pan over medium heat just until they start to become fragrant. Be careful that you do not burn them. Add to the dates and pulse to chop the nuts. Remove the container from the food processor and take out the blade. Stir in the remainder of the dried cherries. Line a square baking pan with plastic wrap and press the mixture firmly into the pan. Refrigerate for an hour and then turn out onto a cutting board. Remove the wrap and cut into 8 to 10 bars. Wrap each bar in plastic wrap and reshape by pressing each side on a flat surface if desired.
Tip: Wipe your knife with a hot water soaked paper towel between cuts to prevent it from sticking. You can reuse the piece of wrap you lined the pan with to wrap your bars.
Edited…. because I forgot the word "cup" in one spot