Topic

11.4 oz 78x20x2.5″ Sleeping pad :)

  • This topic is empty.
Viewing 25 posts - 1 through 25 (of 150 total)
>> Bender << BPL Member
PostedOct 9, 2009 at 1:13 pm

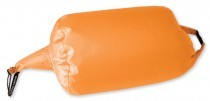
After making a pillow out of the same 30D air tight nylon I decided to make a full sized sleeping pad. I am rather tall so the pad is 78x20x2.5". Anyway the pad weighs only 11.4oz and packs down to 4.25" by 3.75". In the picture it was packed slightly different so its bigger lengthwise. Knowing how to fold and roll the pad really helps pack size.


Construction: the pad was made of a single piece of fabric folded over like a taco shell. Folding the fabric met I only had 3 seams to seal instead of 4. I then taped the fabric along the edges to keep the rectangular shape. I carefully marked out 8 equally spaced air chambers with a Sharpy and a yardstick. I left about 2 inches at the head and foot of the pad so air can flow between all 8 chambers. Wit my iron I sealed the outer edges, but left one corner unsealed for the valve. To make the air chambers I was able to put the iron on its side to get a 1/8" wide seam. The valve I used was a Thermarest replacement not made to be used by itself. What I did was seal the corner to the exact size of the replacement valve. I was able to get a tight enough fit so the valve could be pushed in with no glue whatsoever. The seal is so good I was able to sleep on it last night with almost zero air loss! I do plan on using a dab of JB Weld but I didn't have any on hand.

If you want to make your own here are some things you should know. Construction was a tedious job so need to be patient. It took me about 2 hours to make the pad after I did all my testing with iron settings and timing. The ideal setting for my iron was right in the middle of Linen/Cloth. The iron does not slide so you can only seal a few inches at a time. I found that holding the iron in place for 20 seconds worked the best. You absolutely need to test some scrap material before starting a project like this. If you don't have enough heat/time the fabric peals appart like nothing. If you overheat the fabric the seam will fail because the coating delaminates from the nylon. If you have everything set perfectly the bond is absolutely incredible. I was literally not able to pull apart 1" squares bonded together. It was a Eureka moment when this happened and I think all the planets must have been aligned as well. The only source for this material I could find is Seattle Fabrics. It is not cheap at $16 a linear yard and you will need about 2 yards for a pad like this. Shipping was about $12 which seems a bit high less than a pound in a UPS bubble envelope. I would recommend getting more fabric so you can start off by making something easy like a pillow. The valve is available at most camping stores for $8 or less.

PostedOct 9, 2009 at 1:52 pm

Nice, I really like this. How much did all the materials cost ( minus the iron)? And how long did everything take to make this?

todd BPL Member
PostedOct 9, 2009 at 4:07 pm

Bender,

That is one sweet pad!

Now the question is……..

How much to make one for me? :)

>> Bender << BPL Member
PostedOct 9, 2009 at 8:15 pm

Todd I'm going to keep testing this one for a while. If all goes well I may make some more! I have some ideas that would greatly speed up the process but it would require getting a Mono Kote iron and modifying it. I wish I could find the material less than $16 a yard and stupid high shipping.

Steve I actually was thinking the same thing. If my calculations are correct I could make a 72" 800 fill power down version that weighs 14 oz! I know down isn't good with moisture but it may have a slow self inflating affect.

PostedOct 9, 2009 at 9:00 pm

Just an idea on the seam sealing, probably not worth it just for one mattress, but… In a book on making geodesic domes I read about someone grinding the side of a big soldering iron flat, drilling a hole and bolting on a ball bearing. The bearing got hot enough when the iron was heated to heat-seal polyethelene sheeting – easier to control the speed since it rolled rather than having to slide.

>> Bender << BPL Member
PostedOct 9, 2009 at 9:18 pm

Paul thanks for the tip. I have actually been on some of the hobby forums and found a similar idea. They were sealing material for blimps. The one I liked was just an adjustable soldering iron with a wheel instead of a soldering tip.

PostedOct 9, 2009 at 10:12 pm

Just a tip on the insulated ones – if you look at the insulated BA air cores, they use synthetic insulation. and the insulated model is only 2 oz over the regular. so the down may not be worth it.

>> Bender << BPL Member
PostedOct 9, 2009 at 10:34 pm

Kieran your right the BA insulated pad is only 2oz more but there is one small catch. The insulated pad uses 50D ripstop and the uninsulated version is 70D. That's not a bad thing, I just can't do the same trick. I would estimate they are using 5-6 oz of synthetic insulation. Anyway if I stuffed one of mine with down it would still end up being 10 oz less than the BA insulated. Now who wants to send me some 800+ goose down, preferably detached from the geese!

I used a tiny amount of JB weld so the valve can't be pulled out. The JB weld actually helped get the valve completely pushed in flush. I am actually amazed at how well the valve area turned out. I was expecting this to be this designs weakness but I no longer think so.

Tim Marshall BPL Member
PostedOct 10, 2009 at 9:32 am

using 2.5oz XP would add 3.125oz. It would be easy to make and more resistant to any moisture trapped in the tubes. If you don't i think i'm gonna have to try making one like that.

Also, i have a lot of down, how much do you need? email on the down please tmarshall charterinternet com

-Tim

>> Bender << BPL Member
PostedOct 10, 2009 at 11:14 am

Tim check your email. Is the XP insulation in sheet form?

Here is my pad next to a BA Air Core which is 2x the weight and packed size!

Tim Marshall BPL Member
PostedOct 10, 2009 at 12:14 pm

yes Xp comes in sheets from thru-hiker.com

60"xnum yds ordered.

-Tim

PostedOct 10, 2009 at 1:33 pm

Tim,
If you use XP and insert strips after the mat is welded, how do you keep them from twisting to vertical in the tube, and creating 2 uninsulated channels?

Tim Marshall BPL Member
PostedOct 10, 2009 at 2:41 pm

good questions, i haven't even though about it at all. However XP melts easily at low temps so i would guess that where the pad was heat sealed the xp would seal in there 2, maybe i'm way off though. I was thinking of putting the xp in before sealing.

Maybe i'll have to get some 30 heat seal able nylon and just try it out.

-Tim

PostedOct 10, 2009 at 3:00 pm

Tim,
What R Value do you get from a single layer of XP?

I assume the additional air spaces would contribute, and would be a 'plus something' in the down the road guestimations.

Thanks.

Tim Marshall BPL Member
PostedOct 10, 2009 at 3:30 pm

don't know the r-value, but is it safe to guess that it would insulate equally as well above or bellow the sleeper? (if uncompressed)

If so then 2.5oz XP to 45*, 3.7oz COMBAT 35*, 5ozXP 25*, 7.4ozCOMBAT 15*.

Should be warmer in the pad than in the quilt as the air is trapped and can't escape resisting change in temperature longer right?

-Tim

PostedOct 10, 2009 at 10:06 pm

I've heard some say that making one layer a solar blanket, so long as it isn't directly touching you, is a great thing to have in your padding "sandwich" – so maybe layer one of those in also?

Curt Peterson BPL Member
PostedOct 11, 2009 at 7:43 am

VERY cool! What width does the fabric come in? I'm interested in making a wide pad – 25", or even 30".

How does the fabric feel as far as durability? As strong as the BA material? More fragile? Similar?

Really interested where this one goes. Thanks for sharing!

>> Bender << BPL Member
PostedOct 11, 2009 at 11:40 am

Curt

I wouldn't go as far as to say the material is as tough as the BA but I do think it will be tough enough for most people. The material comes 56" wide so you could easily make a pad but not the same way I did. Instead of folding the fabric you could have a top and bottom piece but you will waste a bit of material. If you want to waste the least fabric you can fold the fabric and just make the tubes horizontal instead of vertical. This would give you a pad over 25" wide when inflated. You would need roughly 3.25 linear yards to get a 72" pad with horizontal 2.5" tubes. FYI the material is 91.5g per square yard so that pad would be about a pound with valve.

>> Bender << BPL Member
PostedOct 11, 2009 at 9:55 pm

Now what would you all think if I told you I had a working prototype electric air pump capable of filling a standard sized sleeping pad in 20-30 seconds? What if it weighed less than an ounce and was good for 10-20 inflations per charge? Hummmmm, that would be nice! I'm still working on it so don't expect pictures anytime soon.

I was thinking about integrating this with a down insulated version of my sleeping pad. The current 78" pad is now 11.3 oz because I trimmed the excess material around the edges this weekend. Were talking 14-15 oz total for a 72" down filled sleeping pad with a very nice built in pump! This totally solves the manual inflation problems with moisture and down. Do guys think a pump is worth an ounce?

PostedOct 12, 2009 at 6:01 am

yeah i would think a pump would be worth it only on the down version because of the condensation issues. I would imagine after a week long trip that down could get fairly soggy.

PostedOct 12, 2009 at 11:50 am

"Do guys think a pump is worth an ounce?"

Absolutely.

An even bigger plus is the time reduction. A Stephenson DAM "stuff sack inflator" takes about 15 fills to get a DAM up to snuff, requiring a fair amount of time and patience – Something I'm often short of in the dark and cold.

I'll be waiting.

Viewing 25 posts - 1 through 25 (of 150 total)
Loading...