Topic

New Tarptent ;this is the Moment !!!


Forum Posting

A Membership is required to post in the forums. Login or become a member to post in the member forums!

Home Forums Gear Forums Gear (General) New Tarptent ;this is the Moment !!!

  • This topic is empty.
Viewing 25 posts - 126 through 150 (of 176 total)
  • Author
    Posts
  • #1627111
    Marc Clarke
    BPL Member

    @marcclarke

    Locale: Front Range of the Rocky Mountains

    Franco,

    Thank you both for your suggestions and for your pictures. As I compare my pitch to yours, I suspect that I do not have the end-to-end tension set high enough, as the apex of your Moment's end sticks out much further than mine does (my end poles are pretty much in a vertical plain).

    Update: Franco, you 'da man! Yes, getting the end-to-end tension correct caused the apex vents to stay open. Many, many thanks! :-)

    #1627285
    Jason G
    BPL Member

    @jasong

    Locale: iceberg lake

    hey franco, i got a Rainbow a month ago and its vents don't seem to be open at all or very little when pitched.. any suggestions/pix? thanks

    also where you clip the outside bathtub clips to?

    #1627289
    Marc Clarke
    BPL Member

    @marcclarke

    Locale: Front Range of the Rocky Mountains

    I'm afraid I have another newbie question. I see three tie points on the end of the bathtub floor at the door end of the tent floor. To what do they attach in order to pull the end of the bathtub floor upward?Three tie points on door end of bathtub floor, but to what do they attach?

    #1627355
    Franco Darioli
    Spectator

    @franco

    Locale: Gauche, CU.

    Marc
    Not a newbie question at all…
    end clips

    One corner is easy, it just clips onto the same hook as the pocket.
    The other two are waiting for the liner to be released.So at the moment (…) they have nothing to do.
    Note that the floor stands up better when the door is zipped up
    This is what the liner will look like.
    Moment liner

    Jason
    I will look at the Rainbow next.
    Franco

    #1627366
    Franco Darioli
    Spectator

    @franco

    Locale: Gauche, CU.

    Jason
    By outside clips i think you are referring to the corner clips. Those attach to the same webbing that holds the corner tightener.
    (I actually clip them on the treatpease line)
    That is point 8 in the instruction. Point 8 is a favourite with Henry and that is why he used that twice…
    point 8
    As for the vents , you are correct. They don't open much at all by themselves.
    On the plus side my own Rainbow only has one…
    (that is why I had to set the 2010 version up to have a look)
    This is one way to fix that.
    Vent spreader
    vent spreader 1
    Make yourself a vent opener. The one in my pictures is a highly sophisticated version made out of cardboard , clear tape and a piece of gaffa tape (reversed) over the ends to give it
    some grip.
    (in the bush I would use a stick , shove that into a sock to protect the fabric and give it some grip too…)
    This will likely fall off if the wind picks up, so it is an automatic device designed to disengage in adverse condition to minimise wind ingress.
    (if it is windy you don't need those vents opened up)
    The door vent opens enough for me as it is.
    Franco

    #1627424
    Ryan McCabe
    BPL Member

    @3tree

    Hmmm… Will this new liner for the Moment fit into pre-existing Moments????

    #1627429
    Adam Kilpatrick
    BPL Member

    @oysters

    Locale: South Australia

    And how much will it weigh, and what are the benefits? I can see it being handy if you are in condensation prone conditions and don't like getting wet from the walls. But will it add much warmth over not having it-enough to justify the weight? That would be the clincher for me personally

    #1627430
    Jack H.
    Member

    @found

    Locale: Sacramento, CA

    From what I've heard, you'd need to sew some attachments into the older/current Moments for the liner to attach to.

    I'm getting pretty awful condensation in my Moment. No likey.

    #1627438
    Franco Darioli
    Spectator

    @franco

    Locale: Gauche, CU.

    The liner will be about 4 oz. Same idea as the one for the Rainbows.
    It can attach to the existing Moments but will fit better with an additional two clips.
    I think that because of the low stress it should be viable to glue those two clips on to the fabric with a bit of silicone.
    (I have yet to test that . I may try it with my ancient Rainbow since I have the liner for that. I just thought of this right now…)
    keep in mind to allow as much air flow as possible (keeping the end vents open as well as making sure that the top vents are open too)
    A small groundsheet over the vestibule area will also minimise the effect of ground evaporation. Or camp on hard soil…
    Franco

    #1627469
    Joe Clement
    BPL Member

    @skinewmexico

    Locale: Southwest

    I had less condensation when I cut my ground cloth to cover the areas under the vestibules.

    #1627488
    Backpack Jack
    BPL Member

    @jumpbackjack

    Locale: Armpit of California

    Here's mine this last winter in the mid teen's for temp's and about a foot of snow over night just starting to snow 2nd pic

    No condensation and slept like a toasty marshmallow, I LOVE THIS TENT!!

    #1627555
    Mark Castagnoli
    Member

    @mcastagnoli

    Locale: NorCal

    I love my Moment too.
    One issue I have is that the pole is somewhat difficult to run through the sleeve when setting up the tent. It has been this way since I got it. Could be a batch thing with the pole sleeve material.

    Any one else have this issue?

    Any suggestions for making it slippery?

    #1627556
    Travis Leanna
    BPL Member

    @t-l

    Locale: Wisconsin

    Mark, is it seam sealed? I noticed that when I sealed my DR ridge line, it became more difficult to slide the pole through due to the increased friction caused by the silicone that seeped into the sleeve.

    #1627562
    Jennifer W
    BPL Member

    @tothetrail

    Locale: So. Cal.

    Thanks Joe, I'm going to try that.

    #1627640
    Franco Darioli
    Spectator

    @franco

    Locale: Gauche, CU.

    The trick with sleeves is to push the pole in downwards. That is lift the entry point up and push the pole down in it.
    As in this clip :
    http://www.youtube.com/watch?v=CWZQKivY2SA
    Franco

    #1627667
    Marc Clarke
    BPL Member

    @marcclarke

    Locale: Front Range of the Rocky Mountains

    I have used spray silicone lubricant on my tent poles and sleeves for years. I haven't needed any lubricant on my Moment's sleeve (yet).

    #1627743
    Backpack Jack
    BPL Member

    @jumpbackjack

    Locale: Armpit of California

    Never tried it, but what about a sent free powder, put some on the poles and slide it through. Mine works great no sticky!, sticky!

    #1627748
    Marc Clarke
    BPL Member

    @marcclarke

    Locale: Front Range of the Rocky Mountains

    I had not thought of that. Talcum powder ought to work just as well, maybe better.

    #1628687
    Marc Clarke
    BPL Member

    @marcclarke

    Locale: Front Range of the Rocky Mountains

    My back yard testing (rain, hail, wind, sweltering temperatures, bird doo, etc.) has so far revealed one commonly-reported failure; the head came off of one of my Easton Arrow tent stakes.

    Easton Arrow Tent Stake Head Failure

    I'm switching to MSR Groundhog stakes. They don't fail.

    #1628688
    Franco Darioli
    Spectator

    @franco

    Locale: Gauche, CU.

    One trick I have learned is to give the peg a small nudge (kick…) before pulling on the rope.
    Franco

    #1628690
    Marc Clarke
    BPL Member

    @marcclarke

    Locale: Front Range of the Rocky Mountains

    Franco,

    Thanks, I'll use that technique in the future (with all and any stakes). Advice much appreciated.

    #1629506
    Mike In Socal
    BPL Member

    @rcmike

    Locale: California

    Mix up some epoxy or JB Weld and put the stake back together… it will never come apart again. You can reinforce the rest of the stakes with a fillet of epoxy where the head meets the body of the stake.

    #1629516
    Marc Clarke
    BPL Member

    @marcclarke

    Locale: Front Range of the Rocky Mountains

    Michael,

    Thank you. I will find my beloved JB Weld and fix my broken stake. I was wondering how to pull the heads off of the other ones so I could firmly attach their heads. I'll try reinforcing the unbroken stakes using a bead of JB Weld. Much appreciated.

    #1629557
    Steven McAllister
    BPL Member

    @brooklynkayak

    Locale: Arizona, US

    I have sort of been comparing the Tarptent Moment with the SMD Vamp for a friend.

    Some advantages that the Vamp appears to have:
    1) True double wall design that looks like it may have better ventilation for summer use.
    2) Slightly roomier.
    3) More flexible design. Leave the bug net at home in the winter, use only the bug net if the forecast is dry.
    4) Lighter
    5) Taller and more headroom

    Possible disadvantages:
    1) May not be so good in snow
    2) May not pitch as fast
    3) More expensive
    4) Requires trekking poles or optional carbon poles(adds weight)

    Any ideas?

    #1629778
    Marc Clarke
    BPL Member

    @marcclarke

    Locale: Front Range of the Rocky Mountains

    I went through the same comparison before I ordered my Tarptent Moment tent.

    First, you have to be really careful to compare apples to apples, not to oranges or watermelons. :-) If you need hiking poles for the Vamp set-up, then you don't get to claim that the Vamp is lighter than the Moment. (I fell into that same trap originally, until a friend straightened me out.) You have to include the weight of hiking poles in the weight of the Vamp system. Sorry about that; if you need hiking poles and stakes to set up the tent system, then you have to include the hiking poles and the stakes in the tent system's weight.

    Similarly, if you don't already own the required hiking poles, then you have to include the price of the required hiking poles in the total system purchase price of the Vamp system. If you will be shelling out in excess of US $100 for good ultra-lightweight carbon fiber trekking (hiking) poles, you need to include that $100+ against the Vamp's "real" purchase price.

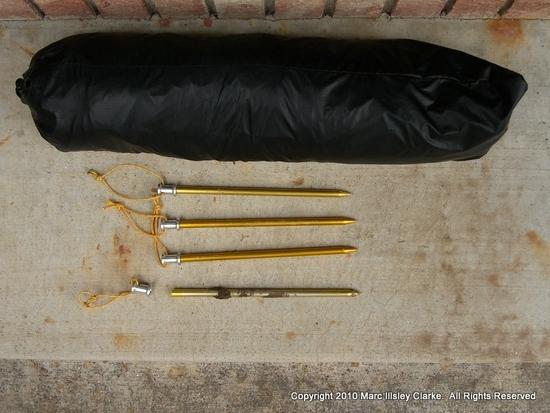
    Same argument for dedicated purpose carbon fiber poles if you don't bring the hiking poles. (My slightly-bunged-up knee insists that I bring hiking poles. I use them instead of the lengthwise ridge pole on my Moment. Please see the pictures of the hiking poles holding up the center-line tie points on the Moment earlier in this thread.)

    I'm 6"2" and XXL, and the Moment is plenty roomy for me to stretch and flop around while sleeping (I toss and turn and roll around a lot while sleeping). There is lots of room under the door-side vestibule for my Gregory z55 (large frame, 65+ liters) pack, boots, cooking stuff, etc. There is also a fair amount of room inside the tent on the side away from the door.

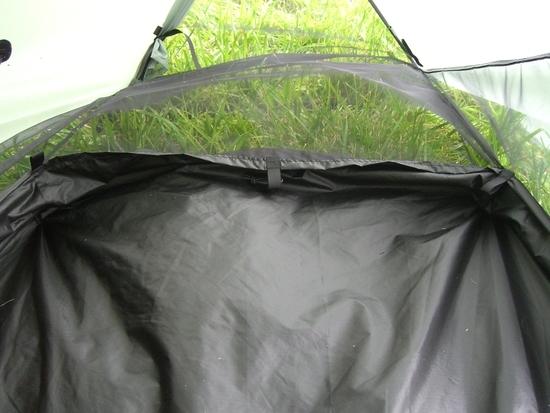
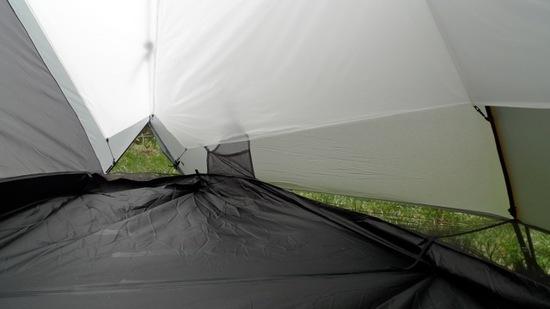
    I have been backyard testing my Moment in Colorado's sweltering 100 degree days lately, and I am getting plenty of ventilation through the Moment's open door, open ends, and raise periphery (which all has netting). While I do own a double-wall solo tent with a mesh interior, I have felt no urge to go back to my old tent and just its mesh interior for these wretchedly hot nights (backyard testing, not yet mountain testing, mountain testing may give different results).

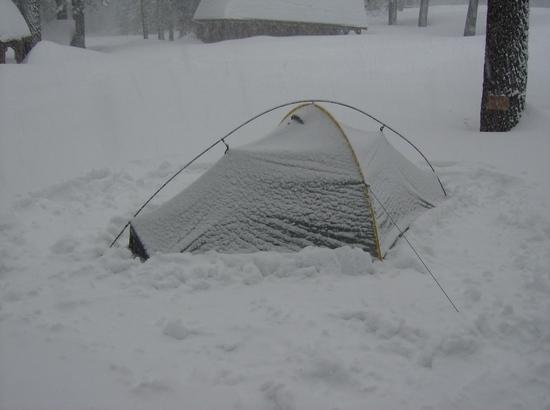
    As I can get snow in any month of the year in Colorado's mountains, snow resistance was a vital decision factor for me.

Viewing 25 posts - 126 through 150 (of 176 total)
  • You must be logged in to reply to this topic.
Forum Posting

A Membership is required to post in the forums. Login or become a member to post in the member forums!

Get the Newsletter

Get our free Handbook and Receive our weekly newsletter to see what's new at Backpacking Light!

Gear Research & Discovery Tools


Loading...