


Pet shops carry small valves for controlling the flow of air from aquarium pumps for only a couple of dollars.
Topic
Become a member to post in the forums.
Pet shops carry small valves for controlling the flow of air from aquarium pumps for only a couple of dollars.
Minibulldesigns.com has some really interesting remote fueled alcohol stoves.

I had to shorten the vid to get it to load. Next installment tomorrow.
<center>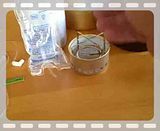
</center>
we'll see if YouTube link is working
http://www.youtube.com/watch?v=neI_mseZioA&feature=channel
Nope!!!!! You need to copy and paste it.
Keep in mind that this is a prototype and is evolving daily. Watch for further updates on bplite, I can't always get back here to give updates ;)
Post your progress, don't flame your kitchens =)
close-ups of the valve:
<center>


</center>
THAT'S THE TUBE REGULATOR I'VE BEEN LOOKING FOR EVERYWHERE!!!
Great video. We're all getting soooo close to polishing off the details in this remote fuel stove.
Very accurate device to regulate fuel. I have a good amount of them and if you'll give me an address in a PM, I'll send one off to you so you can finalize a stove or two.
Here it is. "The Coil Stove".
A remotely fueled stove with adjustable flame working from a fuel bag that stores easy once the fuel is gone. 2 grams is the coil's weight.

Version 1.
Parts missing in the photo above:
– the regulator which controls the drip
– the can bottom that props the Heini keg up from it's lower lip on the Keg ripple. This is also what houses the coil.
– the last part not appearing is photo is the full length Foil Bubble Wrap cosy that inverts over the stove to cover the entire cook system, doubling as a lid and insulator while cooking.
Thanks Dan – Dan was kind enough to send me a few of his extra regulators. They are in the mail.
Also to note: Dan very politely turned down my offer to send him a bit of chowda (money) to cover shipping and 'thank you' for pulling through. I appreciate your contribution to our progress.
Please share your thoughts.
Those are both some pretty sweet looking stove prototypes!
I'm intrigued by the coil design because I haven't seen anything else even "remotely" ;) like it before. I have a few "burning" questions for you Matthew:
I'm curious if there is a large difference in pressure/flame height between the inner and outer "rings" of the spiral–or is the flame evenly distributed all the way along the spiral?
How do you light it? Do you need a priming pan of some sort, or is the tubing small enough (small volume of enclosed air?) that one can light it straight with a lighter?
Keep up the inventing you two!
-Ben
Dan, you're the man. Thank you so much for the IV tube. I just pulled it out of the mail today. I appreciate you shipping it so quickly.
And you sent the whole set up, hose, drip window, and roller regulator!!! Thank you.
I also received in the mail two Monster Traildesigns.com silicone bands. I can't wait to make this stove work. These silicone bands are REALLY REALLY nice. The photo posted earlier doesn't do them justice. We need to get you a better photographer because those pictures didn't do these justice.
My answer to your earlier question – these should be sold a la carte – too many guys out there like me that want to craft their own design.
I'm getting really excited at seeing what the Caldera Cone guys crank out next.
…
That's slick – I just put the monster silicone band on my Heine pot. The TrailDesign guys made the band match the colors on the Heine keg. *laughing*.
That was clever!!!
It looks really good.
Hi Ben:
In building the stove, goal was to heat up the least amount of fuel to start the vaporization priming process.
The stove primes almost instantaneously – and without a primer pan. There's very very little fuel to boil to start the vaporization.
I'm still working out the flame distribution. Now that Dan's regulator came in the mail :) I will have more control. I've been pinching the tube with one hand and running flame control with the other *grinning*. My pincher fingers are raw.
Hi Matthew, the instructions that are on the iv administration set are helpful to understand the regulation process. 15 drops per ml. The “StarLyte burner uses 15 ml to boil 2 cups of water. It makes it easy to determine the drip rate to boil 1 gal of water.
The 250ml IV bags are proving to be worthy of fuel storage. I’ve found a source for fuel line more suitable for use with the IV regulator. Smaller diameter for lighter weight. I’m waiting on some items for a better fuel line hook up for the #2 stove. The video shows the fuel line connection of the 1st stove. Your coil arrangement looks interesting and look forward to your advancements.
<center>
</center>
I like the update. Thank you.
I'm very curious as to what hose you're using. Is it silicone?
My 1/8" silicone from the local hobby shop is pipe'n fuel pretty well. It's doing a good job handling the heat. The wall diameter is inbetween the stuff you're using and what you previously had on your video before. I like your hose better.
Latest update on my stove : the current version is a modified supercat done on a 3/4" diameter stove, sat inside a 3 1/4" aluminum can.
Hey Dan,
I'm also very interested in what type of hose you're using. I'm working on my own remote stove right now and am looking for something similar to yours. Any website links you can provide? I've tried Tygon which melts too easily, and Zeuz PTFE which collapses too easily. Thanks, Mark
The hose I show is Tygon purchased locally at a small engine repair shop. Working well for me.
Thanks Dan,
I guess I just need to have a longer extension of metal tubing that is farther away from the flame source. Cheers, Mark
I have been redesigning. I came up with a more secure way to attach the fuel tube to the burner. It looks more professional also. Watch the video:
<center>
</center>
Dan:
You're inline looks sharp! Great work. Care to share how you did it :) *big grin*
After a few twists & turns in the design, my remote fuel alcohol stove is beginning to materialize.
Here's the progress thus far: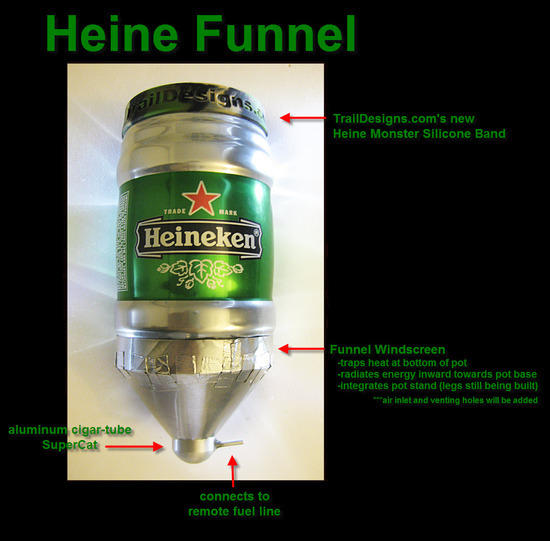
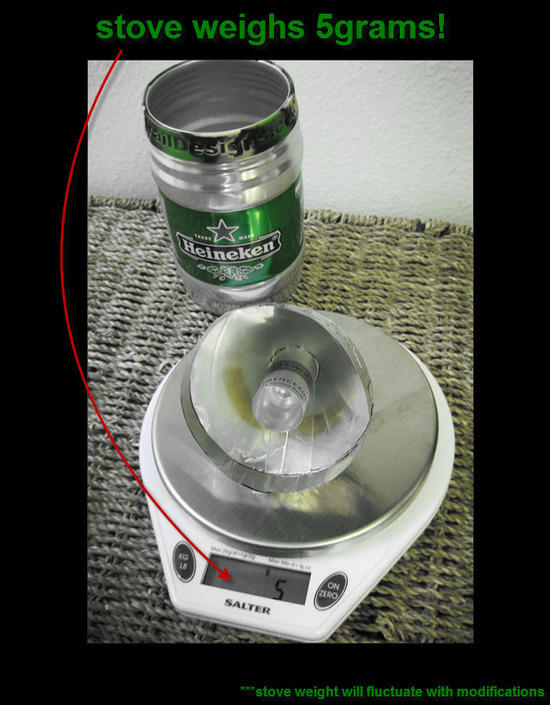
thats impressive to say the least, im really interested in all this remote alky stove stuff… that heiny system is awesome, is the burner design your own?
Thank you.
Although I did design the system, I have been consulting for feedback with the master stovies throughout the process.
-Dan
-Tinny
-Jason Klass
-Rand
Their input has helped quite a bit.
Thanks Matthew, yours is looking great. I think I recall you were going to suspend it from something while the stove is working right? As it is I can't see how it's going to work. from where will the stove get oxygen and how will you light it? Supercats need to be lit and burn for a few seconds before the pot is put onto it. I'll share all the build info for mine once the stove is complete and working right. I should have this one finalized by Monday evening. I'm working on the other remote stove also.
And I thought i was done building alchy stoves… guess not, I got a friend who is an RN, gonna have him grab me some IV supplies…
Hi:
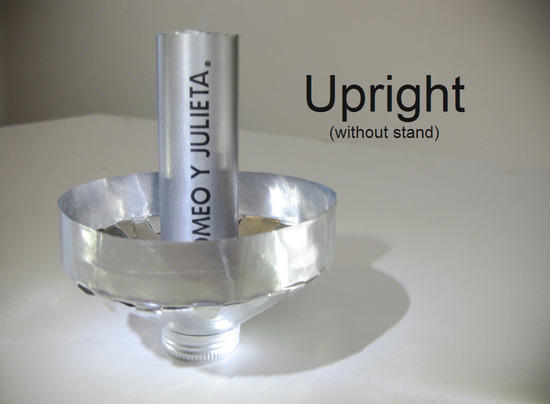
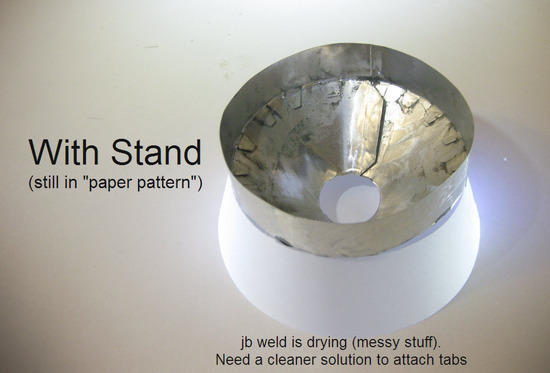
Today's progress might help communicate where the design is going.
Two things not pictured in the photos below
– Air inlet and venting gaps will be cut into both the funnel and the supporting cone. The air inlet gaps will stagger between the funnel and the cone so as to still provide screening from wind.
– A hose insert needs to be set in through the screw-top of the cigar case
……I'm holding out to see your final post on that sweet inline rivet attachment before drilling my hole *wink* :)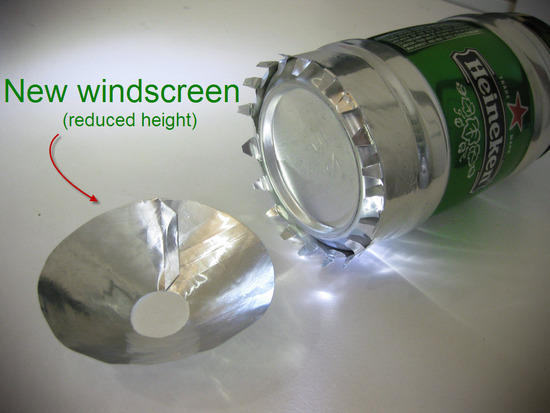
…
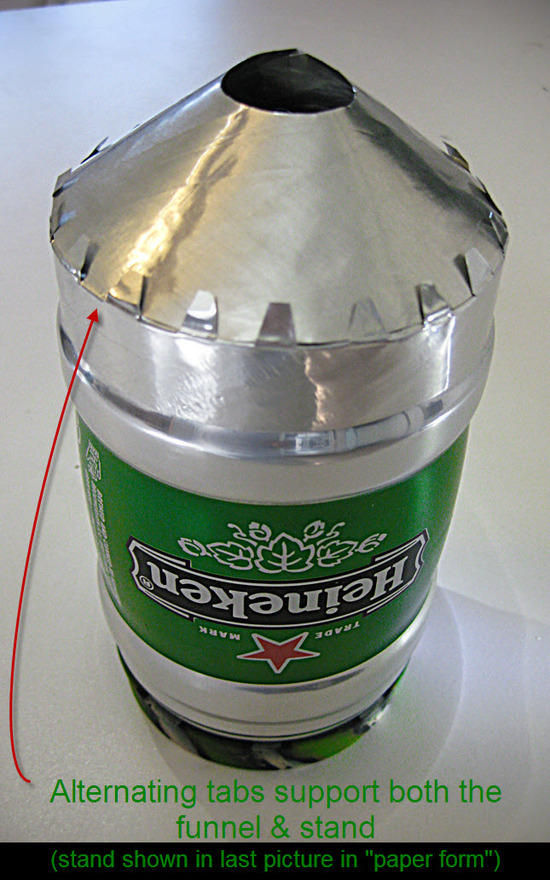
…
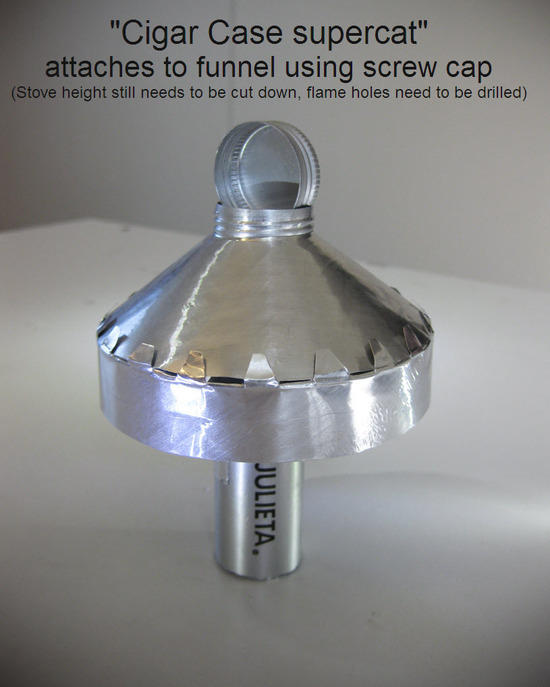
…
…
Matthew, hold out no more!!! Here is the port pieces and how they are attached. A video also showing hoe the tube looks connected.
Here is the latest on the rigid fuel tube setup. Working ok, needs some refining. The photo shows the bayonet type connectors used. Thread Setter tool was used to create the fuel port. Gold plated electrical parts were used also as shown. One piece threaded into the stove port and the other press fit into the brass tube. More details comming tomorrow.
<center>
</center>
<center>
</center>
Matthew, looks like your stove is going to be hard to light. It’s going to be interesting. Look forward to your progress.
wow, awesome design, did you make the starlite, or buy it? also wouldnt this work with pretty much any alcohol stove, or do you need the fiberglass, to act as a buffer?
Become a member to post in the forums.
 New Gear with Aluula FabricsLighter, stronger, more abrasion-resistant, and highly water-resistant - explore ultralight backpacking gear made with ALUULA Graflyte fabrics. Engineered for exceptional strength, durability, and lightweight performance, ALUULA Graflyte helps reduce pack weight without sacrificing reliability, making it ideal for demanding backcountry adventures.
 © Beartooth Media Group Inc.
 Loading...