Topic

Advice – Alcohol “Simmer” Stove

  • This topic is empty.
Viewing 25 posts - 1 through 25 (of 28 total)
PostedMar 1, 2009 at 2:32 pm

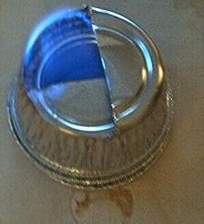
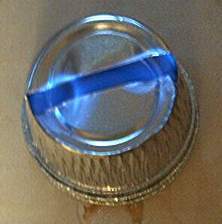
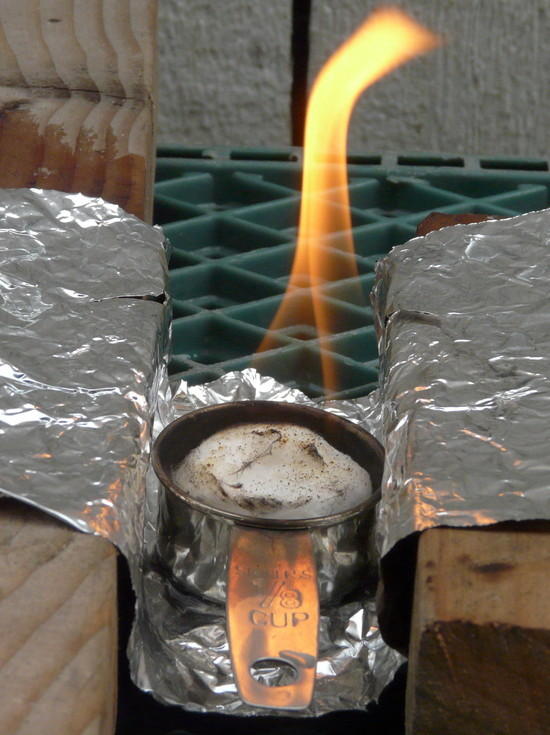
I really like using the basic popcan-style alcohol stoves with my Caldera Cone, but the normal alcohol stove doesn't simmer well. There are some recipes that I've been eyeing that call for longer simmering. I COULD use my Trangia with the simmer ring, but that's a relatively heavy solution.

It seems to me that one reasonable solution is to carry a second stove that is designed for simmer-type output. Stove #1 can heat the water to boiling, while Stove #2 can await the pot/cone combination and then simmer away.

So, does anyone have specific stove model suggestions? Or MYOG plan suggestions for a simmer-only stove?

John G BPL Member
PostedMar 1, 2009 at 3:53 pm

Suggestion 1: Use a cozy instead of simmering. Pros: No fuel used. Cons: Takes 1.5 times as longer as simmering + some things (rice, beans, etc) need prehydrating / soaking in water for 10 minutes before cooking which leads to slightly mushier consistancy. (Noodles work fine without prehydrating).

Suggestion 2: Build a SimmerCat. See instructions about 1/3 of the way down Jim Wood's page at http://jwbasecamp.com/Articles/SuperCat/index.html

PostedMar 1, 2009 at 3:59 pm

William,
I’m a Conehead and I can simmer. You can too.

Take an aluminum “chicken pot pie” pan cut off the top lip and form remainder around the bottom of a pop can (still full). It will match your 10-12 burner. Trim it up so it fits. Then slice a slot in the top, about 1/4″ x 1/2″. That’s it.

Fire up the stove, and when you’re ready to simmer just drop the simmer cap gently in place. The slot size will determine the burn rate.

Store the simmer cap on the stove for packing and travel.

Here are a couple more ideas from Brawny at Trailquest.

SimmerCapsimmerCap2

PostedMar 1, 2009 at 4:05 pm

Lynn (or anyone else), have you used a packafeather with the caldera?

I've been toying with the idea of getting a caldera (2L AGG pot size) for cooking for 2 people. But we do like to do real cooking (as opposed to boil water) which means simmering sometimes, and preferably having a bit of flame control.

Also, do you need to wait for alcohol stoves to cool down completely before you can re-light them? What do you do if you need to add more fuel while cooking?

PostedMar 1, 2009 at 4:17 pm

Ashely,
"Cool Down" – if you mean for the simmer ring, no. The stove will stay lit as you drop it in place.

If you mean before you re-fuel, not as long as you are positive that nearly invisible light blue flame is GONE. I put my hand over the opening to be sure.

After bringing 2 cups of cold water and oatmeal to a boil I can simmer for another 20 minutes or so on a Caldera 10-12 with a simmer cap in place.

Otherwise, lift the pot, refill, and relight.

PostedMar 1, 2009 at 4:21 pm

Thanks Greg. I might give it a go.

Is it tricky to adjust the simmer cap while it's in place, or do you just set it before you put it on and then leave it?

PostedMar 1, 2009 at 4:23 pm

A 1/8 cup coffee grounds measuring cup with a jumbo cotton ball stuffed into it may work. 1oz of 91% isopropyl alcohol burned for over 50 minutes…I had to go so I had to extinguish it and the cotton ball was still wet. Later I burned 1oz without cotton ball (same alcohol) and it burned for ~30 minutes before the wind blow it out. There was about 20-25% alcohol still in the cup. Both times I had 16ozs in a Snow Peak pot and the water would just get to steaming…no bubbles on the bottom.

This pic was taken after burning 40 minutes:
Alcohol Simmering/Warming Stove

Of course YMMV if using denatured alcohol or HEET, windscreen, Caldera cone…etc.

b.gin

PS…those little cups can bought at almost any grocery store at ~$3, are stainless steel and weight 19g. Seems making something similar wouldn't be a prob with you DIY'ers

PostedMar 1, 2009 at 4:26 pm

Ashley,
If you are using the "two cap" approach you just have to make sure they slide easily before putting them in place. Then a quick hand will get the job done.

PostedMar 1, 2009 at 5:05 pm

I'm loving all the great ideas!!!

Greg Mihalik's idea of converting the recycled pot pie pan into a slotted simmer ring seems like an "elegant" solution, whether one or two pieces. That works well from a weight, packing and practical solution using the stove I have.

I'm all about cozy cooking, too, but there are some baking-type recipes that need extended time of boiling heat for cooking (corn bread, brownie type desserts, etc.) These "luxury" treats are planned more for short weekend or weekend+ trips that are my usual pattern these days.

PostedMar 1, 2009 at 5:22 pm

Look at Minibull Designs (minibulldesigns.com) Gnome stove, Choke Hazard stove, or any of the Black Fly stoves. All of these simmer and the Black Fly has fiberglass wicks that can be raised up for more flame or down for simmer.

PostedMar 1, 2009 at 5:37 pm

William,
When my wife and I do freezer bag simmer "baking" we find things are done in 15 minutes or less, so with a simmer cap things work out fine.

On a three night trip my wife introduced girlfriends to the wonder of Cones and Cornbread and knocked their socks off.

We use freezer bags because we have them, but somewhere in this forum Mike Clelland shows the use of silicone cupcake bakers. He is getting 3 in a small pot and perfect results.

Have fun out there.

PostedMar 1, 2009 at 5:55 pm

The Gnome and choke hazard are slow, hold very litttle fuel, and are not in any true sense of the word 'simmerable'. Not sure how you would simmer with a BIOS either? The easiest choice here are the Packafeather stoves. There is no need to remove the pot or cone to simmer, no need to carry extra stuff like a simmer lid, but you can, if you wish, use a snuff cap on it and recover unused fuel. This makes it very fuel efficient. And it's just plain cool.

Yes Ashley, I have used it with a cone and it works great.

Elliott Wolin BPL Member
PostedMar 1, 2009 at 6:20 pm

See my post on simmer rings
for Caldera Cone stoves.

I had little luck partially covering the Caldera Cone stove as the airflow became unstable and it eventually popped itself out.

But the simmer ring worked perfectly, and it’s only 1 gram.

PostedMar 1, 2009 at 8:40 pm

Thanks Lynn!

One more question… how much longer does it take you to boil water using the caldera, compared to a canister setup (with windscreen)?

The most I probably ever boil at one time is around a litre. Obviously time it takes depends on how hot the water is to start with, but is there a big difference between the the two? Usually I don't care too much about boil time, but sometimes my GF is cold and wants a hot drink quick… so I'll be pretty unpopular if it takes ages to boil one!

Thanks….!

PostedMar 1, 2009 at 10:43 pm

Ashley,
I'd vote for the PackFeather XL. I use the PackFeather standard stove with my caldera cone and it works fine. and you may simmer to your hearts content, without disturbing the Caldera Cone.

The XL has no pot stand to get in the way. Though the standard stove's pot stand raises the Evernew 0.9L pot less than a sixteenth of an inch (1mm+).

Packfeather Stove with legs deployed
PackFeather Stove

Packfeather Stove with Caldera Cone and Evernew 0.9L pot
PackFeather stove with Evernew 0.9L pot and Caldera Cone

PostedMar 1, 2009 at 10:57 pm

Thanks Denis. I'll be using it with the AGG 2 quart pot though (twice as big as that evernew) so it might be better to go for the original (non-XL). On the website they say that the XL is tuned for narrow pots, whereas this one is going to be fairly wide. If I'm only going to use it with the caldera I can always cut off the stove supports if they annoy me. According to the website the original is a bit faster to boil too (though not much).

Nice to see that you are using this setup too. Seems like it will be well worth a go.

PostedMar 1, 2009 at 11:11 pm

Ashley,
If you cut off the pot supports I'd recommend leaving the legs on. It'll help stabilize the stove while turning the adjustment screw.

Rand Lindsly BPL Member
PostedMar 1, 2009 at 11:12 pm

Denis….DUDE!….you got yourself a wicked old Caldera Cone buddy. That was the old "finger" closure…..and obviously…..old enough that we were still using flashing from Home Depot. Notice the brown burned ring around the cone? That is what happens to the coating that comes with off-the-shelf flashing. Now that we are buying 1000 pounds at a shot, we get the hardness, thickness, and (lack of) coating we want.

What would it take to get a newer version into your hands? Great to see this one still going though!!!

Rand :-)

PostedMar 1, 2009 at 11:18 pm

Rand,
You're looking over my shoulder? I've cut the handle brackets off the pot since I took the photo. What's the possibility of getting a cone with no cutout?

Tony Wong BPL Member
PostedMar 1, 2009 at 11:50 pm

Bailey,

Wow, 50 minutes on less than 1 oz of fuel!

That is amazing.

Any negatives to the system?

Is the heat output increased or decreased by using the cotton ball?

Also, it sounds like the cotton ball was not consumed in the fire and could be used again?

-Tony

Viewing 25 posts - 1 through 25 (of 28 total)
Loading...