Topic

Stripped MSR windpro canister stove


Forum Posting

A Membership is required to post in the forums. Login or become a member to post in the member forums!

Home Forums Gear Forums Make Your Own Gear Stripped MSR windpro canister stove

  • This topic is empty.
Viewing 25 posts - 51 through 75 (of 75 total)
  • Author
    Posts
  • #1346699
    Roger Caffin
    BPL Member

    @rcaffin

    Locale: Wollemi & Kosciusko NPs, Europe

    > 3) By tightening or loosening the fitting on the windpro valve 180 degrees, it can be oriented so the default position is inverted.

    Old Woman time…
    Please, be very careful if you do this. Yes, I have done it myself :-)
    Make sure there are NO gas leaks, PLEASE!
    If you want to be sure, you can add a drop of threadlock on the thread after you have done it up to where you want it. This won’t prevent you from undoing it again, but it should help seal the connection. Don’t add the threadlock before you do it up: it might get into the valve mech – bad news then.

    Otherwise, a good test Mike.
    Cheers
    Roger

    #1346772
    Michael Martin
    BPL Member

    @mikemartin

    Locale: North Idaho

    Well, it’s not a Fornshellesque work of art, but it does weigh 5.1oz! When cold, it’s plenty sturdy enough to support a 2L pot full of water. But, I still need to test fire it to make sure the legs don’t soften into wet noodles when they get hot.

    The supports are made from BPL Ti ultrarods. I cut them each to 25.5cm, then bent them in thirds. One leg is secured to the pre-heat tube with several wraps of stainless steel wire.

    Note the valve is setup for inverted canister operation, making this a really light snow melting machine. :-)

    A special thanks to Ryan Faulkner for providing the inspiration for this project.

    Cheers,

    -Mike

    PS — I thought I remembered seeing a post about the Ti rods weakening when they got hot, but I can’t seem to find it. If anyone can locate that thread, please let me know. [thanks.]

    PPS — this stove is experimental. Use this design at your own risk!

    #1346774
    Anonymous
    Inactive

    Excellent Job Mike,

    5.1oz. Wow! Looks Very professional like a production item.

    Best of Luck with the heat test.

    #1346775
    Michael Freyman
    BPL Member

    @mfreyman

    Can someone email this pic to MSR and tell them to get off their collective rears and build it; we will come!

    #1346779
    Ryan Faulkner
    Spectator

    @ryanf

    nice job.
    a little more “purdy” than my stand.

    ??? how did you invert the fuel line ???

    if you have snow, try testing it out.

    a little of topic, but I would just like to mention that I added more holes to the sides of my stand, and now it works much better than before.

    #1346782
    kevin davidson
    Member

    @kdesign

    Locale: Mythical State of Jefferson

    Great stuff, Michael. It’s something anyone could do to their Windpros w/o recourse to specialized tools.

    Hope the Ultrarod stock works in long term exposure to heat tests. I seem to recall an earlier post on another thread raising some issues concerning this, too.

    Would cutting down the length of the fuel line offer any weight saving rewards? Sorry, Ryan, about the confusion from the previous unedited post

    #1346783
    Ryan Faulkner
    Spectator

    @ryanf

    KD how do you cut and reconnect the fuel line?

    #1346784
    Michael Martin
    BPL Member

    @mikemartin

    Locale: North Idaho

    Thank you all for your kind remarks. After seeing Bill F’s beautiful work on the Xtreme, I was hesitant to post a photo. ;-)

    RF writes:

    >> ??? how did you invert the fuel line ???

    I put the valve in a vise and unscrewed the fitting with a wrench. I cleaned the threads. Then I applied some Propane-safe teflon pipe thread compound, making sure not to get any inside the fuel line. Then I just screwed it back on until it was in the orientation I wanted. Note that the brass fitting is soft — don’t apply too much torque or you’ll round off the nut. (Don’t ask me how I know this….)

    KD writes:

    >> Would cutting down the length of the fuel line offer any weight saving rewards?

    I’m sure it would, but I don’t have the tools needed to crimp the threaded fitting on the hose. Also, the long hose still allows easily using the stove with an upright canister, should lighting or simmering prove problematic with the inverted canister.

    Cheers,

    -Mike

    PS — I found that heat weakening post. It was hidden in “Reviews”, not “Forums”.

    #1346789
    Anonymous
    Inactive

    Mike,

    Not everyone has access to a Mill or wants to invest in one.

    What you did was very creative and doesn’t require a full-on machine shop. Bottom line the results speak for themselves.

    So don’t ever hesitate on posting those pictures or ideas…

    Regards

    #1346792
    kevin davidson
    Member

    @kdesign

    Locale: Mythical State of Jefferson

    So I guess that’s the only question re. operating this stove w/ inverted canisters–Will there be lighting or simmering issues?

    Also, I noticed on the Z stand thread, when using Ultrarod stock that it had to have an additional element added to provide support. This is spindly stuff.

    And it would appear based on the “heat weakening post” that a heavier gauge of Ti rod would make this mod structurally perfect.

    #1346795
    Vick Hines
    Member

    @vickrhines

    Locale: Central Texas

    Online Metals has 1/8″ titaniam in Grade 2 (unalloyed) (the least expensive)for $2.70 per foot. The BPL rods are 1/16″. Online Metals

    #1346862
    Michael Martin
    BPL Member

    @mikemartin

    Locale: North Idaho

    Hi All-

    I’ve done some more testing on the SUL Windpro and have a few things to report:

    1) Stove testing is a great way to use up those partially used canisters gathering dust in the garage. :-)

    2) I boiled water in a 2L pot for 30 minutes to test the integrity of the Ti Rod legs. The legs were definitely stable enough. Even at a rolling boil, no water was spilled, and the legs did not collapse. Long term reliability after repeated heat/cool cycles is unknown. Also, the legs were somewhat deformed after the test, so they are not as straight and pretty as they were originally.

    3) If you are used to boiling 4L at a time on your XGK, then you will be disappointed in the stability of the Ti legs. But, with a little care and finesse, I’d say they are fine to use in an SUL context. They are more stable than many alcohol stove stands I’ve used in the past.

    4) The heat output drops off noticeably with about 10g of fuel left in the cans. At this point, the temperature of the canister starts to drop also — suggesting it is no longer operating in liquid feed mode. However, with the long and flexible (and unmodified) hose attached, the canister can then be turned upright and held closer to the flame to drive out the remaining fuel vapor. If you’re comfortable with the EXPLOSION RISK, and if the water temperature is not too hot to touch, you could even ***TURN OFF THE STOVE***, dip the canister into the warm water, and relight. [Try this at you own risk.]

    5) An additional 0.5g (wee!) can be saved by replacing the stock stainless steel valve handle with a Ti ultrarod one. (I weighed it out, but decided it was not worth the effort on my stove.)

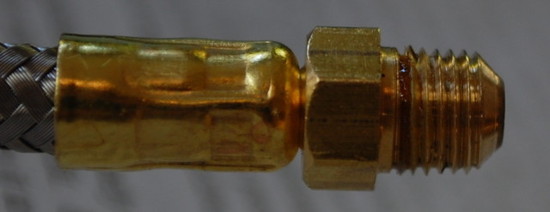
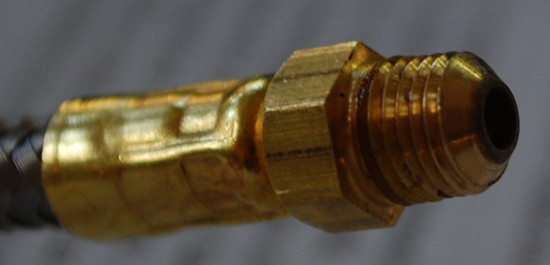
    6) As Kevin Davidson suggested, the hose could be shortened for additional weight savings. I estimate this might save 0.5oz. The hose could be made as short as 2-3″, but this would eliminate the capability to operate with an upright canister, and would require some kind of crimping tool to install the fitting on the hose.

    Cheers,

    -Mike

    #1346917
    Roger Caffin
    BPL Member

    @rcaffin

    Locale: Wollemi & Kosciusko NPs, Europe

    Mike

    The long brass bolts at top and bottom are 10-32 gauge ones. However, you could get away with undersized 5 mm ones. This would let you reduce the size of the bolts it you wanted.

    Caution: the bolt at the top also seals the top of the burner against gas leaks. I am not sure whether it matters or not if there is a small flame out of that hole. I guess it won’t be large.

    What would be really nice would be three ‘washers’ of thin Titanium welded to each end of the rods, so you could have a really smooth opening system. But at present I have neither rod nor sheet to try it out. If you have some, you could try spot welding the rod to the sheet if you can find someone with a spot welder.

    Cheers
    PS: VERY nice idea with those rods!

    #1346927
    Michael Martin
    BPL Member

    @mikemartin

    Locale: North Idaho

    Thanks for your suggestions, Roger!

    >> …so you could have a really smooth opening system…

    Thats a great idea. It is definitely a high friction fit at the moment. Although, I think this contributes to pot stability. A smooth pivot may introduce more flexing.

    I haven’t noticed any gas leaks from the top bolt, but thanks for the warning. I’ll keep an eye on it.

    I have noticed that the air holes in the jet assembly can be partially occluded by the jet nut as the burner can flex the legs and sit a little lower than stock. This does not seem to affect operation though. If you wanted, this could be fixed with a few washers.

    I also noticed production variation amongst stock Windpros. Mine weighs 6.9oz stock, while another seemingly identical one at the store weighed 6.6oz. (Yeah, I wish I discovered that before I bought the heavy one….)

    Cheers,

    -Mike

    #1346929
    Anonymous
    Inactive

    Thanks for sharing your research/info Mike I’m looking forward to purchasing a WindPro and making simular mods.

    Regards

    #1347508
    Hideaki Terasawa
    Spectator

    @trsw3

    Locale: Tokyo

    Hello.
    This picture is my trial.

    Upside down method is working well in the Japanese snow.
    The temperature was 14F. Altitudes was 8000 feet.

    #1347630
    Michael Martin
    BPL Member

    @mikemartin

    Locale: North Idaho

    Domo Arigato Hideaki-san.

    I’m glad to see it working in cold weather at high altitude.

    Cheers,

    -Mike

    #1347880
    Bill Fornshell
    BPL Member

    @bfornshell

    Locale: Southern Texas

    I bought a WindPro tonight. The devil made me do it.

    It is already in pieces and tomorrow it goes in for surgery.

    #1353400
    Patrick Baker
    Member

    @wildman

    Bill,

    Will you give us some updates on the WindPro surgury.

    Thanks,

    Patrick

    #1353403
    Bill Fornshell
    BPL Member

    @bfornshell

    Locale: Southern Texas
    #1444790
    Ben Pearre
    BPL Member

    @fugue137

    Can this thread be brought back to life? Or is there a more recent incarnation?

    Michael Martin wrote:
    "I put the valve in a vise and unscrewed the fitting with a wrench. I cleaned the threads. Then I applied some Propane-safe teflon pipe thread compound, making sure not to get any inside the fuel line. Then I just screwed it back on until it was in the orientation I wanted. Note that the brass fitting is soft — don't apply too much torque or you'll round off the nut. (Don't ask me how I know this….)"

    I just picked up a WindPro and tried this. The valve assembly and hose are joined by a brass-on-aluminium cone seal, pulled together by the threads as you screw the hose into the valve, so the threads more or less define the final orientation of the valve assembly. Are you saying that you did not screw it all the way shut, so that rather than using the cone seal you are counting on the seal created by just the teflon tape in the threads? How is that holding up? I'd expect the valve to rotate occasionally and wear at the tape–does this not happen? Or has the valve design changed since you posted this? I'm contemplating an o-ring or washer in the system to restore the cone seal… any thoughts?

    I assume I can test for leaks by hooking up a fuel canister and putting the whole thing underwater (or brushing with soap) and opening the valve. Any problem with that?

    Thanks!

    Edited to include pictures:Hose connector.  The seal seems to happen near the tip of the cone.Another view.Valve

    #1444802
    Michael Martin
    BPL Member

    @mikemartin

    Locale: North Idaho

    Hi Ben-

    It's been some time since I looked at this. FWIW, I took off the Ti legs and put back on the stock ones as they were much sturdier. I still have the 180 degree reversed fitting on there and have had no problems.

    It sounds like MSR may have changed the design since then. Can you post a photo of your unit?

    Cheers,

    -Mike

    #1444876
    Ben Pearre
    BPL Member

    @fugue137

    Thanks for your response! Pictures added to above post.

    Three more questions:

    Priming: people claim that the liquid feed propane/butane stoves do not flare up immediately upon lighting the stove, but I don't understand why not. That goes for lighting in liquid feed mode at all temperatures? The PowerMax has 40% propane, much higher than the 20% or so in everyone else's canisters. Is that maybe to guarantee that immediately after lighting there will be enough propane in the tube to boil and guarantee a gas (not liquid) feed for long enough to heat the generator coil? Any problems with the 20% stuff allowing some liquid fuel out the nozzle (which could be very very bad, if I understand correctly)? Nobody has talked about using a lighter to heat the generator tube, but that might be a sufficient kludge…

    Temperature limits: my understanding from the article Selecting Canister Stoves… is that a liquid feed stove should generate feed pressure down to -40 or so (while propane is gaseous). Why have I seen reports of the inverted stoves having trouble at warmer temperatures? Are the causes understood? What am I missing?

    Temperature control: another BPL article claimed that gas flames were much easier to control than liquid flames using the standard valve (a question of volume flux, I believe). From the field, do the liquid-feed Windpros simmer as well as the gas-feed ones? Or am I reduced to SimmerLite-grade "simmering"?

    Cheers!
    -Ben

    #1444887
    Roger Caffin
    BPL Member

    @rcaffin

    Locale: Wollemi & Kosciusko NPs, Europe

    Hi Ben

    Some of your questions are answered in various other articles on canister stoves here at BPL. Look for ones with my name on them.

    Flaring:
    Yes, a liquid feed canister stove WILL flare if you start with a liquid feed and open the valve up fast. You need to start with a low flame and let the stove warm up a bit. A few little sputters of liquid fuel won't be very problematic. You can improve this greatly by starting with the canister upright to get a mainly propane feed for 10 – 20 seconds.

    With the Powermax canisters you get a liquid feed from the start. So start slow with those too. I think the valve assembly gets warmed slightly by your hand as you assemble the connection onto the can.

    Lowest operating tenperature:
    Yes, propane will evaporate down to -40 C, but the propane/butane mix is only useful down to -26 C, and that is being a trifle generous. However, you can always warm a canister up just by putting it in a pot of liquid water. Sounds weird, but the water will be above 0 C and this works fine.

    Ease of control:
    Yes, it is a matter of volume flux.
    I have used a liquid feed Windpro with success. It was a little harder to valve down to a simmer, but it was certainly possible.

    Cheers

    #1444891
    Michael Martin
    BPL Member

    @mikemartin

    Locale: North Idaho

    Hi Ben-

    Looking at your photos, the valve assembly on your stove appears to be the same as mine. When I re-assembled mine after taping, I still got a seal from the compression cone. I was just able to torque it on an extra half-turn. (But, I did manage to strip the brass fitting a bit in doing so.

    I used this stove for 10 days in sub-freezing conditions last February in Yellowstone. It worked fine, but was a bit fussy about getting consistent fuel flow and would require opening the valve full-throttle once in a while to get it running smoothly again. I think Roger has experienced something similar.

    Good Luck. Remember that stove surgery is at your own risk.

    Cheers,

    -Mike

Viewing 25 posts - 51 through 75 (of 75 total)
  • You must be logged in to reply to this topic.
Forum Posting

A Membership is required to post in the forums. Login or become a member to post in the member forums!

Get the Newsletter

Get our free Handbook and Receive our weekly newsletter to see what's new at Backpacking Light!

Gear Research & Discovery Tools


Loading...