Now that this thread is active again, I realized I forgot to post instructions and photos of my Chrome Dome & Komperdell C2 trekking pole combo.
Before you remove the main umbrella pole, measure the distance from the underside of the canopy to where the rods attach to the main pole. You will need this length in a later step.
Next, remove the pole from the Chrome Dome. There is a metal wire that needs to be unwound and removed under the canopy, and a metal bar that has to be removed from the tip. These are easy to do, require no special tools, and do no damage to the umbrella canopy. The one thing you have to do is saw of the end of the umbrella clip (the part you push in to retract the umbrella). This lets you add a clamp from a Black Diamond FlickLock trekking pole. This clamp is what keeps the umbrella canopy open and attached to the trekking pole. I had a spare BD pole that I removed the clamps from, but you can purchase these as individual accessories from BD's website. You want the larger clamp.
Here is a photo of the center pole removed, with a view of the clip top sawed off, and the large BD pole clip ready to add:

And here is a photo with the BD pole clip attached:
Next, you need to wrap a few centimeters of 3/4-inch wide electrical tape around the trekking pole in two places. This is because the trekking pole has a narrower diameter than the umbrella pole. It also adds a tacky grip. The first place is at the tip of the pole, just under the trekking basket. This keeps water out and keeps the top in place. The second electrical tape ring should be lower down on the pole at the same distance you measured earlier, where the rods attach to the original pole. You will have to experiment with how much tape to add; too little and you don't get a grippy seal; too much and the pole won't fit through. A few centimeters makes a big difference, so it will take a few tries. Here is a photo of where I placed both 'rings' of electrical tape:
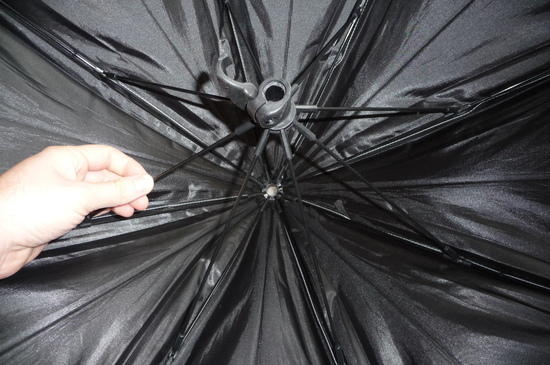
From here, you separate the trekking pole, insert the longer end through the TOP of the umbrella, and reattach the lower end. You can now push the umbrella open and use the BD clip to keep it open. Be sure to tighten the BD clip over the electrical tape area; this keeps the clip in place, and locks the umbrella onto the pole, thus preventing the umbrella from twisting. If you added just the right amount of electrical tape, there will be an excellent grip; I can twist the umbrella back and forth quickly on the axis and it doesn't budge. Here is a photo of the completed, open umbrella:
Here is a different angle, showing the tip coming out the top:

The great thing about using the Komperdell C2 pole, aside from being the lightest 2-section CF pole, is that the lower shaft is long enough that you can completely close the umbrella onto the pole. You can't do this with a three-section pole:
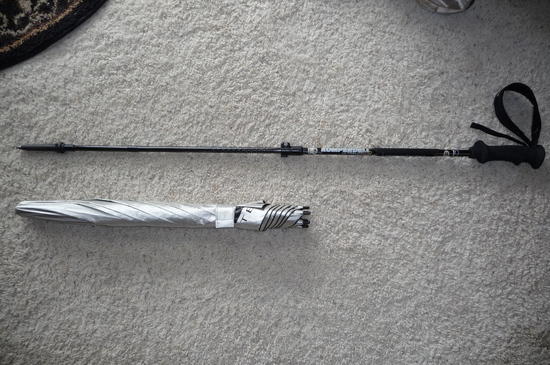
Lastly, here is a photo of the umbrella and pole separated:
I usually keep the umbrella portion in my backpack, and put it on when I need it. This is easy and quick. What's nice about this setup is that if there are on-and-off showers, or it is raining but I have to go through a patch of dense brush, I can close the umbrella onto the pole and hike with it attached for a few minutes. This would get old after a while since it begins to feel quite heavy in trekking pole mode, but it means I'm not constantly putting the umbrella back into and out of my pack. It also means I never have to store a trekking pole in my backpack when using an umbrella. And if I extend the pole a bit, I can hold the pole near my waist, which is much less tiring than holding a short umbrella pole up near my shoulder. Oh, and fully extended, I can sit under it, holding it under my armpit, and have great shade. I really love this setup!