Topic

Top-entry bivies/bug-tents under a tarp – how liveable?


Forum Posting

A Membership is required to post in the forums. Login or become a member to post in the member forums!

Home Forums Gear Forums Gear (General) Top-entry bivies/bug-tents under a tarp – how liveable?

Viewing 10 posts - 1 through 10 (of 10 total)
  • Author
    Posts
  • #3632060
    Geoff Caplan
    BPL Member

    @geoffcaplan

    Locale: Lake District, Cumbria

    H folks

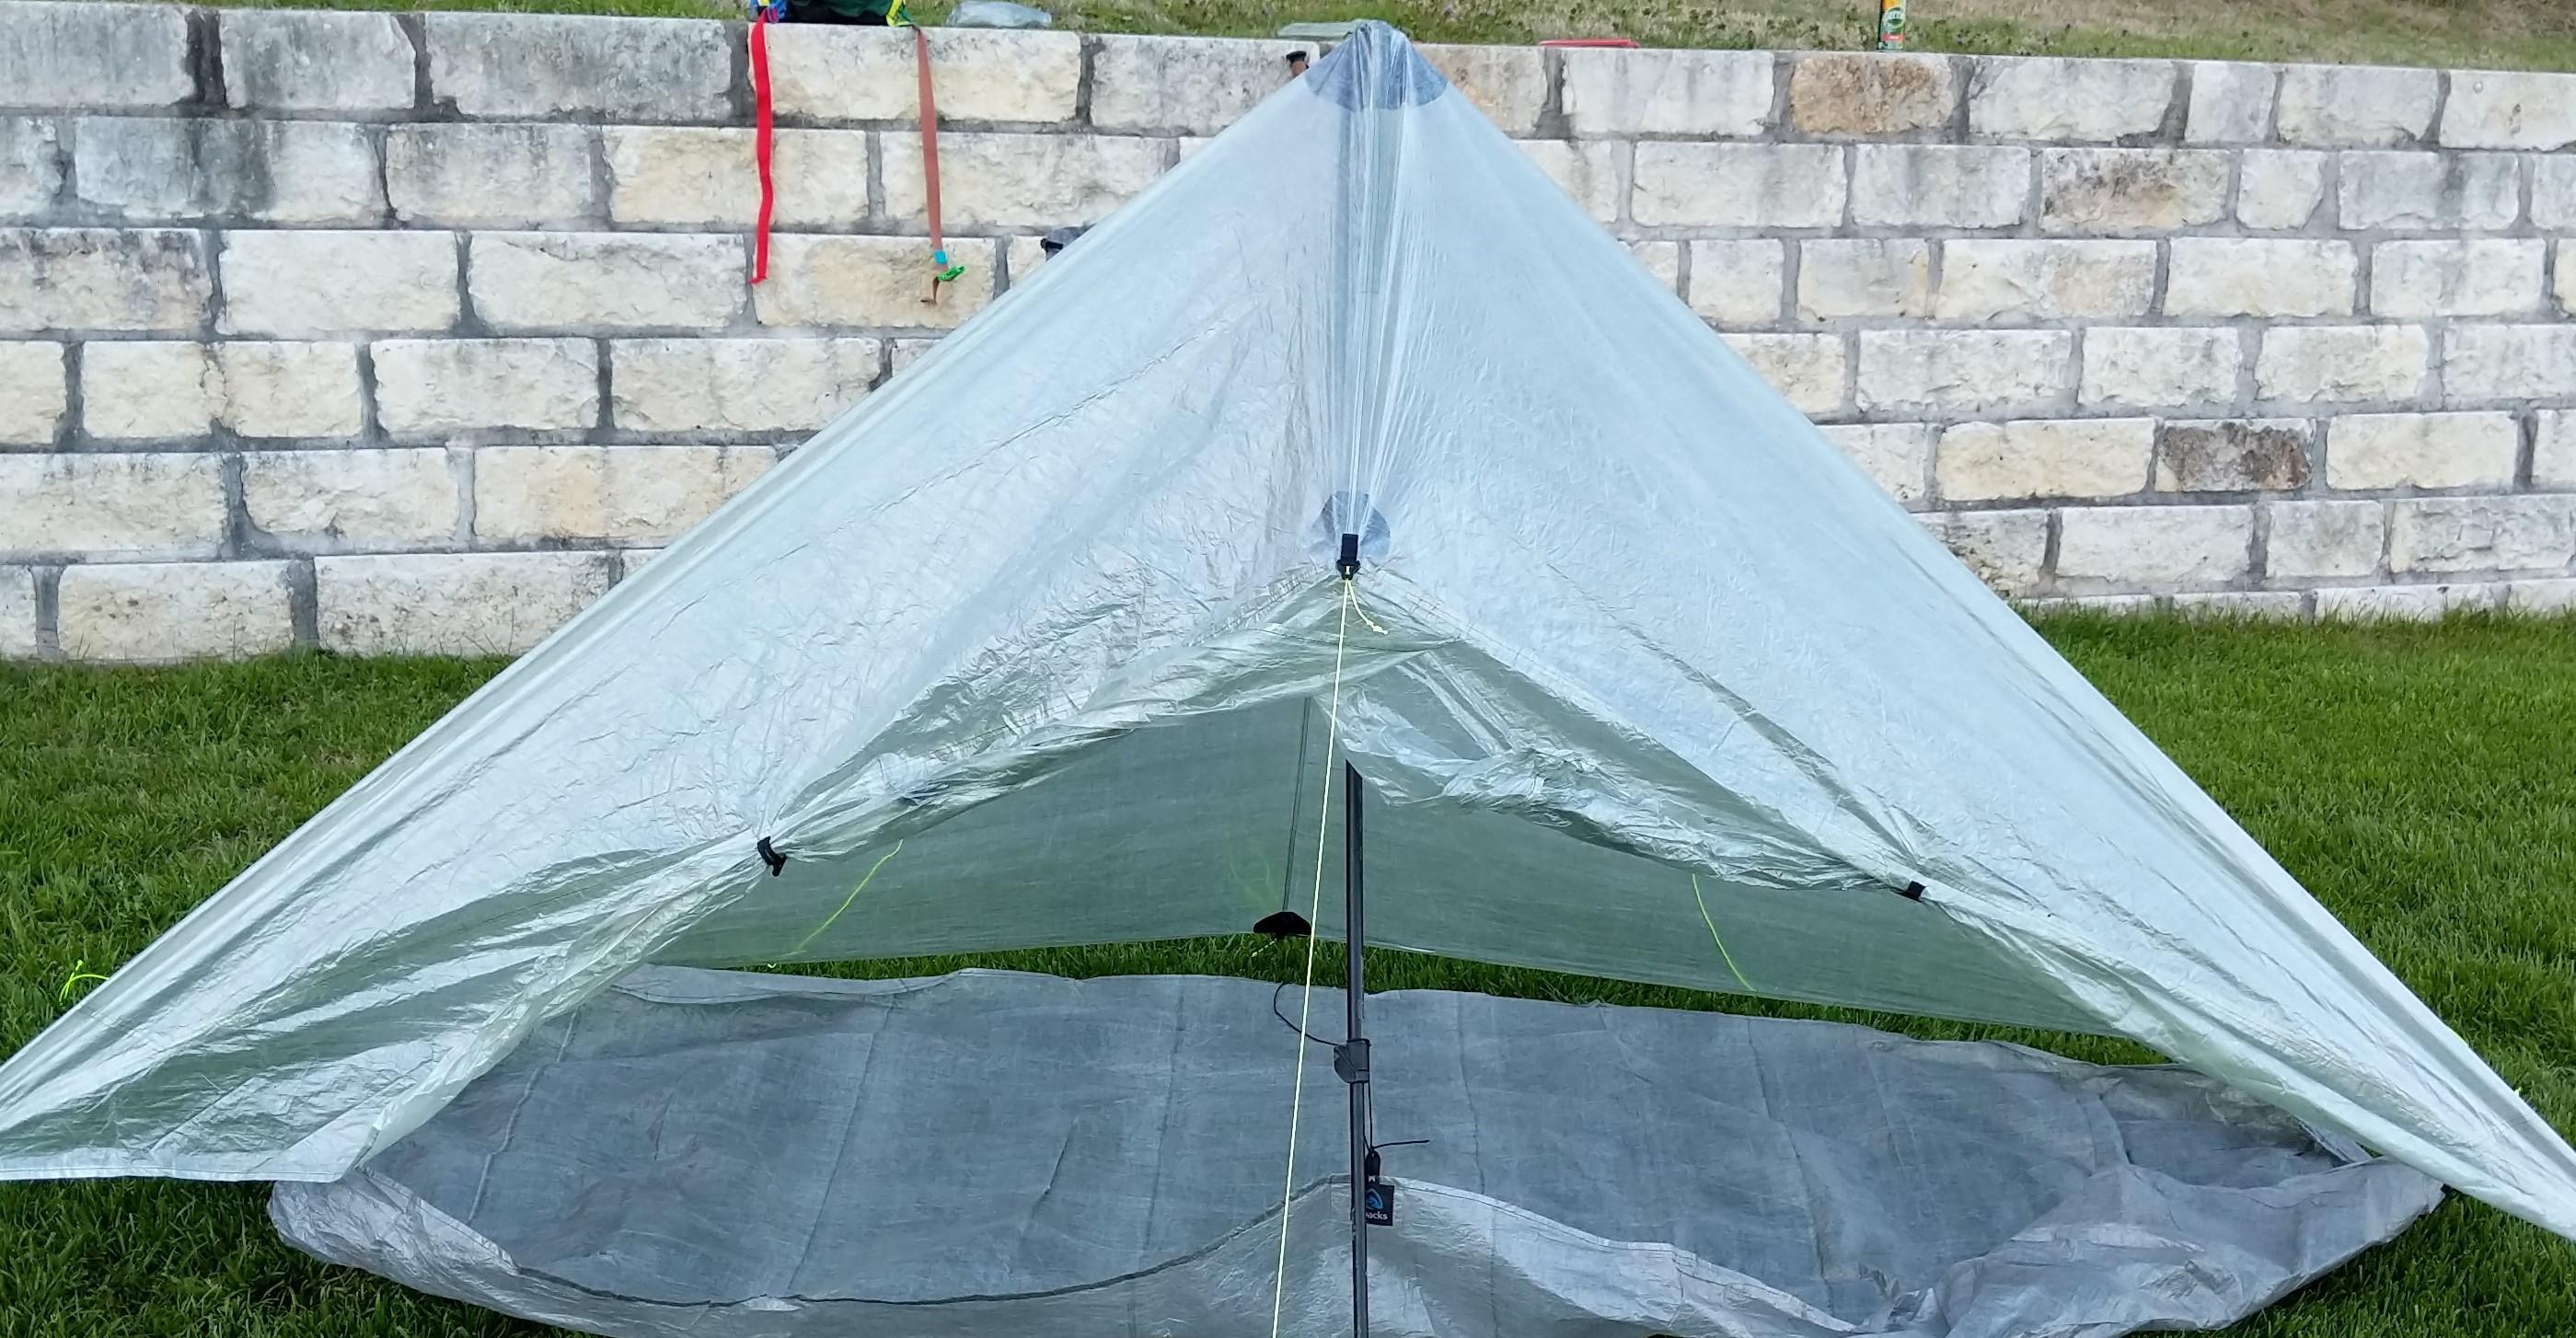
    I’m designing an inner to pair with my beaked A-frame tarp.

    Till now, I’ve always used conventional front-entry inners in the style of the MLD Serenity:

    But this setup has a couple of issues. First, it’s hard to reach gear stowed to the sides, and it’s not practical to reach the rear pole if you need to adjust it – you’re basically trapped inside it. Second, to cook under the beak you have to open the front of the nest, which lets bugs into your sleeping area.

    With an A-frame tarp the main alternative seems to be a top entry like the MLD Bug Bivy 2:

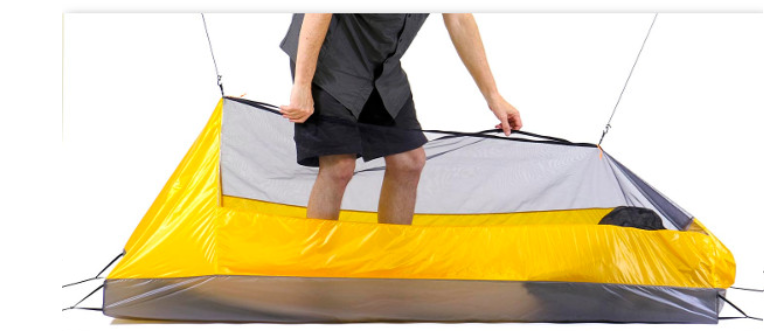
    The potential advantage is that you can drop the top to reach the sides and back of the tarp, and when you’re cooking you can simply drape it round your legs and keep out the bugs. Plus it’s a nice setup when you’re cowboy camping, as you can simply step into it.

    The downside is the hassle of dropping and re-clipping the front to get in and out when under the tarp – though as I’m pretty much a walk and sleep kind of hiker I wouldn’t be doing that very often on a typical day.

    But I’ve no practical experience of a top entry, so I’d be grateful for any feedback from people who have used them in the field. How liveable do you find this setup?

    #3632065
    Monte Masterson
    BPL Member

    @septimius

    Locale: Southern Indiana

    I’ve used the MLD Bug Bivy a lot for warmer weather, short-term trips. but with colder season bags/quilts and pads there’s just not enough space. And when under smaller tarps, say under 2 meters wide, you find yourself having to shimmy like a worm to enter and exit , as with any front entry. A 250 cm wide or larger tarp allows for a much more comfortable way to get in and out of the  MLD Bug Bivy. The top entry is a good thing though. I think ideally a  larger DIY version would be great. Ron simply uses a 54″ wide 0.7 noseeum material to make the bivy, so if you used a 60″ wide  .50 from RSBTR it would give you 6 more inches of space, without having to sew 2 separate pieces. A tad lighter too.

    #3632077
    Diane “Piper” Soini
    BPL Member

    @sbhikes

    Locale: Santa Barbara

    I have decided the superior bug tent is bottom entry. Floorless. You do not need to be sealed inside. Zippers will fail you eventually and they are inconvenient. If your floorless bug shelter is attached at the four corners to your existing tarp stakes with elastic cord, getting inside is a simple matter of pushing it aside to sit on your groundsheet, take off your shoes while you are still outside, then lift the whole net up and over you. It will snap back and you’re now inside. Rocks or your belongings can be used to hold the edges down if needed. If your pack is outside, you can reach it easily from any direction. This is easier to make yourself and it is lighter without the zipper and requires no extra stakes.

    I suppose you could make a floorless bug shelter that attaches to the same lines as a separate bathtub floor if you want one.

    #3632079
    Geoff Caplan
    BPL Member

    @geoffcaplan

    Locale: Lake District, Cumbria

    Monte

    I agree with you about the size – for me the MLD Bug Net would be too small for a long-distance hike. I was planning to make it bigger.

    My tarp is designed to be spacious in good weather, so I’d have plenty of room for entry and exit in typical conditions.

    When it’s battened down for a serious storm I’d be short of room, but in that situation I value safety and minimal flapping more than convenience!

    #3632083
    Geoff Caplan
    BPL Member

    @geoffcaplan

    Locale: Lake District, Cumbria

    Diane

    I have been thinking about a bottomless net as the alternative to the top entry. As you say, failsafe and gives excellent access to the rest of the tarp.

    It could make for a very modular system:

    1. Basic space-blanket groundsheet for dry conditions
    2. Standalone bathtub floor for wet and boggy conditions
    3. Well-vented pure mesh net for bugs in good weather
    4. Partially walled net for bugs and/or warmth in bad weather.

    With a bit of thought, I’m sure I could get the mesh and bathtub to play OK together.

    Mix and match components as conditions dictate.

    All these components would be very small and light – you could put them in your bounce box on a long hike and swap them out as conditions change.

    Main downside I can see – a bit more faff than having just a single, do-it-all one-piece inner. But that would be heavier, harder to make and less adaptable. Hmm.

    This guy has an interesting take on modular inners – though he uses zips. I prefer your idea of using bungee cord instead:

    https://youtu.be/Q4ECBP-AIn0?t=423

    I got the idea of using bungee for entry from the guys at SlingFin who used it in one of their tents. They may have abandoned it though – can’t see it on the current range. Maybe a bit off-the-wall for a commercial product. The advantage of MYOG is that we can do unfashionable things!


    #3632090
    Monte Masterson
    BPL Member

    @septimius

    Locale: Southern Indiana

    Here’s a 4.7 oz net I made a few years back out of .67 Dutchware noseeum. Since then I’ve learned to use nylon strips to sew together separate pieces at seams and it works far easier and is stronger to boot. Now I’m working on a half pyramid net now for Pocket Tarps, Gatewood Capes, half pyramid tarp pitches, etc. The trigonometry on the side pieces threw me for awhile.

    #3632098
    Murali C
    BPL Member

    @mchinnak

    I have thought about taking a bathtub floor that has a 5 inch bathtub floor and then stitching the net on 3 sides and keep one side open for entry/exit and then once you get inside, you can drape the 4th side over the bathtub floor – no zips or anything.  Of course the sea to summit nano net can also be used at 2.9 oz….only reason to stitch my own would be to reduce weight.

    Here is my pocket tarp with bathtub floor…..I like this setup better than the A frame as it provides excellent rain protection when the doors are down and the bathtub is attached to the tarp on all sides…..I have just attached it to the pole in this picture. I like side entry better than the front entry….

    #3632109
    Garrett
    Spectator

    @gtturner1988-2-2

    ”The downside is the hassle of dropping and re-clipping the front to get in and out when under the tarp”

    Not a hassle at all. The ends are attached via shock cords, so it’s super easy to move out of the way. I never used the clip near the footbox, which made entry even easier.

    #3632130
    Diane “Piper” Soini
    BPL Member

    @sbhikes

    Locale: Santa Barbara

    Wow, that’s a quality job, Monte. Why didn’t I think of that pattern when trying to make my own A-frame net years ago?? I’m just so engineeringly-challenged.

    Main downside I can see – a bit more faff than having just a single, do-it-all one-piece inner. But that would be heavier, harder to make and less adaptable. Hmm.

    The thing is a single, do-it-all one piece inner doesn’t really do it all. It only does one thing, and that’s put you inside the one-piece inner. Unless you want to lay it down and sleep on top of the mesh, which runs the risk of damaging it. I can see the advantage of maybe being able to sleep in just the mesh, though.

    It is a little fiddly to have all these separate pieces. I have found I can dial in the comfort when my things are in pieces. And send home (or bounce) just the pieces I don’t need right now.

    As far as doing a long distance hike, the zipper on my tent didn’t make it the whole way for me (I set it up every night, I don’t like to cowboy camp). I have decided my tarps and bug nets, all of which have no zippers, are better for not having zippers. I’m done with zippers. That’s just me though. I’m probably zipperly-challenged as well.

    #3632138
    Geoff Caplan
    BPL Member

    @geoffcaplan

    Locale: Lake District, Cumbria

    Diane

    In my experience, curved zippers fail. And coil zippers sometimes fail, if they are exposed to UV and the threads that hold the teeth degrade. But a short, straight YKK zipper that’s kept out of the sun should last indefinitely, I think, if used with care. I have one on my daypack I’ve used pretty much every day since the early 1970s… The biggest risk is the slider wearing out, especially in dusty environments. To offset that you can fit a couple when you sew the zip. If the slider fails, lever it off and there’s a fresh one ready to go.

    Your floorless approach is certainly the most flexible and will often be the lightest. And it should keep most critters out, except perhaps for ants. But chatting today with an experienced thru-hiker, he abandoned the 3-piece setup because he found it too much hassle setting it up at the end of a tiring day. And he’s a lot younger and fitter than I am!

    An all-in-one inner reduces the faff factor, at the cost of reduced flexibility vs the 3-piece approach, but is still more flexible than the ubiquitous single skin tents like the Duplex or Protrail – especially the ability to use it for cowboy camping. And a lot of experienced thru-hikers like the single skin approach.

    I think on a weekender I’d go with your system, but right now I’m minded to take the simpler approach for a long hike.

Viewing 10 posts - 1 through 10 (of 10 total)
  • You must be logged in to reply to this topic.
Forum Posting

A Membership is required to post in the forums. Login or become a member to post in the member forums!

Get the Newsletter

Get our free Handbook and Receive our weekly newsletter to see what's new at Backpacking Light!

Gear Research & Discovery Tools


Loading...