Topic

The Dogplex


Forum Posting

A Membership is required to post in the forums. Login or become a member to post in the member forums!

Home Forums Gear Forums Make Your Own Gear The Dogplex

Viewing 12 posts - 1 through 12 (of 12 total)
  • Author
    Posts
  • #3485004
    Nick Smolinske
    BPL Member

    @smo

    Locale: Rogue Panda Designs

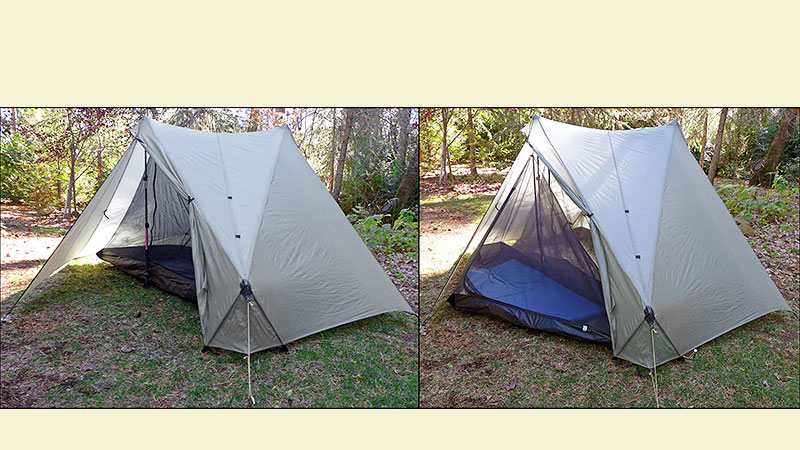
    So I’ve been pondering a new tent design recently. I like the simplicity of the mid I’ve been using but it’s not really the best usable-space-to-weight ratio, and a tent like the Duplex is looking nicer and nicer for a variety of reasons. But since I frequently backpack with my girlfriend and her dog (and hopefully soon 2 dogs), the duplex and triplex aren’t really good uses of space. Dogs don’t need that much headroom, and we don’t need that much vestibule.

    So I’ve been playing around on graph paper with a tent very much like the Duplex, but more suitable for added canine companions. Of course, I have already dubbed it “The Dogplex”. The plan is to make a silnylon version first, then sell it and make a cuben one with any changes we decide we need.

    I’ve gone back and forth on a number of designs but this is what I’m currently thinking. It’s basically a duplex with the floor and netting extended to include one of the poles and most of one vestibule (with that vestibule extended as well to cover the new floor space better). So it means there’s one pole inside the netting and one outside, which is kind of weird. But we still get two doors and in nice weather we can leave both open for good airflow.

    I’m a luddite when it comes to design, so here’s my graph paper sketches. No CAD drawings for me yet.

    First, the top view. In this view the black is the tent outline, the green is the floor, the purple dots are the trekking pole locations, and the blue is the rough size/shape of our largest winter sleeping pads.

    Now for the side view. Same colors as above except that the blue now signifies the netting.

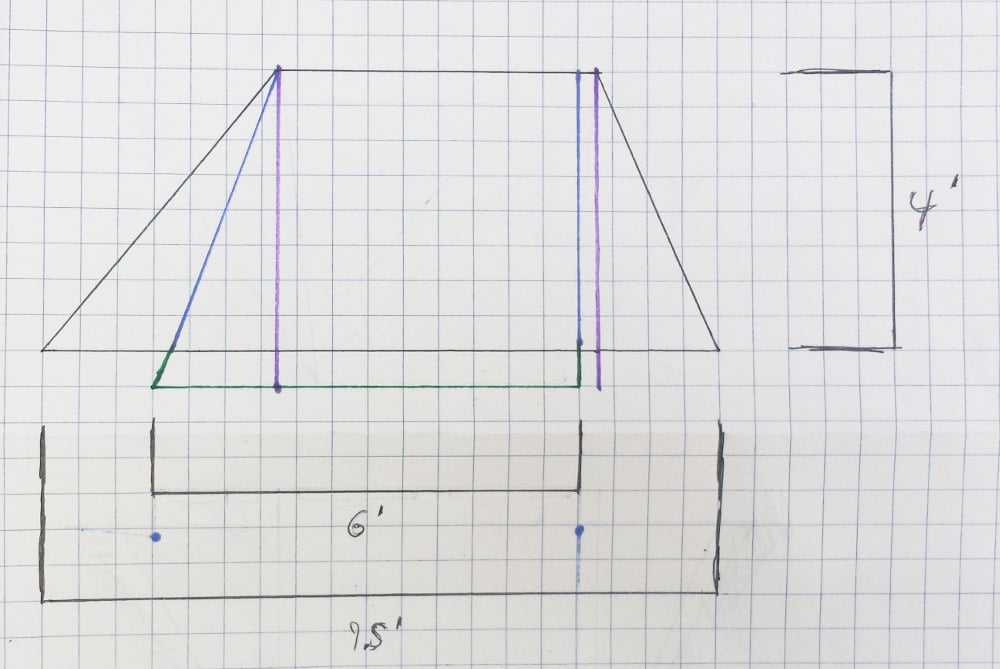
    And that’s the gist of it. I think it might be kind of annoying to have one pole in the net tent and one outside, but after running through the options it seems like the best plan to me.

    #3485009
    Franco Darioli
    Spectator

    @franco

    Locale: Gauche, CU.

    You could get some inspiration from this :

    https://www.tarptent.com/sidecar.html

    YouTube video

    #3485186
    Nick Smolinske
    BPL Member

    @smo

    Locale: Rogue Panda Designs

    That looks pretty sweet! Basically the same thing I’m looking at doing, but mine will be integrated into the shelter and thus quite a bit lighter.

    I just laid out the patterns. I did it the old-school way, calculating all the lengths with the Pythagorean theorem and then using some geometry to lay everything out. It worked pretty well for me, and more practical than trying to print them somehow IMO. I added a 2″ cat curve to the ridgeline and left the other seams straight.

    Now I’m pretty much ready to cut and build the sil version. One thing I’m stuck on when I make the cuben one is how best to form the peak. I haven’t found much good info on MYOG cuben peaks in my searching. Here’s what I’m thinking so far:

    1. Rather than one thick reinforcement like Zpacks tents, I want to do graduated patches with decreasing thickness traveling away from stress points. So I’ll probably use 1.0oz cuben for all of the patches, or even 0.75 for the largest ones. Then maybe something stronger for the very center of the peak. I will have some extra from the rest of the shelter, and I have plenty of seam grip and cotol-240 to bond the patches on.
    2. I think for the largest peak reinforcements, I’ll apply them to the individual pieces before putting the mid together. Then once the main seam is applied I’ll probably glue some cuben strips across the peak for strength (crossing at the center in an X pattern), and then make a cone and press it in with seam grip. Probably way overkill but it seems worth it, when I’ve tested adding even very heavy fabrics to silnylon mid peaks the weight difference has been very small (I think the 1000d cordura cone for my silpoly ‘mid weighed 3 grams). The cone is probably going to be a PITA to build and get right, but by using seam grip instead of double-sided tape it should be a lot easier to get it in there since I’ll have a few minutes to get it into place.
    3. One thing left uncertain is sewing. I’m pretty settled for the main seams – I’ll be taping, then sewing (with a triple step zig-zag stitch like the one used by professional cuben sailmakers). Then seam grip on top. But I’m unsure whether to have any sewing involved in those reinforcement patches. I’m leaning towards none and only sewing the main seams, the tie-outs themselves and the hem.

    First things first, though – time to get sewing on the sil version!

    #3485187
    Nick Smolinske
    BPL Member

    @smo

    Locale: Rogue Panda Designs

    Oh, and one other unresolved issue in both the sil and cuben version is how to handle the sharp end of the trekking pole on the inside peak. On the outside one it’s easy, just do it handles up and sharp end into the ground. But for a pole inside the net tent I’m unsure.

    #3485188
    Paul S.
    BPL Member

    @pschontz

    Locale: PNW

    For the trekking pole you can bring a rubber tip for the pole (easiest) or build in a metal grommet and a reinforced patch on the spot the tip goes into at the peak.

    #3485189
    Franco Darioli
    Spectator

    @franco

    Locale: Gauche, CU.

    This is how we do it :

    #3485190
    Nick Smolinske
    BPL Member

    @smo

    Locale: Rogue Panda Designs

    Paul, I do like that idea. But unfortunately I think we’ve thrown away the tips for all of our poles! I think the grommet in the peak makes a lot of sense, especially since we don’t have to worry about losing it. I’ll try adding one to the cone – the nice thing is I can test it *before* gluing the cone on and tweak until I get it right.

    I might also add a thick patch of slip-not fabric on the tent floor, but I can worry about that after the tent is put together.

    Also, one nice aspect about making full-size physical patterns is that you can easily estimate final structure weight using a kitchen scale and a square yard-sized sample of your pattern material. Looks like I’ll be using 12.1 square yards of material for the fly, including seam allowances but not reinforcement patches. So with 0.75oz cuben that means about 8oz for the fly material. Looking pretty good.

    #3485273
    Nick Smolinske
    BPL Member

    @smo

    Locale: Rogue Panda Designs

    Another design issue which I have not seen addressed on the forums – how best to make the Duplex-style outer doors? I like the look of them, but don’t have a source for the special buckle that they use. I also don’t know that I’ve seen a single MYOG project using that design. Maybe that means it’s not that good in practice? But I’ve heard mostly good things.

    I did see a modification online somewhere with two side-release LineLoc3’s on each door. That would still be fairly light (definitely lighter than a zipper).

    #3485280
    William Chilton
    BPL Member

    @williamc3

    Locale: Antakya

    You can buy the buckles direct from Zpacks.

    #3485425
    Nick Smolinske
    BPL Member

    @smo

    Locale: Rogue Panda Designs

    Sweet, thanks for posting that William. I figured they would sell them but couldn’t find it on their site.

    I just cut all the silpoly pieces and they came in at 430 grams. My sewing machine is in the shop and I’ll be heading out for the eclipse, so this project is going to take a break for a week or so – but I think I’ve got all of the design details worked out now, at least for the fly. I still need to research the best way to sew zippers onto mesh, that will be tricky. I did it once to repair a friend’s tarptent but that was a couple of years ago and I recall it being a pain.

    I wish there were a better way to do a zipperless mesh opening – I’ve seen the Big Agnes tent that had it and it seems interesting, but I figure if I’m carrying the weight of a mesh inner, I might as well have a perfect enclosure.

    I designed this for a 3/4″ overlap in the cuben version, which means I can just do a 1/4″-1/2″ flat felled seam in the silpoly and I should end up with the exact same final dimensions in both tents.

    #3485569
    Eric Blanche
    BPL Member

    @eblanche

    Locale: Northeast US

    Hey Nick keep up the good work and the updates. I’m learning a lot from your posts!

    I did question the zig zag stich though and after trying to conduct some further research I actually found this thread from bpl years back. https://backpackinglight.com/forums/topic/31037/

    What do you think?

    Can’t wait to see both versions! Taking notes on trekking pole reinforcements..

    #3485597
    Nick Smolinske
    BPL Member

    @smo

    Locale: Rogue Panda Designs

    Thanks! I haven’t seen too many threads detailing a cuben structure this complicated so I figured I’d post in some detail.

    Re: The zig-zag stitch – I did see that thread, and it was one of the ones that made me think of doing the 3-step zig-zag. The other one was this thread where someone from North Sails chimed in:

    https://backpackinglight.com/forums/topic/58096/

    He mentioned sails failing when made with only bonding, but no failures on their bonded+stitched. Granted, sails take on a bit more force and I think a tent will probably be fine either way, but it makes sense to me that the stitches will help, and that the triple step zig-zag wouldn’t create the same kind of perforation damage that a regular stitch would. I’ll also be taking the advice from that post to use Tex 30 thread (Gutermann Mara 100) and the smallest needle that works with it (either a 90/14 or an 80/12).

    The stitching also adds very little weight. Same thing with the seam grip if you use masking tape on your seam and thin it out (I buy Cotol-240 at wholesale price, but if not I would probably find some cheaper form of Toluene). It won’t need a thick layer of sealer globbed over the seam, just a thin one. So it might end up being a little lighter than doing a double-taped seam.

    I should add that after pricing out the cuben fiber and mentally going through all the work that needs to be done, this project is only worth it because I’m making something that isn’t on the market. I would actually save money if I just bought a Triplex and spent the time sewing bike bags for people instead, but the end result should be better for our needs than a Triplex. And I enjoy the change of pace from making bike bags and the professional experience I’ll gain from making a complex cuben project.

Viewing 12 posts - 1 through 12 (of 12 total)
  • You must be logged in to reply to this topic.
Forum Posting

A Membership is required to post in the forums. Login or become a member to post in the member forums!

Get the Newsletter

Get our free Handbook and Receive our weekly newsletter to see what's new at Backpacking Light!

Gear Research & Discovery Tools


Loading...