A BPL member recently sent me his 1st gen Seek Outside Daypack Talon, the predecessor to the Merlin, for very cheap–less than what it would have cost me to buy the fabric and notions for a similar-sized pack. The zipper was damaged and the sliders did not stay on anymore, so the lid couldn’t close, and all of the attachment loops—which allow it to function as a compression panel— had been cut off. This member didn’t want to throw it away and I thought maybe I could bring it back into use. I knew that Seek Outside has a great repair policy and would have put on a new zipper, but I wasn’t sure if they would take on putting in new attachment loops, since that had been a deliberate modification. Plus, I wanted to challenge myself with the repair and see what I could learn.
Originally, the daypack used two sliders that met in the middle at the front of the pack (Mystery Ranch packs are another example of this). There was continuous zipper tape on the top of the lid, and two individual pieces of zipper tape on the bottom, that came together in a V. This allowed you to “rip” open the top quickly by grabbing the pull tab in the middle, but to close it you have to close two zippers. For more water resistance (no gap where the sliders meet) and simplicity, I opted to replace it with a single slider and water-resistant zipper.
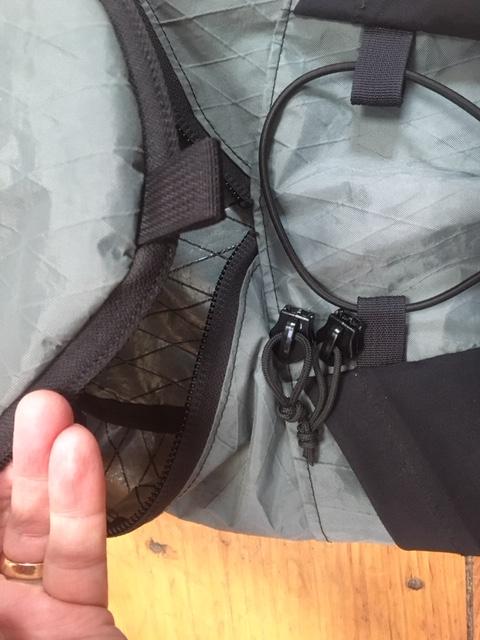 original zipper
I started by seam-ripping the zipper. The internal seams were bound with grosgrain. Halfway through seam-ripping, I thought, “What have I gotten myself into?!” Seek Outside’s sewing and reinforcements are very robust.
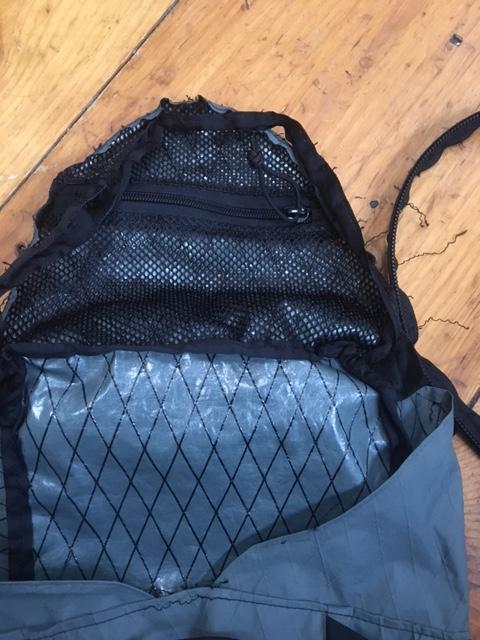
 attachment loops had been cut off
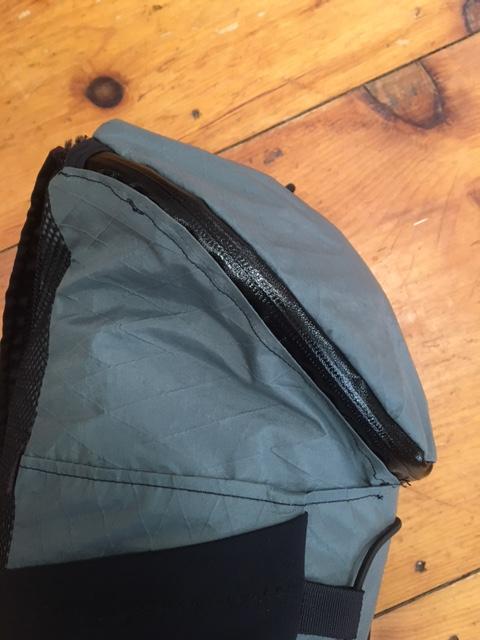
I discovered that the original two-zipper design meant the bottom edge of the opening was slightly longer than the top edge of the lid (because the bottom used two zippers that came close to meeting in the middle, but it’s not a continuous length of zipper teeth like the top). Replacing this with a single zipper meant that there was about a centimeter of extra fabric on the bottom edge of the opening where the zipper tape ended. I simply made a tiny baffle here to shorten the fabric on that edge and it’s barely noticeable.
My new zipper closure looks a little funky, but it’s perfectly serviceable and once the seam ripping was done, the sewing went very quickly. I’m pleased with the result and this Talon is a big improvement to the much smaller compression panel I had been using previously.


In honor of Earth Day, I wanted to encourage BPL members who have damaged gear that doesn’t feel worth it to get professionally repaired to consider offering up to the community on Gear Swap.
While this was a fun and worthwhile project, I’m not asking primarily for me, as my MYOG queue is quite long right now. But there are a lot of fabric wizards here–check out this post of a beautiful tunnel tent made from secondhand fabrics by Warren McLaren. I think it would be an exciting series to see what folks can bring back into use from gear previously destined for the trash bin.
Happy hiking!
Greg

