Topic

Quilt Design Help & Validation Needed


Forum Posting

A Membership is required to post in the forums. Login or become a member to post in the member forums!

Home Forums Gear Forums Make Your Own Gear Quilt Design Help & Validation Needed

Viewing 24 posts - 1 through 24 (of 24 total)
  • Author
    Posts
  • #3402328
    Lydia K
    BPL Member

    @lydiack-2

    Locale: Northern California

    I’ve been stalking the MYOG posts for quite a while now, and am finally getting ready to sew my first quilt.  I have some questions, and would like to validate the plan before I jump in.

    Materials: RBTR .66 oz Membrane 10 Taffeta Nylon for both shell and liner, with .5 oz NS50 Noseeum mesh baffles, and 800 FP down from Down Linens.

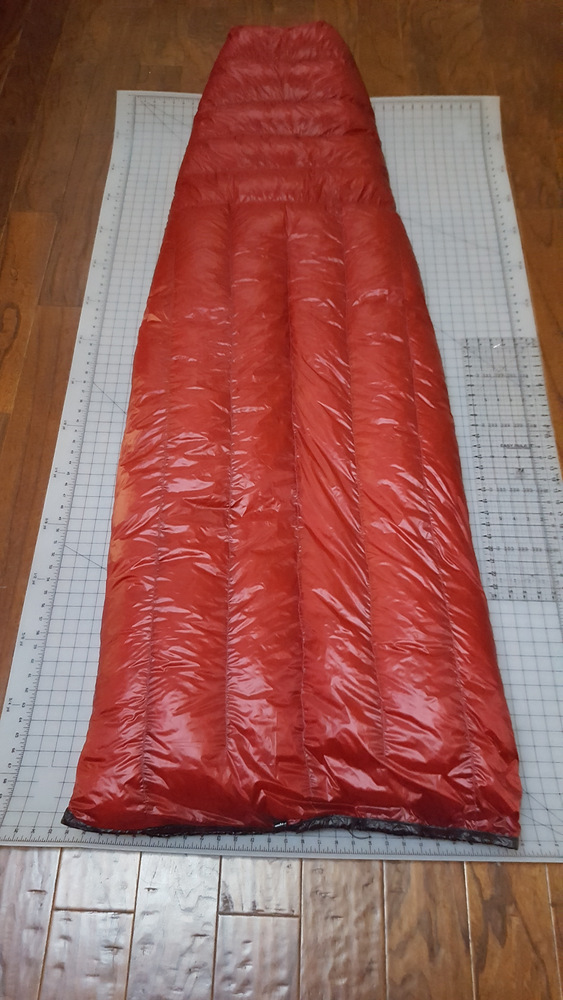
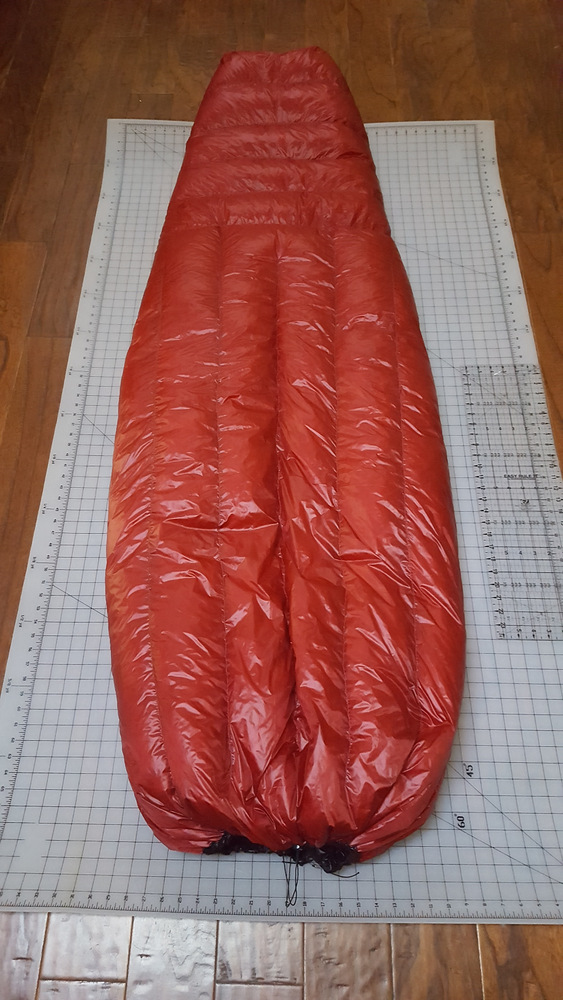
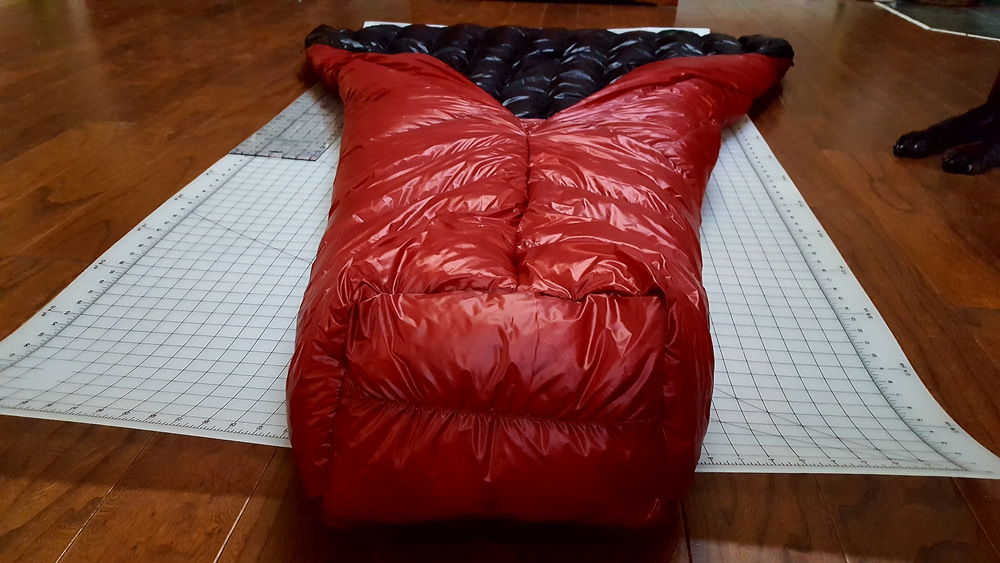
    Overall design plan: Vertical baffles, round sewn in foot box, I plan to use the full width of the fabric, which is listed as 58″, so it should be ~57″ after seam allowances, but not accounting for width loss due to loft.

    Questions:

    1. Baffle Height: I want the quilt to be good to ~20 degrees, so research says the loft should be 2.5″.  Should my baffles be 2″, and overstuffed to loft to 2.5″?  Or should the baffles be 2.5″?
    2. Baffle spacing: I’m planning to do vertical baffles, would 5″ be an appropriate spacing, or could/should they be wider?
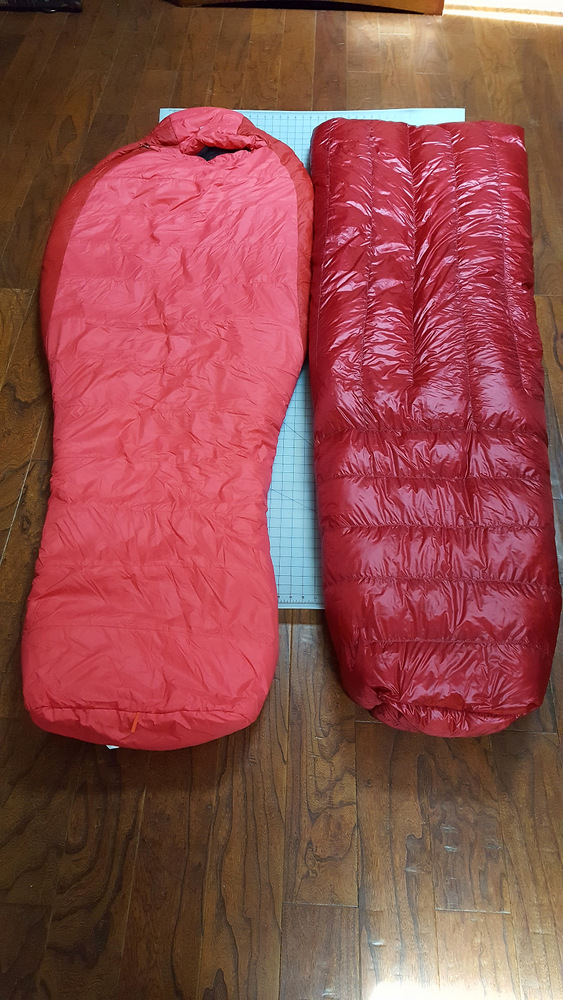
    3. Length: I’m 5’7″, so with a sewn in circular foot box, is there any reason why the quilt needs to be longer than 72″?  My current sleeping bag is an REI Lyra Long, and it has too much room, so I find cold spots when moving around on a cold night (I tend to re-position multiple times throughout the night).  I tried laying on the ground with the Lyra opened like a quilt, and pulled it over my head to see how much extra length I’d need, and 72″ seemed, good.  Also, with vertical baffles, will there be any loss of length due to loft?
    4. Taper: Planning to start the taper at 36″ and taper down to the footbox.  What is a good foot box size?  My current sleeping bag seems to be about 44″, but I could probably shave that down a little.
    5. Waterproof strips: I’m considering using a strip of Membrane Silpoly on the footbox and at the head end like Enlightened Equipment offers, to protect from moisture if I bump my shelter.  Good or bad idea?
    6. Inside vs. Outside dimensions: Should I make the liner smaller than the shell, or will it work just fine with the liner/shell being a mirror image?  It seems like I’ve mostly seen this mentioned by hammockers for underquilts, but not so much for top quilts.

    Thanks in advance for any help you all can provide! :)

    ~Lydia

    #3402356
    Hoosier T
    BPL Member

    @jturner140

    Locale: Midwest

    Haven’t worked with down so I can’t answer those specific question. However, I would recommend just using EE’s quilt sizes and their recommended sizing based on your height. This would include the size of the footbox.

    One important thing to note is that they DO NOT use waterproof fabric for their weather strips. They just use a slight heavier rip stop nylon that likely has a better DWR and doesn’t absorb as much water since it’s thicker material. I’m afraid you would have issues drying your quilt without any breathability in these areas. Read wind jacket – breathers well, releases your body moisture, but is slightly water resistant. I would probably recommend the 1.1 ripstop poly if you like any of the colors since it generally absorbs less than nylon but otherwise I would say just use the 1.1 ripstop nylon. Assuming we’re talking ripstop by the roll for all your materials.

    #3402358
    Hoosier T
    BPL Member

    @jturner140

    Locale: Midwest

    Yea, so it looks like they’re just using 20D for the strips. Just found this in their FAQ and it’s really helpful:

    What’s the difference between the 10D and 20D fabric?

    Both fabrics have a Durable Water Repellent (DWR) treatment and have a great feel and low weight. The 10D fabric favors minimal weight and maximum breathability as its highest priorities, whereas the 20D offers somewhat higher durability and water resistance at the cost of a bit more weight. In most cases with careful use the 10D fabric will be your best option, though if you tend to be somewhat more exposed to the elements in your camping style, the 20D will offer some added protection. Both 10D and 20D fabric options should be treated with care.

    Why can’t I use 20D fabric on both the inside and outside of my quilt?

    While it’s tougher and more water resistant than our standard 10D fabric options, our 20D fabric also doesn’t breath as well. When using two layers of it, this restriction can make your quilt more clammy, and makes packing the quilt more frustrating since air can’t escape quickly enough to easily compress the quilt to a smaller size.

    What are the Weather Resistant Stripes?

    If you’re frequently dealing with condensation on your tent walls and from your breath, the 20D weather resistant stripes can offer some additional moisture resistance at the head and foot of the quilt (as compared to the 10D fabric). This combined with a 10D selection for the shell adds approximately 1 oz of weight vs 2 oz for selecting 20D fabric for the whole shell of the quilt.

    #3402363
    Ryan Smith
    BPL Member

    @violentgreen

    Locale: East TN

    1. I always started with a 2.5″ baffle height. Once you sew in with a slight seam allowance it comes out closer to 2.25″. You still get the correct 2.5″ of loft just with a little better down control.

    2. Five inches is the max you want to go.

    3. IIRC, 6-8″ longer for a sewn footbox if you plan on snugging up to your neck.

    4.  I usually went 38″ for my size 13 feet. I wouldn’t go less than that personally.

    5. Might work OK, but I would probably just try to keep my quilt from touching.

    6. Differential cut – Not as necessary in a top quilt as compared to a sleeping bag or underquilt, and does add some complexity. Size your quilt properly and it’s a non-issue. Skip it.

    #3402378
    Lydia K
    BPL Member

    @lydiack-2

    Locale: Northern California

    Hoosier – thank you SO much for pointing that out!  Based on this, I think perhaps I’ll skip the 20D strips and stick with the membrane taffeta for the whole thing.

    Ryan – Thank you for all your input!  When you sew baffles, do you fold the noseeum mesh over on itself and sew through a double layer, or do you sew through a single layer?  I was thinking I’d need to cut my baffles about 1″ wider than the final width, so I could fold it over on itself before sewing, but that probably makes a a lot bigger seam allowance than what’s necessary.

    Do you have any thoughts on vertical vs. horizontal baffles?  I keep waffling back and forth between which would be best.

    I have been VERY tempted to buy an EE quilt, but I love the idea of making one myself, and the lead time puts delivery out past when I’ll need it.

    #3402385
    Todd Stough
    BPL Member

    @brewguy

    Lydia.  I do fold the baffles to see although honestly I don’t see why you need to.  It’s rather a pain to sew, I figure about .75″ for each seam.  Also using blue painters tape for layout helps.

    Ripstop by the roll has precut baffle material in, 3.5″ which works great, gives about a 2″ or so baffle. Then stuff to 2.5″ for a slight over stuff to help hold everything in place.

    Ive been going for twice the height as the width but again I don’t know why.  I think western mountaineering has 6″ on a sewn thru.

    Pa’s for vertical or horizontal. All my under quilts are vertical, and I’m going to make my wife’s that was as well.  Mine and daughters are horizontal.  I don’t see much difference, less baffles to sew.  Also maybe the head end will cinch slightly better with verticle.

    footbox, measure around your feet with the tape.  Should not lose any length with a sewn foot box because you make a second pillow to sew in there.

    #3402389
    Aaron Sorensen
    BPL Member

    @awsorensen

    Locale: South of Forester Pass

    I would add 3″ to your length.  At 72″ with your feet all the way down that 72″ will come up just barely to your mouth.

    Just do the outermost baffles at 6″ and the rest 5″.

    Start with a pre sewn 40″ footbox and once you get it seem up it will be good.

    Agree with the starting baffle pre sewn width of 2.5″.

    I would either start the tapper 34″ from the top or do a tapper from the top to 38″ from 57″ down to about 53″ then start the tapper from 38″.

    Also agree on ditching any outer  strip of fabric.  The 10d membrane is great fabric.

    #3402457
    Ryan Smith
    BPL Member

    @violentgreen

    Locale: East TN

    “Do you have any thoughts on vertical vs. horizontal baffles?  I keep waffling back and forth between which would be best.”

    I’m a pretty active sleeper so all the tossing and turning will move the down from the top by the second night. Vertical baffles handle this sleeping style better. If you sleep like a stone, horizontal works fine. Other than that, I think Aaron has made about 182 quilts so he probably has good advice.  : )

    Post pics when your done!

    #3402479
    Aaron Sorensen
    BPL Member

    @awsorensen

    Locale: South of Forester Pass

    The one and only thing I dislike about vertical baffles is if they full length.

    My next quilt will have the bottom tappered area with horizontal baffles and the top vertical. I would leave a few inches open on every other vertical baffle on top and bottom so I could shift the down around

    This also makes it easier to fill it with down.

    #3402580
    Aaron Sorensen
    BPL Member

    @awsorensen

    Locale: South of Forester Pass

    Every quilt I make (for me at least) will have this baffle design.

    The outer most baffles will be separate from the down shiftable ones and have 1/3 less down in them.

    #3402676
    Mary D
    BPL Member

    @marydotson

    I just finished my second quilt project this past winter and road tested it twice this spring. First, I would echo what was said before–plan on making it longer. I cut this last one 7″ longer than our desired length (plus 1 extra inch for seam allowances) and it came out barely long enough. As you wrote, there is shrinkage due to loft (and curvature of the fabric as it meets at the edges). Moreover, there is a big feeling of comfort on cold nights from being able to bring it high around the neck–so don’t skimp there. As mentioned before, there’s no need for a differential cut–even commercial quilts don’t have that. I might also add, be sure to overstuff–you won’t regret that at all.

    I’d also (highly) recommend, if you are using a lighter color fabric, using white or light grey no-see-um netting for baffles. Black netting baffles are very visible through light colored quilts.  Also–bear in mind (as others have written here) that 2″ baffle strips are going to end up 2″ when the top and bottom 1/2″ seam allowances get sewn. BTW–even though there is a tutorial out there that shows this technique, there is no real need to sew it back down double at the seam allowances. The general rational for doing this kind of seam technique is to prevent fraying–however, no-see-um is not a woven fabric, so it shouldn’t fray like that. I tried a test strip of this technique on scrap and found it difficult to do without pinning–and it made odd impression on the outside of the nylon.

    FWIW–while the pre-cut baffle fabric is great (especially if you only use scissors for cutting), I ended up buying it as continuous yardage. With a cutting mat setup, it took less than five minutes to prepare.

    BTW–on this project, I made it karo-step. The previous one had 4″ horizontal baffles and was an absolute nightmare to fill. In use, the karo quilt does keep down somewhat better in the center (which is where you want it on a cold night), however, I’d like to try a vertical style next time.

    Good luck!

    Mary


    #3402738
    Lydia K
    BPL Member

    @lydiack-2

    Locale: Northern California

    Todd – Thanks for your input, very much appreciated!  From what you and others have said I think I’ll sew a test piece of noseeum to a scrap of shell material and give it some abuse to see if there’s any sign of weakness in not folding it over.  As Mary later mentioned, it’s probably not necessary considering the non-woven noseeum mesh construction.  This will also allow me to cut the baffles a bit narrower, which in the big scheme of things probably won’t amount to all that much, but I can’t help but want to make it as efficient as possible.

    Aaron – excellent suggestions – and thank you for the drawing!  I love the idea of leaving openings in the baffles to allow shifting of down from one to the next.  For the transition from vertical to horizontal baffles for the foot box, I’m trying to think through the construction process.  I’m thinking step 1: sew all the upper verticals, step 2: sew the first horizontal baffle to the ends of the connecting verticals, step 3: sew the upper and lower horizontal seams for this first horizontal baffle, step 4: sewing the rest of the horizontals in place.

    Regarding taper, I like the idea of having multiple tapers, it appears it will cut down on excess material for the legs, but still provide enough space for my shoulders and hips.  I’ll have to take more measurements of my shape to make sure the final plan suits me (my hips are about the same circumference as my shoulders).

    Ryan – That makes a lot of sense about the vertical baffles, I’m an active sleeper as well, so it sounds like it’s the right choice.  And I will definitely be sharing pics, I’m going to order the fabric today, can’t wait to get started. :)

    Mary – great feedback – thank you!  Glad to hear confirmation that a differential cut is not needed.  After all the feedback I’ll definitely add a few more inches, sounds like a little extra length will be welcome on the colder nights, and I know I’ll be kicking myself if I come up short.  Also glad to hear from you and others that folding over the noseeum mesh probably isn’t necessary for the baffles.  Now that you mention it, it makes perfect sense that the technique would be different if the baffles were made from a material that would fray vs. the noseeum net. I’ll sew a little test piece before I dive in, just to make sure, particularly since the NS50 is fairly new, I wouldn’t want any unpleasant surprises.  I do have a rotary cutter and cutting mat which will make cutting my own baffles a lot easier.  Good point on the shell vs. baffle material color contrast.  I’m probably going to be using a darker color shell, but was seriously considering a lighter color for a while.


    #3402802
    Aaron Sorensen
    BPL Member

    @awsorensen

    Locale: South of Forester Pass

    You do want to back-stitch.  It locks your stitches in.  If you don’t, the ends will start coming undone and can open up and have down escape pretty easily.

    I use a china marker and mark up both sides with all the baffle sew locations prior to sewing.  Then you can start anywhere.  It takes a while but it makes sewing really easy.

    #3403518
    Mary D
    BPL Member

    @marydotson

    Backstitching is definitely a good way of locking stitches, but there are other stitch locking techniques which I find work better with fine nylon fabrics.  I tie off all my threads (in square knots) and seal the seam ends with Fraycheck (definitely test ahead to make sure this doesn’t discolor your fabric). You might want to consider this, since every stitch creates a permanent piercing of the fabric and offers opportunity for down leakage, so it can be worthwhile to eliminate redundant stitches. There are also people in the trade that believe excess stitches can weaken calendared nylon–but I think it really would take an awful lot of back and forth to really make a difference to a quilt (which doesn’t really rely much on fabric to be strong). On the other hand, a definite plus is that the stitching this way looks neater and more professional.  That said, this technique does add a lot more time to the sewing process, so it’s probably not for everyone. I’ve done this on both (backpacking) quilts that I’ve made–and the first has had more than 14 years of use and shows no signs of any loss of down.

    #3408497
    Lydia K
    BPL Member

    @lydiack-2

    Locale: Northern California

    Thank you to Hoosier T, Ryan, Todd, Aaron, and Mary for your help and input!

    Finally had the time to build my quilt last weekend, and I’m very happy with the results.

    I followed Aaron’s suggestions to leave the upper baffles open alternating from top to bottom, and used horizontal baffles for the footbox.  Concerns about feeling too restrictive in the legs kept me from tapering more than I did.  The taper starts half way down and ends at 41″ wide (diagram indicates 40″, but that doesn’t include the seam allowance.

    It has a 1/16″ shock cord drawstring at the top, with a mini cord lock in the center.  The quilt is long enough to pull over my head and has excellent loft.  For baffle height I finally settled on 2.75″ to start, with a 1/4″ seam allowance, the resulting baffles are 2.25″.  I started by stuffing for a calculated loft of about 2.5″, but when I was done I felt like it could use a little more down, so I went ahead and added the rest of what I had… maybe unnecessary, but I tend to sleep a little cold, and doubt I’ll regret it.

    Final weight: 1 lb 5 oz – this is 2 lbs lighter than my synthetic bag, and I feel it may actually provide more warmth.

    Overall, a very fun project, I even enjoyed weighing the down and stuffing the quilt. :)

    Baffle diagram:

    Fabric taped to the floor for measuring, drawing the baffles,and cutting:

    Baffles sewn to the shell:

    Liner sewed on:

    And the finished quilt:

    And side-by-side with my synthetic sleeping bag:

    #3408550
    Adam Kilpatrick
    BPL Member

    @oysters

    Locale: South Australia

    Superb :-)

    #3408640
    Ryan Smith
    BPL Member

    @violentgreen

    Locale: East TN

    That looks great! Come back after a few trips and let us know how that style of baffles works out.

    Ryan

    #3408798
    Kevin Beeden
    BPL Member

    @captain_paranoia

    Locale: UK

    That looks beautiful.

    But, as always, my poor brain is struggling to figure out the sewing sequence… In particular, at what point you sew the enclosing (side) seams, and how you sew them.

    I can imagine that you can sew one side with an internal seam, and then progress across the vertical baffles, sewing each baffle in turn, but then you come to the other side, and I can’t see how you can sew an internal seam without turning the shell inside out (and I can’t see that that is possible..).

    Also, did the switch between vertical and horizontal baffles cause any problems for sewing the baffles? Given the scenario above, I can’t see that you could fully sew the first side seam at the start, as that would make sewing the horizontal baffles difficult.

    The other thing I’ve pondered for some time is that midge netting that I’ve found is heavier than many ultralight fabrics, e.g. this at 36 gsm:

    http://www.profabrics.co.uk/products/insect-midge-net-fine?variant=6809888963

    Is the midge netting used for low weight, or to allow air movement between the baffles?

    I wondered whether there would be a cold spot at the change from vertical to horizontal baffles. Which got me pondering a zig-zag transition, with the tip between the tubes either side of the open baffle extending down to a V, i.e. all internal baffles end at the same point, but the first horizontal baffle is actually a zig-zag, with the first pure horizontal baffle being a full baffle distance away from the bottom of the V.

    The sewing of the zig-zag would be awful… Okay; silly idea…

    Finally: it looks like you have a foot plug. Is that right?

    #3408873
    Aaron Sorensen
    BPL Member

    @awsorensen

    Locale: South of Forester Pass

    That is a beautiful quilt!

    Did you use 15 or 16 ounces of down?

    My 16 ounce fill 22 ounce quilt is just a few inches wider and has size 20 cam-snaps to snap the bottom together as I can sleep comfortably with it snapped. You may be able to do this as well?

    Kevin- All you do is sew the vertical baffles from one side to the other first then start with the top horizontal baffle and work your way down.

    You don’t get to have seamless stitches around the perimeter. You just have to tuck both ends in the middle and sew them as close to the outer edge as possible.

    #3408946
    Lydia K
    BPL Member

    @lydiack-2

    Locale: Northern California

    Thank you Adam, Ryan, Kevin, and Aaron!

    Ryan – I’d be happy to report back after I’ve had a chance to use it.  My first trip is coming up in about 2 1/2 weeks, Can’t wait to see how it performs. :)

    Kevin – The sewing sequence was something I should have thought through a little better before starting, as I probably could have saved myself a little work.  I didn’t sew any of the sides closed before sewing in the baffles.  After sewing in the baffles I decided I wanted to double-roll the edges to lock in the raw edge to ensure it would never fray.  This is overkill, but it made me feel better. Due to the slippery nature of the fabric I ended up folding the edge over 1/4″ around the whole thing and sewing that down.  Then on the edge of the vertical baffles I folded each edge under 1/4″ again, and sewed the two pieces together near the edge, inserting the grosgrain loops as I went.  I continued this down one end of the horizontal baffles, and along the bottom. At this point I also inserted the triangular piece of fabric for the top of the enclosed footbox, so it was sewn into the seam, and not added later.  I stuffed the footbox first, then using the same fold and sew method closed up that side.  Stuffed the upper baffles, then did the same thing along the top edge, followed by folding the top edge down, and tucking the edge under again to sew the channel for the draw cord.  Double-folding the edges had the added benefit that sewing through several layers of this ultralight fabric was a tad bit thicker and less likely to have any puckering along the seam.

    I honestly don’t know what the original reason was for using noseeum netting for the baffles.  Air flow is certainly a plus, although I don’t know if that’s a primary reason.  For me, it was actually the lightest choice available, as I used 0.5 oz per square yard NS50 noseeum netting from RBTR.  My fabric only weighed .66 oz per square yard, so the weight savings is negligible.  I do think it may be easier to work with than sewing baffles from the shell/liner material.  And the other heavier nosseeum netting would be even more so, as I hear it’s stiffer than the NS50.

    I don’t *think* there will be a cold spot at the transition, since it’s just another baffle, but if there is I’ll certainly report back.  I think you’re right that the zig-zag baffle would be a pain to sew, but not impossible. :)

    And yes – I did install a “foot plug”.  I cut rectangular pieces from the liner and shell material, sewed one baffle down the center, sewed up 3 sides, stuffed it, sewed it closed the same was I did the main part of the quilt, then sewed it into the end of the quilt.

    Aaron – I believe I used about 15.5 oz of down in total.  My order for was 1 lb, but I weighed the shell before stuffing at about 5.5 oz.  So either I lost .5 oz of down, or the order was a little light.  There was a little mess in the bathroom after stuffing, but I wouldn’t guess it was anywhere near .5 oz worth!

    It is definitely wide enough to completely close on the bottom.  It won’t be as roomy as my sleeping bag, but this would actually be a good thing, as I struggle with having cold spots in my synthetic bag on very cold nights when I move around, because of all the excess space.  I was considering snaps, but hadn’t decided for sure yet.  How close together are your snaps?  This may be nice if a night was particularly cold.  I could snap it closed, pull it over my head, and should be quite warm.

    By the way – I forgot to mention I took your advice and put less down in the 2 outermost baffles for the top section. :)  Thanks again for all the helpful design advice!

    #3408966
    Roger Caffin
    BPL Member

    @rcaffin

    Locale: Wollemi & Kosciusko NPs, Europe

    Dare I suggest another BPL article on quilts?

    Cheers


    #3409038
    Kevin Beeden
    BPL Member

    @captain_paranoia

    Locale: UK

    Thanks Aaron and Lydia. Tucked external seams was the only way i could see it working.

    That’s how i finished a pair of salopette liners (which had full length side openings). But I could turn them inside out, so only the final seams were external. I’d visualised the construction sequence beforehand, but by the time it got to 3am, my brain was fried, and it took me a while to figure out the final inversion. I managed it in the end, and got to bed at 4. Then up at 7 to set off for a skiing holiday, for which i needed the liners…

    They’re still going after 19 years, but the Thinsulate Liteloft 90 has lost all its loft…

    #3417791
    Lydia K
    BPL Member

    @lydiack-2

    Locale: Northern California

    I finally had a chance to take my quilt on its first backpacking trip – and WOW, was I toasty!!!  The trip was delayed, and the temperatures were quite a bit warmer than originally expected, probably only in the upper 40’s to low 50’s at night.  My brother had a regular synthetic sleeping bag which is optimistically rated to 20 degrees – he was cold in his bag, and I was sweating in mine.  After this trip I feel fairly confident it could keep me toasty down below freezing. :)  I would also like to make a thinner quilt for these warmer temps, I could save weight and room, and still be plenty warm!

    #3720092
    Lydia K
    BPL Member

    @lydiack-2

    Locale: Northern California

    It’s been a while, but I was thinking about my quilt and thought I’d do a quick report back on how it’s holding up.  Hard to believe it’s approaching 5 years old!

    Overall – I LOVE my quilt.  Regarding the baffle design – in all this time I’ve never pushed down through the switchbacks… however, I am very happy to have the vertical upper baffles and horizontal lower baffles.

    I have many trips under my belt with this quilt ranging from 1 – 18 nights, including thru-hikes of the Tahoe Rim Trail and John Muir Trail, and it’s still going strong.  I’ve washed it several times (it gets a bit stinky on those long trips…) and I’m very pleased with how it’s holding up.  I see no signs of the fabric becoming worn.

    Last year I decided to try hammock camping for the first time, and naturally, it’s just as great in a hammock as it is on the ground.

    Thanks again to all those who helped me along the way – this is my favorite piece of gear I’ve ever made!  But I still need to make a lighter version, as it can be a bit challenging to ventilate/manage the warmth effectively on warmer nights.

Viewing 24 posts - 1 through 24 (of 24 total)
  • You must be logged in to reply to this topic.
Forum Posting

A Membership is required to post in the forums. Login or become a member to post in the member forums!

Get the Newsletter

Get our free Handbook and Receive our weekly newsletter to see what's new at Backpacking Light!

Gear Research & Discovery Tools


Loading...