First time poster – however, I have been lurking a long time, and read about first post of a thread not being editable. See next post for details. -Michael
Topic
Pyramid Tent: Seam Order of Operations
Become a member to post in the forums.
- This topic has 15 replies, 3 voices, and was last updated 5 years, 10 months ago by
 .
.
Viewing 16 posts - 1 through 16 (of 16 total)
Ok, so here goes- I’ve been reading a while on here, Reddit, various other myog websites and watched lots of videos, but have not really gotten my questions answered by my observations so far.
I’ve managed flat tarps, apex quilts, stuff sacks, ZPP bags, and a few other little things without much difficulty. I’ve tried to make a couple pyramid style prototypes, but have not done a good job with making the felled seams work well at the pyramid apex. I don’t own any manufactured pyramids, since I am a bit miserly, and frankly, I like to make my own stuff. If any of you have tips on the correct order to sew the panels to each other to make the best looking, most robust seams with minimal fuss, I would appreciate it!
“since I am a bit miserly, and frankly, I like to make my own stuff.”
same here : )
if I have 8 panels, I sew pairs together to get 4 assemblies. sew pairs together to get 2 bigger assemblies. Sew them together.
I don’t think that answers your question : )
Can you sew together two panels and keep them aligned? I tend to start at one end, but the top piece of fabric sticks to the pressure foot a little so it slides relative to the bottom piece of fabric so by the end of the seam they’re no longer aligned
Hi Jerry, I have appreciated your MANY posts on this forum over the past couple years, so thanks for the reply!
What is the last seam you typically do, besides hemming the bottom? I have done what you proposed on my prototypes, but it has been a pain to cross over the apex while felling the last seam due to the geometry, so that was mostly my question. It seems like MLD, from what I can tell, sews its little vent flap piece on last to minimize the impact on the other seams; I was thinking that might be the best way, but was interested in how other MYOG guys might do it.
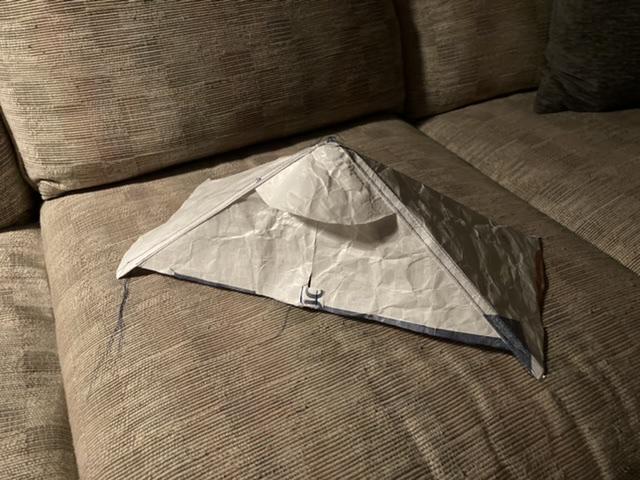
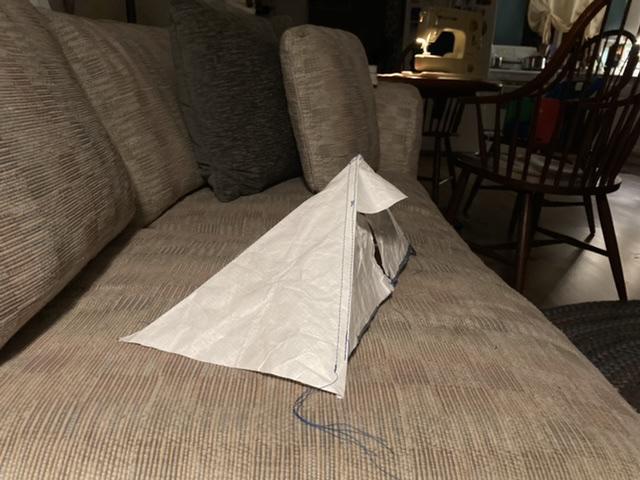
I have a six sided pyramid by the way
peak, inside out:

You can see the flat felled seams overlap as they reach the peak. the last 1/2 inch or so get’s funky, it’s hard to get the presser foot in there
outside out:

After I sew the 6 panels together, and I have a pyramid, I finish the bottom including tent stake loops. Then I erect tent, but don’t put so much pressure on it that the tent pole will poke through.
Then, take a 6 inch diameter circle of the same fabric as the tent. fold over edges one time and hem (don’t need to hide the unfinished fabric edge) so now it’s a 5 inch diameter circle. Put that over the peak of the erect tent and sew one hand stitch, reinforcing circle to tent, at each of the 6 flat felled seams. You have to make folds in the reinforcing circle to make it into a cone, rather than a circle.
Repeat with a 5 inch diameter circle of heavier fabric.
Then, with sewing machine, sew all the way around the edge of the reinforcing circles. I just leave the hand stitches.
The reinforcing circles cover the top of the zipper. The zipper goes all the way from top to bottom.
I add a grosgrain loop to hang it to dry.
This is so much better than working for a living :)
I am glad to know that others have encountered the “funky” sections :) Thank you for sharing your methodology, and for the tip about the reinforcement.
then, the last thing, is to take a 3 inch strip of fabric along the grain. Fold over 3 times to make 6 layers, 1/2 inch wide. Sew a couple rows of stitches along it to keep it together.
Then sew that to the ridge seam. So the strip goes from the peak to the bottom of the tent. Repeat for all 4 ridge seams.
I claim this makes the side panels flap less in the wind. Normally, the ridge seams are along the bias so they stretch more. Then the side panels will be loose perpendicular to the seam.
Haven’t heard of anyone else trying this so it may not work for other people. It may make it flap less, but not affect the point where the fabric rips. It could actually make that worse.
Or you could use a 1/2 inch wide non stretchy strip, grosgrain maybe.
Interesting. So the strips, you posit, are just making the structure stiffer?
yes
I’ve noticed that they put poles in the ridges for antarctic trips
putting non stretchy strips, and then pulling out with tent stake, you get sort of the same effect
I did it on one ridge, but not another, took it on a windy trip, the ridge with the strip was much better, so I did it to all ridges
There’s a thread a couple months ago with some pictures, but it doesn’t say much more than I just said
Interesting. I plan to use a French/felled seam for my ridge lines, and my camping destinations have been far milder than you describe. Thank you for the idea.
I’ve done that differently, adding the reinforcement before I sewed the last seam. Here are the steps for a four-sided pyramid:
- Make the four panels
- Join each pair of them. For the pair containing the vent, you may insert the vent hood into the seam
- Join these two pieces so that the other side of the vent is at the unfinished edge
- Now you have one flat piece
- Add the reinforcement – on my silnylon mid, I’ve glued on extra layers of the same material, but you can sew it on too. If you already sewed in the vent hood, you have to stop at that seam, fold it out of way, and continue from there
- Alternatively, you can now sew the vent hood over the seam
- Finally, there’s only one last seam to finish. The other side of the vent hood is inserted into this seam. It can’t be felled all the way to the peak, but the last piece is hidden inside the peak
Thanks Jan, do you have any pictures to show what your finished product looks like?
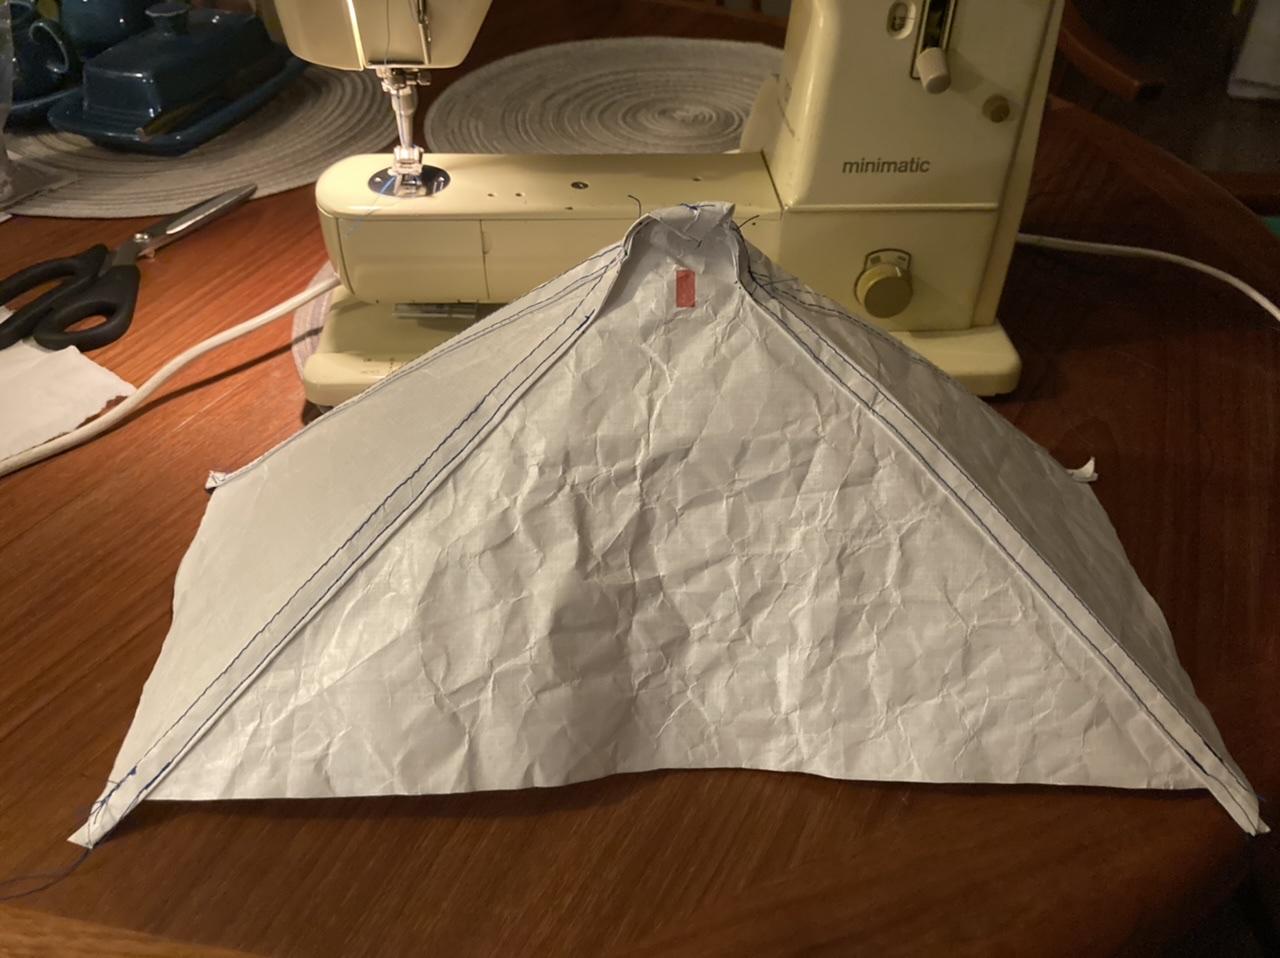
first mockup attempt with tyvek.
I think I need to split the sides up into two panels, then sew up a front and a back section, each consisting of the front/back and left and right half panels. Then I should be able to deal with the peak a little easier. The mockup is just about 8” of the top of a solomid-style tent I am thinking will be a good fit for my first effort at a tent.
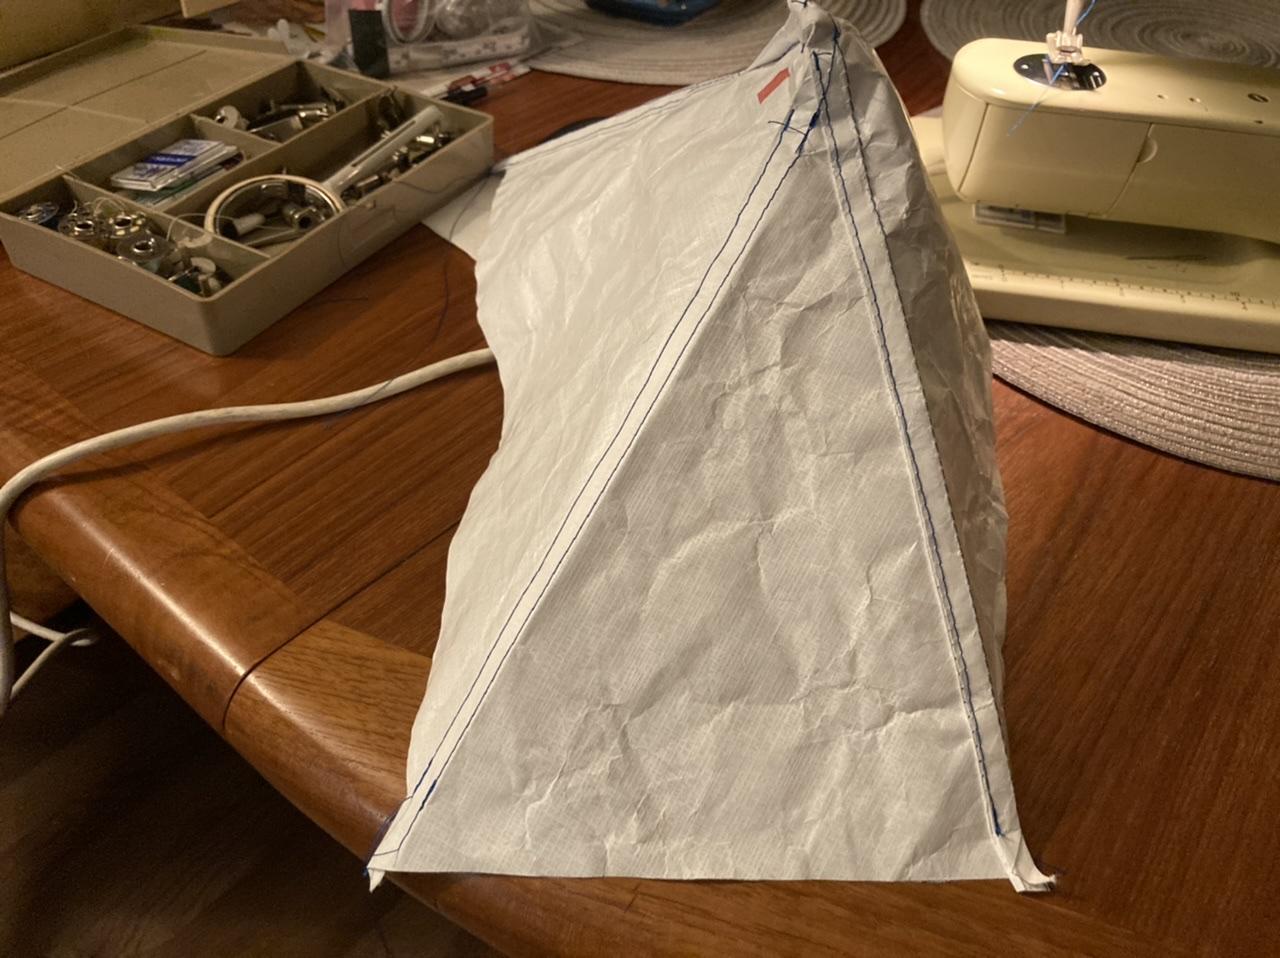
 After a few more efforts, I am approaching something workable. A couple more and I think I may try on some real fabric. I need to work on the lay of the fell so it doesn’t get too thick at the top. Thinking to tell the seams away from the center, rather than toward the center as I did in this try.
have the fell of the seam go the same direction on all seams, for example clockwise wround the tent
I will have to try that.
Viewing 16 posts - 1 through 16 (of 16 total)
Become a member to post in the forums.
advertisementYour privacy is protected: We do not transmit your user data to third-party ad platforms or advertisers, and we do not host third-party tracking pixels. Backpacking Light serves ads on its own custom, native, and internal platform.
 New Alpha Direct FleeceSee the latest hoodies, pants, and hands / feet / head accessories from cottage makers.