Blank first post to allow editing of main post below
Topic
MYOG My Modified G4 Backpack Project – Very long post
Become a member to post in the forums.
- This topic has 17 replies, 14 voices, and was last updated 9 years, 1 month ago by
 .
.
Viewing 18 posts - 1 through 18 (of 18 total)
This is a very long and photo heavy guide about how I made a substantially modified version of a G4 backpack. There are over 40 photos in this guide and over 4000 words. Get a coffee and settle in!
How I constructed my modified G4 backpack and my thoughts on the changes made
 INTRO
INTRO
After lurking on these for some time I decided to get out and start backpacking again. My girlfriend bought me a shiny new Podsac 50ltr alpine pack which seemed incredibly lightweight to me. I loaded it up with what I thought was lightweight gear, enough for 2 days walking and camping.
I remember thinking that my pack was small, my load light and that nothing could hold me back from completing my 2 day adventure.
I eventually got to my destination with some help from a friend who came and picked me up and took me the last few miles. I had run out of light, worn holes into my boot soles and had severe bruising from my ‘light’ pack.
When we got to camp my friend could barely lift up my pack and there and then I decided that perhaps this ultralight thing was worth a look. I had already constructed a lighter cook set but so much more needed to be done. It was time to learn how to use a sewing machine.
I am a researcher by personality type and I spent weeks if not months looking at every video I could find, every tutorial, every plan i could download. You name it, I probably looked at it. The time came when I simply hard to ‘start’. I had already made a net tent and a tarp a month or so before which gave me a good lesson on the sewing machine. Time to make a backpack!
PURPOSE
My Podsac alpine 50ltr pack weighed a (what i thought was light) hefty 1.67kg including the body, lid and ‘frame’. After cutting everything off the pack that I wouldn’t use, removing the lid and the frame I got the weight down to 1.12kg. A good saving but my research was showing me people with packs weight less than .5kg. The main purpose of this exercise was to lose as much weight as possible while having a backpack that was durable where it needed to be. An afterthought but an important one was that it should fit my torso length. I have never had a backpack that fitted me correctly.
In considering all the above I wasn’t content with losing too much function. So I wanted to build a pack that was sized correctly, light as possible, could carry a good load but which also had a few features that I would find useful. I wanted to be able to carry a minimum of two good sized water bottles (large smart water bottles) on the outside of the pack and have somewhere to put wet gear and/or items used on the trail for my dog Charlie.
I like hip belts. I like being able to move weight from my hips to my shoulders and back again to relieve pressure and muscle fatigue. So, my pack would have to have a hip belt and load lifters. My memory of hauling heavy loads in my teenage years meant that I would want good straps which were well padded.
My dream at this point was to be able to take my dog walking everywhere with me. On my journey testing this pack that became….challenging. But in order to do this I wanted the pack to have points that I could clip my dog lead/long lead to so my hands could be kept free.
RAW MATERIALS
I wanted to use a light silnylon for the body and something more durable for the contact points with my body and the ground. I am a big bloke and sometimes less careful than I could be. This pack had to be light were possible be but durable on points where it would be dropped, dragged, twisted or in contact with my body.
Being in the UK we really struggle to get hold of lightweight and exotic fabrics that are commonly available in the US. I ended up using a fabric company called Point North http://www.profabrics.co.uk The choice was a bit limited and I was unable to pick the fabrics I really wanted. In the end I used:
- 500D 270gsm (7.96 oz/yd) Cordura for the bottom, back and shoulder straps and hip belt
- 65gsm (1.92 oz/yd) Silnylon for the body, collar and sides
- 330gsm (9.73oz/yd) 4mm Padded Mesh for the inner hip belt and the inner shoulder straps
3mm shock cord for the tops of the pockets and for the compression strapping around the backpack body - Assorted grosgrain widths
- Assorted buckles and D rings. Most notably 20mm buckles and fittings for all points except the waste belt which was 40mm with 40mm D rings. The attachment points on the outside of the belt were again 20mm
I wanted a lighter silnylon but don’t mind the implied extra durability of the heavier weight. I also wanted 330D Cordura but simply couldn’t source it. 500D is way more than I needed in terms of durability but again, I will likely get a longer life out of the backpack than using a lighter product. This compromise though did cost a lot in terms of weight penalty.
INSPIRATION
This pack was made primarily from the free instructions for the G4 backpack available from Quest Outfitters . I looked at lots of sets of instructions and this seemed the most complete that I could find. I watched a lot of videos and read a lot of posts about people modifying this pack and that inspired my own modifications. I will mention the modifications made at each step of the Method below:
METHOD
Largely I followed the instructions from Quest outfitters both in terms of the order of construction but also the lengths and dimensions of fabrics. In some places I have changed the specification of materials or the methods of construction where the fabric I used had different properties or where I simply wanted to change or omit a feature. I will do my best to mention these changes in each of the below steps:
1. CUTTING AND LAYOUT OF SHOULDER STRAPS
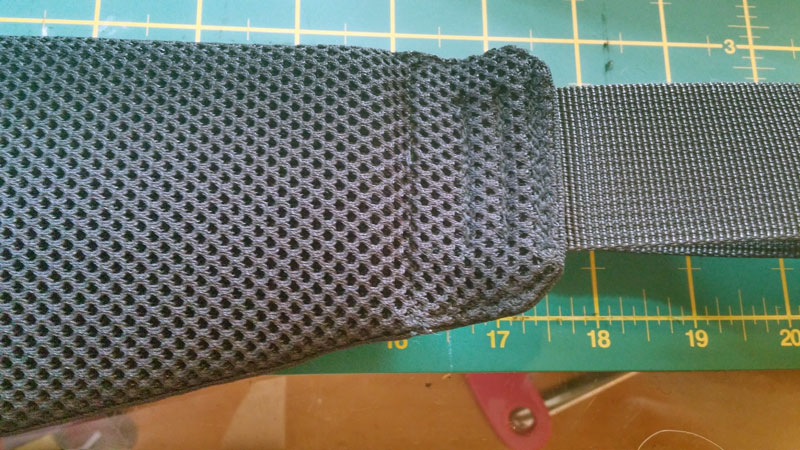
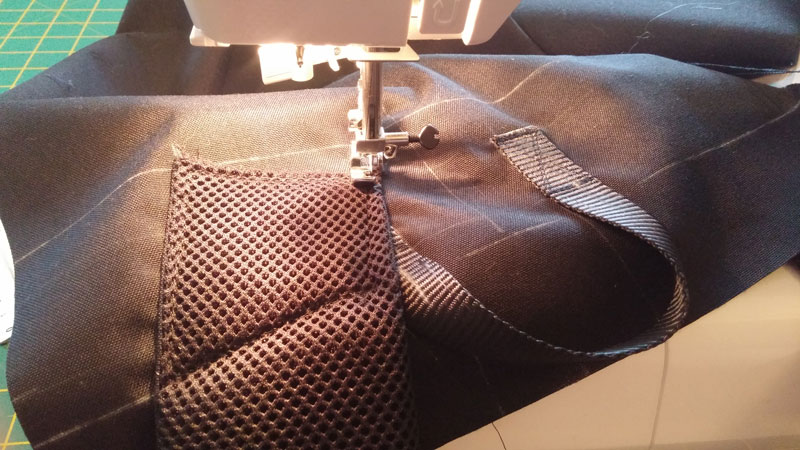
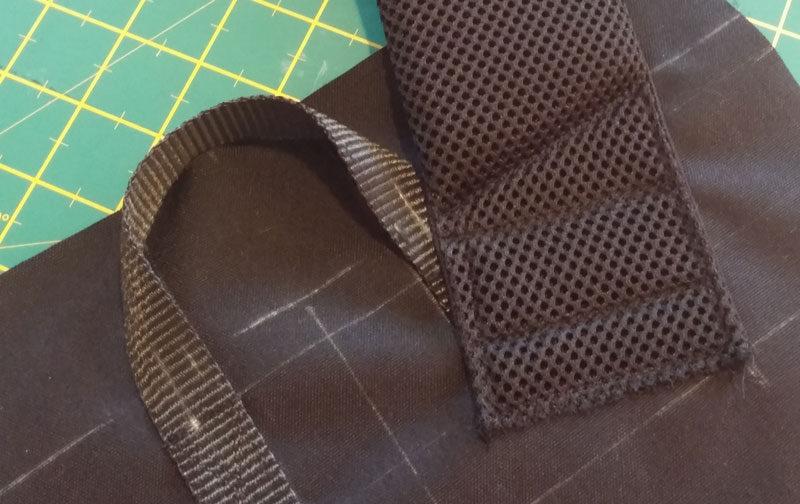
Straight away I made changes to the construction compared to the normal G4 instructions. The instructions call for the use of 400 Coated Oxford. I didn’t know what this was but figured durability would be important so made the tops of my straps from 500D Cordura. The underside of the straps is supposed to be made of the same Oxford fabric but I decided to use 4mm padded mesh. The reason for using the mesh was to make a more stable strap which had an ability to breathe. I like padded mesh, it is used in many of my other backpacks and as such it felt natural to use it, not to mention the improved comfort factor compared to Oxford with no padding.
Neither did I follow the instructions in terms of making the shoulder straps hollow to be stuffed with socks or similar. I have never liked this idea and don’t fancy making my clean clothes dirty with sweat by using them in the straps. I used 10mm closed cell foam for my shoulder straps.
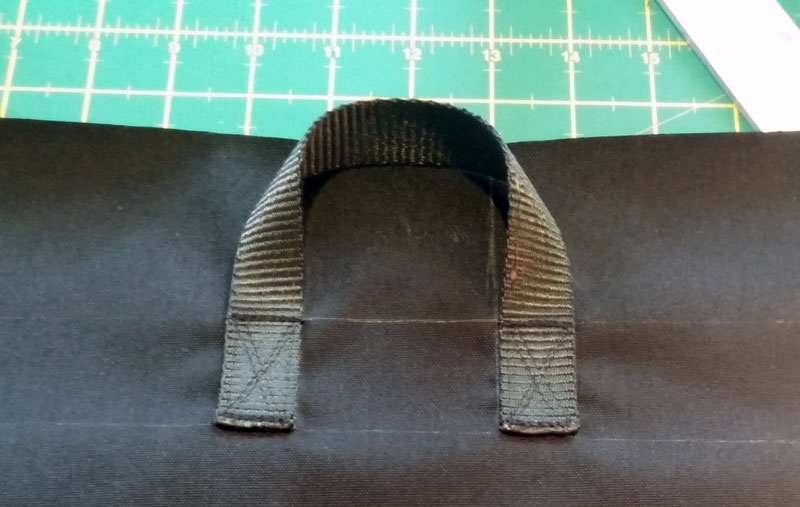
I changed the length and width of the straps. Unfortunately I didn’t write down the changes but I think I added at least an inch to the shoulder strap width. They just didn’t look wide enough on the plans. I also added some D rings to the shoulder straps and some webbing loops. Don’t know why, just seemed like a great idea at the time. I wanted the webbing on the shoulder straps to come quite a way down the strap to help spread load over the strap rather than just connect at the top and put all the load on the material.
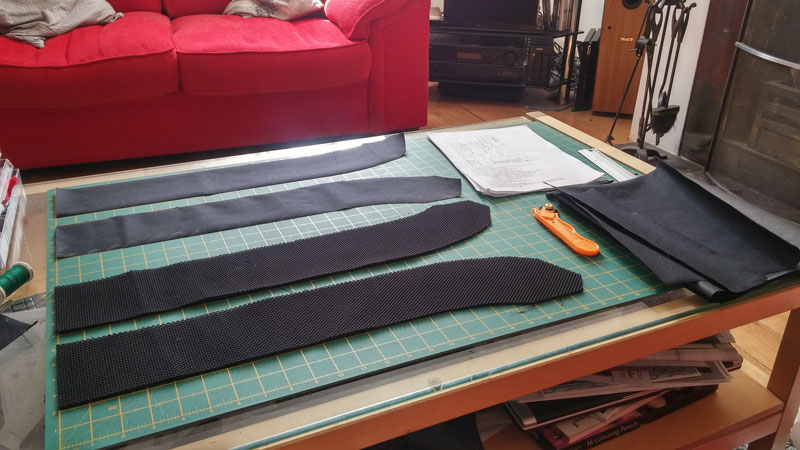
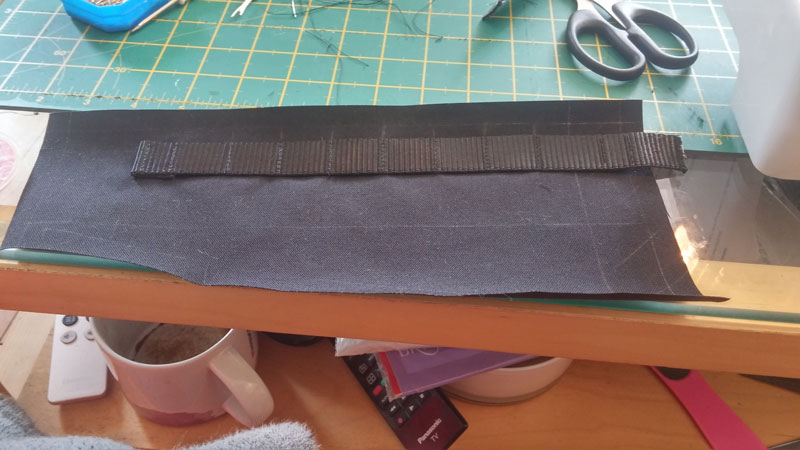
Cut out the 500D Cordura and 3d 4mm padded mesh for the shoulder straps.
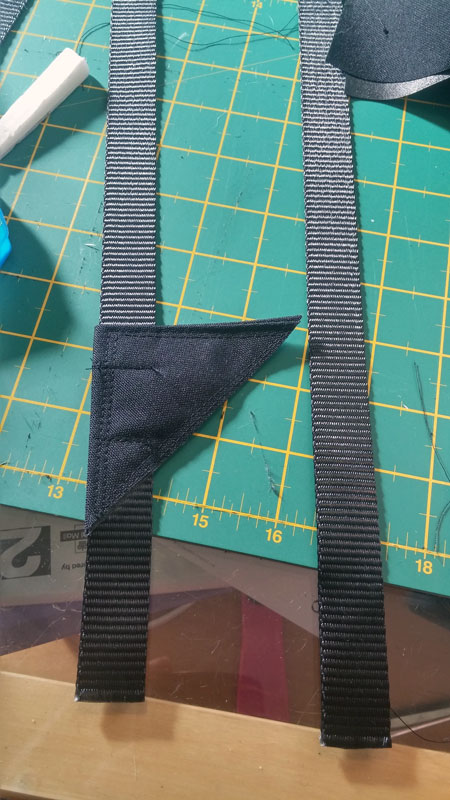
Attach the reinforcements for the lower attachment of the shoulder straps.
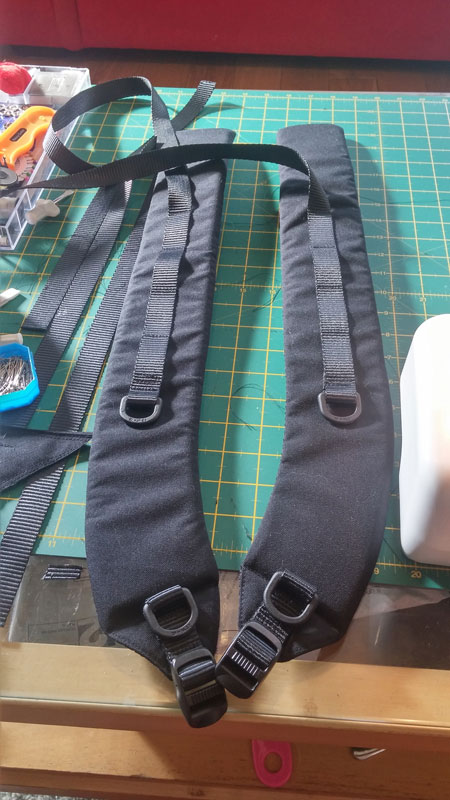
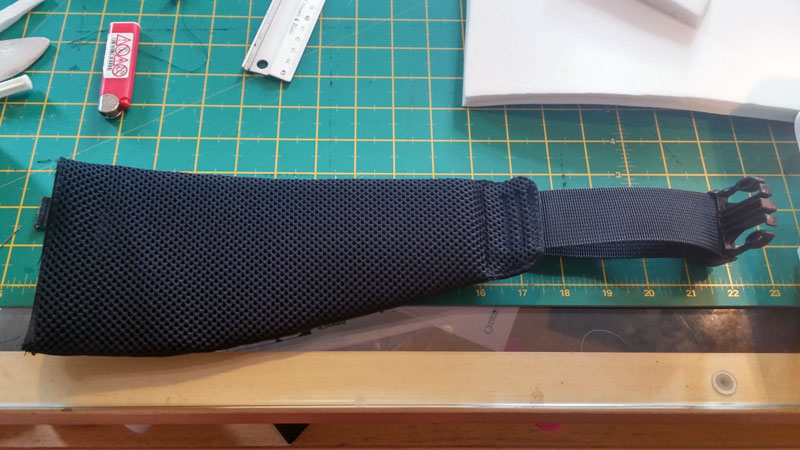
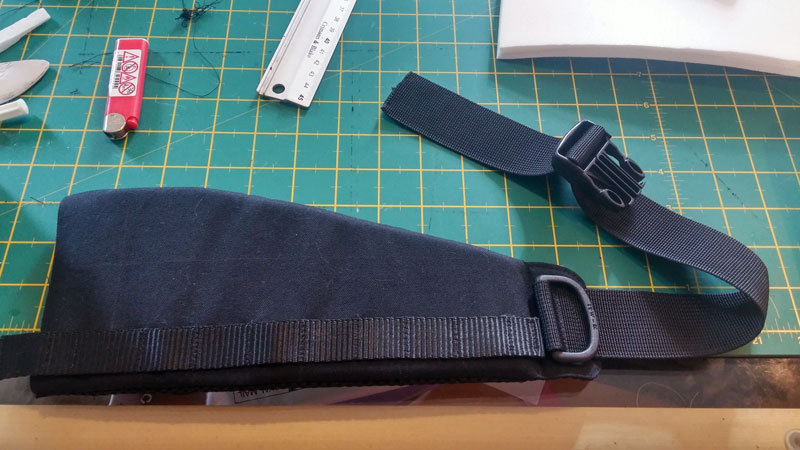
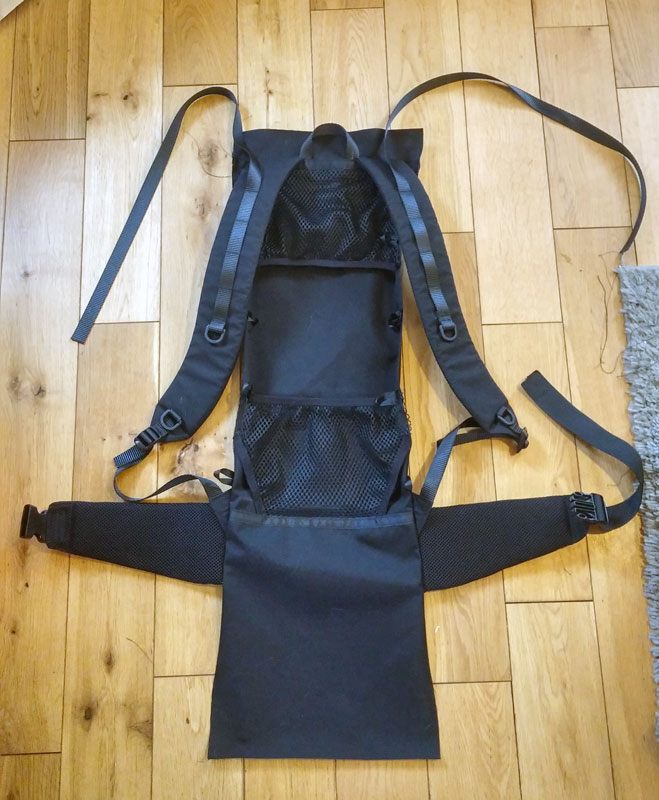
Completed shoulder straps. The webbing loops are for the chest strap so it can be moved. The D rings are for hand straps and other uses yet to be imagined.
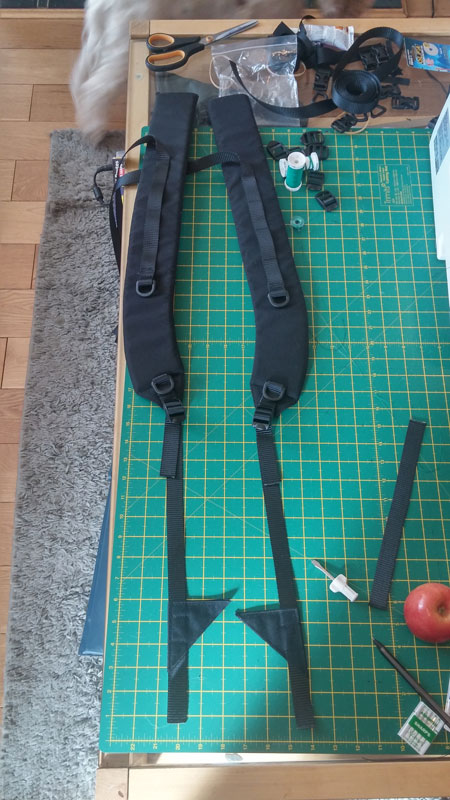
Shoulder straps in full.
2. CUTTING AND CONSTRUCTION OF HIP BELT
Again another area of the design I modified. I am not a fan of tiny hip belts. To me it makes sense to have a belt that is durable and weight bearing or not to have one at all. Just my personal opinion. I added at least an inch, perhaps two to the depth of the belt so I had a bigger contact area. I also added an inch or two to the belt length as my girth is not quite as small as it should be! I prefer a padded belt to a harsh bit of webbing.
Like the shoulder straps I made the hip belt out of 500D Cordura and 4mm padded mesh. I intended to make pockets and other such accessories that could be attached with clips or webbing and as such I added webbing loops to the front face of the belt. I also added some large 40mm D rings that I could use to clip my dog leads to allow hands free dog control.
Again I used 10mm closed cell foam to pad the hip belt with. I found this to be exceptionally comfortable and stable.
The 500D Cordura marked and cut for the front face of the hip belt. The webbing loops are for attaching pockets or other accessories/carabiners.
500D pinned to the 3D 4mm padded mesh to be used for the body side of the hip belt.
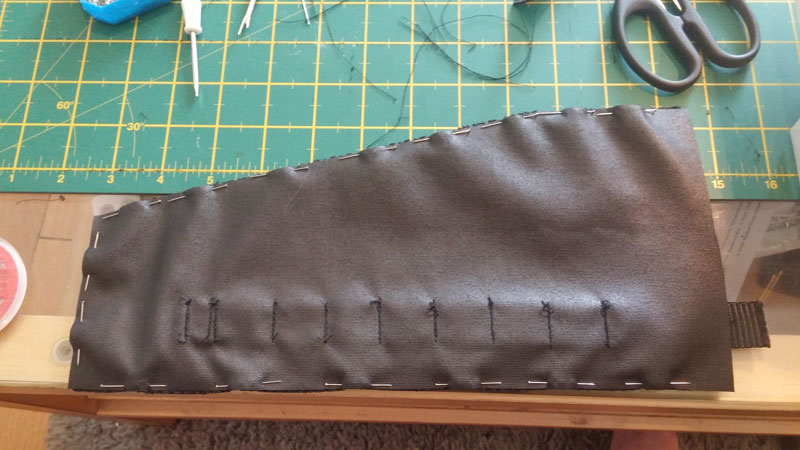
Double sewn and trimmed, about to be turned inside out for webbing attachment and padding to be inserted.
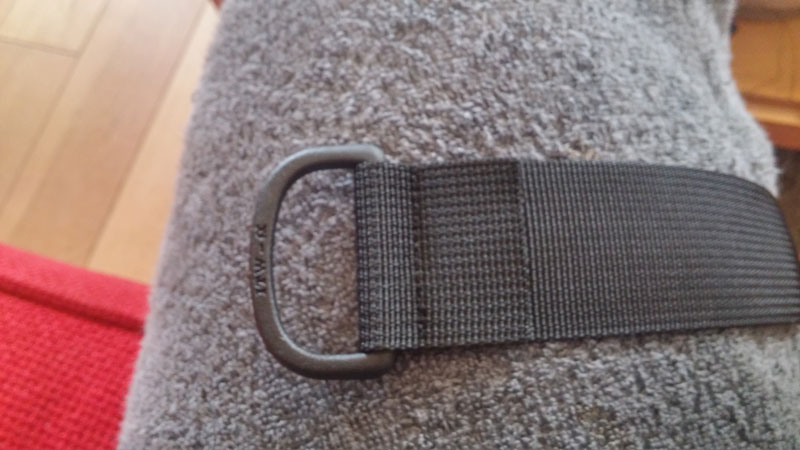
40mm D ring for attaching carabiners/dog leads to front of hip belt. One to be added each side.
Webbing attached with 2 heavy bar tacks.
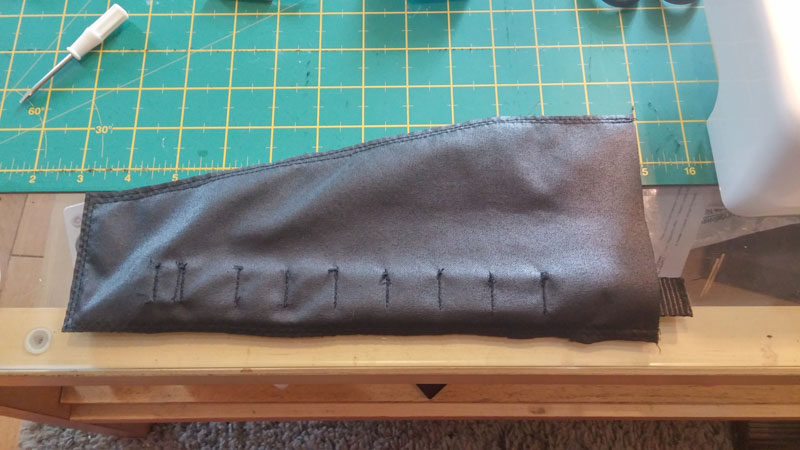
One side completed. Now to do the other.
Front view of same. Notice the long tail on the webbing at the thick end so that it can be sewn into the pack.

Completed belt, body side.
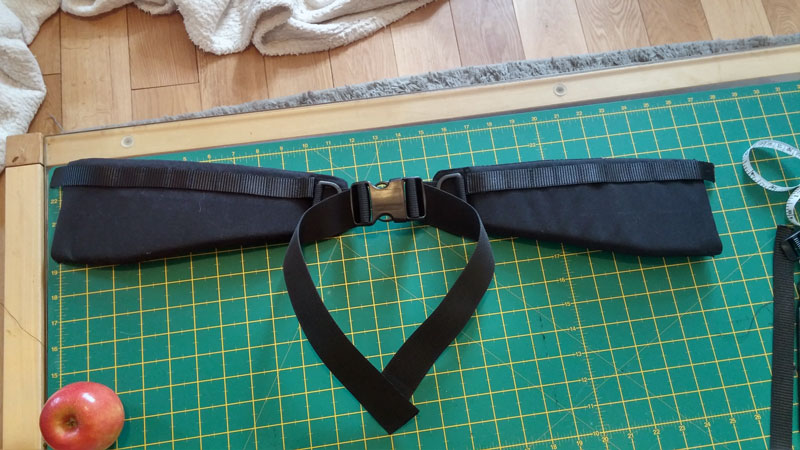
Completed belt outside.

Completed belt and shoulder straps. This was the first point that it felt like I was actually making something.
4. CUTTING AND CONSTRUCTION OF BACK PANEL
Again I altered this part compared to the original instructions. To match my torso length measurement I added 1 inch to the overall length of the back panel. This panel was made of 500D Cordura instead of the Oxford listed in the instructions.
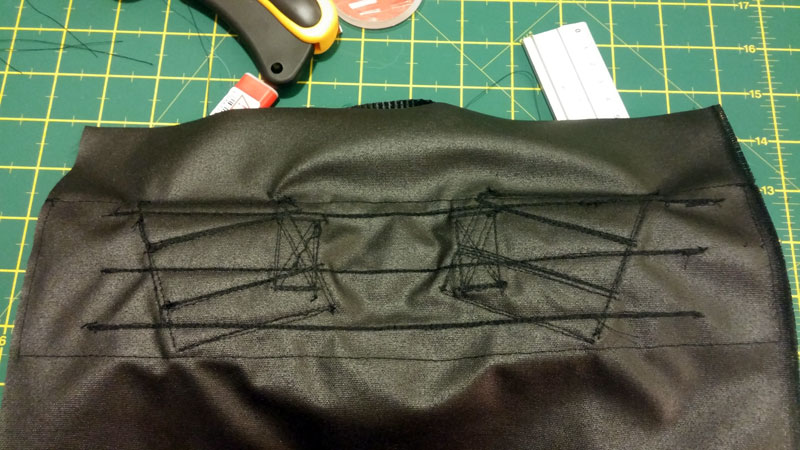
Double X stitching the load carrying handle to the back panel.
4. FITTING OF SHOULDER STRAPS AND REINFORCEMENT TO LOAD CARRYING AREA OF BACK PANEL
Do as the instructions say. This bit is a pain. All of these materials are thin, but when you start to overlay them and do very heavy bar tacking you end up with a surface which is very hard to penetrate with a needle using a domestic sewing machine. I must have broken about 3 needles on this section. Pleased with the result though.
Sewing the shoulder strap in place around its perimeter.
Heavy bar tacking of shoulder strap to the load carrying area of the pack.

Both straps attached.
Long heavy bar tacks to reinforce the shoulder strap and carrying handle area.
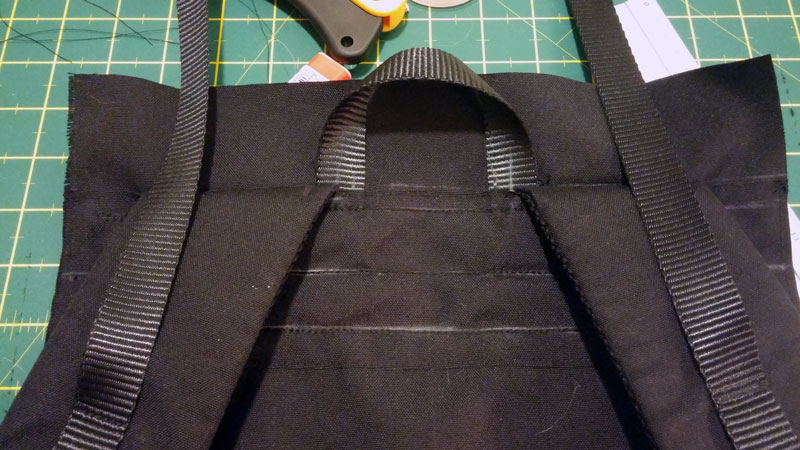
Cover the ugly stitching with 500D Cordura panel to protect the stitching.
5. BACK PAD RETENTION AND SEWING TOGETHER OF STRAPS TO BACK PANEL
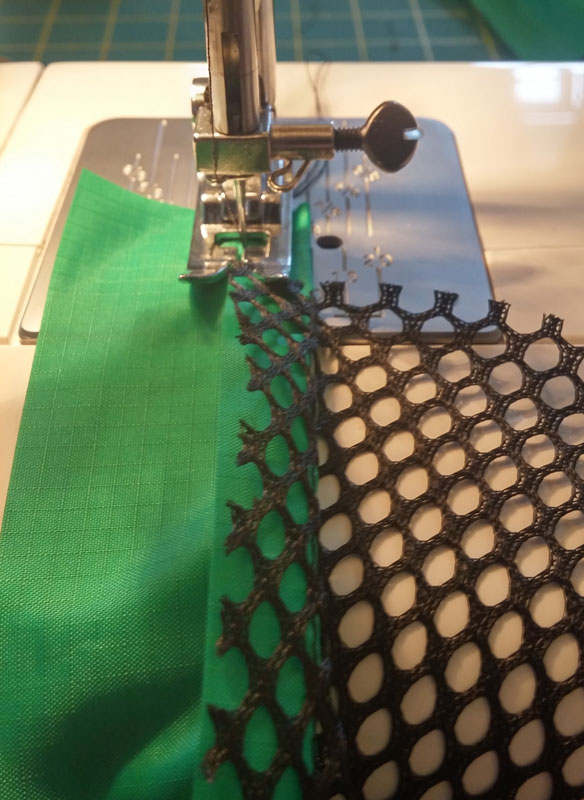
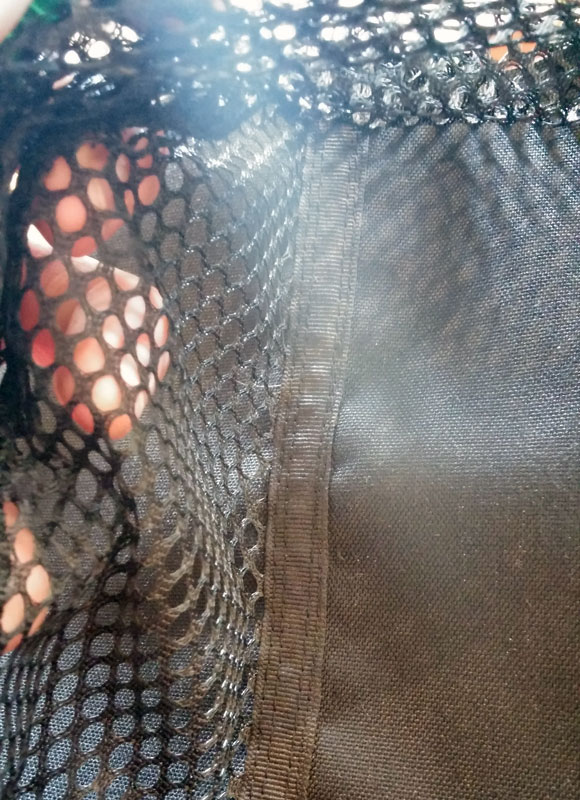
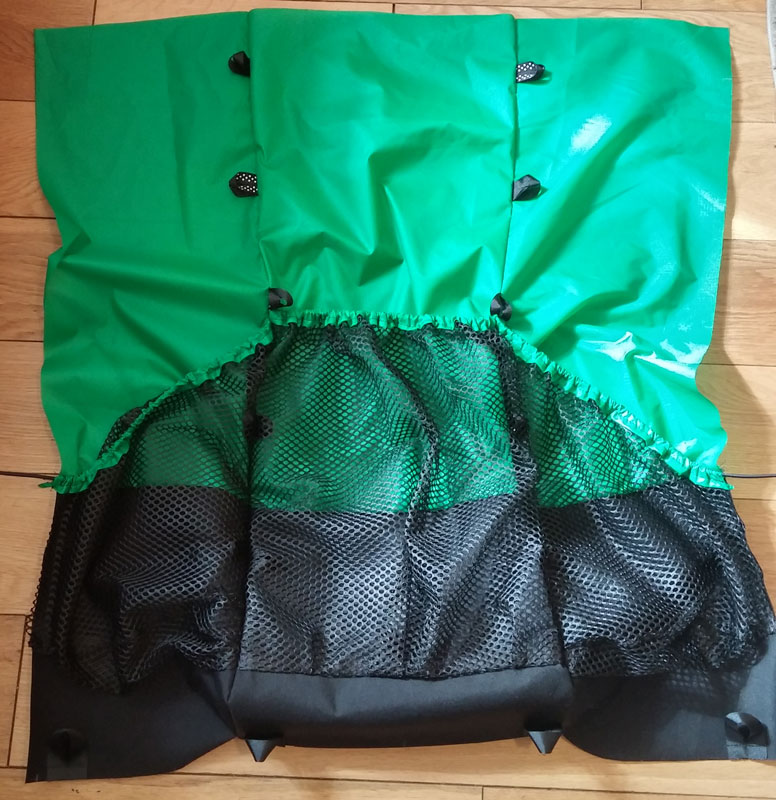
The other packs I have seen made by hikers uses an elastic fine mesh to retain the back pad. I love this idea but I struggled to find any in the UK. In absence of elastic mesh I used an open mesh from Pro Fabrics. The fabric has limited stretch in one direction only and as such I had to work out how much stretch would be needed by my chosen back padding and build in enough slack on the material to allow for the pad to be added. To avoid baggy bits of mesh I used elastic to hem the mesh with so that it would tighten up without a pad in place. I cut the corners out of the mesh to give some more leeway in pad fitting.
I decided to make my back panel straight without the bulge at the bottom of the pack. I just didn’t consider this necessary. I use a down quilt but it simply didn’t need that much space to live in. Also, the side bulges would stick out and catch on things so I decided not to have them and instead put the pockets down in that area so they were easy to reach while wearing the pack.
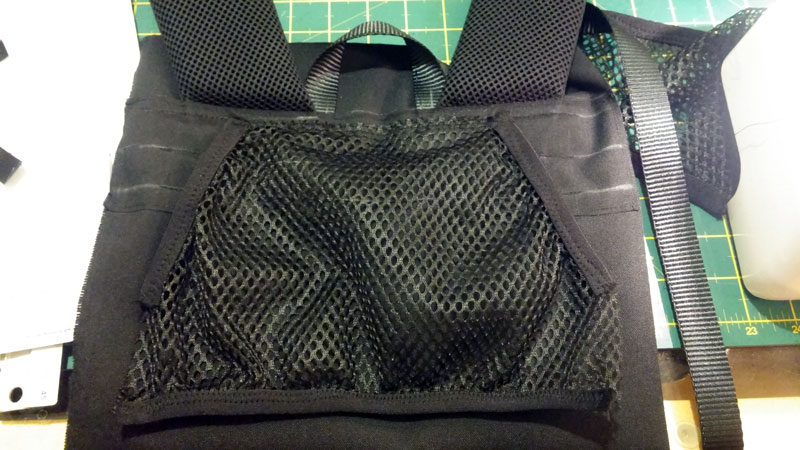
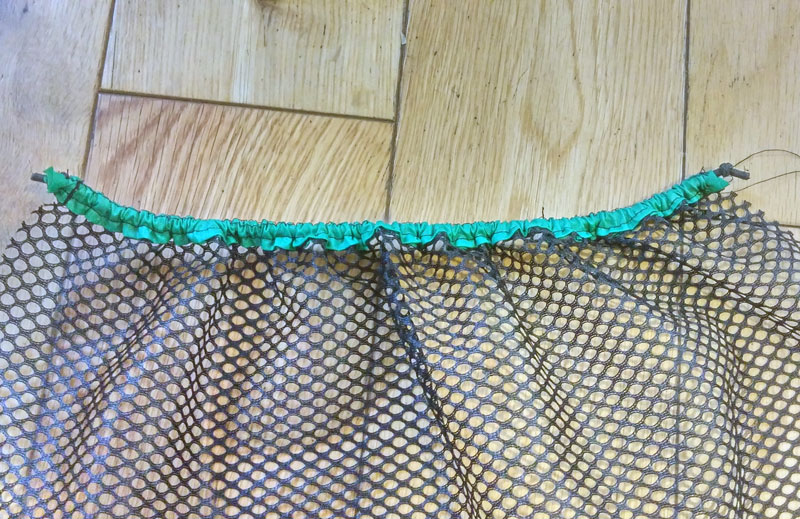
Top pad retention mesh in place. The edges are elasticated tap folded and then sewn with expanding stitches. The elastic was pre stretched and pinned before sewing.
Stitching reinforced with double stitched grosgrain.
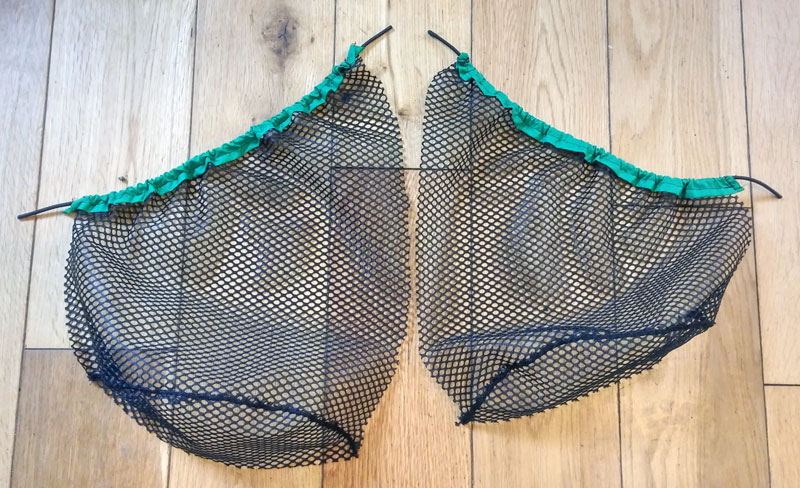
Repeat for bottom.
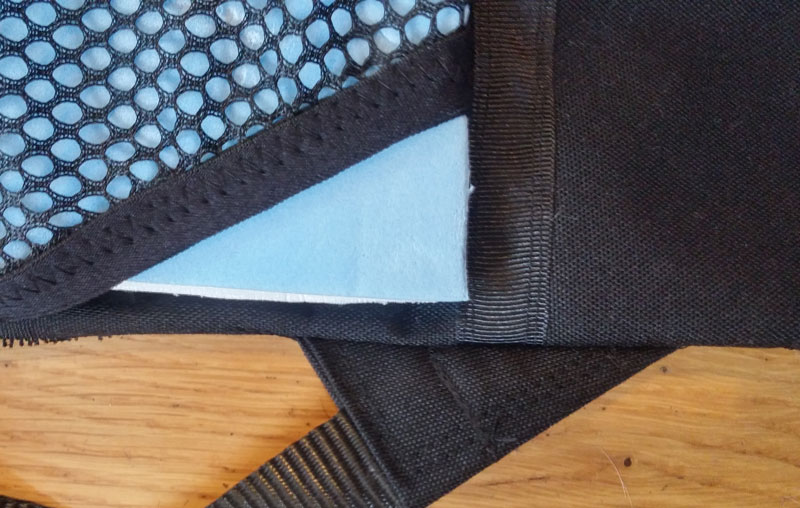
Inside view of all the stitching. Stitching the hip belt onto the body of the pack was incredibly difficult. Hard to keep the foot of the sewing machine in place even with a small foot. I will definately have to get an ex industrial sewing machine next time.
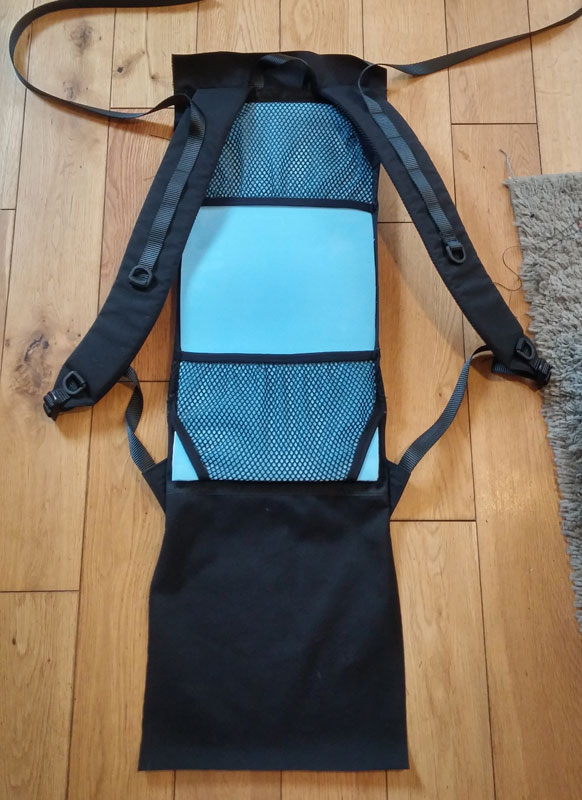
Pad inserted so you can see the parts.
6. CONSTRUCTION OF FRONT PANEL AND COMPRESSION LOOPS
As per instructions but with the addition of more loops for shock cord compression. I knew that this pack would often be used below its carrying capacity and as such that it would have to compress down well to maintain load transfer to the hip belt. Unlike the instructions I ensured that there would be loops inside all the pockets so that the compression took place over the entire backpack surface, front and sides.
Front panel with loops added with bar tacks to anchor the loops for the shock cord compression system.
7. POCKET CONSTRUCTION
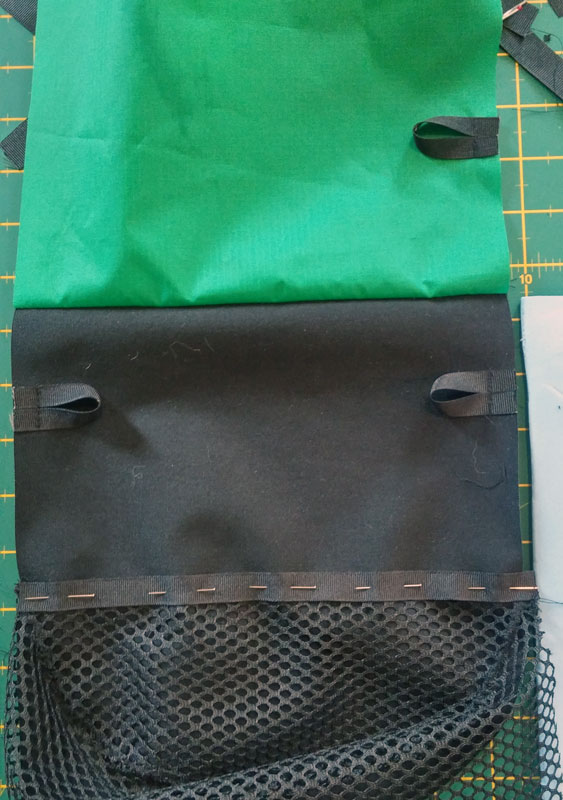
Addition of shock cord to the tops for the pockets to proven items falling out. I measured the shock cord length so that it would be firm but not too tight so as to prevent bottles being put one handed into the pockets. As with the mesh on the back panel, I had to build in the amount I wanted it to give by. This meant pleating the mesh at the bottom of the pocket on the front panel so as to allow it to expand.
On the side pockets I added a semi-circle shaped mesh panel to the bottom of each pocket to allow a water bottle to site nicely without the pack contents squeezing the bottle out the top of the pocket. The depth of the pocket on the side was calculated to fit a smart water bottle height. The angle on the pocket top is intended to allow one handed stowing and retrieval of the water bottle without having to take off the pack.
Sewing a silnylon tube onto mesh to use as a sheath for shock cord to tension the pocke top.
With shock cord pre stretched and bar tacked into tube.

Making semi-circle bottoms for side pockets. Designed to ensure bottles stay put and don’t pop out.
Completed side pockets
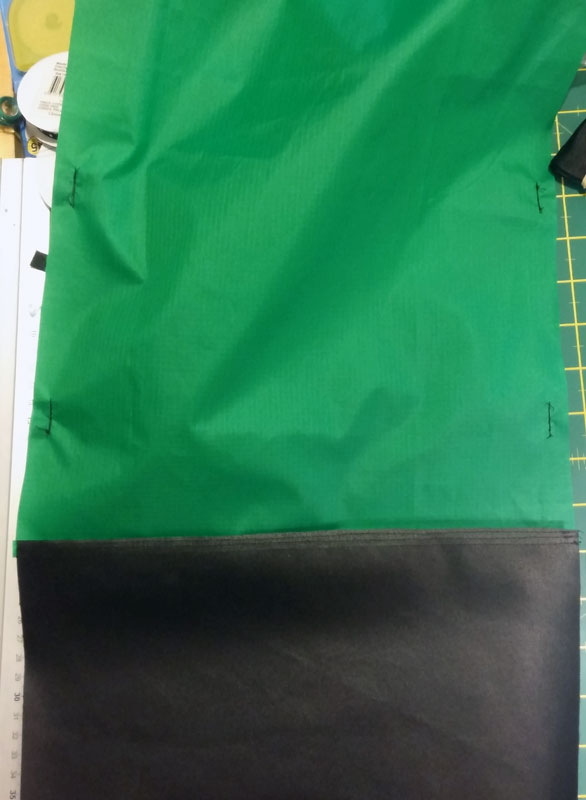
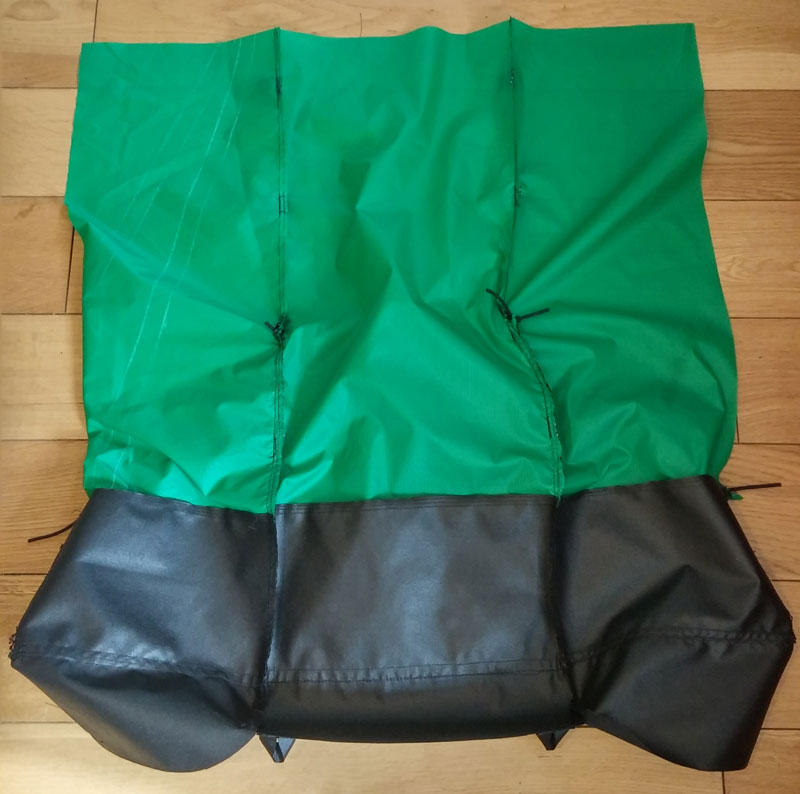
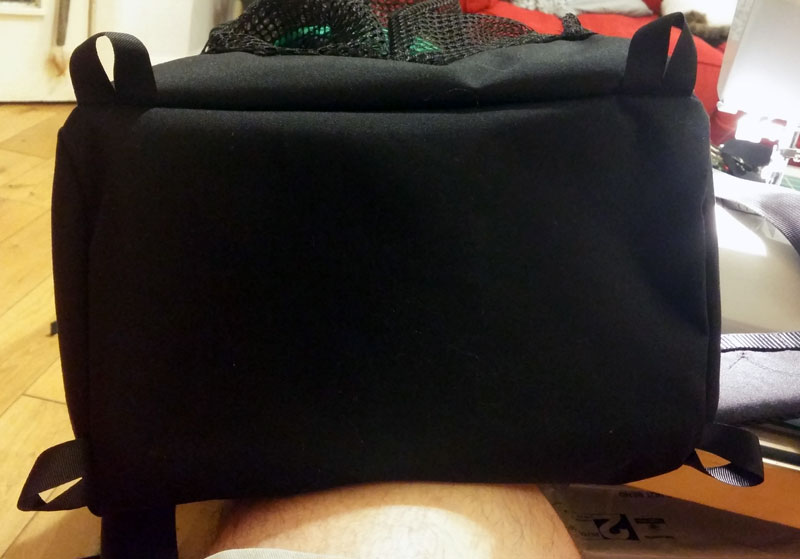
8. JOINING FRONT PANEL AND FRONT BOTTOM PANEL
As per instructions but with a material change. The front bottom panel in the instructions is rip stop nylon and I have used the same 500D Cordura that makes up the straps and back panel. I considered that my pack would get dumped down quite a lot each day and that this impact point should be heavy duty. This is also the part of the pack that houses my down quilt and quite simply I wanted this to be both waterproof and bomb proof. A torn or wet quilt would make me very unhappy. Durability over weight again.
Inside view of front/front bottom join. Tripple sewn for some reason.
9. JOINING SIDE AND FRONT POCKETS TO FRONT AND SIDE PANELS
Side bottoms were made from 500D Cordura in order to be super durable where the pockets would constantly be having things put in and out of them. As above this also protects the area with my down quilt in it. You will note that the positioning of the front and side pockets is lower than in the instructions. This is to enable easy access to the side pockets and to allow a larger capacity front pocket. I think it looks nicely balanced compared to the original.
The pockets are set up from the bottom of the pack so that they aren’t worn each time the pack is put down onto rough or dirty surfaces.
Grosgrain reinforced side pocket pinned for sewing.
Double stitched grosgrain side pocket reinforcement.
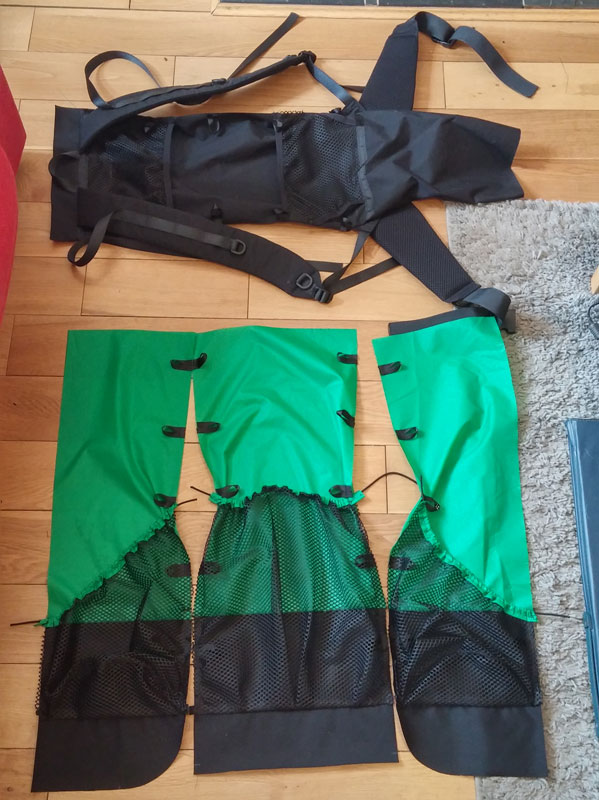
Nearly there!
10. JOINING FRONT AND SIDE PANELS
As instructed but with the addition of compression loops.
Inside of side/front/bottom sewn together. Double sewn but forgot to add grosgrain reinforcement to seams.
Ready for joining to back panel and straps.
11. JOINING FRONT AND SIDE PANELS TO BACK PANEL AND ADDITION OF LOAD LOOPS
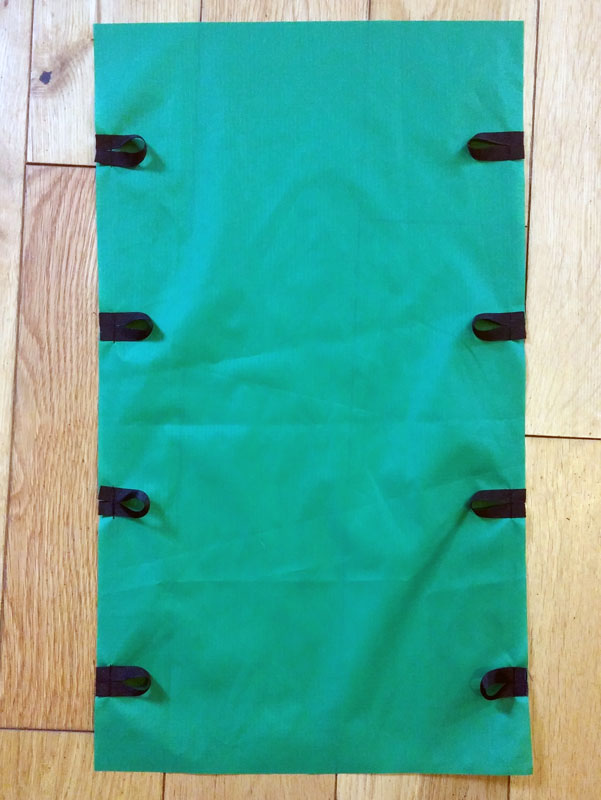
As instructions but with the addition of four grosgrain loops on the bottom of the pack to allow carrying of extra gear if required. I really didn’t know if this was necessary but for so little weight I figured ‘ why not? ‘. One day I may be carrying a roll mat for my girlfriend or something for my dog for example. Perhaps a rope or something. Anyway, the option is there and some shock cord can be added if needed.
I was really worried that I did not have enough material at the bottom of the pack to allow a seam. This was incredibly tight to sew and the single hardest junction to sew on the whole pack. There are so many seams coming together at this point.
Added 4 bottom loops for carrying mats, rope etc.
12. CONSTRUCTION OF COLLAR AND ROLL TOP CLOSURE
Historically I have liked to have a lid on my packs. They are useful and are an extra barrier against the weather getting into my pack. However, in the process of stripping my original Podsac 50ltr pack down I removed the lid and relied upon the roll top closure.
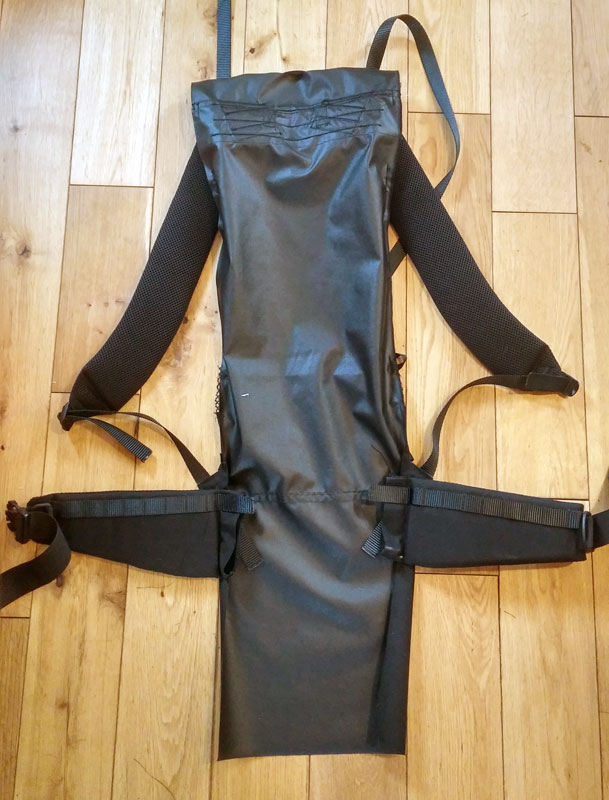
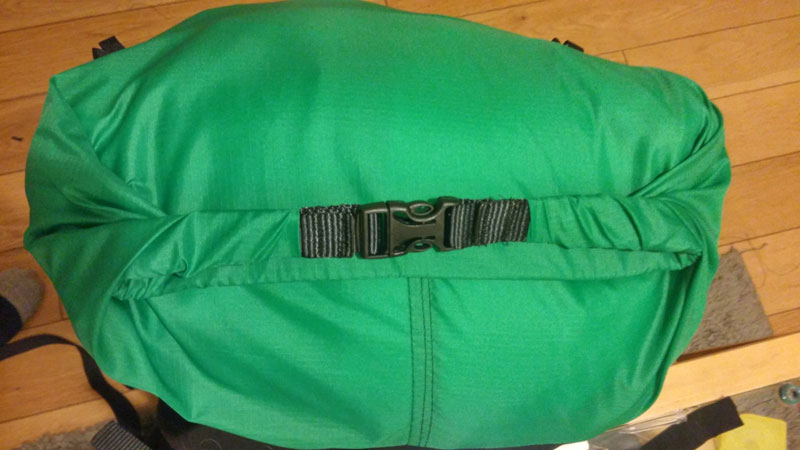
I decided that I didn’t like the closure on the roll top of the G4 instructions so created a roll top closure out of some webbing and a side release buckle. This works rally well in not only creating a water tight closer to the top of the pack but also in giving an area for the load lifter/compression strap to route through.
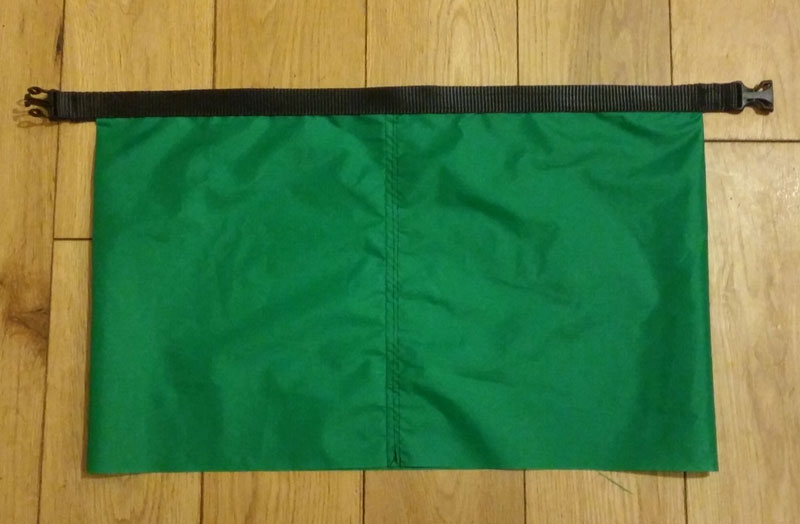
Slightly over engineered roll top collar for backpack.
13. JOIN COLLAR TO RUCKSACK BODY
As per instructions. Seems like a huge collar though!
The collar adds a serious amount of volume to the pack.
Demonstration of roll top closure. I reall like how neat these look compared to draw strings, and nowhere for water ingress.
14. CONSTRUCTION OF LOAD CARRYING AND COMPRESSION STRAP
I wanted to have some load lifters but didn’t want to put lots of extra un-needed strapping onto the rucksack so I decided to use some scrap webbing to make a strap which could compress like a Y strap but also provide load lifting at the shoulder straps. When not needed the strap can simply be unbuckled at each end. The roll top closure keeps this strap in place and I am particularly pleased with its dual function. Unless the pack is full or mostly full this strap seems unnecessary and can be removed. Enough length is in the strap to allow its use when the collar is full of extra gear.
Strap is senw to the black 500D Cordura panel at the front bottom of the pack. It unbuckles form the bottom with a side release buckle and the load lifter end can also be removed.
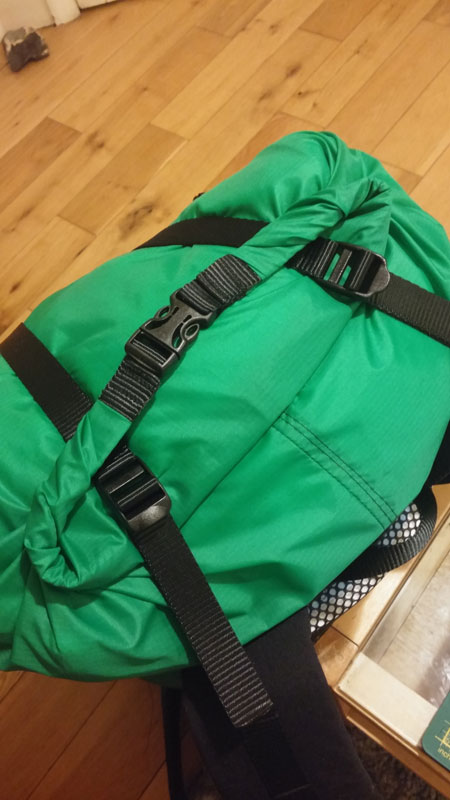
I really like how the roll top closure secures the load lifters. An unexpected bonus.
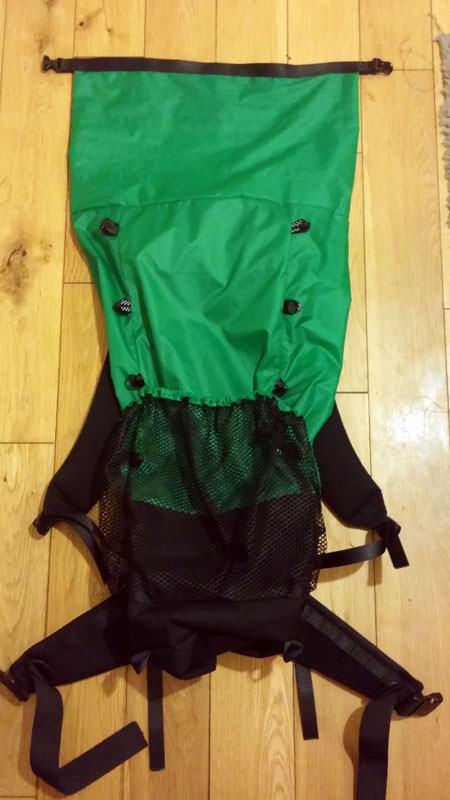
15. FINISHED
I am really pleased with this pack. It has all the features I wanted and eliminates some of the points of weakness from the original design. Sadly the compromise made in the materials and the addition of features and durability has increased the weight of the pack over that of the original design.
The original design of this pack is claimed to be 340g or 12oz. With the heavier more durable fabric, thicker/wider/longer padded straps and waste belt, extra anchor points and cordage and the roll top closure this pack weighs in at 793g or 27.97oz.
OK so its twice the weight of the original but in my opinion it is twice as durable, much more comfortable and longer in the body and contact points in order to fit my torso. It is easy to instantly reduce the weight by removing the load lifting straps and by cutting of spare shock cord. I have left it in place for the sake of flexibility until I have tested it more thoroughly.
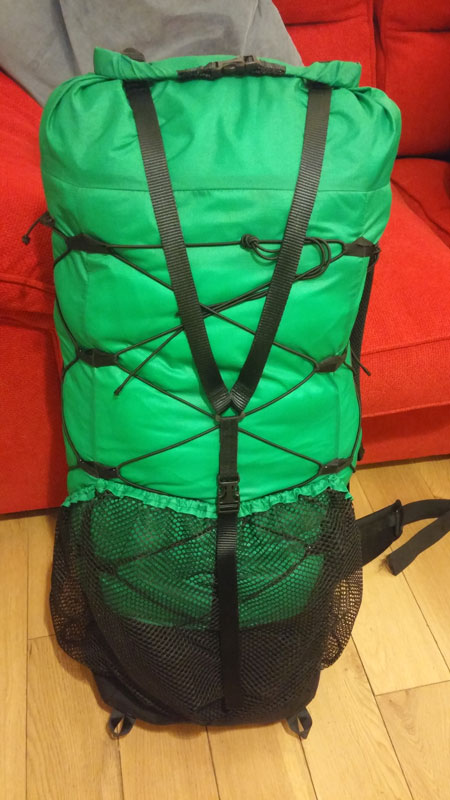
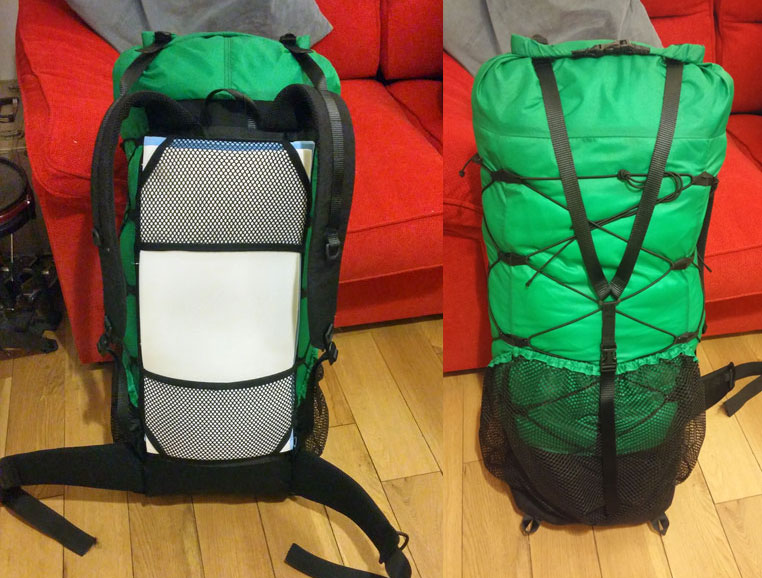
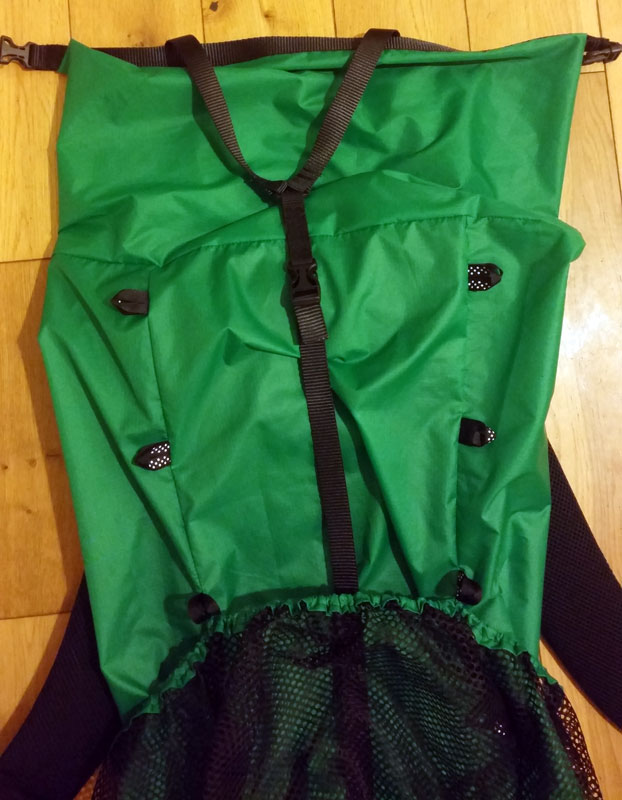
Front view stuffed with a duvet.
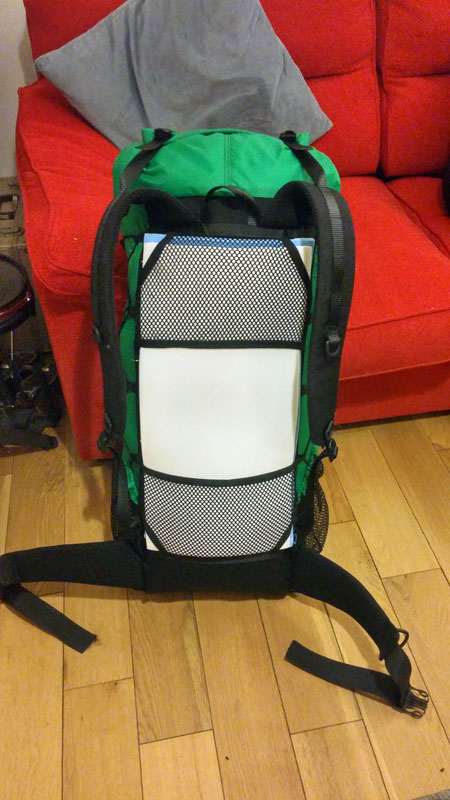
Rear view stuffed with a duvet.
TESTING
I took this backpack out on a 50 mile 3 day/2 night to give it a bit of a shake down. Overall I was really pleased with it in almost every aspect.
Compared to my previous rucksacks this one was less than half the weight of my other lightest pack. It fitted my torso length correctly (with one exception which I will get to). It was largely of more durable fabric, had better fitting straps and more comfortable padding while having all the features I wanted. I actually struggle now to think how firms manage to make their packs so heavy.
I carried this pack for 50 miles over 3 days in a combination of weather from rain and wind to warm weather to very humid weather. At all times the pack was comfortable and made for an exceptionally easy carry. I loved the side pockets and used them for water every day. I loved the front large pocket and used it for wet tent, dog towels, wet weather gear and more. I was really surprised just how much I used this pocket.
The pack remained in one piece. Very little stretch on the seams and no water got in but it has yet to be exposed to heavy rain. Just thinking about it again now, this pack was literally more comfortable than any pack I have bought in a shop in my entire life. This may be down to the pack design or it may be down to poor past gear selection. Difficult to tell really. I suspect a balance between those two thoughts.
The closed cell back pad is very comfortable although as you will all know, this gets very sweaty in fast/long/warm hikes. I did like using the closed cell foam to provide a padded area to my tent porch or something to sit on at meal times.
The load lifters worked well and were easy to adjust, as was the hip belt. I was surprised how much load was transferred to the hips despite the pack only being about half to two thirds full. I can only imagine this would work better with a full load.
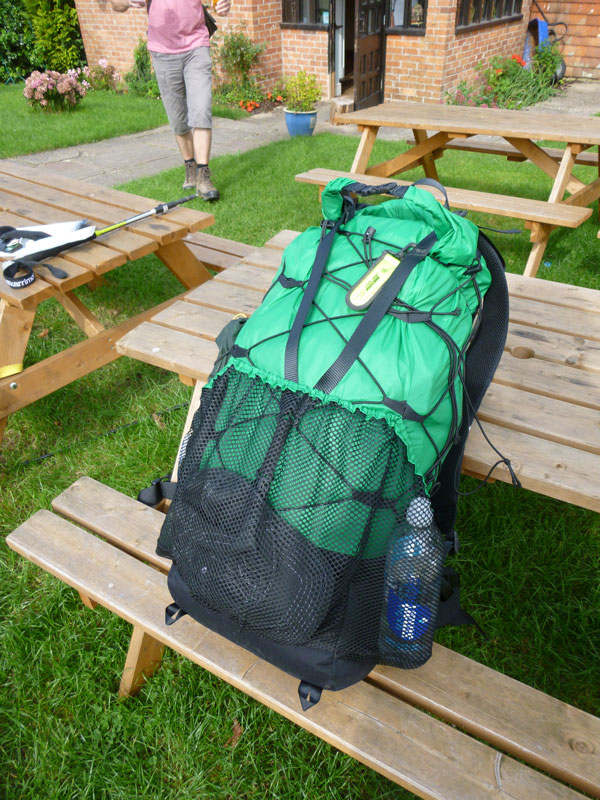
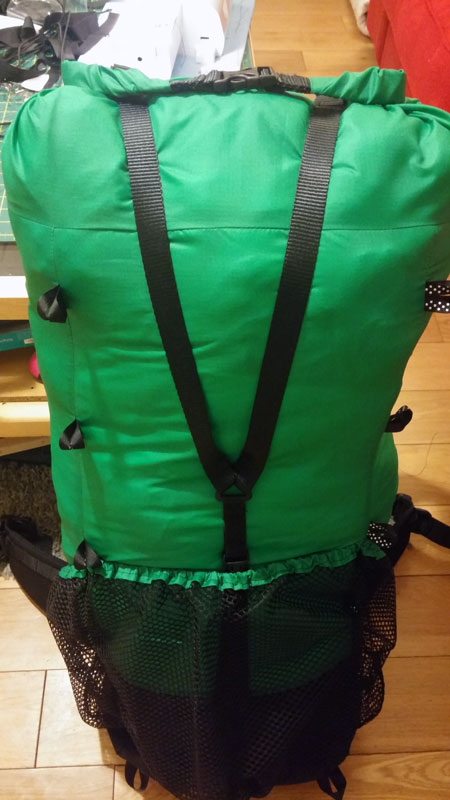
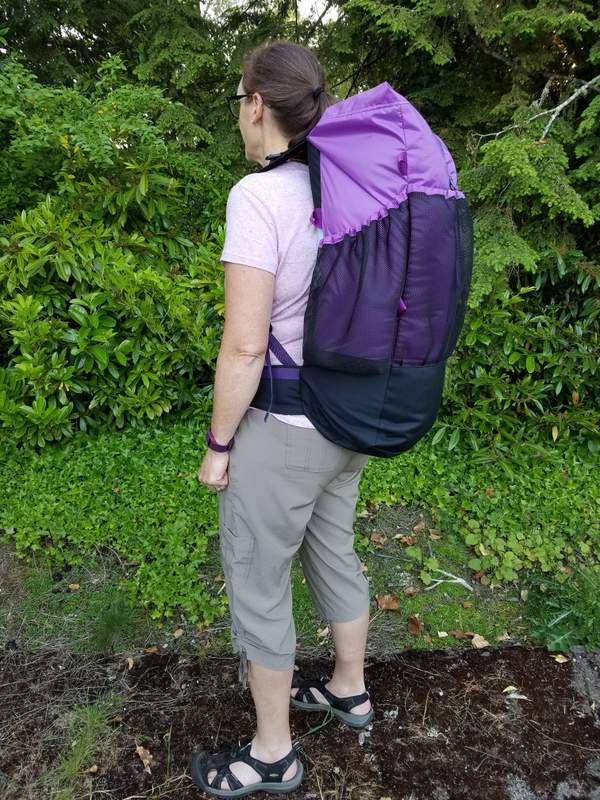
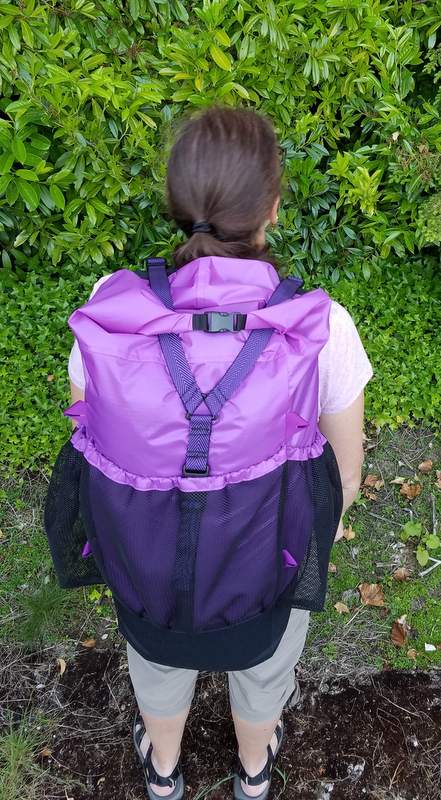
Pack only half to two thirds full. It looks a bit messy but carries very well with the shock cord compressing the body.
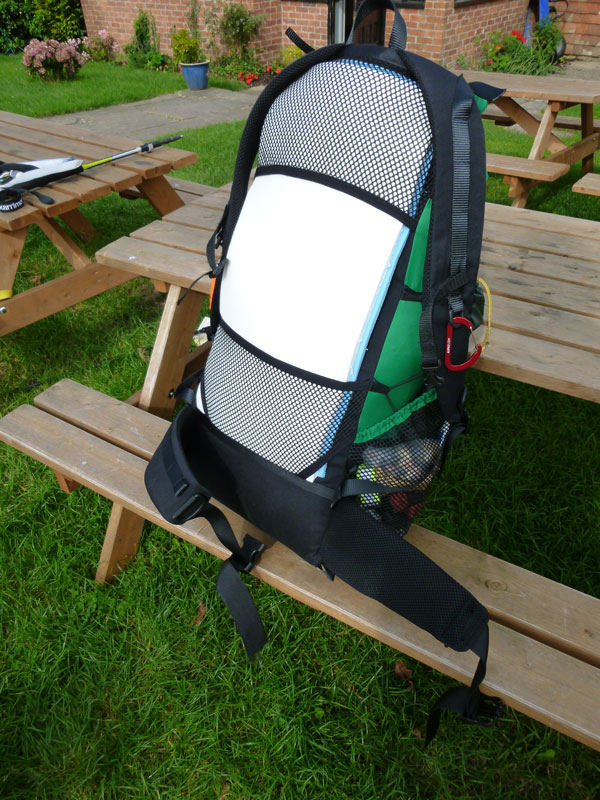
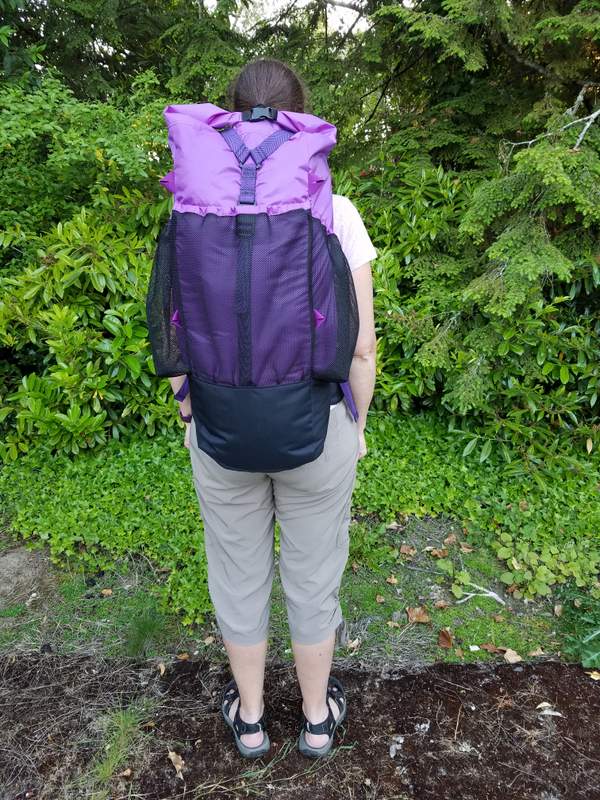
Rear view.
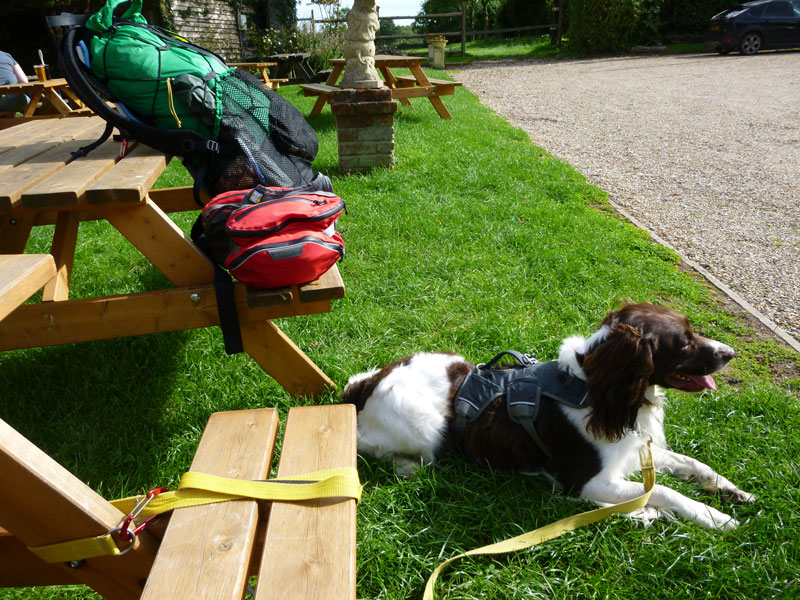
Tired Charlie. He has just pulled for about ten miles. The long yellow lead is a horse training lead with elastic bar tacked to it so it gathers rather than drags on the floor.
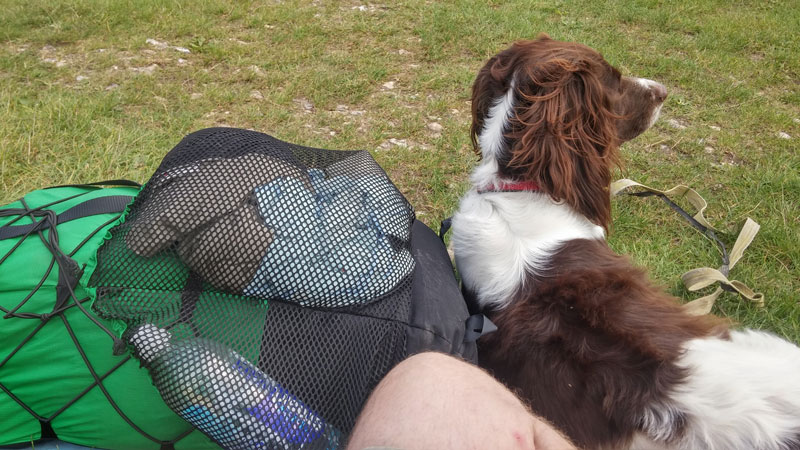
The mesh pocket was really useful for the wet towels from drying the tent that morning.
CONCLUSION ( what I would do differently next time )
Firstly the mistakes. Largely the pack was free from errors in construction (as far as I can tell) however, I did make a few errors in my measurements which I would change:
- I added depth to the hip belt but did not change its position on the back panel. As such my help belt finished lower on the torso than is optimal. Next time I will actually add more depth to the hip belt but would raise it up the back panel to compensate.
- Although making the shoulder straps wider, which were perfect in width, the straps did finish a bit quickly, I think I would add between 2-4 inches to their length next time.
- Strap shape. The fit was good but I think it could be better by having a more S-shaped strap. This would make chest strap placement easier and shorter.
- I added 1 inch to the back panel length to match my torso length and the fact that I’m 6’4.5″ and the pack is designed for a max of 6’4″. Quite simply I didn’t need to add this inch to the length. I should have left that as is. This resulted in the pack sitting down on my butt a bit more than I like. It was totally comfortable but a bit warm.
- Further change to the back panel. I like a pack to end in my lumbar area and as such I would move the top shoulder strap junction with the back panel down the panel a couple of inches and move the hip belt down the same amount. This moves more of the pack up the back and off of the butt. I think this would also make the top of the shoulder straps sit more over the top of the shoulders.
- Shock cord. I would use less. I still think it should be on the sides and the front but with a bigger gap between loops. This pack has LOT of shock cord. Perhaps move 1 pair of loops off of each side and the front.
- The collar. Wow. This pack is big. Even bigger as I added length to the back panel but the top collar is long. I would reduce this collar size by a third.
- Pack volume. I honestly thought that I would easily fill this pack. I filled my 50ltr pack easily before my ultralight conversion so thought that the 60ltr plus volume of this pack would be about right. I only filled a half to two thirds of this pack for a three day walk with 2 nights camping. I think a full 7 days would fill this pack with food and clothing but still wouldn’t use the collar. I am going to make this pack again but with perhaps a quarter less volume (and weight).
- Material choice. I will import some lighter Cordura and perhaps streamline where it is used. I still want all the contact points to use it but from using the pack I can see where that can be refined with a more innovative shape used for the panels.
- Back panel padding. I am going to turn this into a larger/warmer fold out bed for my dog, removing the need to carry his lightweight folding bed (see here https://backpackinglight.com/forums/topic/myog-summerautumn-backpacking-dog-bed/)
- Colour. Although the black and green worked out quite well in the end I prefer more subdued shades of green.
- Hip belt. I would bring the padding even further around the front of the belt for ultimate comfort. I didn’t have any issues with bruising but can imagine with heavier load that this may be an issue.
- Internal seam finish. I quite simply didn’t think to sew grosgrain to my internal seams which would have given them a bit more strength and durability. Although this adds weight it is minimal and I will do it next time.
- Strap width. Some of the straps which are not primary load bearing straps can be reduced in size. At the time I used the stock that I had. I would retain the 40mm hip belt webbing and the 20mm shoulder strap webbing but would reduce the webbing on the surface of the pack and the load lifters to 10 or 15mm. They just don’t need to be that durable. The same goes for the roll top closure.
- Roll top closure. I would make the collar out of a lighter silnylon than the body. It doesn’t need to be that durable. I would also make the roll top webbing thinner and lighter using webbing for one side of the closure and grosgrain for the other. Webbing is not needed both sides.
I am really looking forward to making version 2 of this pack which more closely fits my usage requirement and doesn’t go as overboard on materials whilst retaining them where it makes the difference. If you have any questions please shout and I will do my best to answer them. I will come back and edit this soon for errors etc. but wanted to get it live ASAP.
Paul
Nice looking pack and nice write-up
“I am really looking forward to making version 2 of this pack which more closely fits my usage requirement and…”
MYOG addict
If it’s easier, you can write it as an article, click on “write for us” at lower right
Thanks for your comments Jerry :)
Paul
Awesome job!
Wow! I don’t know what took more work…. Making the pack or documenting it for this posting.
Very nice. Thank you for sharing this.
A great resource for anyone making their own pack.
Great – very informative and a big thank you for taking the time to write and prepare photos in your report.
I’ve not made a big pack yet…….but I can feel an itch developing :-)
Good work!
Super write up, Paul! It’s funny, but many of the discoveries you have made through the process where ones I also made recently during my latest pack build.
Wondering if you had considered using Cuben fiber for your next build? You can get all of the durability, but a fraction of the weight. This pack would probably weigh no more than a pound!
Thanks again for sharing all the photos and details!
Hi Cory,
I have never seen or used cuben. I get the impression its difficult to work with?
I have bought a load of 20d silnylon to make a couple of tarps/tents with so i will probably use some of that and a slightly lighter weight cordura for the contact points.
I think that i can knock quite a bit of weight out of the design by reducing webbing widths on non critical straps and by removing excess webbing. I dont want to compramise the belt and shoulder straps so they will remain the heavy bits.
I think some strength can be given and weight reduced by making the pack out of fewer pieces. May have to cut an interesting shaped bit of material to do that but the fewer seams the better.
Do you have pictures of your project?
Paul
I am 6′ 1.5″ with a 20″ torso. When I had made this pack I made the hip belt 5″ tall and placed it flush with the bottom. I then had to place the shoulder strap junction 3″ lower than where Van Pleski says to place it. This gave me five inches of top-spce instead of the two inches per instruction (going by the original instructions posted to the web some 20 years ago), so I had to reduce the height of the bag to 24″ or so down from the original 27″.
I also had to lengthen the shoulder straps. iirc, I originally extended the lengths by five inches a piece and found that to be too long and ended up going with two or three inch extensions. I also lowered the shoulder strap anchors flush to bottom.
I am not familiar with the instructions offered by Quest but I don’t think they are too different from the original. In looking at the original, Van Pleski says to space the back pad holders the “height” of a Z Rest pad, which back then was 24″ wide. That explains the extremely long torso length.
Edit to add: your link to the free instructions are not to/from Quest but instead are the original document/design by Van Pleski.
About weight; I personally do not think that Cuben is a good choice for packs considering its price and that it has a rather low resistance to abrasion. The good stuff these days is backed with taffeta for increased abrasion resistance but is also now between 3 and 4 oz./yd^2 (ZPacks, HMG, MLD).
The original design using 2.2oz. ripstop and 4oz oxford produces a pack just over 12oz, a weight that does not include padding (shoulder, hip, and back). Removing all hook and loop from original design, sewing in foam to hip belt and should straps, and going with 3/4″ side release buckles and perhaps a foot of 3/4″ webbing or grosgrain won’t even add 3oz., so, this is a very easy pack to keep at or under a pound.
Great post, and jolly happy to see another fella from the UK here!
Thanks for all the details, i finished my first pack a few weeks ago, it is addictive and I’m already planning my one for next year!
Good job on the pack modifications. I am looking at making this soon, however I just traced my backpack hip belt for a more comfortable fit and my shoulder straps. I’m glad I read your post!
Fantastic documentation – thanks for sharing.
Pack looks good too I have to say. The modifications is what makes making it yourself so worth while I imagine.
I haven’t made a pack yet. I have no sewing machine, and am not done researching that. I’d like to be one and done, not upgrade later. Don’t need something fancy, but the ability to go through multiple layers like you write would be good.
cheers
Really great job on the pack and on the detailed write up. I would only add that someone looking to make a similar pack should look at the pattern available at diygearsupply. The pattern there will get you closer to what you intended than modifying the G4 and maybe making some unforeseen errors -especially in the torso length. You can still follow the G4 instructions to keep the sewer on track.
Thanks for sharing,
Scott
Thank you so much for this tutorial. I made this pack this week. The instructions in the G4 kit are great. Your thoughtful modifications and commentary were OH SO HELPFUL as I pulled mine together. Thank you once again!

Fantastic I’m glad it was useful. The pack looks great and I look forward to hearing how it is to use and if there is anything you would change about it.
I will make my version 2 of this pack this year and will reduce its capacity I think by ending the pack at the waist belt and reducing the collar. Will also put thinner straps and smaller buckles on the load lifters etc.
Kind regards
Paul
Nice work and I think the color combination you chose looks great too.
Viewing 18 posts - 1 through 18 (of 18 total)
Become a member to post in the forums.
advertisementYour privacy is protected: We do not transmit your user data to third-party ad platforms or advertisers, and we do not host third-party tracking pixels. Backpacking Light serves ads on its own custom, native, and internal platform.
 New Ultralight ShelterFreestanding silpoly shelter for lightweight adventures.