Topic
Myog Apex quilt draw channel/draft stopper questions
Forum Posting
A Membership is required to post in the forums. Login or become a member to post in the member forums!
Home › Forums › Gear Forums › Make Your Own Gear › Myog Apex quilt draw channel/draft stopper questions
- This topic has 20 replies, 5 voices, and was last updated 5 years, 4 months ago by
 Joost D.
-
AuthorPosts
-
Sep 17, 2019 at 6:13 am #3610526
<p style=”text-align: left;”>Hi All,</p>
I’m planning a second apex quilt using 5oz apex. Now I made one with a simple draw channel with a folded piece of nylon and 2 cordlocks at the side. I would like to have the cordlock in the center of the channel. I’m not completely sure how to make this ;) an ideas?And I’m thinking about adding draft stoppers at the side. Any users have experience with these?
Thanks!
Sep 17, 2019 at 8:59 am #3610528Sew a button hole in the nylon. I always practice on a piece of scrap material to make sure I get the size of button hole that I want.
Sep 17, 2019 at 9:27 am #3610529And the shock cord do you sew over it at the sides? With the main seam?
Sep 17, 2019 at 4:29 pm #3610573A button hole would work for the middle of the draft tube, or you could sew two draft tubes (one on each side) that meet in the middle where the tubes overlap half an inch to form an opening.
You could also leave the ends of the draft tube/s open and sew small shallow grosgrain loops at the ends, then attach both shock cord ends to the loops. This would make the cords removable and also allow you to swap them out for a one-piece cord with the cinch on the left or right as you prefer.
Sep 17, 2019 at 4:30 pm #3610574That’s a great idea thanks!
Sep 17, 2019 at 10:13 pm #3610607I like Lester’s idea better. Button holes are always a pain for me to get in just the right spot. I did sew the 2 grosgrain loops at the end to secure the line to. I used a light nylon cord without a core instead of shock cord, but shock cord should work just fine.
I used cam snaps on tabs of grosgrain for about 24 inches up the sides to further create a foot box.
Sep 18, 2019 at 10:43 am #3610660I Iike the way this channel is made:
http://www.trek-lite.com/index.php?threads/apex233-quilt-making-of.4625/
But sometimes you see channels that are inside the quilt, like a rolled hem with the drawcord inside. Does anyone have experience with that?
 Sep 18, 2019 at 3:17 pm #3610678
But sometimes you see channels that are inside the quilt, like a rolled hem with the drawcord inside. Does anyone have experience with that?
EE quilts use a center draw cord design, at least on their 2016 version Enigma. A MYOG 2.5 APEX over-quilt I made has a side draw cord which I much prefer as it does not get in the way as much as a centered design.
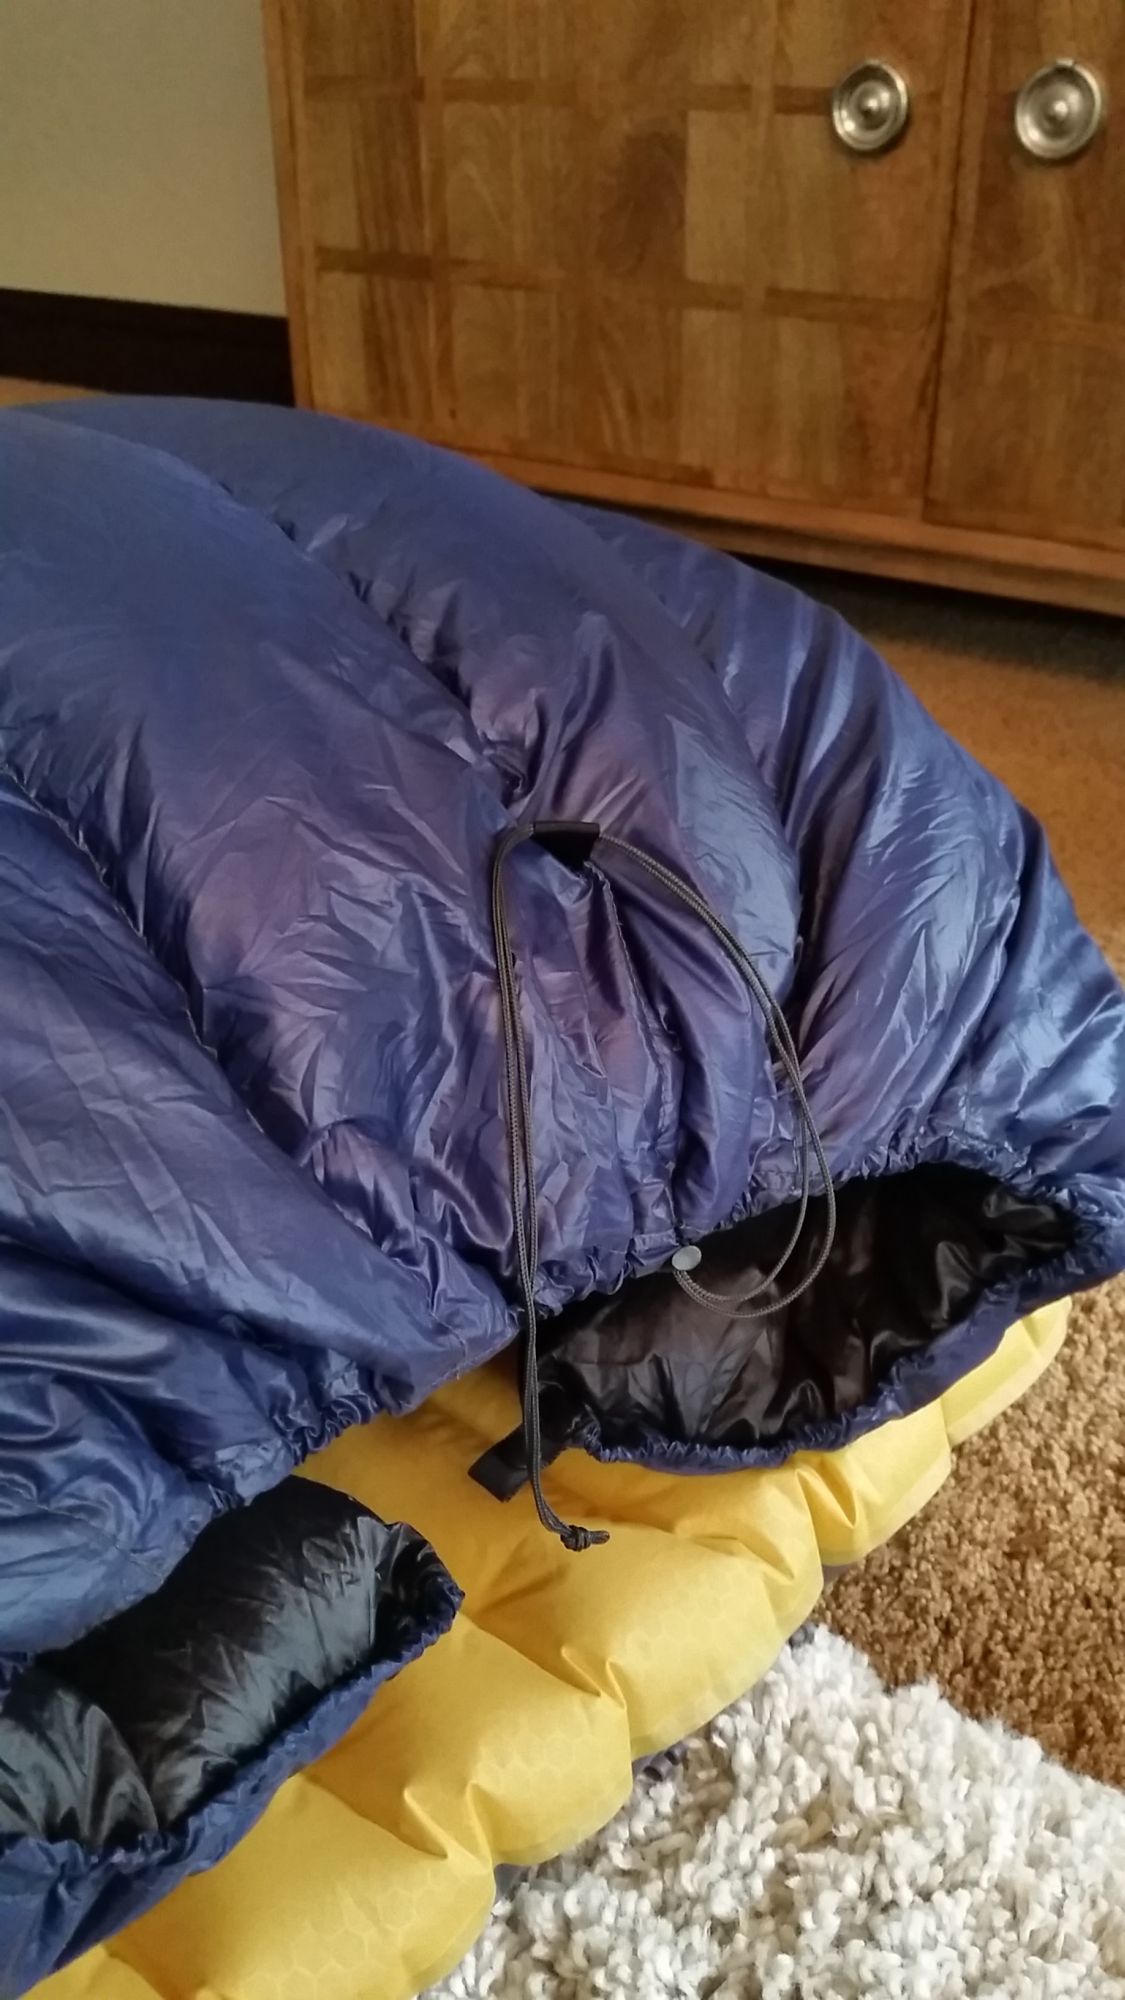
Sep 19, 2019 at 5:47 pm #3610911Another option:
This is located off-center. So there’s just one cordlock near the middle, but it doesn’t hang in my face as much.
Of the two long horizontal seams, the lower one is just a fold to create a channel for the cord. I had the cord in it while sewing. When I got to the spot for the cord to come out in the middle, I just stopped the machine, pulled a loop of cord out and then sank the next stitch on the other side of it.
The trap for the cord lock is two pieces of grosgrain – the bottom one lays flat. Before sewing I melted a hole in the middle of each w/ a hot nail – no fraying. You can see a rectangular line of stitches around the outside of the grosgrain; to re-enforce the grosgrain attachment, I sewed a second layer of shell fabric on the inside before folding the channel as described above. When the seam attaching the grosgrain assembly to the shell crossed the cord channel, I think (this was years ago) I just turned a few stitches by hand and ensured the needle didn’t skewer the cord.
I also used grosgrain loops at the ends to tie in the cord.
Sep 19, 2019 at 6:10 pm #3610912Also, the cord is located 3″ from the end of the quilt, which is a very simple way to create sort of a draft collar. Not the best design, as the collar it forms flares out, but it’s not bad for the effort. I suppose you could add a second draw cord at the very end if you wanted.
Inspired by this guy: https://backpackinglight.com/forums/topic/74725/ He also has some info on the draw cord. Pics at start and end of thread.
Sep 20, 2019 at 5:42 am #3610992Thanks for the tips!
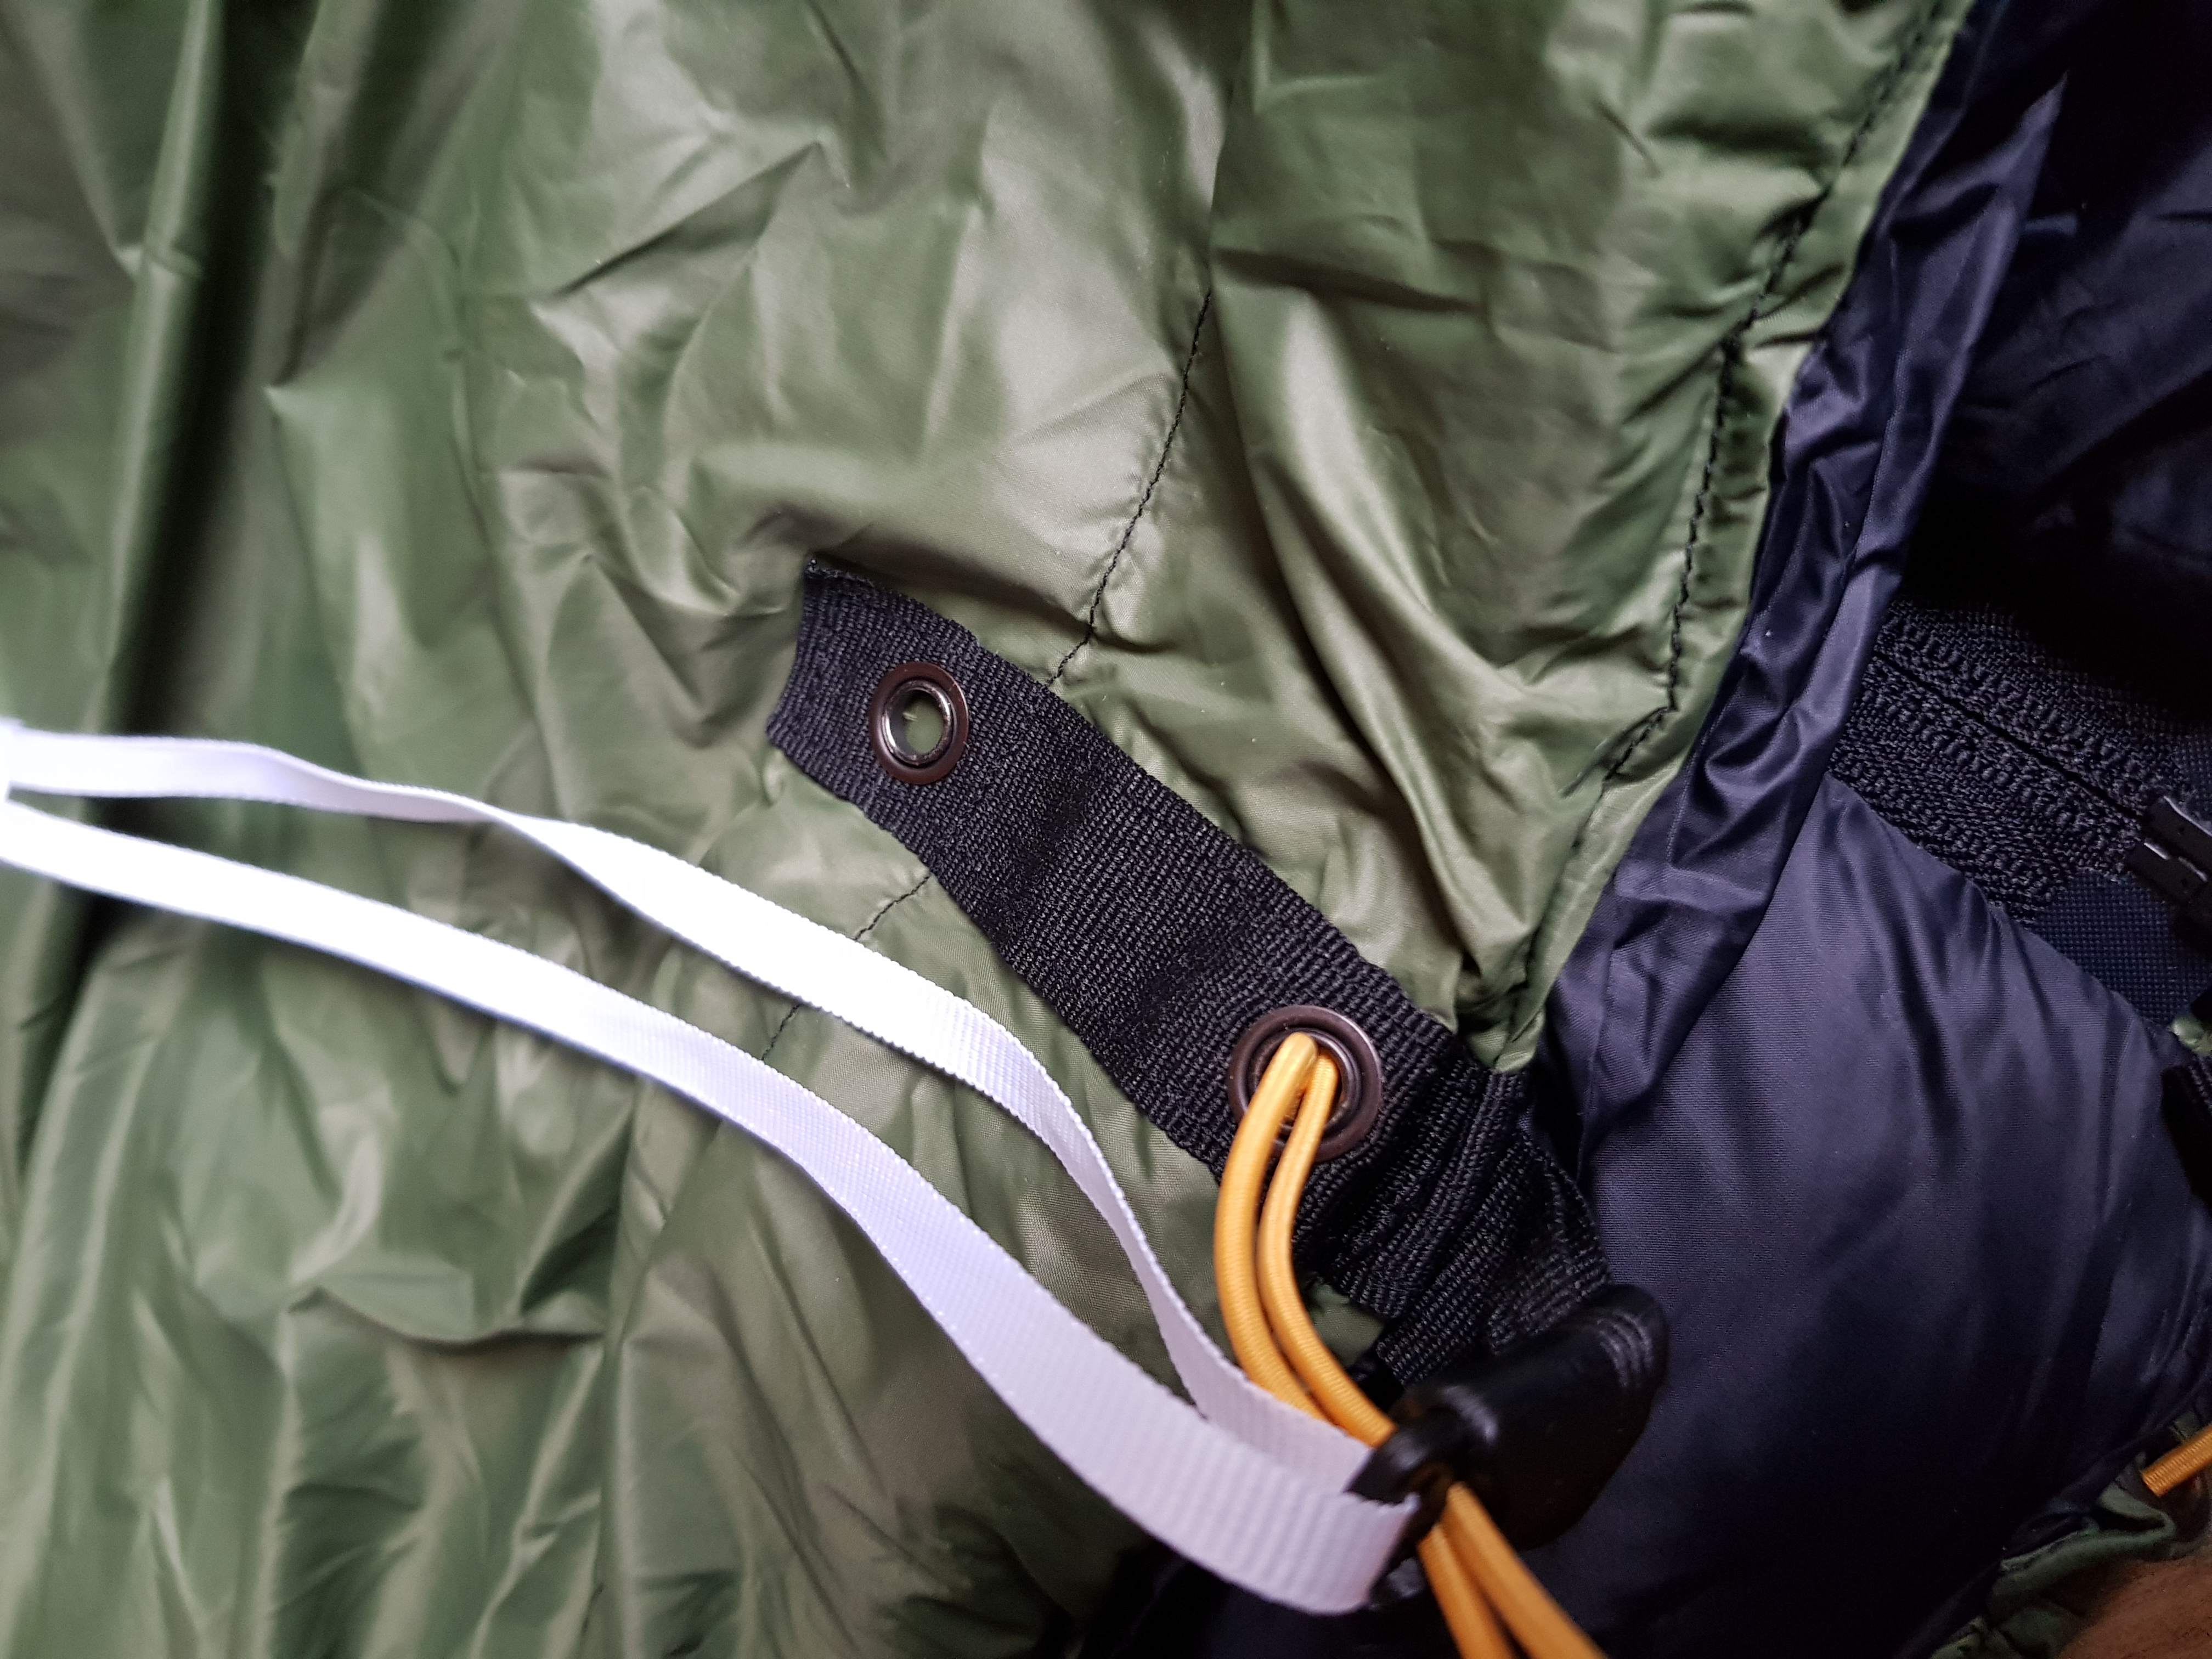
Oct 18, 2019 at 11:55 am #3614447I finished my quilt.
I’m pretty pleased with the results. Of course some stupid mistakes made but that’s the learning curve ;)
So stupid I miscalculated where the eyelet should go and it ended up above the draw channel…. 😢 But the cyberian cord lock works great. Easy to use for ventilation I think.
Made out of 36gr taffeta and 200grs apex. Dimensions 140*200cm
Oct 18, 2019 at 1:19 pm #3614452“So stupid I miscalculated where the eyelet should go and it ended up above the draw channel…. ”
The best thing about MYOG? – stupid mistakes that make me laugh. I’ve always figured out how to make the end product usable. The mistake is usually only noticeable to me.
Oct 18, 2019 at 2:08 pm #3614458Absolutely, I’ll just keep practicing haha. Let’s make another one… How many quilts can a man use 😊
I’m thinking about a backpack now. This is so addicting. Never thought sewing is so much fun.
Oct 18, 2019 at 2:27 pm #3614460I made a 5 oz Apex quilt and used it for a while, but it’s so heavy, bulky, and not all that warm
I’ve made a couple down quilts since. Got rid of my Apex quilts.
The best outer shell material I’ve found is M50 from thru-hiker.com. More important for down. I put a puddle of water on it and let it sit overnight, puddle still on the outside a day later. Other DWR fabric – the puddle eventually went through the fabric. Sat there for a long time, then a little bit leaked through, then the rest of the puddle quickly went through – “dam broke”
Oct 18, 2019 at 2:33 pm #3614461<p style=”padding-left: 40px;”>That’s a good idea to test fabrics. I was thinking about down. A few weeks ago I used my first quilt an was very happy with it.</p>
We had a Strom and rain went trough my mates tent soaking everything in it… That’s my reservation with down in Europe. Pretty damp and rainy countries here 😢..How do you make you’re baffles?
Oct 18, 2019 at 3:10 pm #3614465pretty wet here in Porltand OR. I find it manageable to keep down dry.
I use a 2.5 oz Apex vest for survival reasons – if all my down gets wet, maybe the vest, jacket, and other stuff will keep me alive. An Apex quilt would be a lot better than down if it got wet.
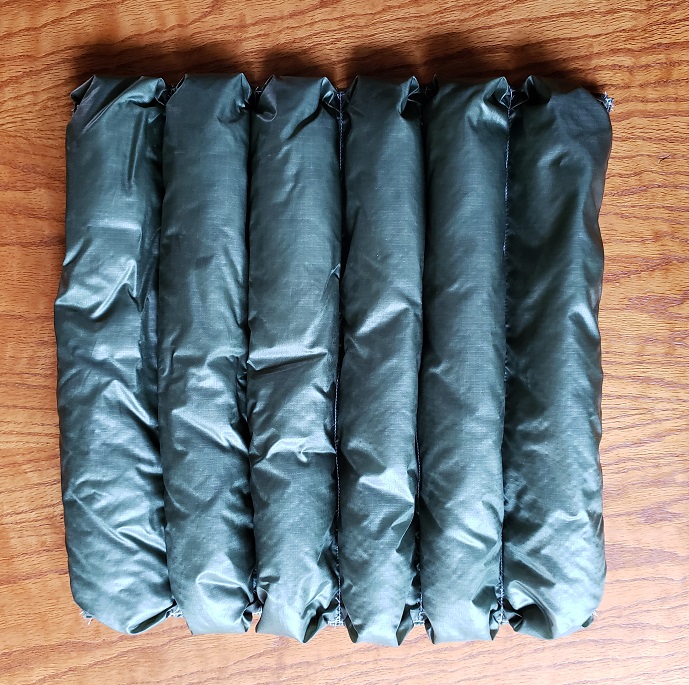
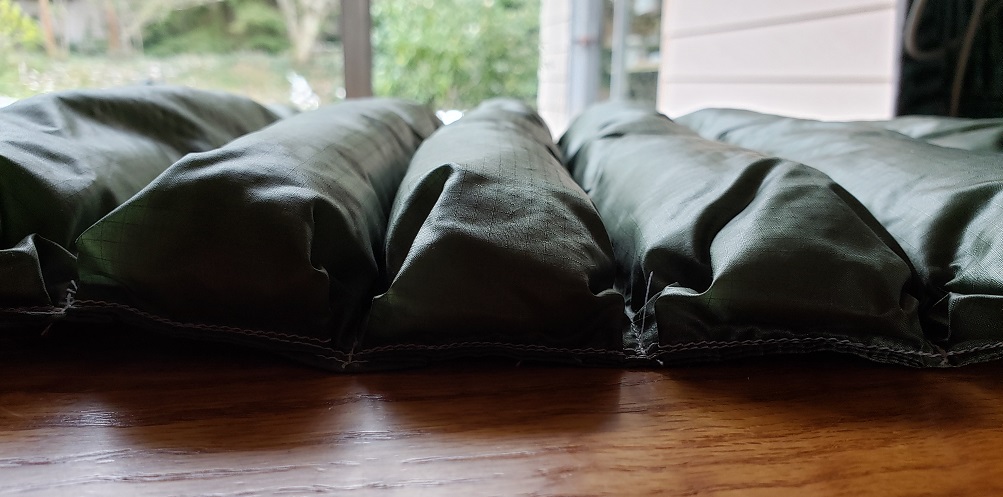
I use asymmetric sewn through baffles – the ease of sewn through baffles with the performance of regular baffles. Inner fabric has, for example, 2 inch wide baffles, outer fabric is 3.25 inches. You can scale both up for wider baffles.
1 foot square test piece:
side view:
Theoretically, cold air can get between the baffles, but if there’s a fabric layer on the outside it will be a dead air space so doesn’t matter. Even without an outside fabric layer there’s a skin of dead air above the outside surface so it doesn’t matter. If it was windy maybe it would be worse.
You also have to make the outside fabric 0.625 inch wider in the other direction. And sewing it together is weird, you have to do some folds to get the fabric to line up. Make a test piece, like this 1 foot square to get the technique down.
This is a far out idea. I’ve made a couple quilts and a couple vests successfully. I don’t think I’ve convinced anyone else to try it though : )
Another advantage is there are no hidden seams. If a seam starts to rip out, I can just re-sew. With regular baffles one side of the seam is hidden inside, difficult to repair it.
Oct 18, 2019 at 3:40 pm #3614474Great thanks, to be honest Jerry I saw your design in an older post and thought “that’s a neat trick!” and wanted to try it out.
Thanks for the extra information I’m definitely going to try that! I don’t hike in very cold conditions maybe thus far 30f has been the coldest.
Oct 18, 2019 at 4:40 pm #3614477Another “great idea” I’ve had is a foil reflector to operate an upright canister stove at lower temps. I finally got someone to try it, not very successful. Since then I’ve sort of abandoned it. I can get it to work but it’s a little tricky to get the geometry right. I now use a bowl with water. Not all my “great ideas” are all that great
But I swear, the asymmetric baffles idea is really a good one : )
Oct 19, 2019 at 9:42 pm #3614718Link to BPL write up on making down quilts and bags (among other useful links!): https://backpackinglight.com/forums/topic/reference-resource-index/#post-3498408
Oct 21, 2019 at 1:40 pm #3614993Great resource, thanks!
-
AuthorPosts


- You must be logged in to reply to this topic.
Forum Posting
A Membership is required to post in the forums. Login or become a member to post in the member forums!
LAST CALL (Sale Ends Feb 24) - Hyperlite Mountain Gear's Biggest Sale of the Year.
All DCF shelters, packs, premium quilts, and accessories are on sale.
Our Community Posts are Moderated
Backpacking Light community posts are moderated and here to foster helpful and positive discussions about lightweight backpacking. Please be mindful of our values and boundaries and review our Community Guidelines prior to posting.
Get the Newsletter
Gear Research & Discovery Tools
- Browse our curated Gear Shop
- See the latest Gear Deals and Sales
- Our Recommendations
- Search for Gear on Sale with the Gear Finder
- Used Gear Swap
- Member Gear Reviews and BPL Gear Review Articles
- Browse by Gear Type or Brand.
