Topic
maintenance on an opened sawyer squeeze
Forum Posting
A Membership is required to post in the forums. Login or become a member to post in the member forums!
Home › Forums › Gear Forums › Gear (General) › maintenance on an opened sawyer squeeze
- This topic has 16 replies, 4 voices, and was last updated 1 year, 1 month ago by
 Jerry Adams.
-
AuthorPosts
-
Jan 24, 2024 at 8:56 am #3802268
I’ve opened up my sawyer squeeze (there are two tiny holes on each side that can be easily drilled) and am wondering what the best method for cleaning it out is.
Soaking in hot water with vinegar/bleach?
Appreciate any input that anyone with experience has doing this.
Jan 24, 2024 at 9:05 am #3802269There are a lot of threads about this. If its not clogged, then backflush with water. If you backflush with bleach, it can interact with minerals in the water and clog the filter. If it clogged with minerals, then vinegar can be good. Or CLR…
You opened the filter after you drilled the two holes? Can you now close it back up? Pictures?
Jan 24, 2024 at 9:47 am #3802272You split the casing? Post a pic so we can see what you are talking about.
Jan 24, 2024 at 10:14 am #3802273I’ve opened up my sawyer squeeze (there are two tiny holes on each side that can be easily drilled)
Why would you do this? What is the point?
Jan 24, 2024 at 10:23 am #3802274why wouldn’t you?
why do people climb mountains?
I just looked at my vintage sawyer squeeze and saw the 2 holes, but haven’t drilled them out yet : )
Jan 24, 2024 at 10:30 am #3802275@Jerry I get doing it on a old-not going to use again-filter. Like opening up a car oil filter to take a peak. I hope that’s what OP is planning. I would never put it back together and use it though.
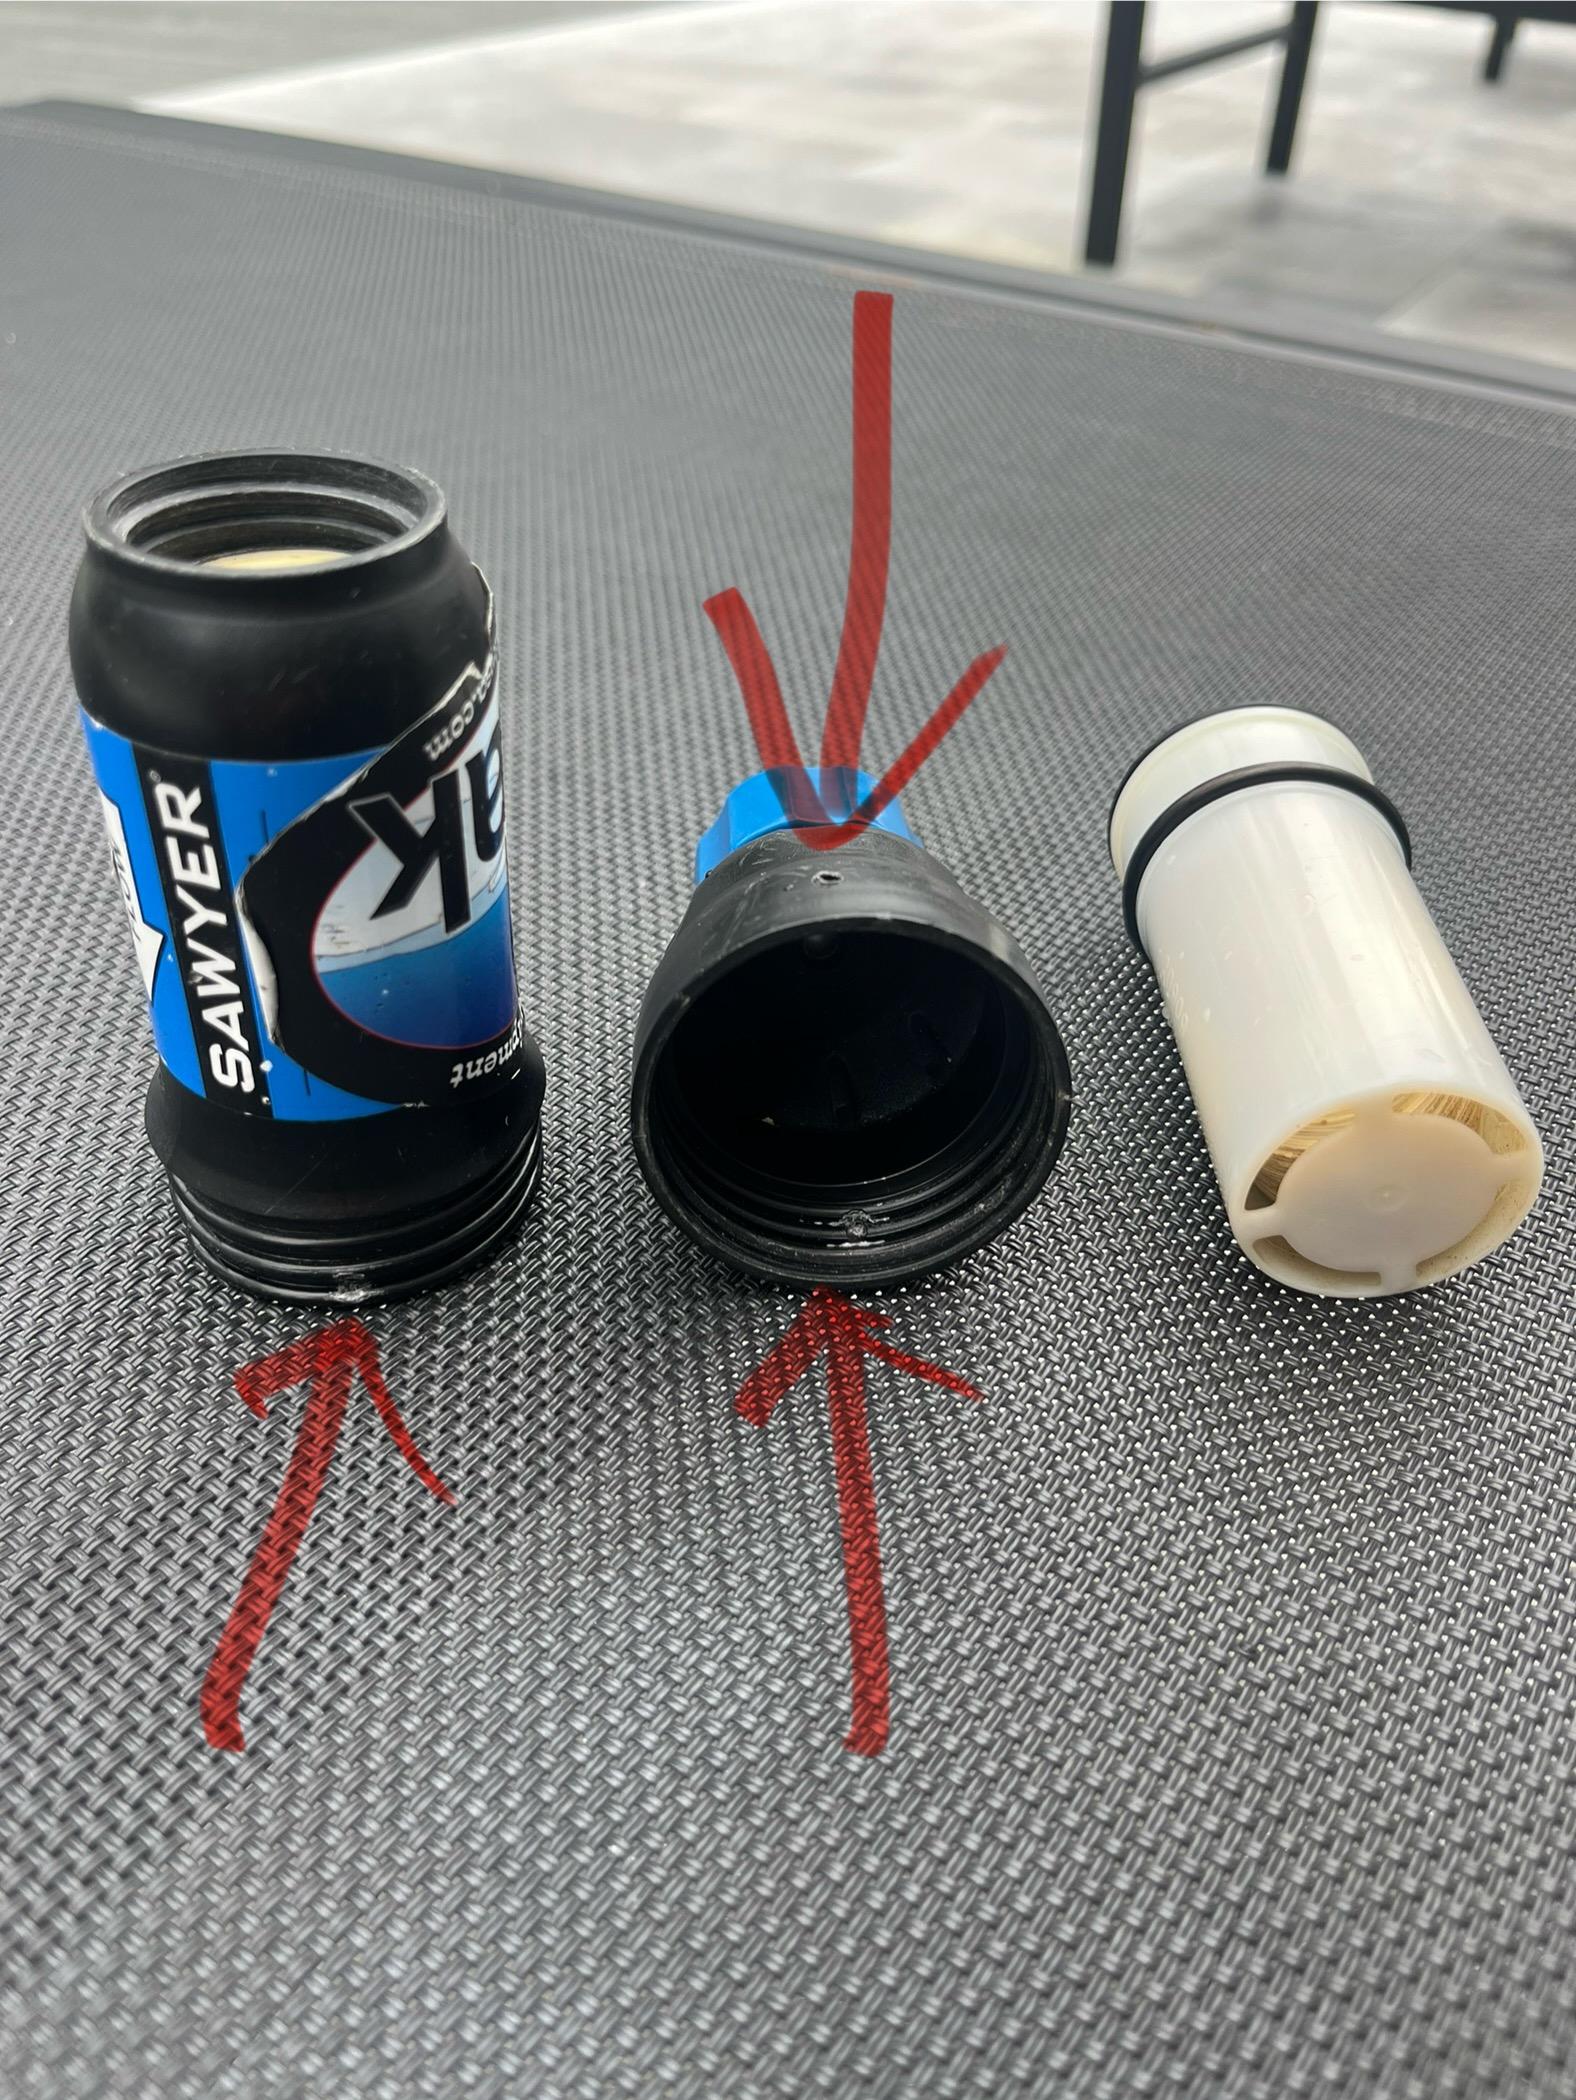
Jan 24, 2024 at 12:18 pm #3802277Below is a pic of the filter.
There are two holes on the top portion that have been filled in with plastic by sawyer. It makes getting access to the filter more difficult but if you look closely at the way it is designed (and are willing to potentially compromise your filter), you can tell it’s easily accessed with a small drill bit. Once drilled on both sides, you can easily twist off the two threaded sections.
In some ways it’s probably good that sawyer intends for this not to be opened (users potentially not properly closing it after opening) but makes maintenance more difficult.
**arrows pointing to the drilled holes***
 Jan 24, 2024 at 1:03 pm #3802278
It looks like they are relying on an O-ring seal on the tube. Technically, if you don’t damage the inside surface, you should be able to re-assemble and use it again. I wouldn’t: they are pretty cheep and not worth the risk. My 2 cents.
Jan 24, 2024 at 1:28 pm #3802280it’s kind of an engineer thing to do something just to just figure it out
even if it results in catastrophe
like “I see why that bomb you just set didn’t go off, here, I’ll fix it”
Jan 24, 2024 at 1:36 pm #3802282I tried unscrewing mine without drilling out the holes
my filter is pretty old, the plastic is brittle, if I did anything to it it would probably split
thanks for the pictures
Jan 24, 2024 at 1:48 pm #3802285“hey, hold my beer”
Jan 24, 2024 at 2:44 pm #3802288next step – drill more holes to reduce the weight of the sawyer
Jan 24, 2024 at 3:01 pm #3802289that white case with the o ring on it – that doesn’t seem to be doing anything critical, maybe cut it off just below the o ring. That could maybe save half an ounce :)
Jan 24, 2024 at 3:05 pm #3802290maybe discard the black pieces to the left and center
then attach something with threads to the bottom of the white piece?
maybe cut off the threads part on one of the black pieces and glue it to the bottom of the white piece – maybe it would save 1.5 ounces. Hard to get any glue to stick to the plastic
Jan 24, 2024 at 3:26 pm #3802291It looks to me like the end of the cylinder makes a “face seal” withth eupper portion of the body. So the lower portion is needed to apply the axial load. My 2 cents.
Jan 24, 2024 at 4:23 pm #3802292you can (barely) see the loops of hollow fibers inside the front of the white piece, so the water flows into that (under pressure)
on the top of the left black piece is the inlet. The white piece goes inside this with the front of the white piece against the inlet
the o ring on the white piece goes against the inside of the left black piece. The high pressure water is prevented from going to the outlet by that o ring
the high pressure water would tend to spit out the white piece, so the left, outlet, black piece prevents this
it would be tough to attach a threaded piece to the white piece such that it would stay on with high water pressure. to save an ounce or two.
Jan 24, 2024 at 4:49 pm #3802294it’s eating away at me. This is all your fault ryan : )
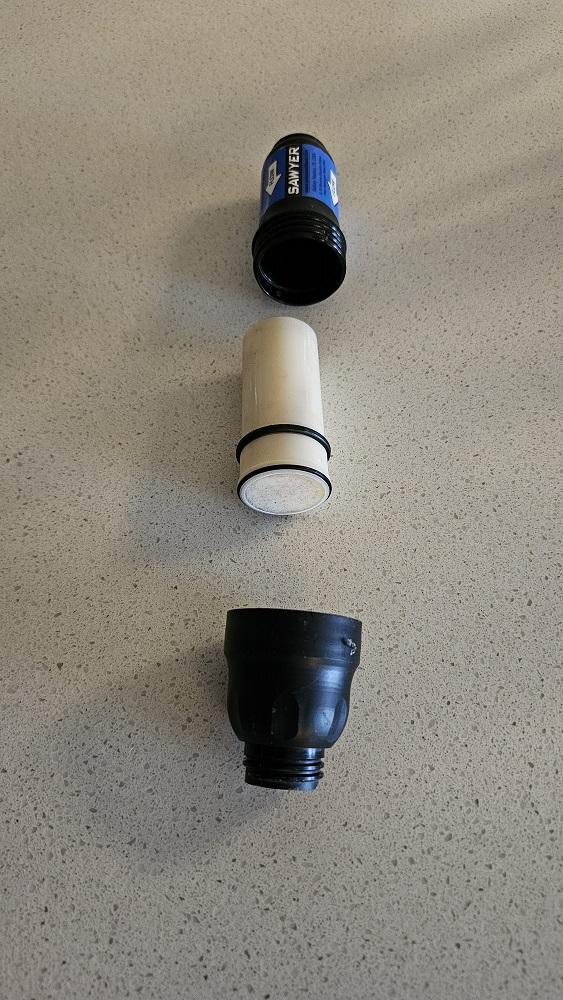
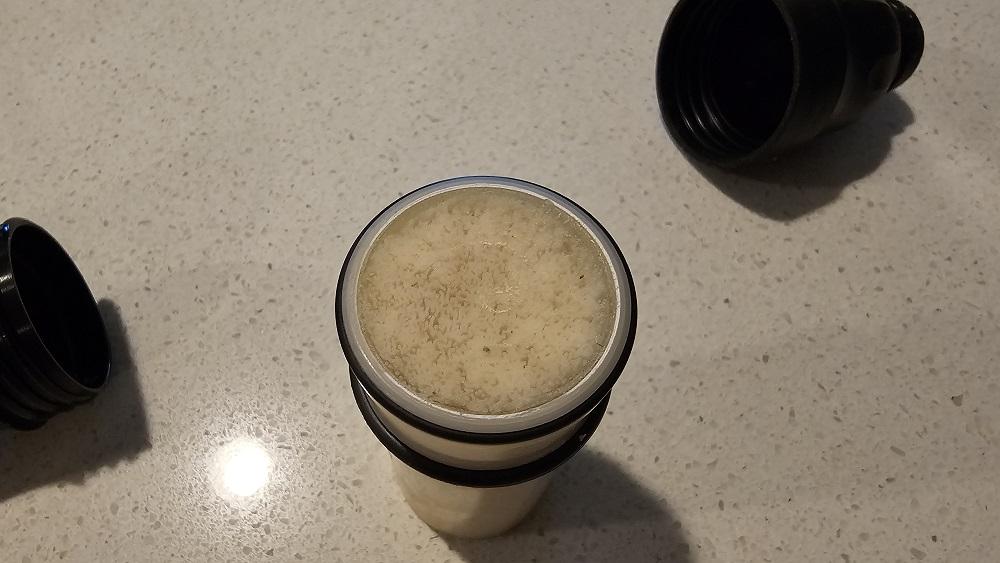
split apart:

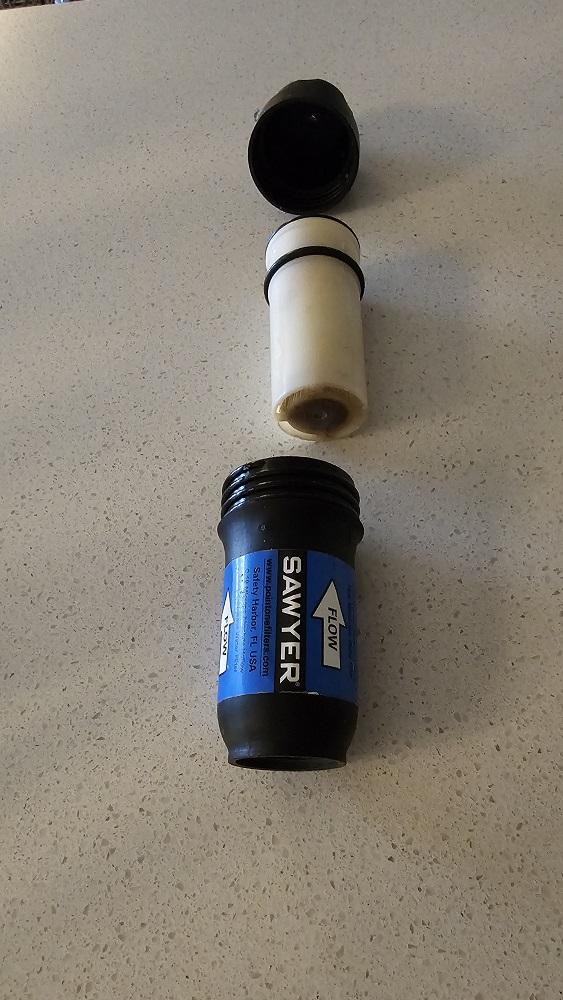
split apart from the opposite direction:

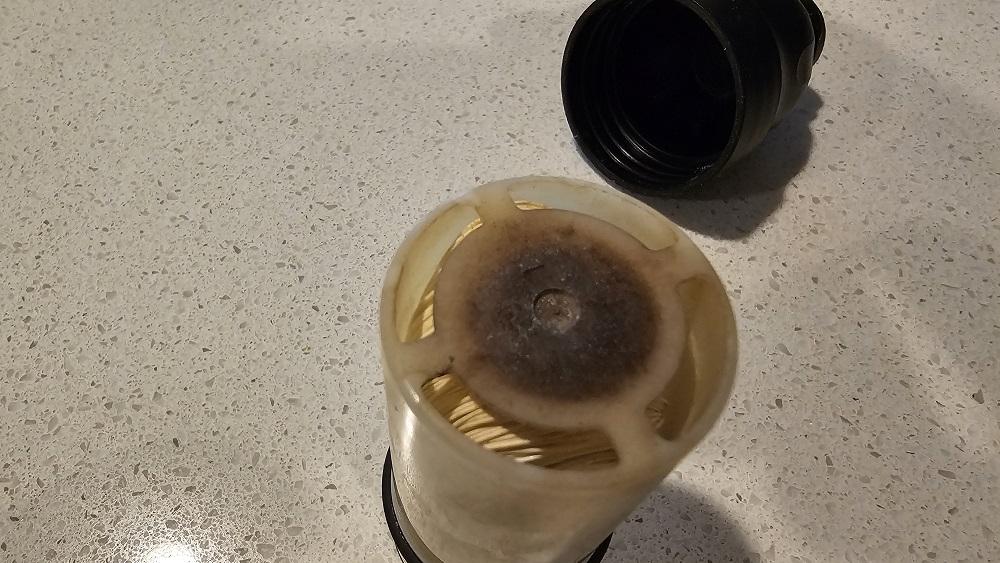
close up on the inlet side of the white piece. You can see all the little hollow tubes. The end is rather dirty from years of use. The hollow tubes don’t look too bad:

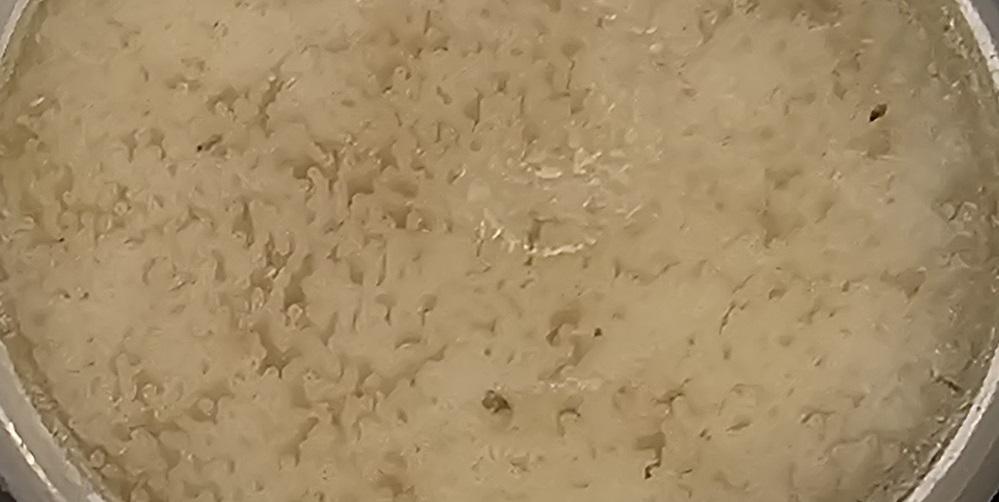
There’s the output side of the white piece. That’s the ends of all the hollow tubes. They’re glued (?) together and to the inside of the white piece.

zoom in on the ends of the hollow tubes:

I screwed it back together and squoze some water through it. Seems like it still works.
-
AuthorPosts
- You must be logged in to reply to this topic.
Forum Posting
A Membership is required to post in the forums. Login or become a member to post in the member forums!
Trail Days Online! 2025 is this week:
Thursday, February 27 through Saturday, March 1 - Registration is Free.
Our Community Posts are Moderated
Backpacking Light community posts are moderated and here to foster helpful and positive discussions about lightweight backpacking. Please be mindful of our values and boundaries and review our Community Guidelines prior to posting.
Get the Newsletter
Gear Research & Discovery Tools
- Browse our curated Gear Shop
- See the latest Gear Deals and Sales
- Our Recommendations
- Search for Gear on Sale with the Gear Finder
- Used Gear Swap
- Member Gear Reviews and BPL Gear Review Articles
- Browse by Gear Type or Brand.

