Topic
I have the gear, want to Dry Bake..don't want to melt my Titanium
Forum Posting
A Membership is required to post in the forums. Login or become a member to post in the member forums!
Home › Forums › Gear Forums › Gear (General) › I have the gear, want to Dry Bake..don't want to melt my Titanium
- This topic has 91 replies, 13 voices, and was last updated 7 years ago by
 DAN-Y.
-
AuthorPosts
-
May 18, 2016 at 7:10 pm #3403344
Thanks for the clarification Jon, that’s a very useful chart.
I have been doing some testings and it’s amazing how a tiny variation on the distance between pot and stove changes the wattage. I did a couple of tests and took note of the temps along the way. (see below) The gap difference between pot and stove differs by 0.25″ in test 1 and test 2. (Basically i put a small piece of carbon felt under the stove in test 2 to raise it a little). That small different basically reduced by half the amount it took to reach boil (actually in test 1 I never got to a rolling boil):
Time Temp 1 Temp2
00 70 72
05 n/a 107
10 106 142
15 124 180
20 142 206
22 n/a 212
25 164
30 180
35 197
40 198
42 outI think my setup on test 2 is close enough to your recommended wattage for dry baking. So next step is to get some baking done. Will post some pictures of final product:-)
May 18, 2016 at 7:10 pm #3403345The pizza was a hit and everything worked great. Didn’t have any pepperoni so we used fresh peppers, mushrooms and onions. The only thing I’ll change next time is cutting most of the pepper flakes. It was pretty spicy.
Also it is surprisingly difficult to shape the dough, I ended up using a rolling pin. I’ll have to keep practicing.
I also need to figure out how to resize the pictures with my iPhone was hoping the forum would do it for me.
Thanks everyone one this is going to be a hit while hiking.
May 18, 2016 at 7:46 pm #3403351Mario,
Keep in mind that the chart is a starting point. The chart is valid for boiling water (max pot temp 212 F). Since the pot reaches higher temperatures during baking, there is a non-linear effect due to the heat transfer: expect the actual wattage to run higher during baking. Best regards.
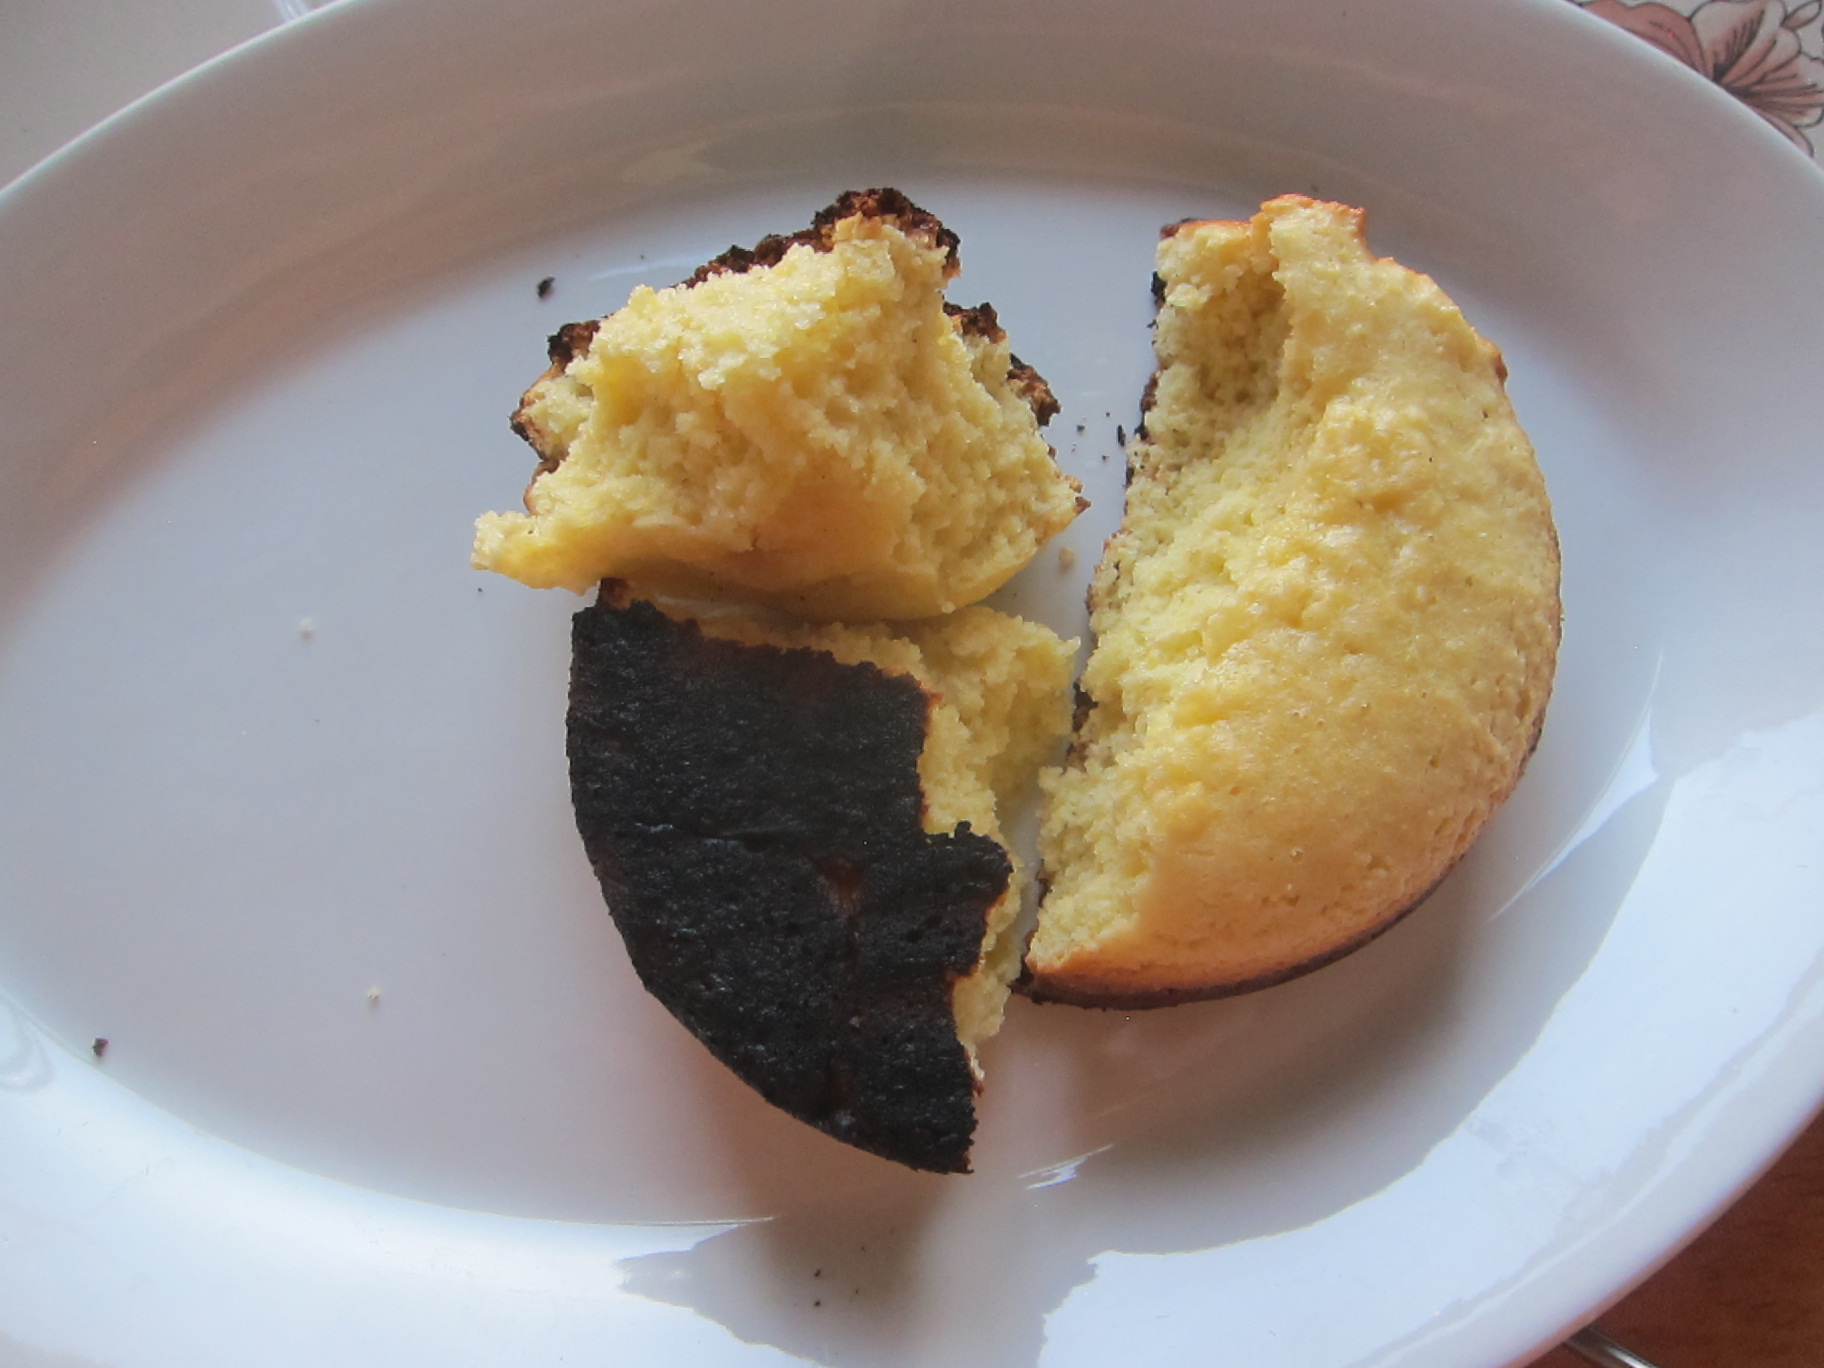
May 18, 2016 at 8:35 pm #3403358I should have removed the pot from the stove a minute or two earlier. Muffin tastes great after removing the thin burnt layer in the bottom.

 May 18, 2016 at 8:42 pm #3403359
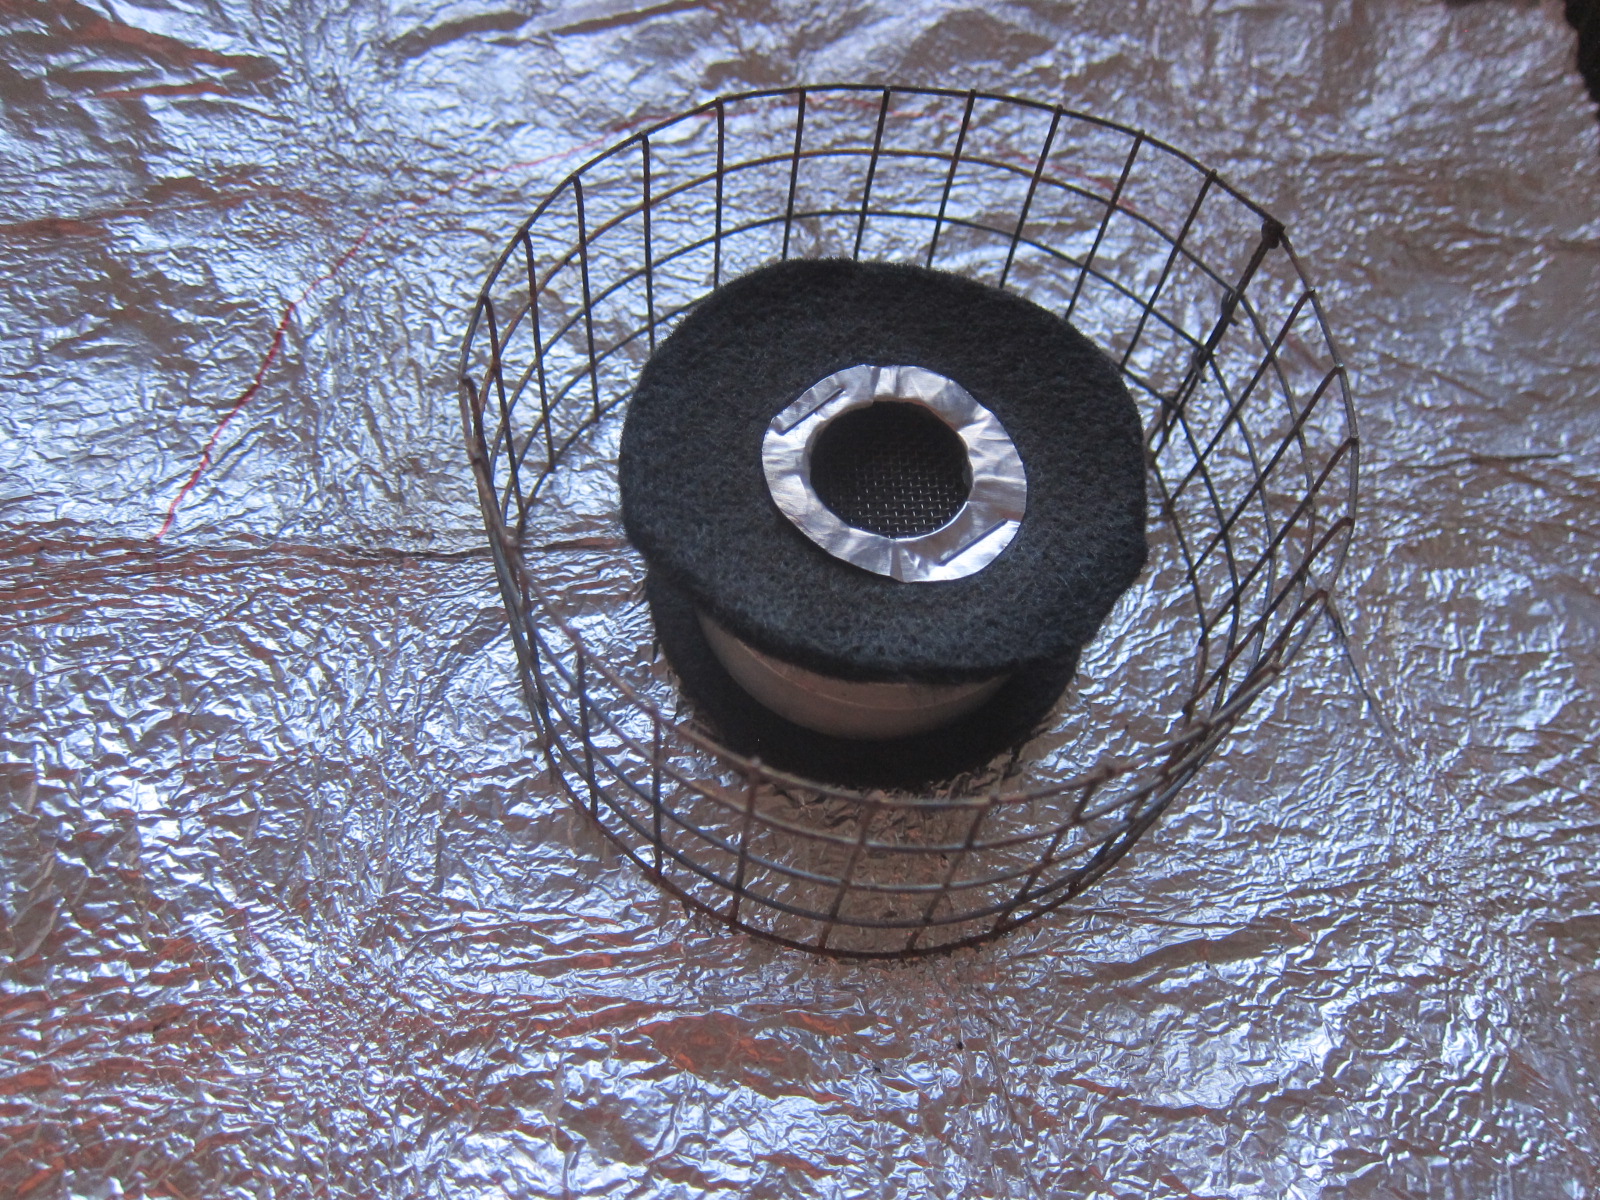
by the way, this is how my carbon felt simmer disk (with reinforced opening) looks like.
 May 19, 2016 at 4:13 am #3403389
Many thanks to everyone especially Jon Fong. These are the ingredients I used, dough was started the night before.

Here is pizza all shaped and ready to go in the pot. I had a pretty hard time stretching the dough enough.

Base of my homemade fancee feest 2″ high and 4 tea lights

All setup, I had to elevate the windscreen a fair bit. The candles kept going out from lack of oxygen.

60 minutes later and we have this awesome pizza!!

The natives are restless, my daughter tried to eat her brother.

Looks great doesn’t it?!

pot took some work to clean, this is why you practice at home. I have a little plastic scraper that took off most, a few minutes in water got the rest.

The tea lights seem very sensitive to air flow. I know I need a better wind screen, I have more flashing so I might make a taller one 6″ with some holes for air. Then the screen would hold the pot. I think long term I want to get Flat Cat Gears Epicurean stove. It seems to be the most solid way to bake and my family loves food. Every hiking trip revolves around what food we can take. :) The pizza and cheese burger are sure to be a must have. I picked up powdered coconut milk for Panang beef which we had the other night, also a winner. Although I left out the brown sugar.
What are some good lunch ideas?
May 19, 2016 at 8:07 am #3403402Todd,
Great looking pizza and it looks like a crowd enjoyed it as well! The stuck on bits after baking is all of the tomato & cheese stuff. The best way to keep the pan clean is to completely line the pan with the dough (even up over the rim). It takes time and practice, you will spend a little more time shaping and a LOT less time cleaning. My 2 cents.
May 19, 2016 at 8:46 am #3403407Nice work Todd. For the pizza I made on the trail (see picture several posts back on this thread) I used “Maseca” Masa which basically is instant corn flour and is very easy to work with. (The dough you form with this stuff has the texture of marzipan and you can easily lay it in your baking pan as thin or thick as you like, is not “elastic” at all). If you have a Hispanic grocery store nearby or a walmart (you can find it in their Hispanic section) is much cheaper than the link above. I also lined my MSR pan with aluminum foil for easy clean up of the pan. The aluminum foil does not have the problem of parchment paper mentioned by Jon a few posts back on this thread. (i.e reducing heat transfer from pot to food).
May 19, 2016 at 8:52 am #3403409Great looking pizza and it looks like a crowd enjoyed it as well! The stuck on bits after baking is all of the tomato & cheese stuff. The best way to keep the pan clean is to completely line the pan with the dough (even up over the rim). It takes time and practice, you will spend a little more time shaping and a LOT less time cleaning. My 2 cents.
Yes Cheese and sauce was the culprit. I think bringing a little extra flour is also nice to help while stretching the dough, some was fairly wet and others was quite dry even though I mixed it really thoroughly in the bag. Maybe putting a little olive oil on would be better to prevent sticking to hands. I do this when making full size pizza at home.
The back of the cake pan worked well but I think using a plate would be even easier. we have some plastic plates I’ll probably take a long for a work surface.
Of coarse if the dough is more sticky it would probably stick in the pan easier and make the process more smooth. Will have to keep practicing.
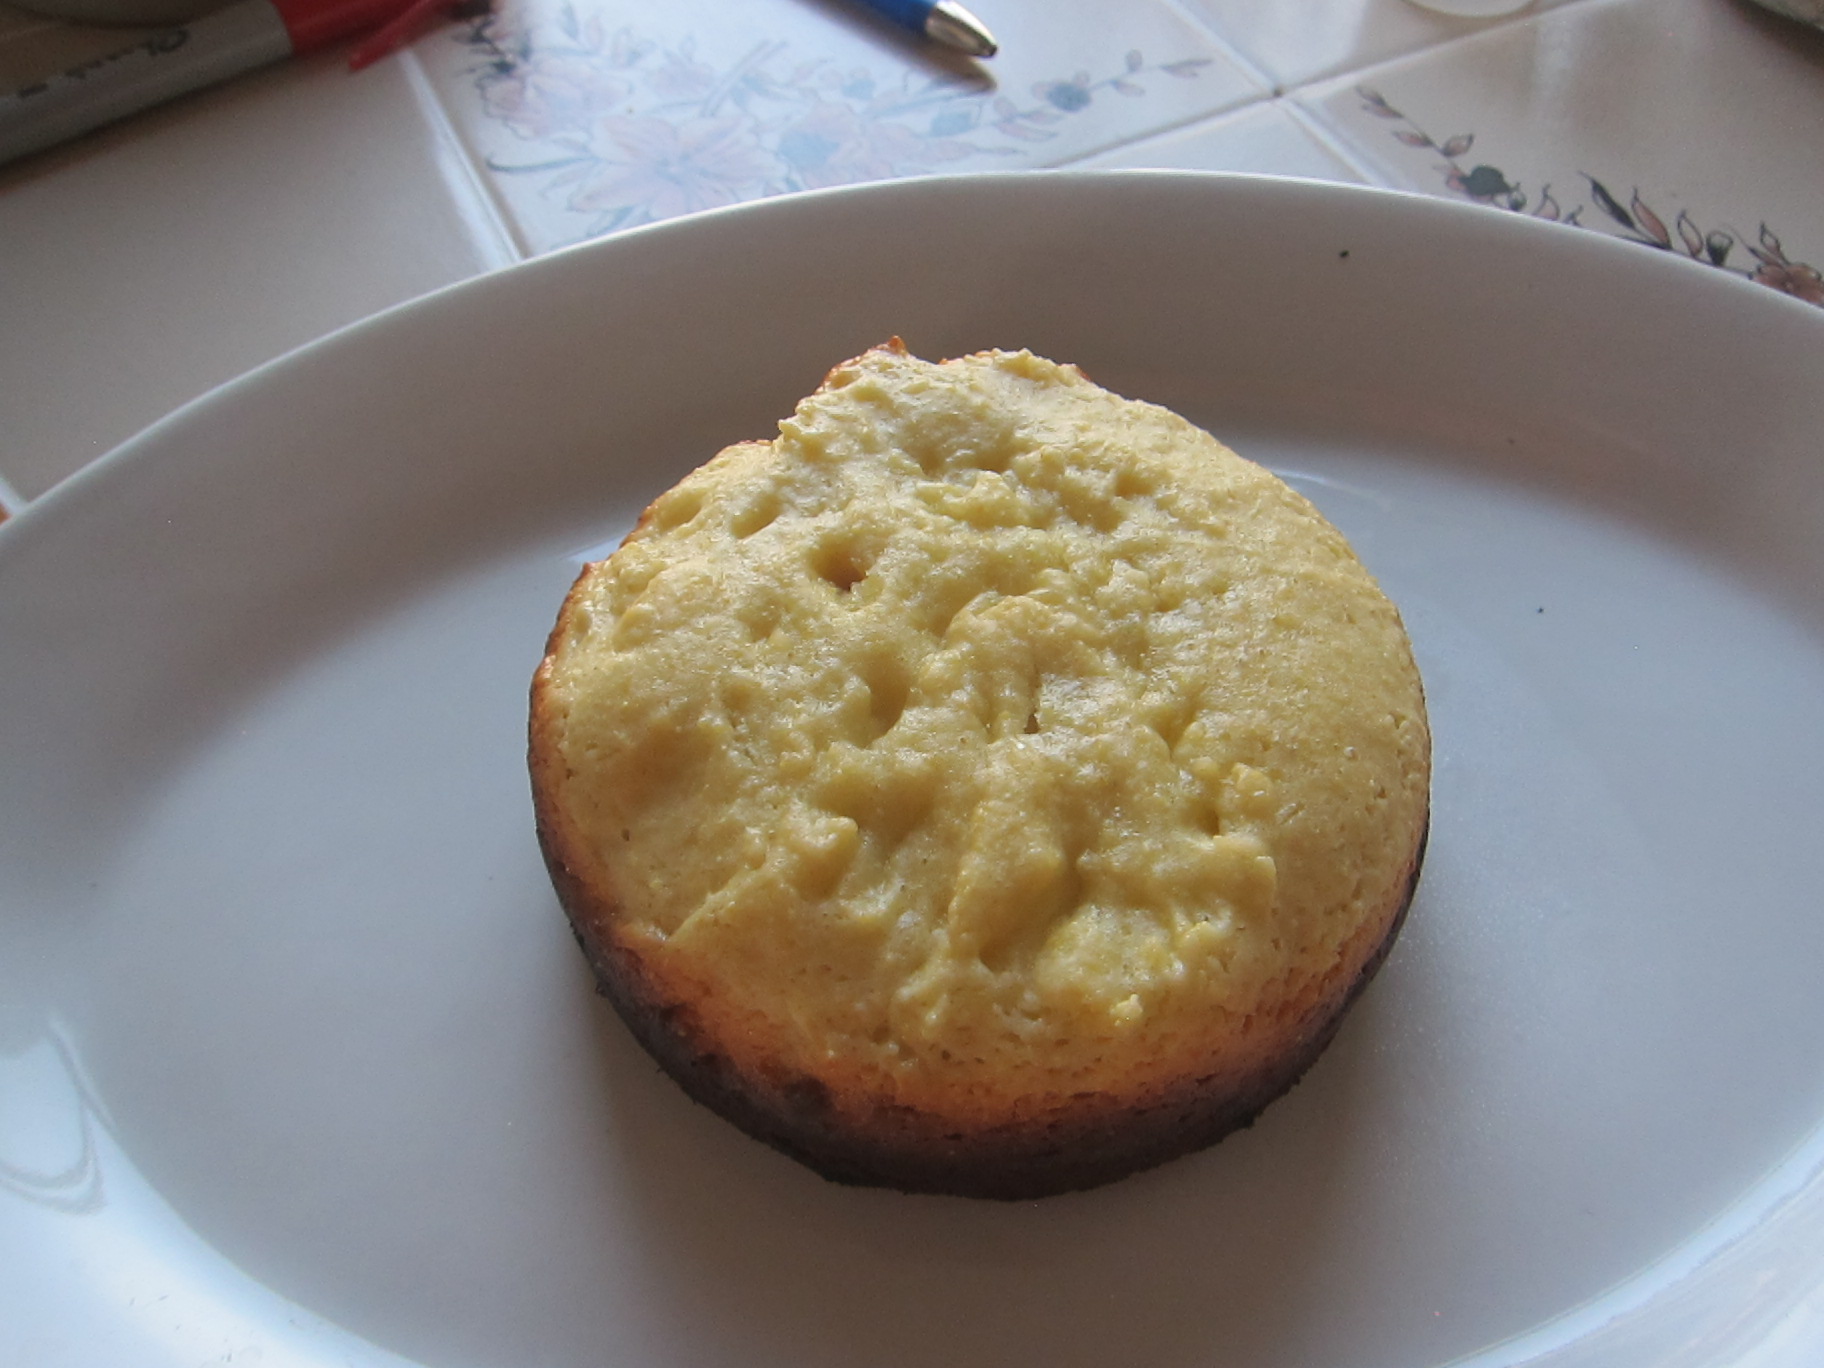
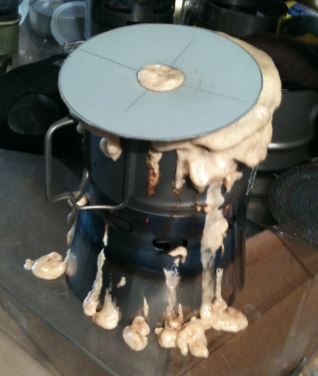
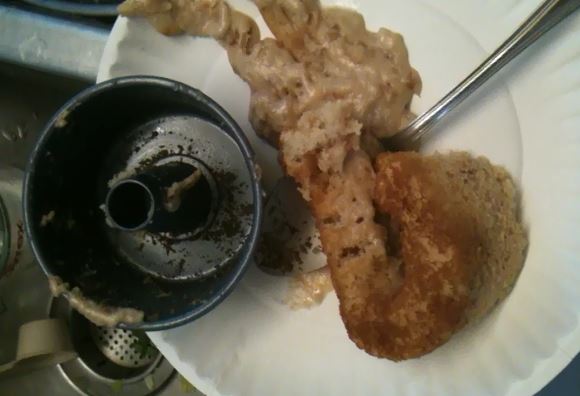
May 27, 2016 at 6:02 am #3404988My first try was a success in learning what not to do :-) I used too much mix ;)
I used a double layer stainless steel heat diffuser that worked well, only a very small amount of discoloration on bottom of pot. Used 70ml of denatured alcohol and let it burn out completely. The bottom of the muffin was a nice brown, not dry.
Using a diffuser is the way to go. Mine weighed 1 gram.
I used a Bundt pan type container to bake in, fits perfect in Toaks550 but had to make a special lid to accommodate the center of the pan that protrudes above the top of the pot by 1/4″. The pan is suspended by top rim of pot, no need for something extra to keep pan suspended off bottom of pot. If I like dry baking I’ll cut the 1/4″ off…..we like modifying ;)


 May 27, 2016 at 7:20 am #3404996
Dan that is great, it looks like when I make waffles
May 27, 2016 at 9:31 am #3405014Dan, what stove did you use? A Simmer starlyte or a slow starlyte? And about how far from stove to pot was it?
Also, you said ->
<hr />
The pan is suspended by top rim of pot, no need for something extra to keep pan suspended off bottom of pot.
<hr />
In dry baking, the pots are supposed to be touching each other on the bottom….its not supposed to be suspended like steam baking. I made the same mistake too….b/c…..its not clear in fat cat’s instruction manual.
May 27, 2016 at 1:40 pm #3405055I used the modified starlyte for the Toaks 550 kit. Distance to pot approx. 2″
The bundt pan was something I had on hand from steam baking so I tried and I think it will work just fine. I’ve seen videos showing the use of something placed on the bottom of pots to keep the baking pot from burning contents.
Only time will tell :-)…………………happy baking to all this Memorial weekend.
Thanks for you comment Todd. I suspect I would overfill a waffle maker also :-)
May 27, 2016 at 2:34 pm #3405066The more you burn, the more you learn. I looks back on my records and found that I have been dry baking with alcohol for about 5 years now (many gallons of alcohol).

Snickers Scone dry baked using an alcohol stove.
To meet the 100 W requirements on the chart that I posted earlier 1) the alcohol stove needs to be able to simmer and 2) alcohol stoves are sensitive to thermal feedback so the geometry of your cooking system needs to be tuned to reduced to control heat transfer to the stove. With the system below, the pot is elevated 3 1/2″ above the top of the stove.

Due to the exposure, this system is more sensitive to wind (wind increases the burn rate and reduces the effective heat transfer). This is one of the man reasons that I prefer to bake using Esbit as pot to ground distance can be low making the cooking system less sensitive to the ambient conditions. You can dry bake with just about anything, some things are easier than others. Your goods will bake fast and evenly using a Fat Daddios pan sitting directly on the bottom of the pot. My 2 cents.
May 27, 2016 at 3:41 pm #3405087Jon. Unfortunately Esbit is not allowed in airplanes, so I have been experimenting with the Kovea Spider (For my trip to Peru / Ausangate Trek for which I have confirmed you can buy gas canisters in Cuzco. Not sure about esbit). I’m thoroughly impressed how low you can put the flame on the Kovea Spider. I had that stove simmering for 47 minutes and only used 17gr of gas. No need to raise the pot above the Spyder’s support. I just put a lid of a tuna can with some holes on it to work as a diffuser.
May 28, 2016 at 7:00 am #3405190Jon or others, What are you using to measure water while hiking? for example the ova easy eggs, to make 4 eggs is 12 tbsp or 6/8 of a cup. Most other things it seems you can just eye ball the water.
I want to make your bacon potato and egg breakfast.
Thanks
May 28, 2016 at 8:12 am #3405203I usually bring a Lexan coffee cup that has markings on the side in 1/2 cup increments.
May 28, 2016 at 11:04 am #3405228changed mind :-)
May 30, 2016 at 1:33 pm #3405722Ok, after a few more tests…..I believe that raising and lowering the pot inside the caldera cone does not significantly change the wattage of the setup. A 3/4″ gap on a starlyte is still around a 25 watt stove, and a 1 3/8″ “slower” version starlyte is a bit over 200watts (actually I think a bit more but I need to retest a few more times). Raising the pot on stakes for the 1 3/8″ starlyte (hole size) does make for a dirtier setup…the flame is yellow when it hits the pot and there is soot on the bottom of the pot.
Now….yes….raising the pot inside the caldera would make thermal feedback less of a problem…but I’m just talking about wattage here.
Anyway…my next step is to make a 1″ opening hole out of the popcan aluminum that I already have, and test that wattage. If its still off, I’ll just keep experimenting with hole size.
Now, I can cut the aluminum with scissors…but if I did want to cut carbon felt larger…I could use scissors but its going to be a bit messy…zelph…are you using some kind of press or something to get a nice clean circle cut?
May 30, 2016 at 3:07 pm #3405740Keep in mind that the wattage charts that I posted were only valid for boiling water and no thermal feedback. I think that you will find this to be true particularly for the higher wattage (100-200 watts) rather than the lower wattage (sub 50 watts). My 2 cents.
May 30, 2016 at 3:51 pm #3405750Right…the goal is to make a 75-80 watt stove where the thermal feedback will take care of the ‘missing’ watts.
Jun 3, 2016 at 8:28 pm #3406894Okay gang. I got the bobcat system with epicurean stove about a week ago and got to try it out tonight. I prepared Flatcatgear’s lasagna recipe with dried beef and left everything soak in cold water 4-5 hours. The result is amazing and I have to say instead of messing around with trying to tame the alcohol stove just get the Flat cat setup.
This tastes just like homemade lasagna.
Esbit lit and ready for the pot. I’m using the open country 2 quart without the bale. Note I need to use 2 stakes to hold the pot flat and there is a slight gap around the pot. This is a little different from Jon’s setup with the evernew pots and I suspect the reason I got 40 minutes burn instead of 50-60. It’s a great product and I can’t wait to bake this for my family while hiking.
Oh and a side note. Apparently I’m the first person to assemble it wrong. My wife says I should be the official idiot tester for Jon’s new ideas. haha


Hat on to help hold in the heat

Finished cooking, about 40 bake and 10 minute rest, still very hot

This is the bottom, no burning. I did use parchment on the bottom of the pan and olive oil.
 Jun 4, 2016 at 11:38 am #3406976
No Garlic Bread ?!?!?!?!
Jun 18, 2016 at 8:02 pm #3409602Ok…that was fun! and for science!
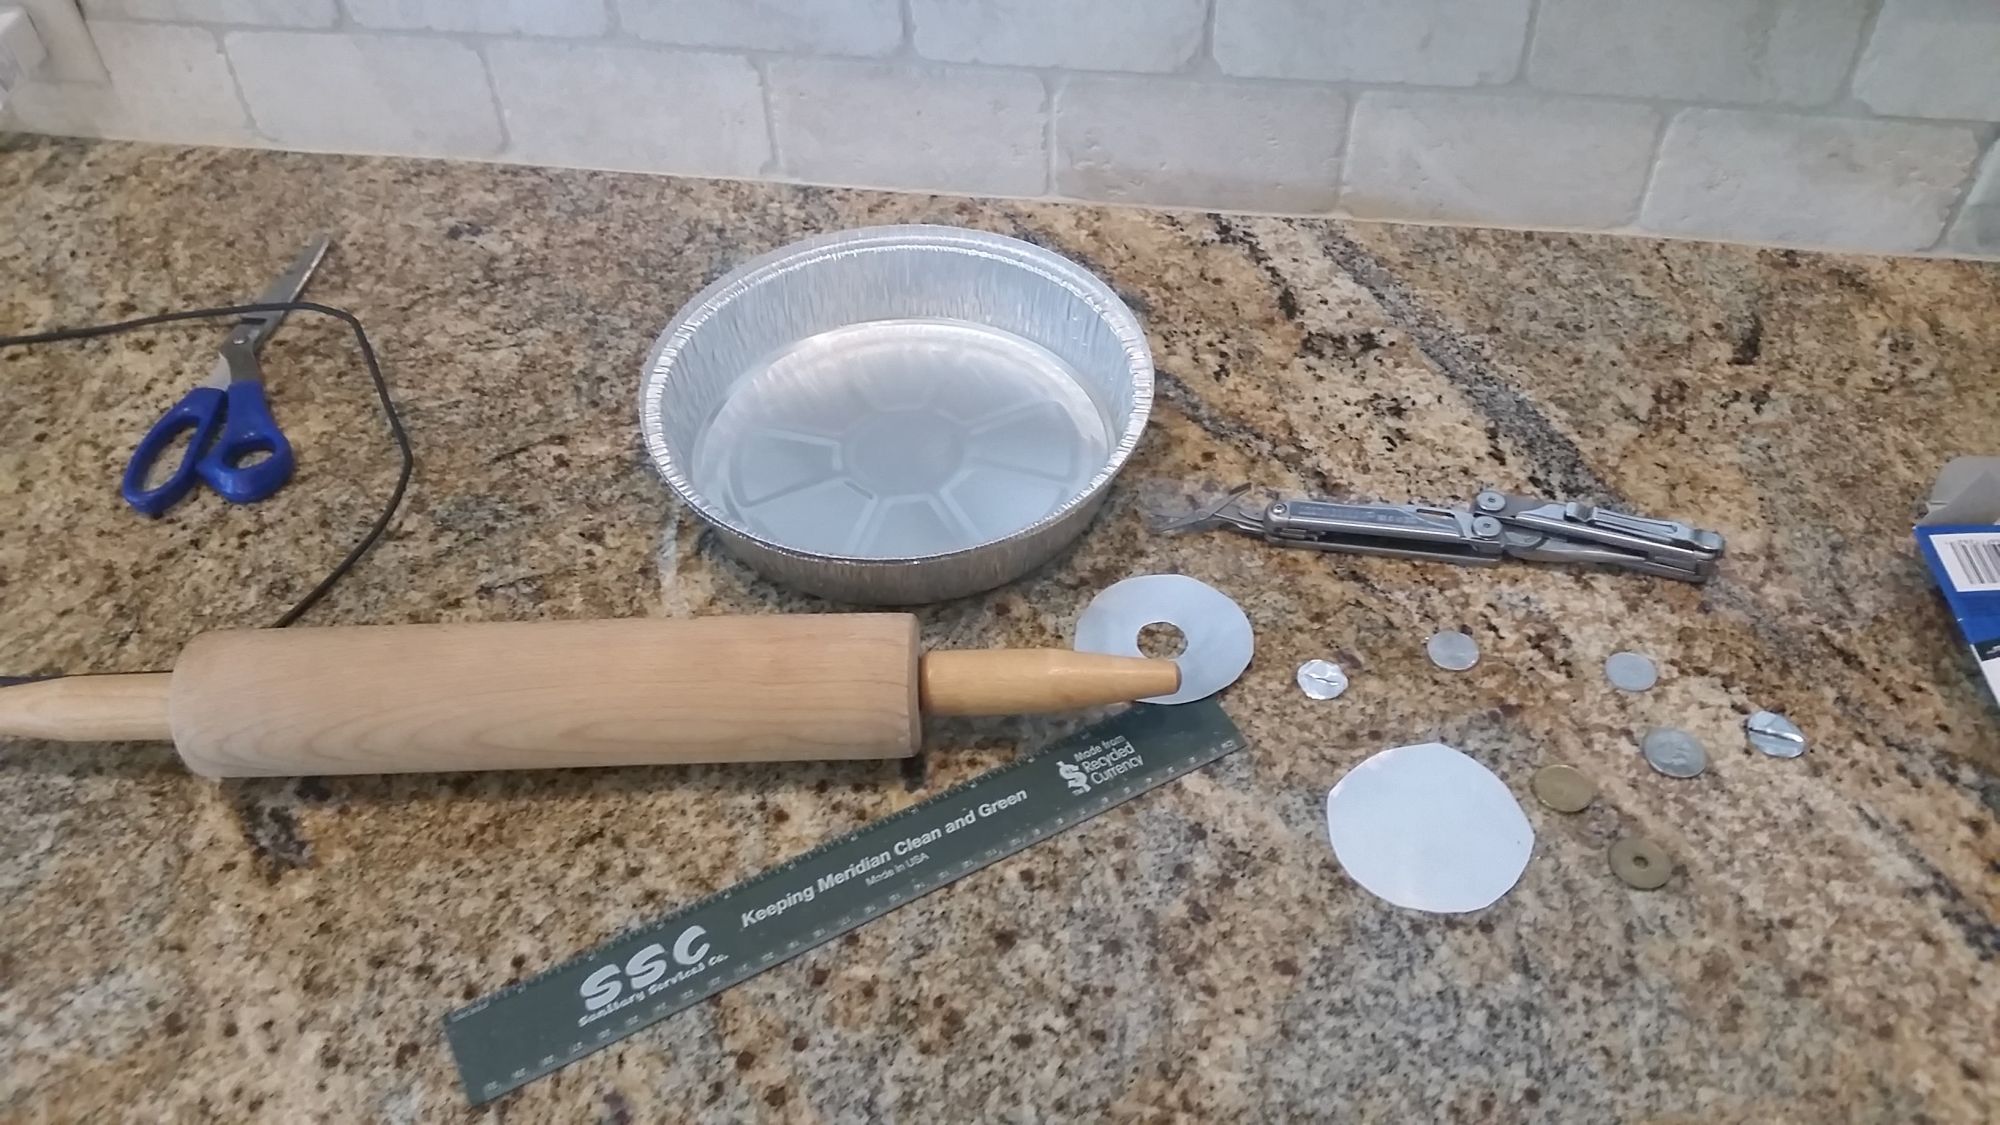
So, update. I made two new starlyte limiters, using to-go type pie pans. Super easy to work with using normal scissors and my little leatherman scissors. I used a nickel to make a 7/8″ opening (nickel is smaller but with tracing/cutting it made the hole larger), and a penny to make a 13/16″ opening.

Initial results for my setup put the 7/8″ at 92 watts. Burned 8g of fuel in 26min. The 13/16″ was 55watts, burning 7g of fuel in 30 minutes. Take note of that….7g in 30 minutes.
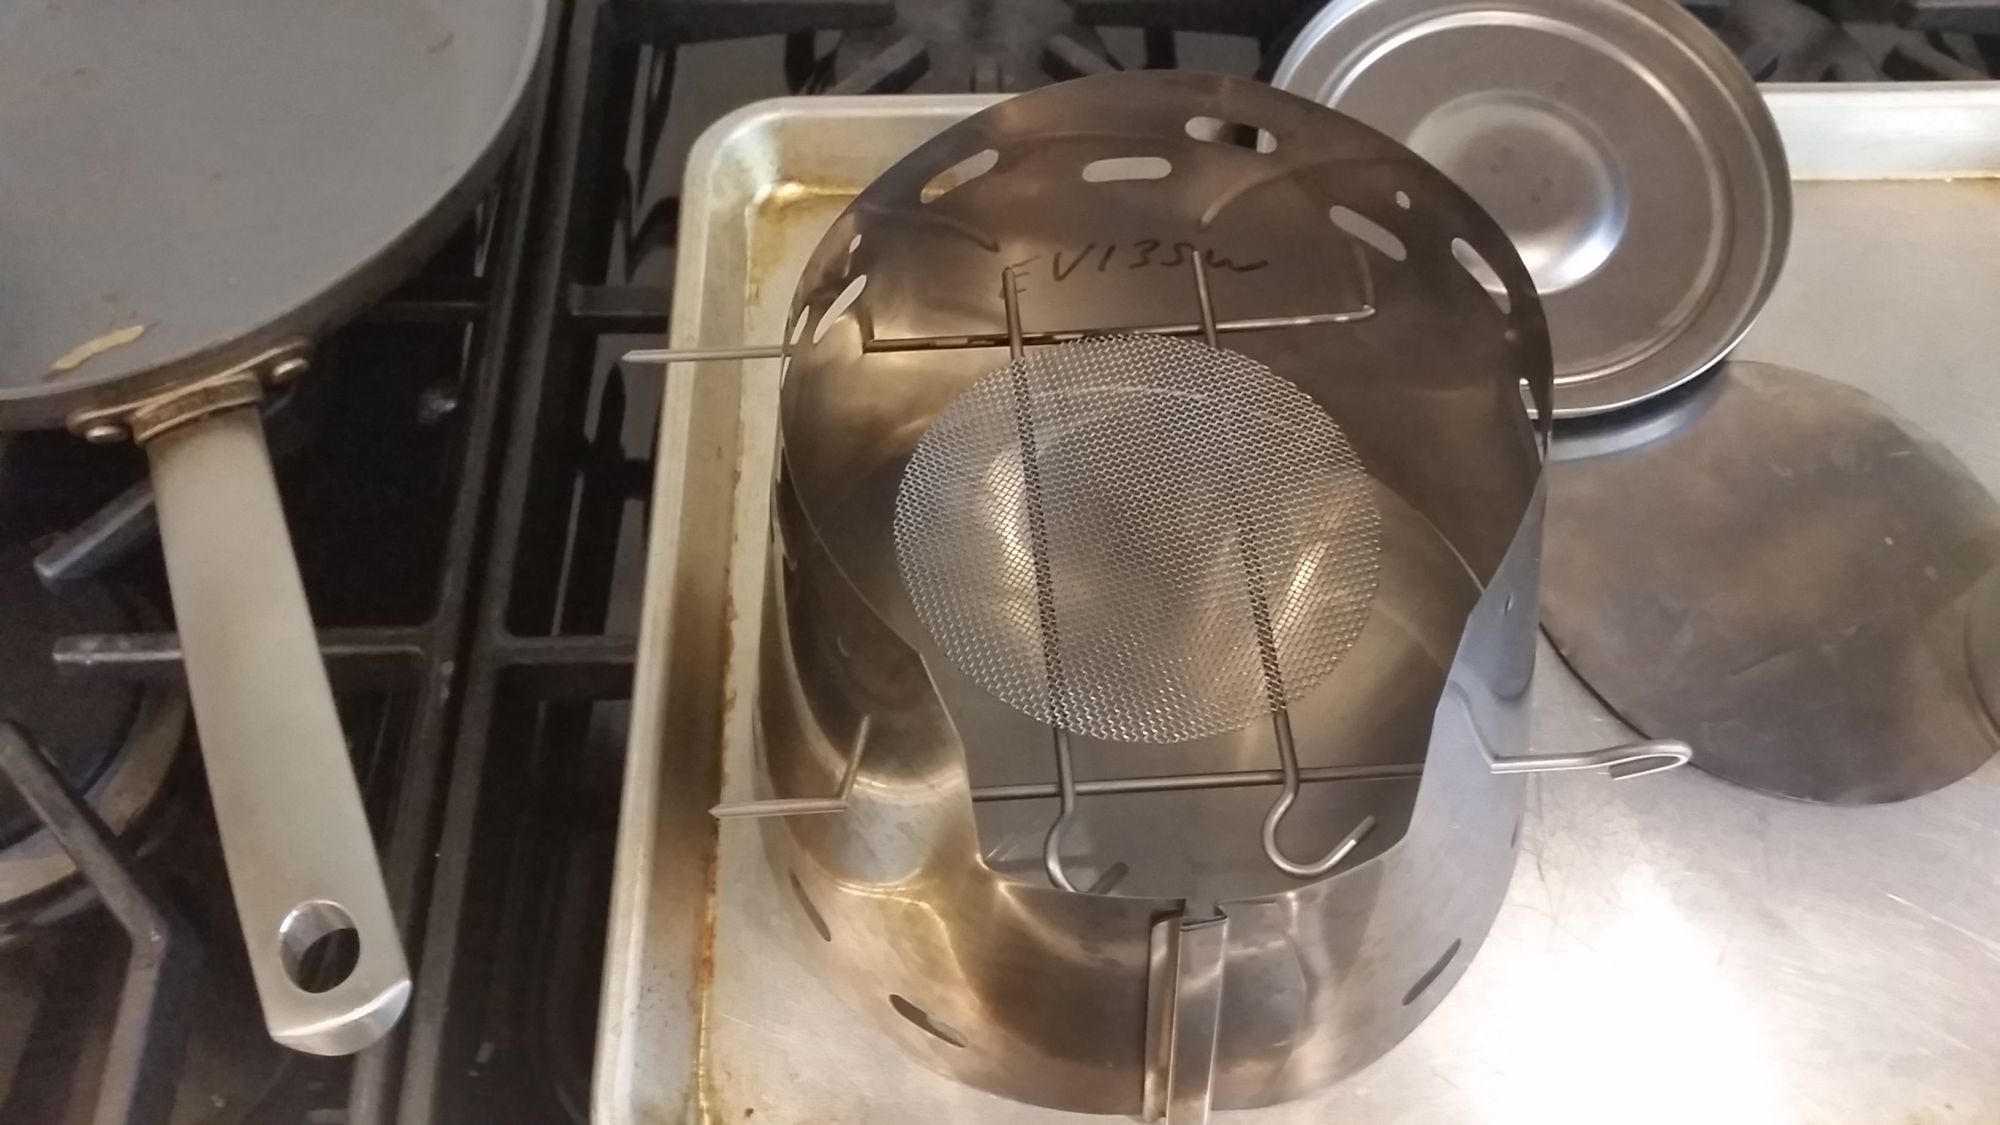
So…I went ahead and starting with baking with the 55W setup. I thought it was low enough…that I used the lower set of stake holes in the caldera cone. The stakes were too far away to use zelph’s 4″ diffuser disks so I used 2 other titanium stakes as a platform.

I started with the 1/2 blueberry muffin mix. I checked the muffin at 17 minutes, and everything was looking great….starting to get cooked, and it looked like it would be nice and done around the 26-28 minute mark (similar to the tealight setup).
However…
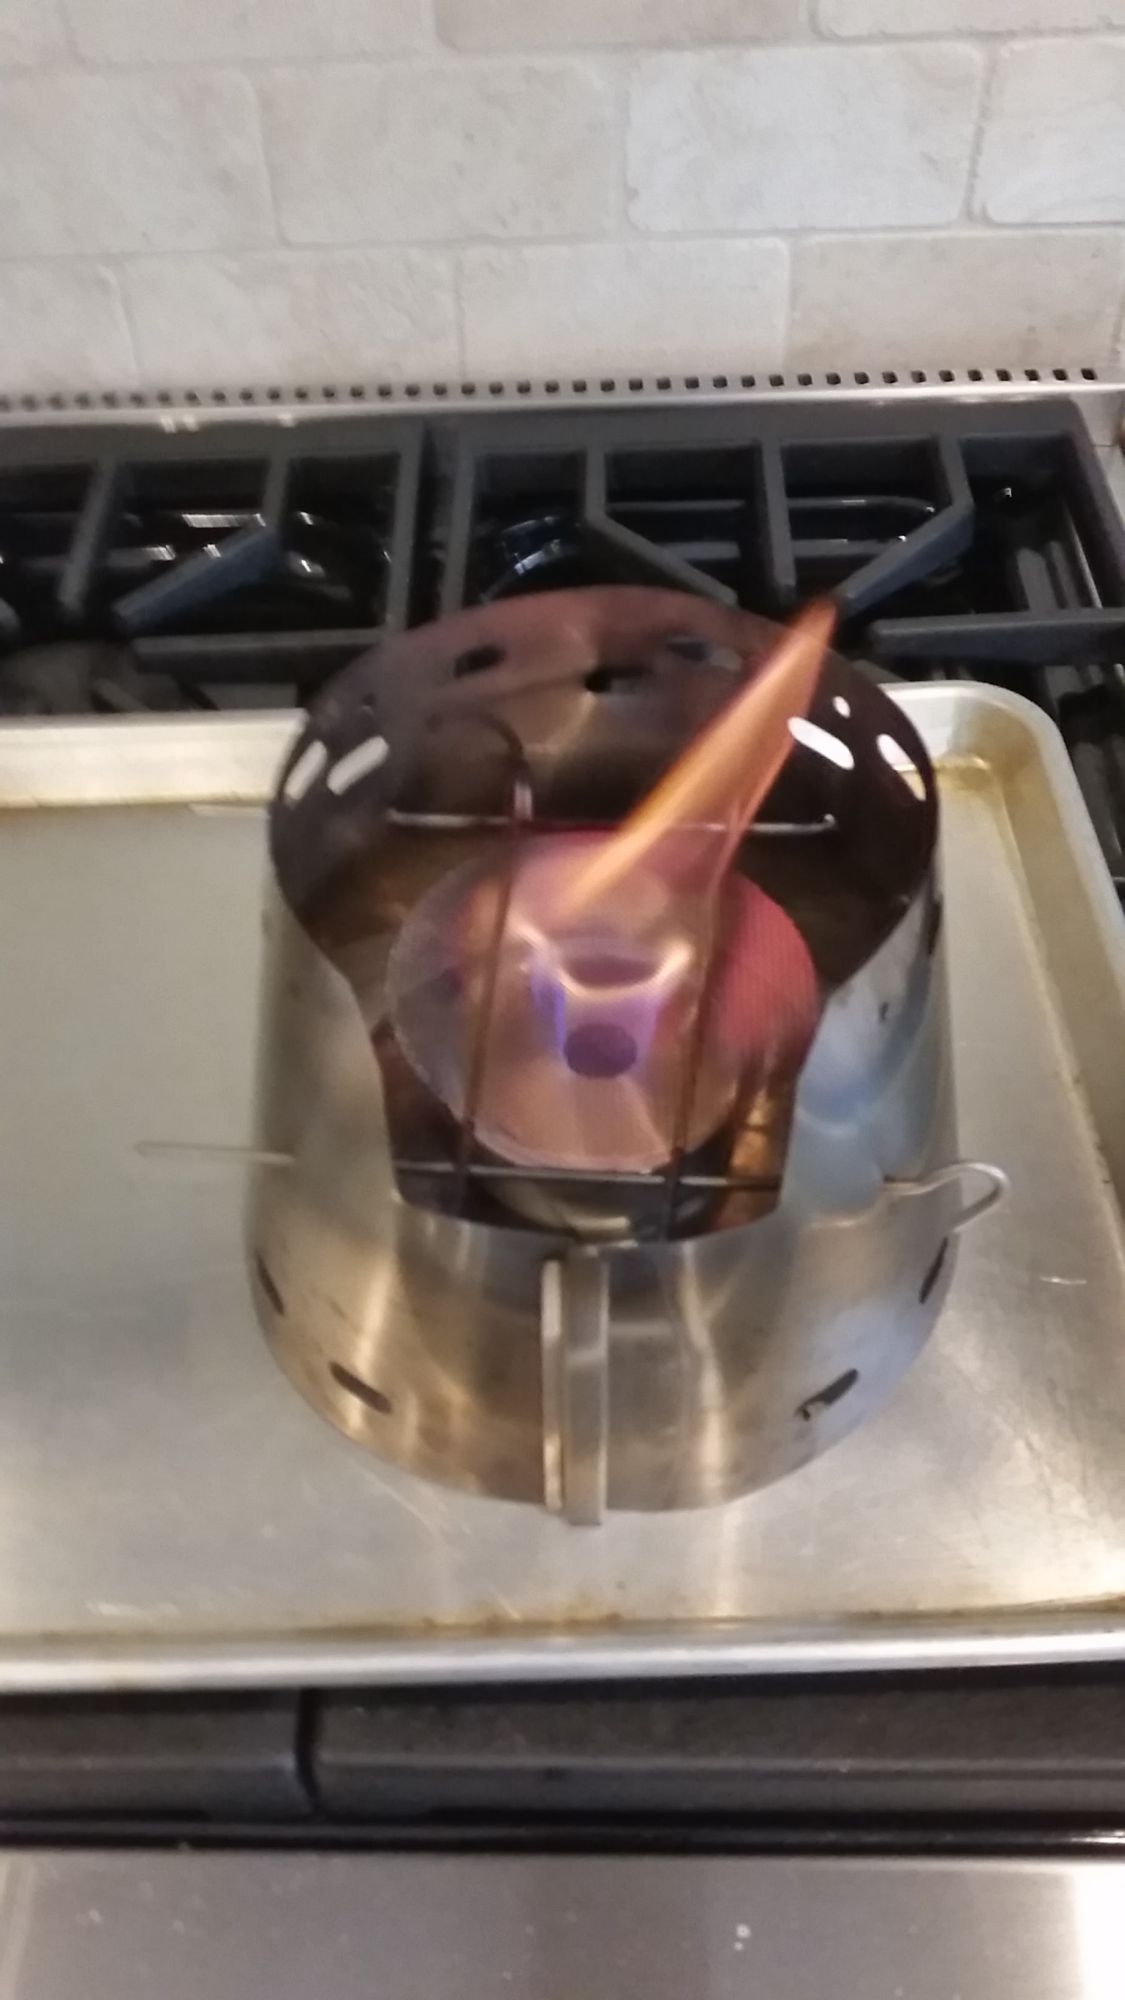
When I checked in at 25 minutes, there was a ton of smoke and fire coming out of the cone. The starlyte got overheated due to the thermal feedback. At risk of my life, and for science!, I took a pic ->

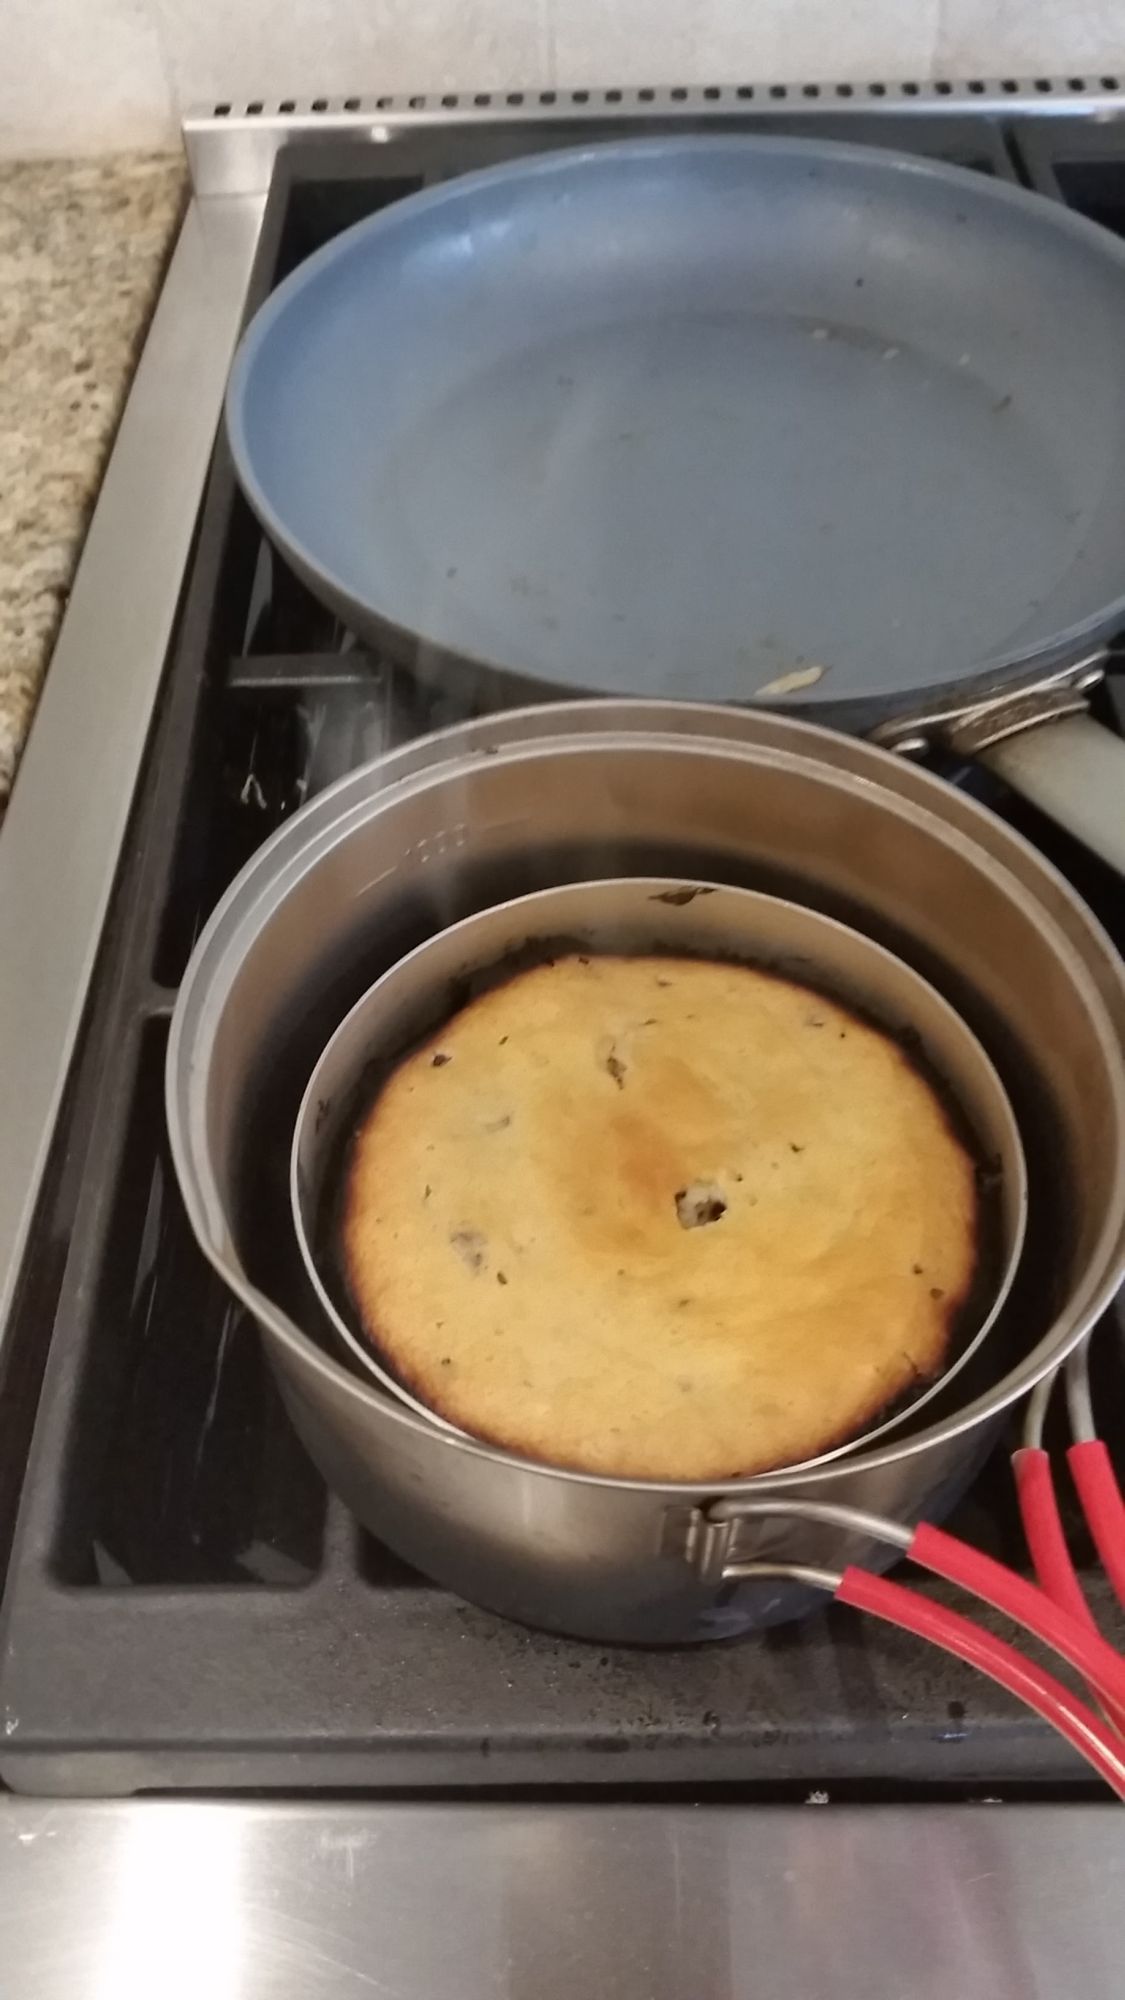
Flame was out of control….it was a TINY flame before with the limiter. Burnt muffin ->

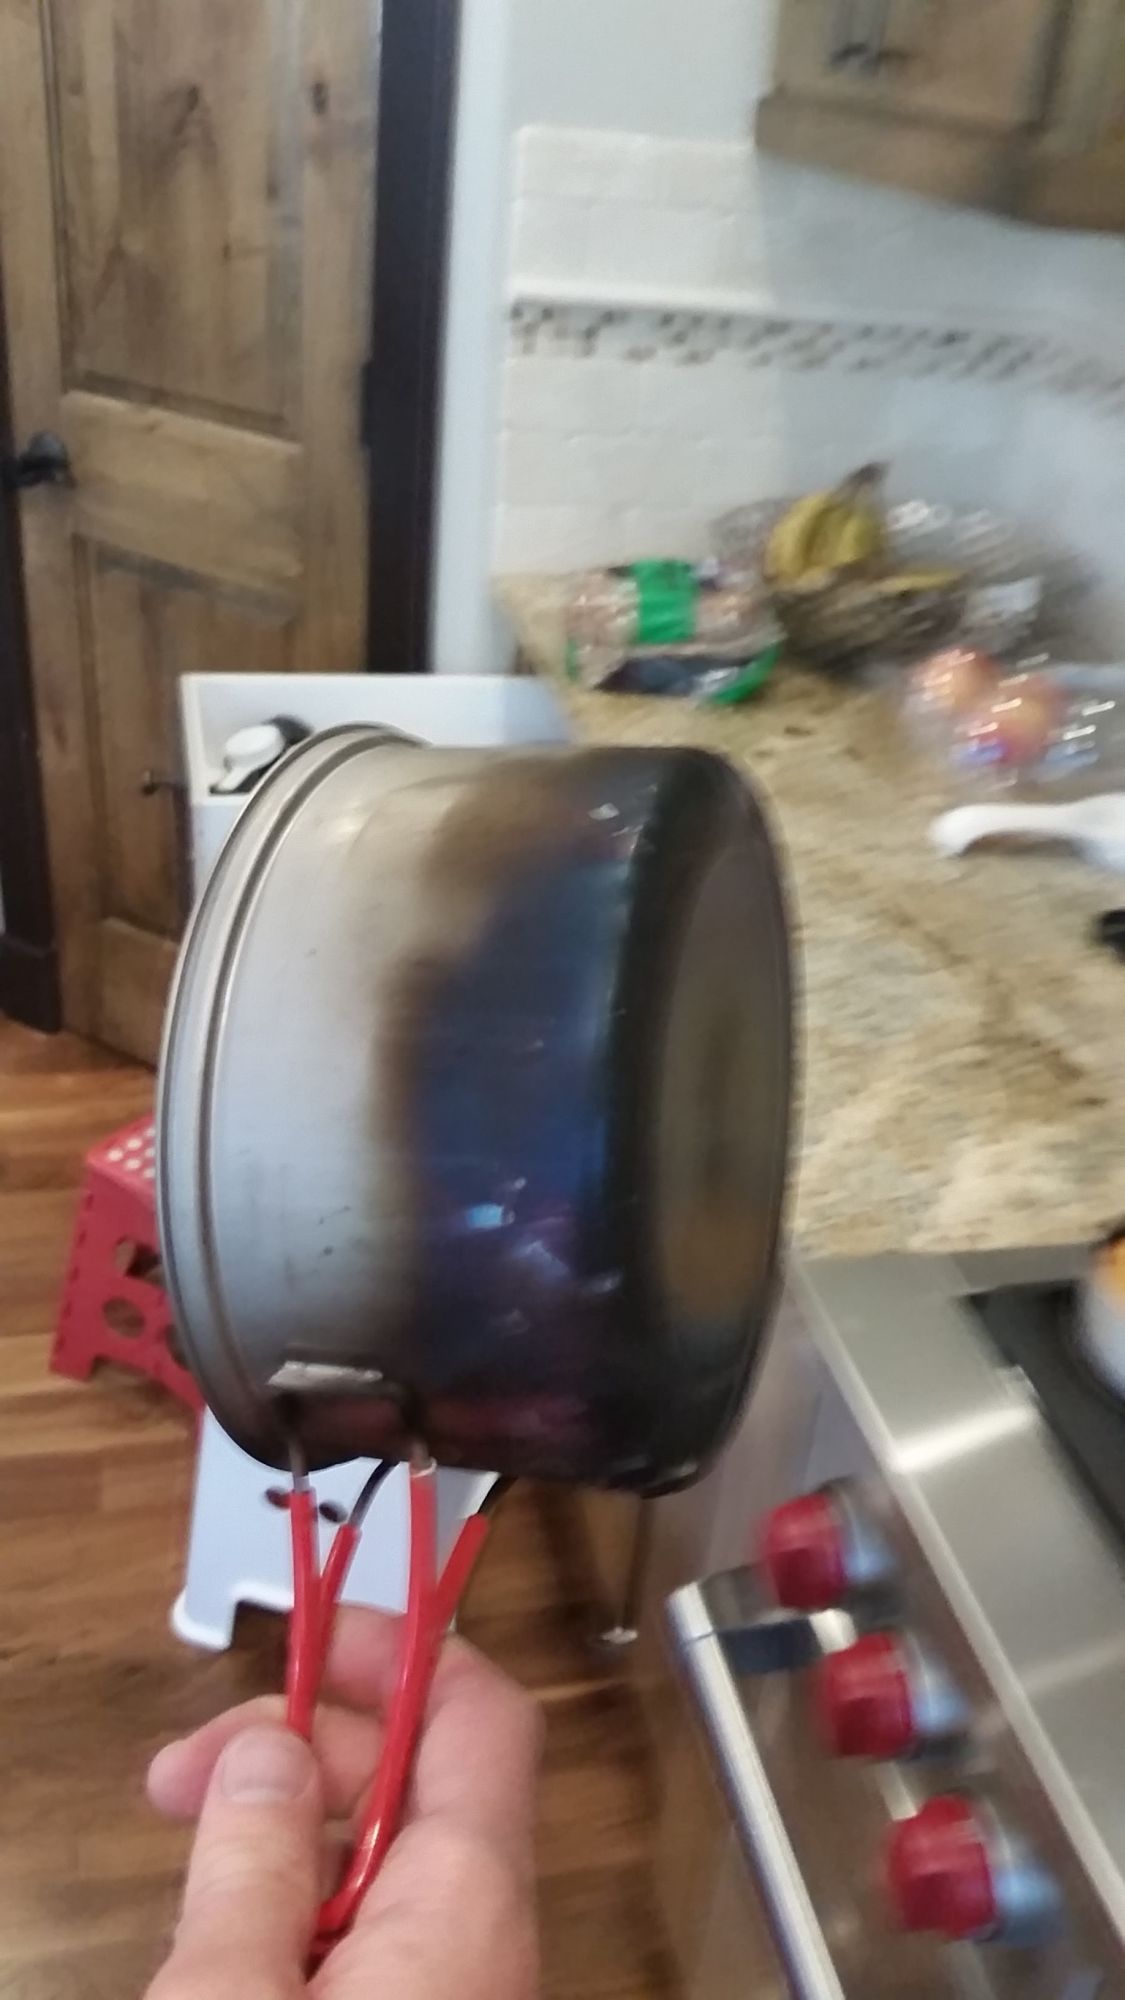
My pot got plenty of soot of course…but this is what a pot should look like! ->

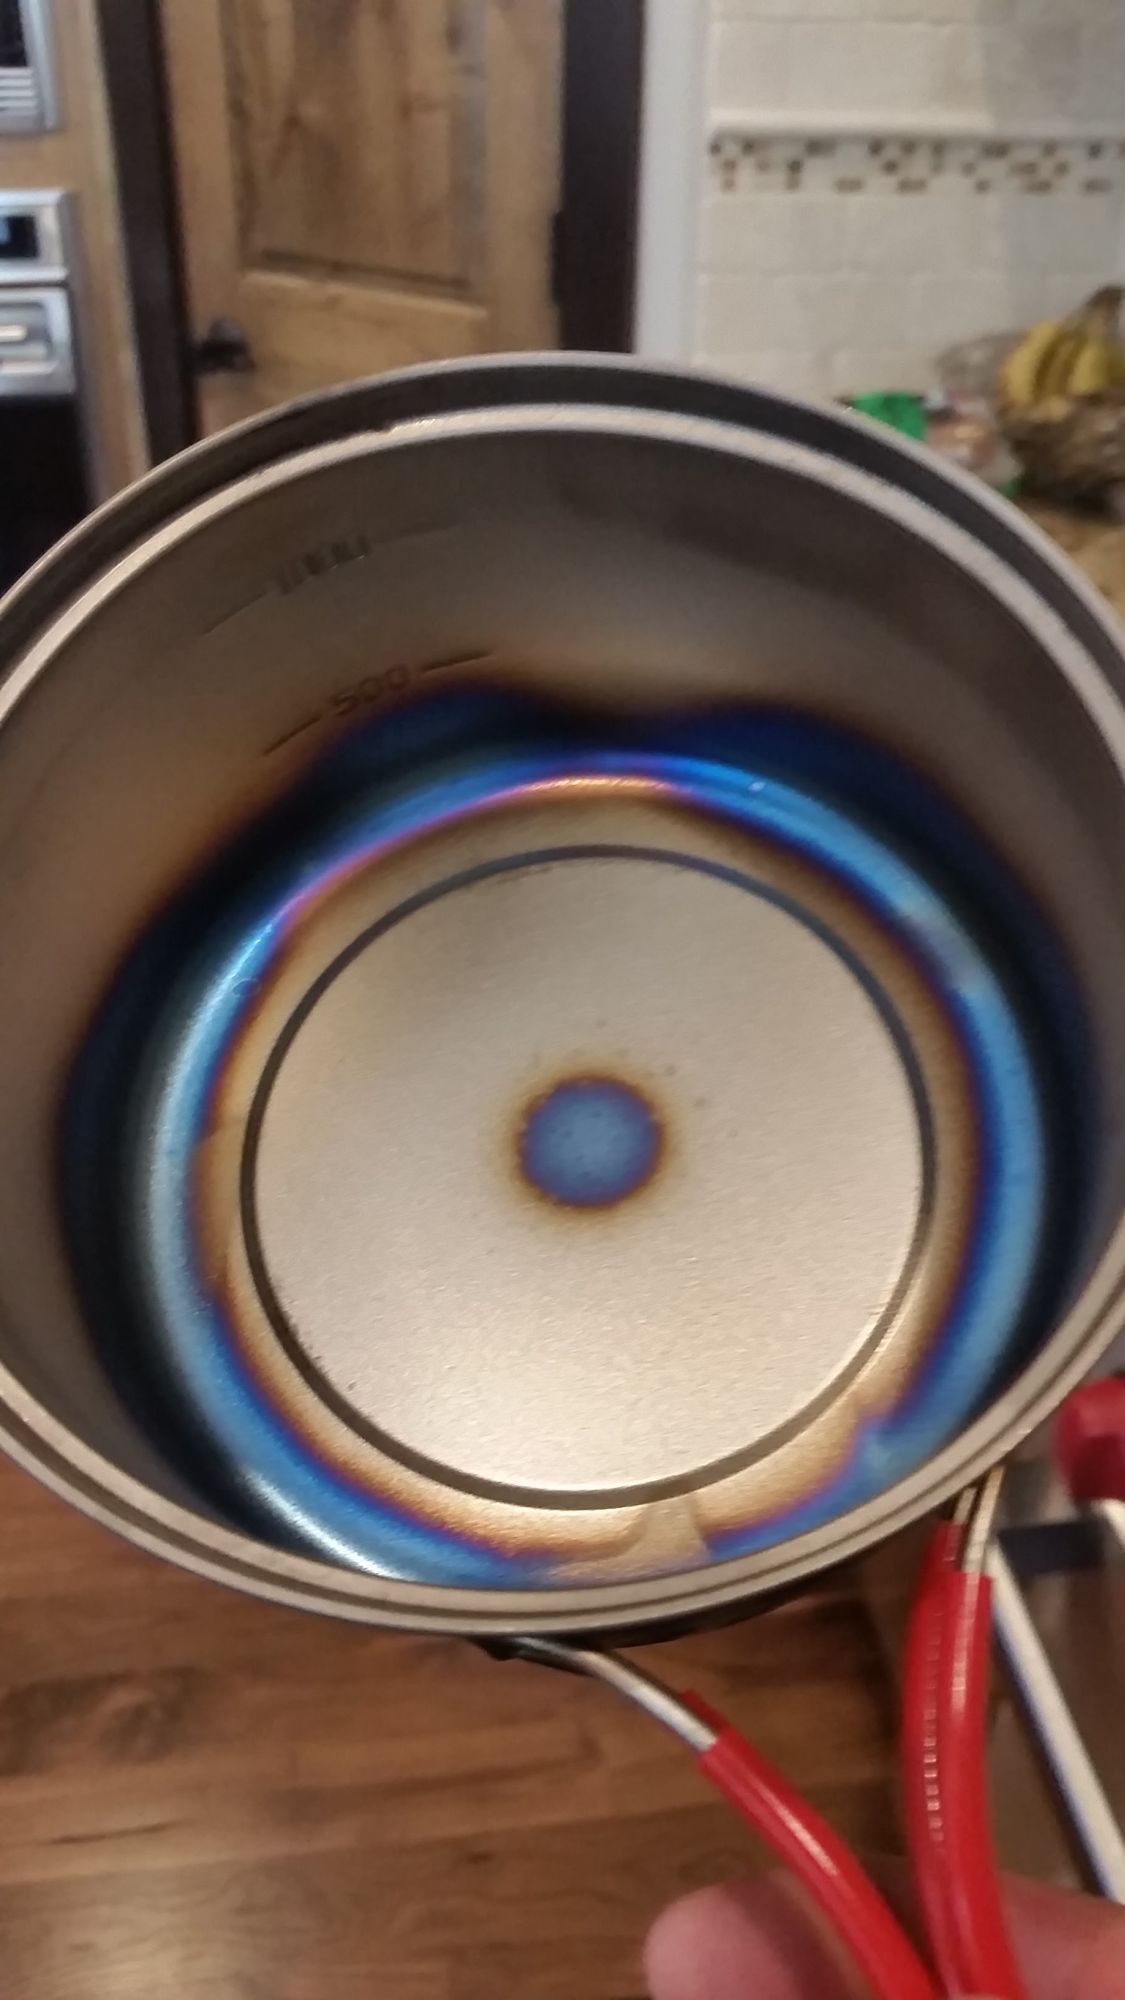
I also received new patina marks on the inside of the pot.

Notice…..that there is still a really hot spot in the middle, and then patina again on the sides…not sure if the diffuser worked or not? I can’t decipher the patina marks…

Crispy muffin with burnt parchment paper. Though…..the inside of the pot was smoking too (from the burnt muffin)…but I also wonder if it was from the vegetable oil that I used to coat the pot….vegetable oil has a smoke point of 400°-450°.
Fortunately…..the pot doesn’t seem to be warped….it still sits flat on a surface, which is great. No harm done to anything else in the setup, though I did notice one of my longer titanium stakes was bent …it could have been from the heat, or…maybe I didn’t notice that it was slightly bent before I put it in the stove. I also noticed that the permanent marker from trail designs was also burnt off.
Anyway…any feedback. For science I might try again and put it on the top stake hole of the caldera cone and just watch it better. I was avoiding using it high b/c I noticed that when I use the alcohol stoves higher it produces soot on the bottom of the pot, but it would beat the overheated stove!
Edit: Oh yeah, so the stove originally burned 7g in 30 minutes….and when it overheated, it burned 24g in 25 minutes…and….the stove was fine for most of the cook cycle so I’m assuming it burned most of the extra fuel in the last 5 minutes or so….
Jun 18, 2016 at 8:33 pm #3409605- Parchment paper will start to brown (but not blacken) at 500 F so I suspect that you were well above that temperature.
- If you are using the rise in water temperature to estimate wattage, it is only a starting point. As you found out thermal feedback to alcohol stoves can happen pretty quickly.
- The heat anodization probably occurred at the start and the outside anodization as it ran away.
- You could try placing the stove in a water bath to control the temperature but I suspect that the stove would float around.
- I would suggest that you elevate the pot to the outlet ports on the windscreen. When I use an alcohol stove to bake, I raise it 3 ½”.
My 2 cents
-
AuthorPosts
- You must be logged in to reply to this topic.
Forum Posting
A Membership is required to post in the forums. Login or become a member to post in the member forums!
HAPPENING RIGHT NOW (February 11-21, 2025) - Shop Hyperlite Mountain Gear's Biggest Sale of the Year:
Our Community Posts are Moderated
Backpacking Light community posts are moderated and here to foster helpful and positive discussions about lightweight backpacking. Please be mindful of our values and boundaries and review our Community Guidelines prior to posting.
Get the Newsletter
Gear Research & Discovery Tools
- Browse our curated Gear Shop
- See the latest Gear Deals and Sales
- Our Recommendations
- Search for Gear on Sale with the Gear Finder
- Used Gear Swap
- Member Gear Reviews and BPL Gear Review Articles
- Browse by Gear Type or Brand.

