See next post
advertisementYour privacy is protected: We do not transmit your user data to third-party ad platforms or advertisers, and we do not host third-party tracking pixels. Backpacking Light serves ads on its own custom, native, and internal platform.
Anniversary SaleMay 15 to 25 - REI's biggest sale of the year.Topic
Help with tarp dimensions, please
Become a member to post in the forums.
- This topic has 14 replies, 7 voices, and was last updated 7 years, 5 months ago by
 .
.
Viewing 15 posts - 1 through 15 (of 15 total)
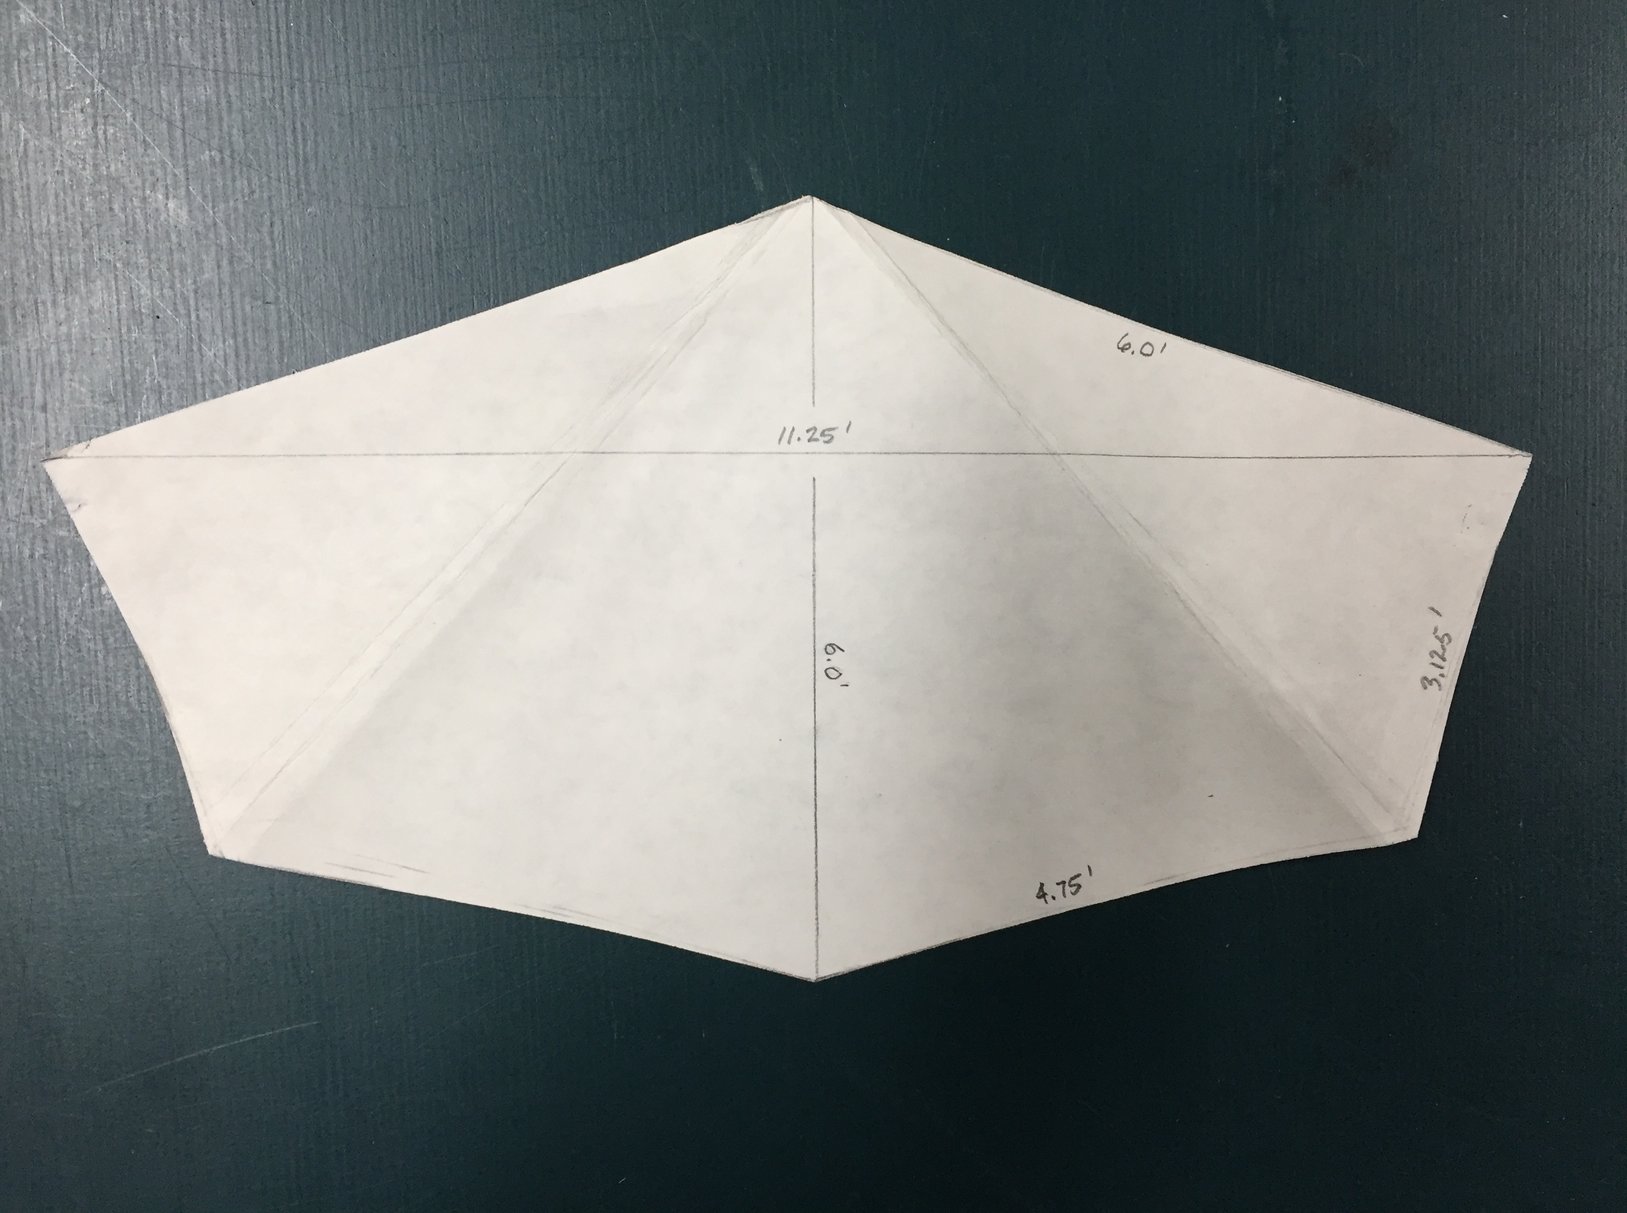
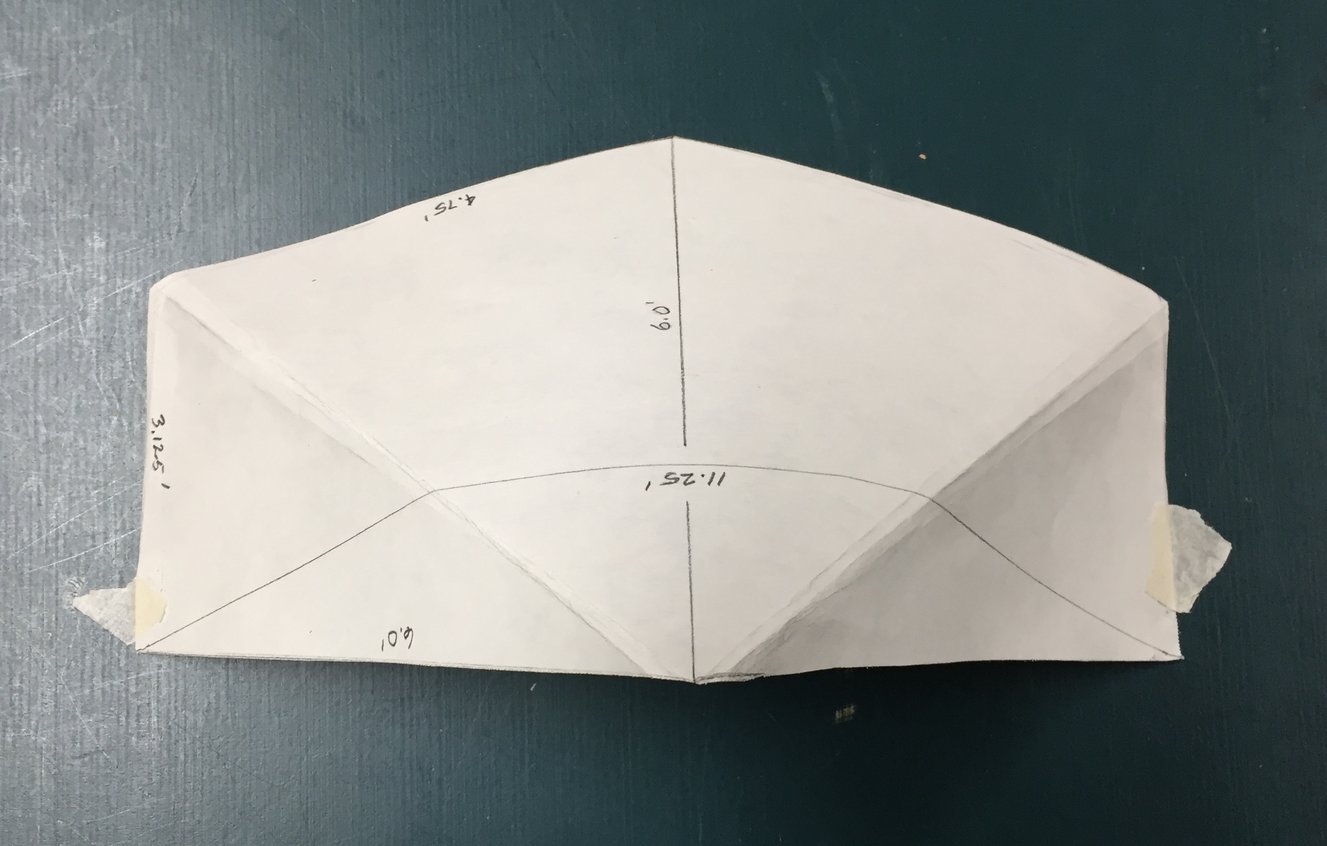
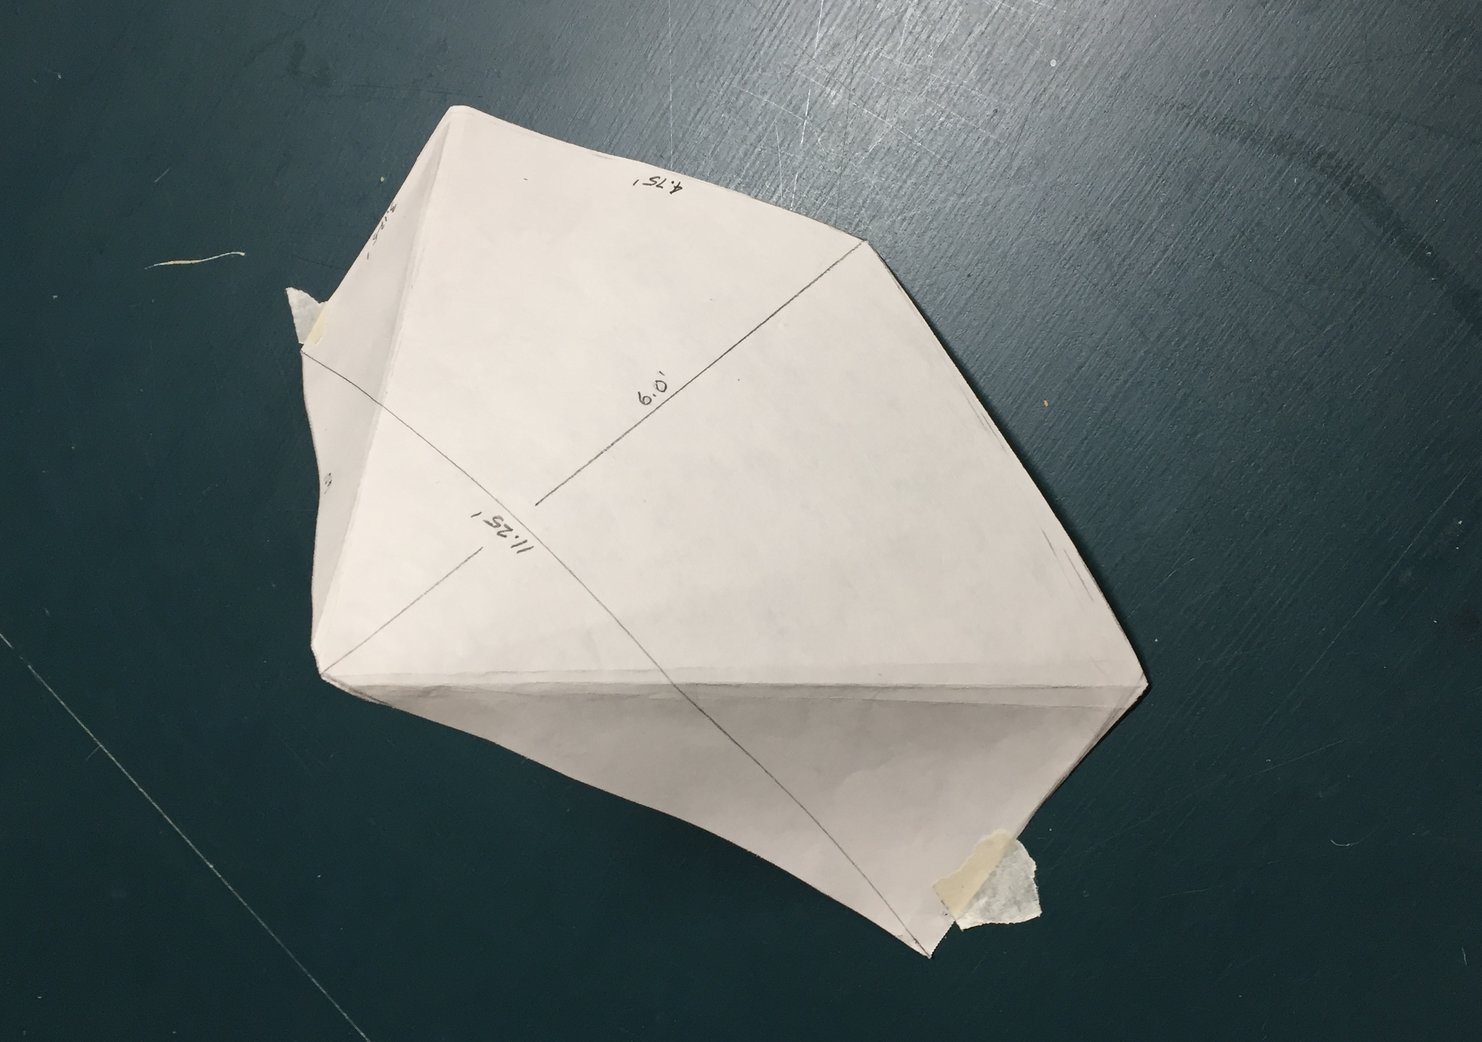
I am designing a tarp that will be shaped like a a Zpack hexamid solo plus tarp without the beak portions or a half pyramid with extended back. I would appreciate help with dimensions / angles to optimize the design. I am shooting for a 9 foot width at the base of the opening. The dimensions I have now are written on the photo of my design laid flat. (The paper model does not yet fit flat to the ‘ground’ at the back.) Now I have 90 degree corners at the outside widest points. Is that right? The front edges form a verticle plane when erected at 9 feet with roughly a 48″ peak. Besides the dimensions please comment if you think other aspects of the design should be changed such as overall size or configuration. My goal is a light tarp with good protection. I plan to deploy my rain skirt over the top 2/3 of the ‘door’ if needed for more protection instead of the using a beak. I am planning to make it from a single piece of 72″ wide fabric.
Clever idea, nice model
Fabric stretches more on the bias than along the grain https://backpackinglight.com/forums/topic/tent-on-bias/
I can not imagine how that will affect your tarp when it’s actually pitched. It may be distorted in some weird way.
The 6-0′ length down the middle is along the grain. Maybe the other two 6-0′ lengths should also be along the grain. And all the edges should be along the grain. That requires 4 pieces.
I’m just speculating though, post pictures of it pitched, that would be useful information.
What fabric is 72″ wide? I sure like that 0.93 oz/yd2 polyester Membrane from RSBTR which is only 58 to 59″ wide.
RSBTR has some nice 1.1 oz Silpoly that is 72″ wide. But that includes the selvedge. Useable width is about 70″ and the finished tarp will be a bit less of course with hemmed edges. I made a square tarp with it last year that’s a bit under 6′ x 6′.
https://ripstopbytheroll.com/collections/xl-wide-fabric/products/1-1-oz-silpoly-xl
Your general shape looks good; though I would add some sort of beak to the open side if I were making it. But if you try to make that shape using one piece of fabric I expect you will have a hard time, if not an impossible task, getting it to pitch tight due to the varying stretch characteristics at the various angles to the grain at which it will be tensioned, and the lack of catenary cut – since with one piece you cannot have catenary cut helping you to achieve a tight pitch. I think the same pattern, but using separate pieces for each face and catenary cut along the ridges, would work well.
To extend your paper models up to full size, I suggest polyethylene sheeting – painters drop cloth stuff; you can get a a 9×12 pretty cheap and try out a full size mockup before you cut fabric.
Just for fun I drew up something close in my CAD program to check measurements. If I draw a floor plan that is 37.5″ ( 3.125′) by 108″ (9′) and then add a triangle on to one long side to get the two, 4.75′ sides you show (or 57″) , and then I run up the front edges at 6′ (72″) in a vertical plane, I find the the ridge going back down to the center rear is 73 5/16″. this would put all five points at the bottom in one plane. If you are not trying to get this out of one piece then the fact that that is a bit over 72 is not a problem. Of course, if you want to have that front opening lean a little bit outwards – whihc could be a good thing for shedding precipitation – then you can get that by making the rear ridgeline longer.
One other thing – if you do try to make this using separate panels as I have suggested, I would further suggest that you orient pieces on the fabric so you have similar angles to the grain at the seams. In other words, do not ever have a seam where one piece has the grain parallel to eh edge while the other has the grain at an angle to the edge. Very hard to get a ridge like that to ever pitch tight unless the fabric is very low stretch.
That’s what I was planning on using.
Thanks for all your comments!
I was not sure about the stretch issue. I have made a couple rectangular tarps already and pitch them in a similar half-pyramid with no problem, except they have ‘extra’ material (unusable area) in the back corners that I wanted to eliminate that with the shaped tarp idea. My last tarp used the 72″ material to make a tarp 70″ by 9.5 feet. Can it be done in one piece or do I need on middle seam or two corner seams?
My thought was to model it in plastic as well. I have a big roll ready to go. Perhaps I should make a seam down the middle (the six foot dim)? Then I can easily get a full six foot width. (But, I am actually not that worried if it is slightly less than six feet.) Really not sure what is best. I appreciate your comments and don’t mind being told off, so to speak. ; – )
Paul, do you think I can get away with one seam? I can see leaning it forward a little and can make that happen when I pitch it. Why do you think I need a beak when I have a ‘door’ cover in mind? Also, if its not too much to ask, would be able to modify your digital model to show a tarp with a 3 x 9 foot foot print and a 48 in peak? What would that be laying flat with dimensions? TIA!! Jim
Check out this similar design. It also uses the 72″ wide RSBTR fabric but manages to get a beak in there as well. There is some wrinkling to the fabric, but not too bad considering the lack of catenary cuts.
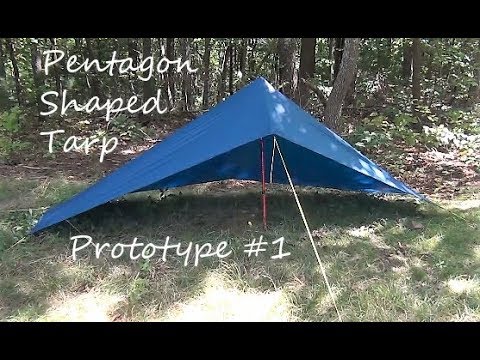
Interesting vid, thanks, Steven. I can see modifying his design to eliminate excess length at the front corners and ‘square up the ends when pitched. Also a little flatter beak and cat cut on the front edges might give it a flatter pitch.
Might I make a suggestion? It wouldn’t be making a tent but you can find A LOT of videos on YouTube that are Bushcraft related that show how to make tents will either a Ridgeline or a trekking pole using 3m x 3m/9ft by 9ft tarps. The reason I like this set up is because it’s A. Simple and B. You can change configurations far more easily.
PS. Kudos on your blueprints.
Thanks for the suggestion, John! I think that is a great option. I am trying this because a I have a few other ‘flat’ tarps and want to do something different, and lighter weight. The 10 x10, 8 x 10, and 9 x 9 are very useful, very flexible and I love them.
James – As to the beak, I just think that works better for more angles of wind-blown rain than attaching anything up there would.
The drawing I did based on the dimensions you originally gave resulted in a peak height of 47 5/8″, so I could do one with 3’x9′ and 48″ height but it would be almost identical – not noticeable in the real thing I think.
As to getting away with one seam -fabric stretch and pitching tight are pretty hard to guess on. I think I may be more persnickety on this than some folks would be. It’s just that I have experienced how much flapping you can get out of small folds when the wind really picks up, so I have a low tolerance for wrinkling in a shelter once pitched. The only way you can be certain is to make one and try it. I’m only going on intuition based on making and using various shelters over the last 45 years. One thing about silnylon is that it is very stretchy, and that makes it somewhat forgiving in terms of cut and pitching tight, but there is a limit to that in that the stretch can allow you to get a pitch that looks smooth and still has big variations in tension – which leads to flapping in the wind. Again, I am being picky here. Another thing to consider with a shape like this is how the shape behaves near the ground. Fewer seams may result in a pitched shape that curves down lower to the ground at the edges – I’ve seen that in some shelters, notably a Gatewood cape that I once had.
Unfortunately there is no good way to mock this up accurately because anything other than the fabric you intend to use will have different stretch characteristics and different tensile strength. Poly sheeting, paper, tyvek – they all have very different characteristics form the silnylon, so they are only good for checking size and interior space, and for rough patterning.
In regards to the shelter in the video, he has much more of a straight line along the back wall than your original has; don’t know how much difference that makes in pitching it and getting smooth/tight.
You could probably get a pretty good idea of how things will work with a half-sized version, and you can get pretty cheap 2nds silnylon to do that with. And if you have little kids, they would love it!
Thanks for the detailed comments, Paul!
I have a really ugly but useful DIY poncho/rainfly, that I bootlegged out of a Ribstopbytheroll HexTarp kit. I’m not sure if it has any catenary sides, if it has, then only about half of the sides. What I did add was a grosgrain loop or two along the hem between the corners. I can stake these, tie a line from a loop to a stake, or run a line between them to tighten them up. It works great. The RipStop kit comes with ‘D’ rings that don’t have very big openings, so some of my lightweight stakes don’t fit through them. What I found I like a lot better than D-Rings is that grosgrain loops are infinity more useful. If I just want to stake a loop, I just twist the stake around 2-3 times to get a snug fit on the stake. I also stopped using any hardware except stakes; for knots, a basic bowline, and then nothing fancy, no adjuster knots. Instead I’ll just retie a knot or move the stake.
Another thing I found works for a non-standard set-up. Instead of poking a hiking pole through a particular grommet on the rainfly, I poke them in the ground . I have a nice long piece of line. I’ll poke a pole in the ground, loop the line around the handle then stake it, then extend the line to the other pole, loop it and from there to a stake. It’s an extra couple of steps, but then I just don’t have to worry about how the poles and the fly work together. To tighten up the poles and their lines, I just raise the poles a bit. Probably if I gave my design some more thought I could do it more standard. Meanwhile, it’s a good system that I’ve set up many times, including in the wind and rain.
Viewing 15 posts - 1 through 15 (of 15 total)
Become a member to post in the forums.
advertisementYour privacy is protected: We do not transmit your user data to third-party ad platforms or advertisers, and we do not host third-party tracking pixels. Backpacking Light serves ads on its own custom, native, and internal platform.
 Pro-Grade Water RepellencyPolypropylene face fabrics: see the future of raingear.