Topic
Heat creasing silnylon prior to hemming (no pins or clips)
Forum Posting
A Membership is required to post in the forums. Login or become a member to post in the member forums!
Home › Forums › Gear Forums › Make Your Own Gear › Heat creasing silnylon prior to hemming (no pins or clips)
- This topic has 5 replies, 6 voices, and was last updated 5 years, 2 months ago by
 Sam Farrington.
-
AuthorPosts
-
Jan 8, 2019 at 1:41 am #3572055
Heat creasing silnylon prior to hemming (no pins or clips)
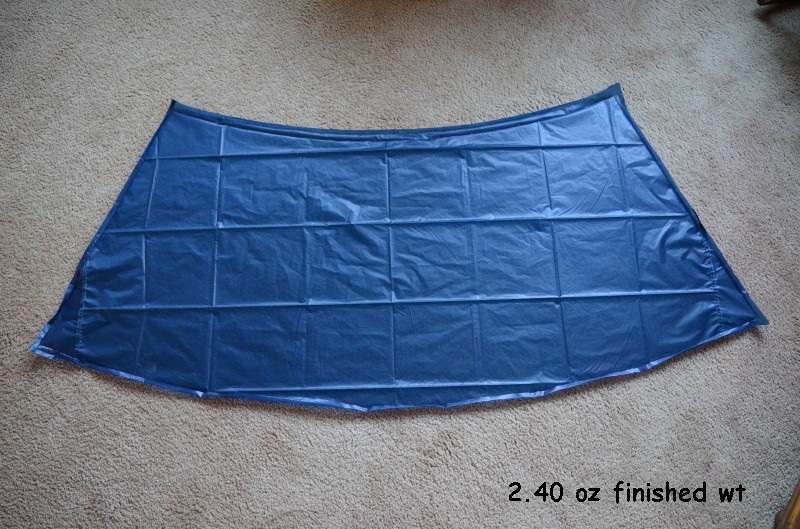
I found a few yards of silnylon I had stashed away a few years ago and forgotten about. It’s heavier fabric at 2.0 oz sq yd (actual wt). I decided to make a rain/wind “skirt” for dayhiking / bushwacking where some encounters with briars are expected. My design was a cone shape so had curved edges to hem. As an option to pins and clips I found I could iron in creases to “set” a rolled hem. The creases in the silnylon do not stay folded as the fabric still springs open but are easy to fold back up as you sew. With hems folded it was pretty easy to feed the fabric into the needle as the creases help keep the fabric from shifting around. Puckering along the curved hem was minimal.
I had to do some experimenting to crease this fabric enought to be useful. Didn’t find much on the web. I currently do not have any of the more light weight fabrics to test but I thought I’d throw this out in case someone else might want to try it.
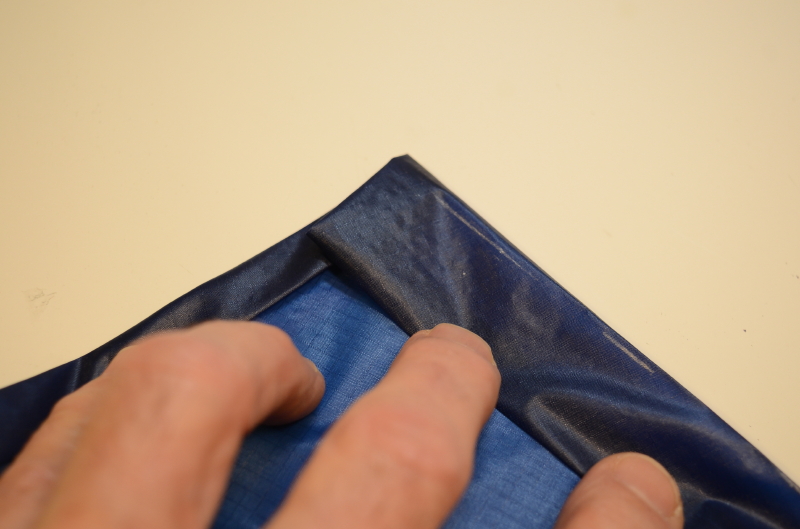
1) I found that folding the hem allowance on a hard surface and pressing hard with a (cold) hard edge would make a slight crease mark but not enough to be useful. I have a small 10 watt mini craft iron (Dritz #29500) that has four heat settings. The third setting was the lowest heat that would help set a crease and not cause any damage to fabric. The stated temp of this tool is 120-150-180-210 deg F but I checked this with a multimeter with a type K thermocouple and found the third setting heated iron to 280-300 deg F.
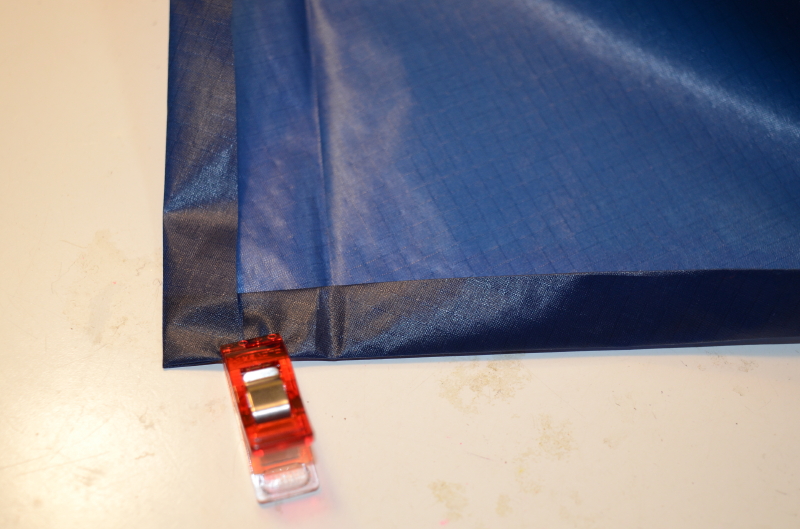
2) I made a hem guide out of thin cardbord (cereal box). It had the same curve as the hemmed edge. I marked a parallel line (hem width) along the edge. On a hard surface I folded the fabric over the cardboard edge until aligned with the line. Held in place with a couple of fingers (a couple of clips might be helpful) I pressed down hard with the hot iron to set the crease in a few places then removed the guide and set the crease a little better with the iron. After the first fold I went back and again and folded a second time to complete a rolled hem (no raw edge).
3) As mentioned, the creases will open back up but have a distinct valley that will re-fold reliably in front of the presser foot.
4) I would suggest (guess) that a hem allowance of about 3/8″ would probably be the minimum for this method as you need to have an edge to press down with your fingers.
5) And yes, it still takes some time and effort to iron in the crease… but I think I made up for that while sewing without stopping for pins or clips. Helped me with straighter stitches also.
Give this a try and report back on your results.
-KenM
 Jan 8, 2019 at 3:38 am #3572074
This technique can also be useful with polyester fabrics. Nylon will tend to shed creases as you noticed but polyester will retain them. Think of ironing a crease into polyester slacks. My only concern is the effect of the heat on the waterproofing.
Jan 9, 2019 at 7:15 pm #3572339I just completed a rain kilt of silnyl, on which I tried to use a rolled hem foot. After a lot of struggling with the rolled hem foot, I decided to press the hems in with an iron and try to sew them. Same results as you got, it was easy peasy. Much better results than I was getting with the foot.
Jan 9, 2019 at 7:50 pm #3572343That’s pretty cool, thanks. I hate sewing with silnylon because it is just sooooooo damn slippery, I can’t keep anything in place.
Jan 15, 2019 at 11:15 pm #3573277Philip – I’ve had good luck with the standard basting tape from my local sewing shop. People say it won’t stick to sil, but I find that after i run my nail along the seam it sticks just fine. Sail makers commonly use basting tape, but it seems to be less usual with the people here. On its own or combined with this folding technique, you should be able to tame your silnylon issues.
Jan 23, 2019 at 5:15 am #3574591Ken,
When doing lap felled seams, I always crease the fabric panel edges first so the edges of the pieces to be joined will overlap perfectly. It is a little tricky, because the crease lines have to be outside the seam lines drawn on the panel, such that when the seam is sewn, the line of stitching will be centered between the creases. But once you figure that out, you will have a true flat felled seamIt is much easier to make a faux felled seam, by just stitching at the seam lines of each piece to be joined, and then folding the seam allowances over on one side and adding one or two lines of stitching, which gives the seam the appearance of the true lap felled seam; however, it will not have the water resistance of a true lap felled seam, because the first line of stitches is not protected by 4 layers of fabric.
So if making true lap felled seams, the creasing simplifies laying up and overlapping the seam allowances before pinning and sewing. Some don’t like pinning because the pin holes reduce water resistance, but if the pins are fine, and set between where the stitch lines will go, the pin holes will be going through 4 layers of fabric, and will not expand to reduce water resistance as on the faux felled seam. But the faux seam is fine for heavier fabrics, as when sewing a pack.
For a thin fabric, as on a tent or tarp, in addition to the seam lines, the crease lines must be determined and marked, and the seam allowances trimmed to just the width necessary for the fabric edges to overlap just enough to produce the desired seam width. Looking at lap felled seams in a gear shop helps to see how they are configured.
Every fabric is different, so before creasing, creases are made with the iron on a scrap of the fabric, gradually heating up the iron until a good crease results without melting or damaging the fabric. The whole process sounds difficult, but actually makes the sewing faster once you get used to it, and you get a stronger and more waterproof seam.
I remove each pin just before the fabric goes under the presser foot, producing a tighter seam, and also sew some lap felled seams on scraps of the fabric beforehand to get the right thread and thread tension. I also hold the fabric both in front of and behind the presser foot during sewing, maintaining just the right tension to produce a good stitch line. These steps will reduce wrinkling of the fabric along the stitch line. Having steady hands like a surgeon also helps.
I’m sure it’s easier to use a device on the machine to make the felled seams more quickly, but that also takes time to develop skills using the device, and for just one tent, the above approach works fine.
Kudos to those who can bond, rather than pin the fabric, with or without stitching. Although I try to design tents with a minimum of seams, there are still enough of them to make bonding too much work and messy for me, particularly if each bond must be clamped along the whole line of the seam. Judy Gross of Lightheart gear is a master seamster, and once expressed how daunting and messy bonding Cuben tent fabrics was for her. That would go double for elastic fabrics like silnylon. So I decided not to go there.
-
AuthorPosts


- You must be logged in to reply to this topic.
Forum Posting
A Membership is required to post in the forums. Login or become a member to post in the member forums!
Our Community Posts are Moderated
Backpacking Light community posts are moderated and here to foster helpful and positive discussions about lightweight backpacking. Please be mindful of our values and boundaries and review our Community Guidelines prior to posting.
Get the Newsletter
Gear Research & Discovery Tools
- Browse our curated Gear Shop
- See the latest Gear Deals and Sales
- Our Recommendations
- Search for Gear on Sale with the Gear Finder
- Used Gear Swap
- Member Gear Reviews and BPL Gear Review Articles
- Browse by Gear Type or Brand.
