Topic
Half Pyramid Net for Pocket Tarps, Gatewood Capes, etc 4.9 oz
Forum Posting
A Membership is required to post in the forums. Login or become a member to post in the member forums!
Home › Forums › Gear Forums › Make Your Own Gear › Half Pyramid Net for Pocket Tarps, Gatewood Capes, etc 4.9 oz
- This topic has 20 replies, 9 voices, and was last updated 4 years, 1 month ago by
 Monte Masterson.
-
AuthorPosts
-
Feb 29, 2020 at 4:51 pm #3633759
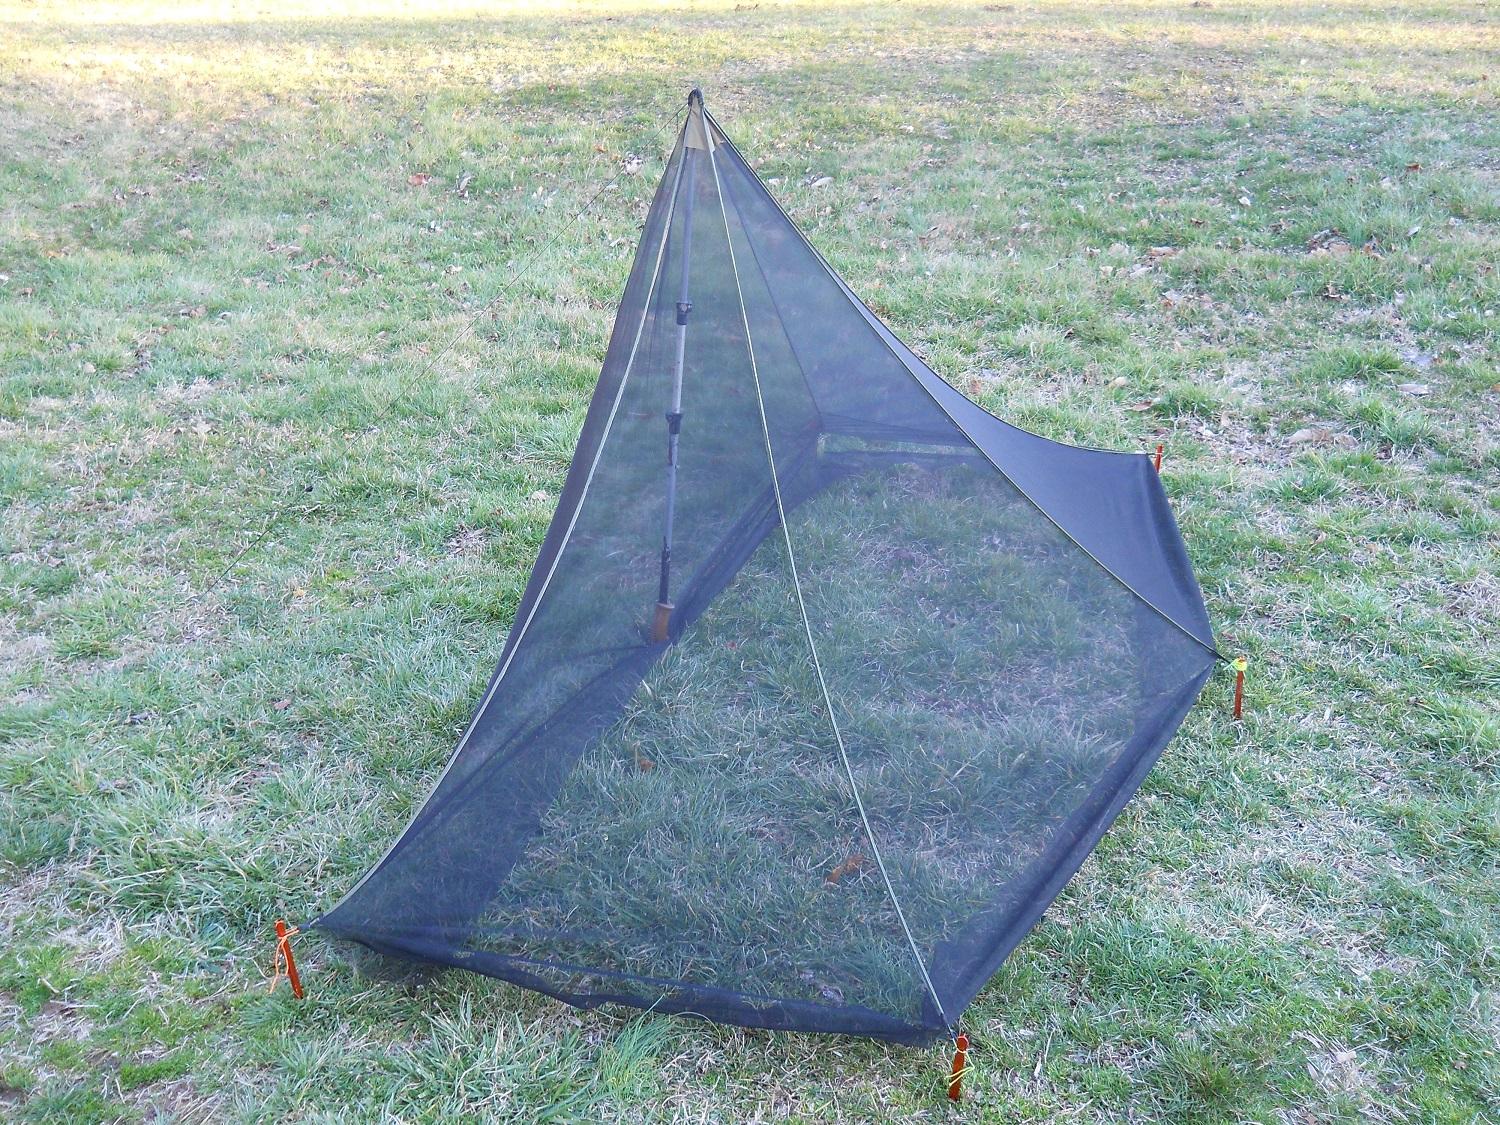
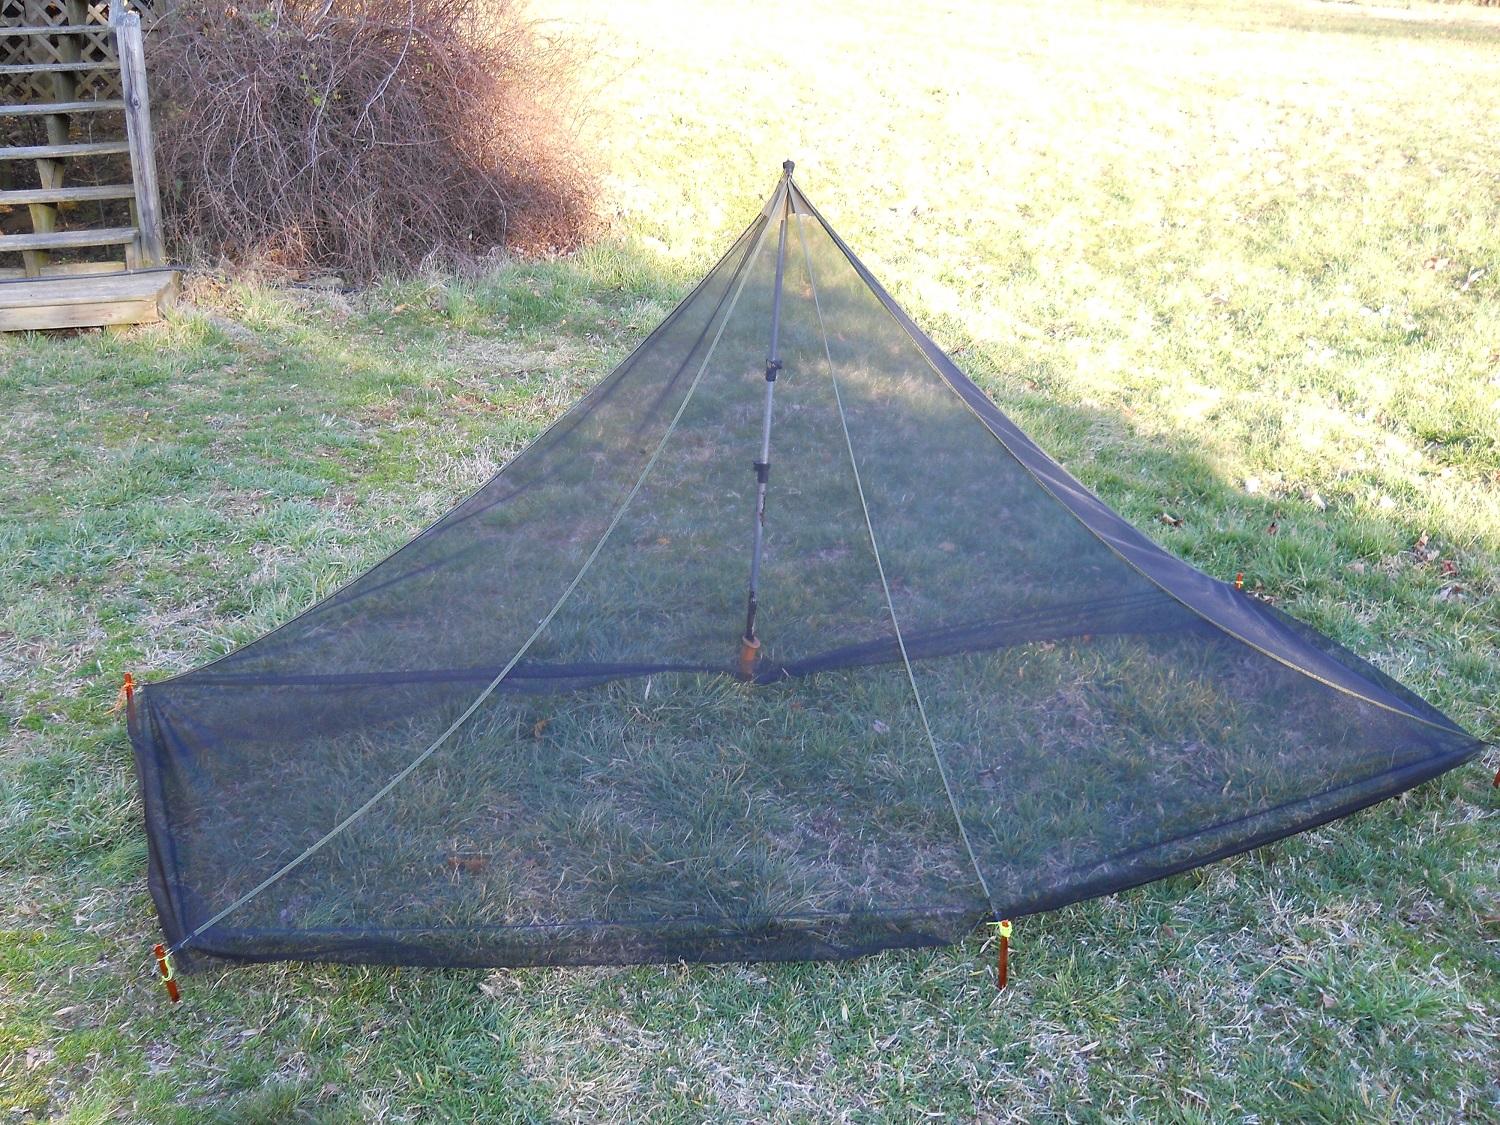
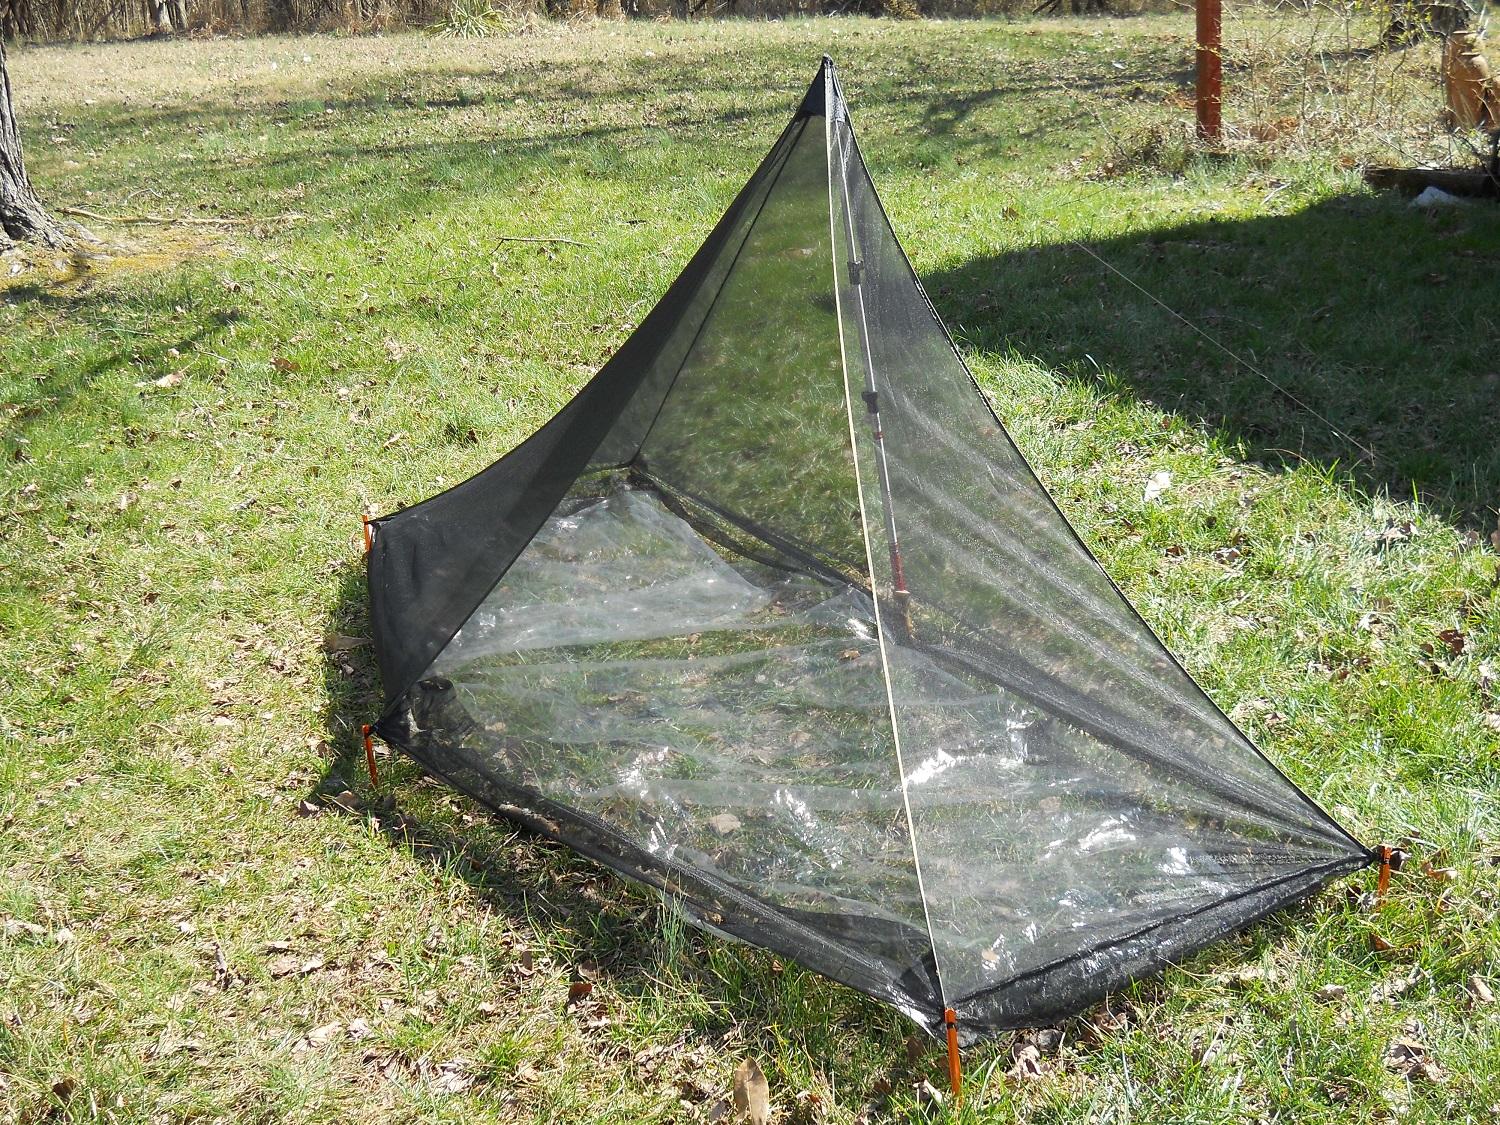
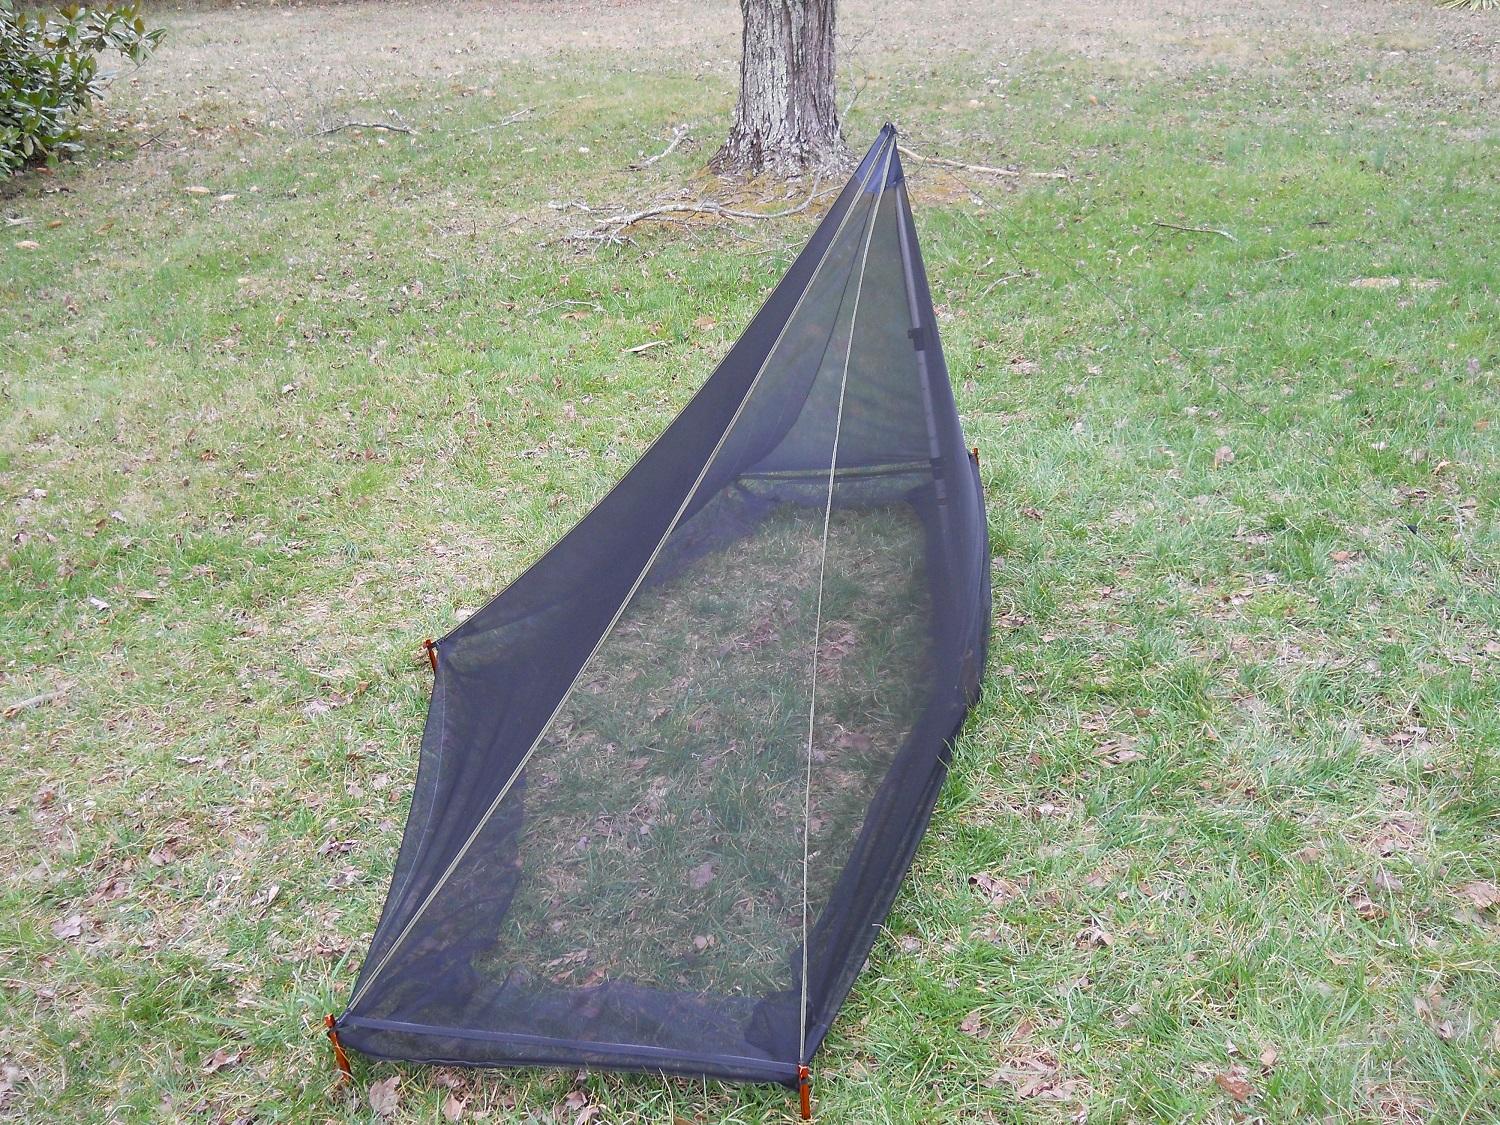
 This is my first prototype. Made with .67 dutchware noseeum. It’s 8 feet long, 47″ high, 33″ wide on ends and 46″ wide in middle. Weighs 4.9 oz. I’ll make the next one 3 inches longer and 2 inches narrower on ends to match up better with the ZPacks Pocket Tarp. In the pics I have it raised up 4 inches at tieouts to simulate the mitten loop height on the Pocket Tarp (that you’d attach bathtub floor to\. Can be pitched with trekking pole inside of net or hung from a ceiling attachment. I’ll post the 2.0 version when I finish it next week. Sorry about the low quality pics.Pics didn’t upload ??? I’ll try again.Feb 29, 2020 at 4:59 pm #3633766Mar 1, 2020 at 4:01 am #3633822
Nice! I can’t tell in the pics but no zipper? I like the no zipper idea on something so minimalist, I assume that you can unhook a corner to get in/out without too much issue.
The main issue I see with net inner designs that aren’t fully attached to a bathtub floor is leeches. They are rather pesky things. I wonder whether they’d get through the gap.
Mar 1, 2020 at 5:19 am #3633824That looks great!
Mar 1, 2020 at 10:23 am #3633841The main issue I see with net inner designs that aren’t fully attached to a bathtub floor is leeches.
Leeches just wander around on dry land in Australia?
Mar 1, 2020 at 2:12 pm #3633861Sorry for the derail but I wish someone made a mesh inner with a DCF floor that fit nicely under the pocket tarp. I think that would be a near perfect modular setup. Didn’t ZPacks make a hexanet back in the day?
Mar 1, 2020 at 2:58 pm #3633865I had a Hexamid tarp with Hexanet some years ago, but the innernet was miserable. Big ZPacks fanboy here, but the Hexanet was just too narrow. Not to be confused with the Solo Plus with Hexanet. It was much better.
I’m in the process of making another net that is 30″ wide at the ends. It will work with the Pocket Tarp and will also go over the detachable bathtub floor by attaching it to the same mitten hooks the floor attaches to, with 1/32″ shock cord.
Also considering a Pocket Tarp innernet with a high grade 7d RSBTR Mtn silnylon floor. With ploycro underneath it would last. It has a 2000 mm rating and weighs about 0.8 oz per square yard. Less than half the price of DCF. Besides, DCF isn’t known for abrasion resistance anyway With zippered entrance the innernet would weigh about 8.5 oz.
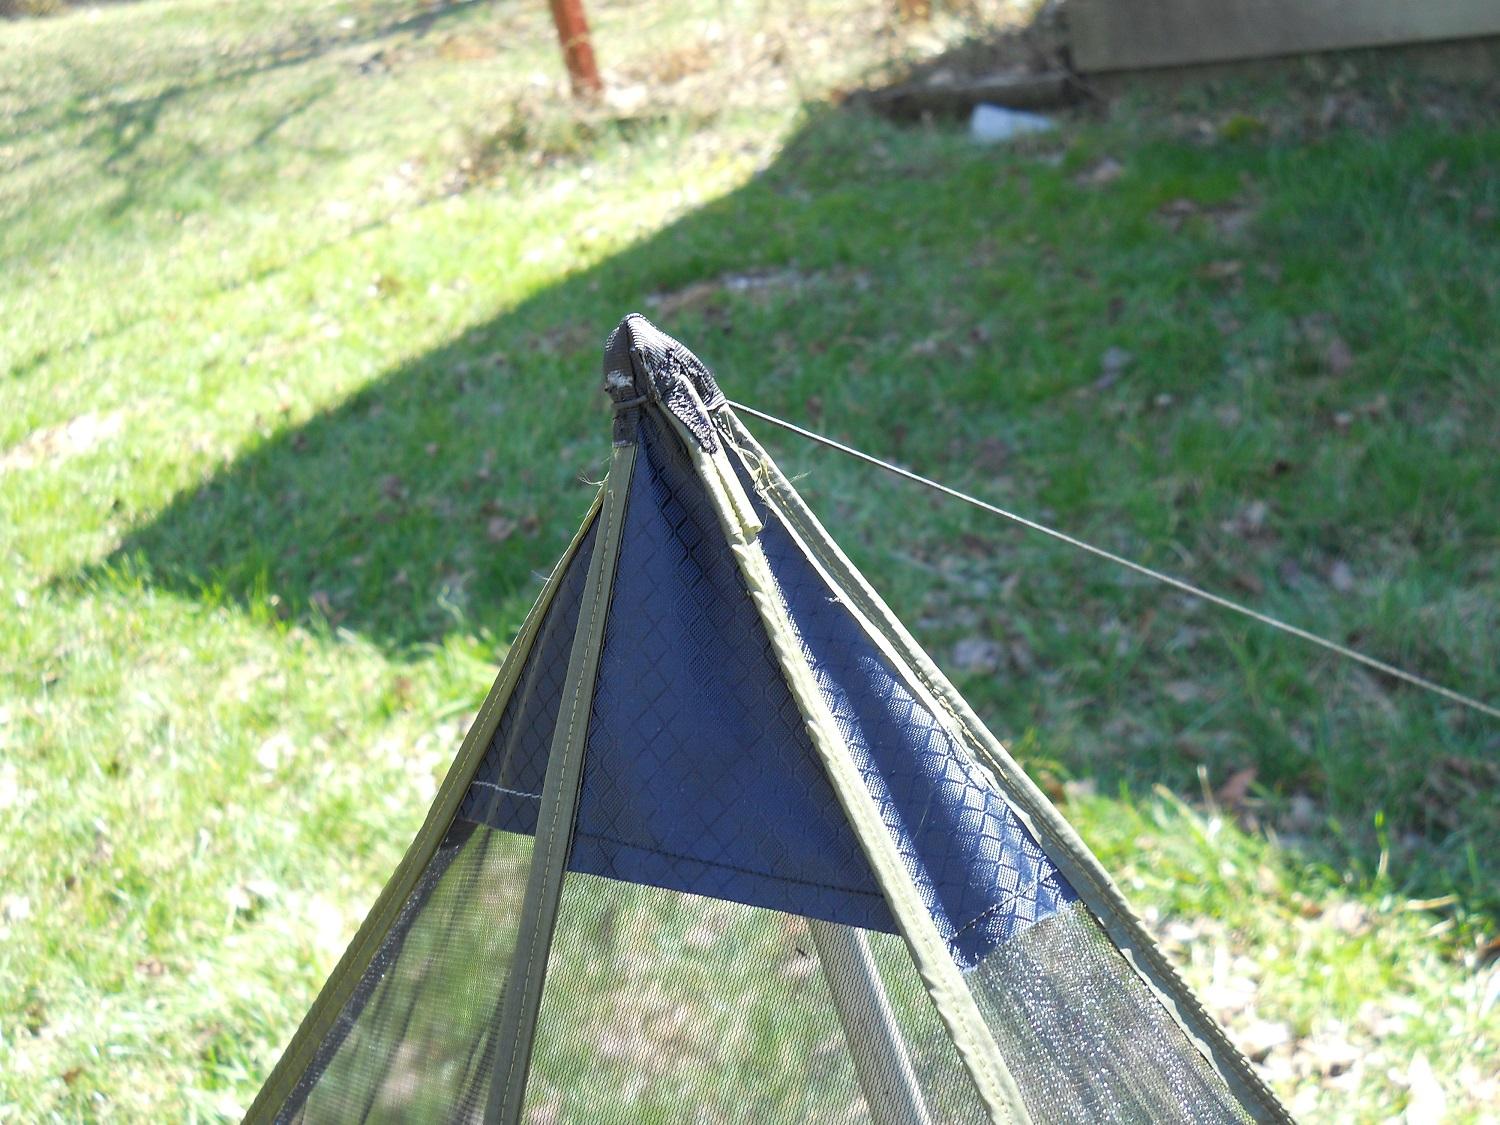
Mar 1, 2020 at 3:24 pm #3633869That looks really good. Are you putting in a cat curve in the seams? What makes them appear white or light colored?
Mar 1, 2020 at 3:50 pm #3633872I put 1.5 ” cat cut on the 2 front and single back seams and a 2″ cut on the longer back corner seams. Next net I’m going with 1.5 ” cut on the back corners too. 2″ was a tad much. I sewed the seams by sandwiching 2 pieces of netting together between 1 1/8″ wide strips of 20d silnylon folded in half and sewn. I ironed the fold because it is so much easier to keep the netting where you want it that way. Then I put Scotch 2025 masking tape just over the edge and sew. After that I fold and sew again .but with just pins on the second go. Gives you a 1/4 seam that is strong enough to take substantial pulling. I use a lower tension and longer thread length on the first sew to minimize the shortening effect of 2 sews.
Mar 1, 2020 at 4:30 pm #3633877Yep @MJ H. They crawl along the floor (as well as be in vegetation etc). Its quite normal in Tasmania and other places (like the “Alpine” parts of eastern Australia, tropical places…heck I’ve seen them next to/in water holes in Arid areas…) for them to crawl along and then onto your shoe/boot, then up your gaiter… on the outside…or the inside if you are unlucky…then you can flick them off before they get to flesh. Or to be sitting in your inner tent and watch them crawl along towards you, then try to get up the bathtub, then onto the inner net… then you get to flick them away again haha. Given they occasionally squeeze through gaiter gaps at the bottom of your shoe, I dare suspect the occasional leech will find its way into the gap between a net and the floor if they aren’t attached. But one can only test this out! ;-)
Mar 1, 2020 at 4:34 pm #3633878Monte I’ve also thought lately about that MTN 7D silnylon as a floor, thinking about it for a bivy floor. I concur that this might work better long term than a cuben floor of similar weights with abrasion. At least additional sil coating can easily be applied to a 7D nylon floor after a while…
Let me know how you go…I won’t start on the project until maybe the end of the year (time constraints). Like you thinking about some polycryo underneath for occcasional protection if I’m expecting rougher areas and uses…though with a bivy the footprint is that bit smaller and I’m looking for cushy protected sleeping sites where possible.
Mar 1, 2020 at 4:35 pm #3633879Thanks for the details. It does look to pitch really taut.
That sounds like a good method for the ridgeline seams. The silnylon probably helps with the mesh netting stretching on the bias.
Mar 2, 2020 at 8:23 pm #3634053That looks really good. I attempted to make something like that and ruined 8 yards of noseum. So I bought a Sea-to-summit net instead. It will do the job. Not as roomy as what you made.
Mar 2, 2020 at 9:57 pm #3634062Nice work, looks great
Leeches crawling on ground? Sounds inhabitable to me;)
Mar 4, 2020 at 1:25 am #3634214If I was making such a net tent, I’d use a light waterproof fabrics for the lower part of the front side. It would greatly improve the weather-resistance of the shelter at no weight penalty. Upper part (which is protected by the beak) can still be a mesh for better ventilation (and as a window). The only downside is losing the views right from the sleeping bag.
Mar 4, 2020 at 6:59 am #3634220I think he intends for it to clip into the same spots as a zpacks bathtub floor. So the bathtub floor will provide the weather protection around the edges.
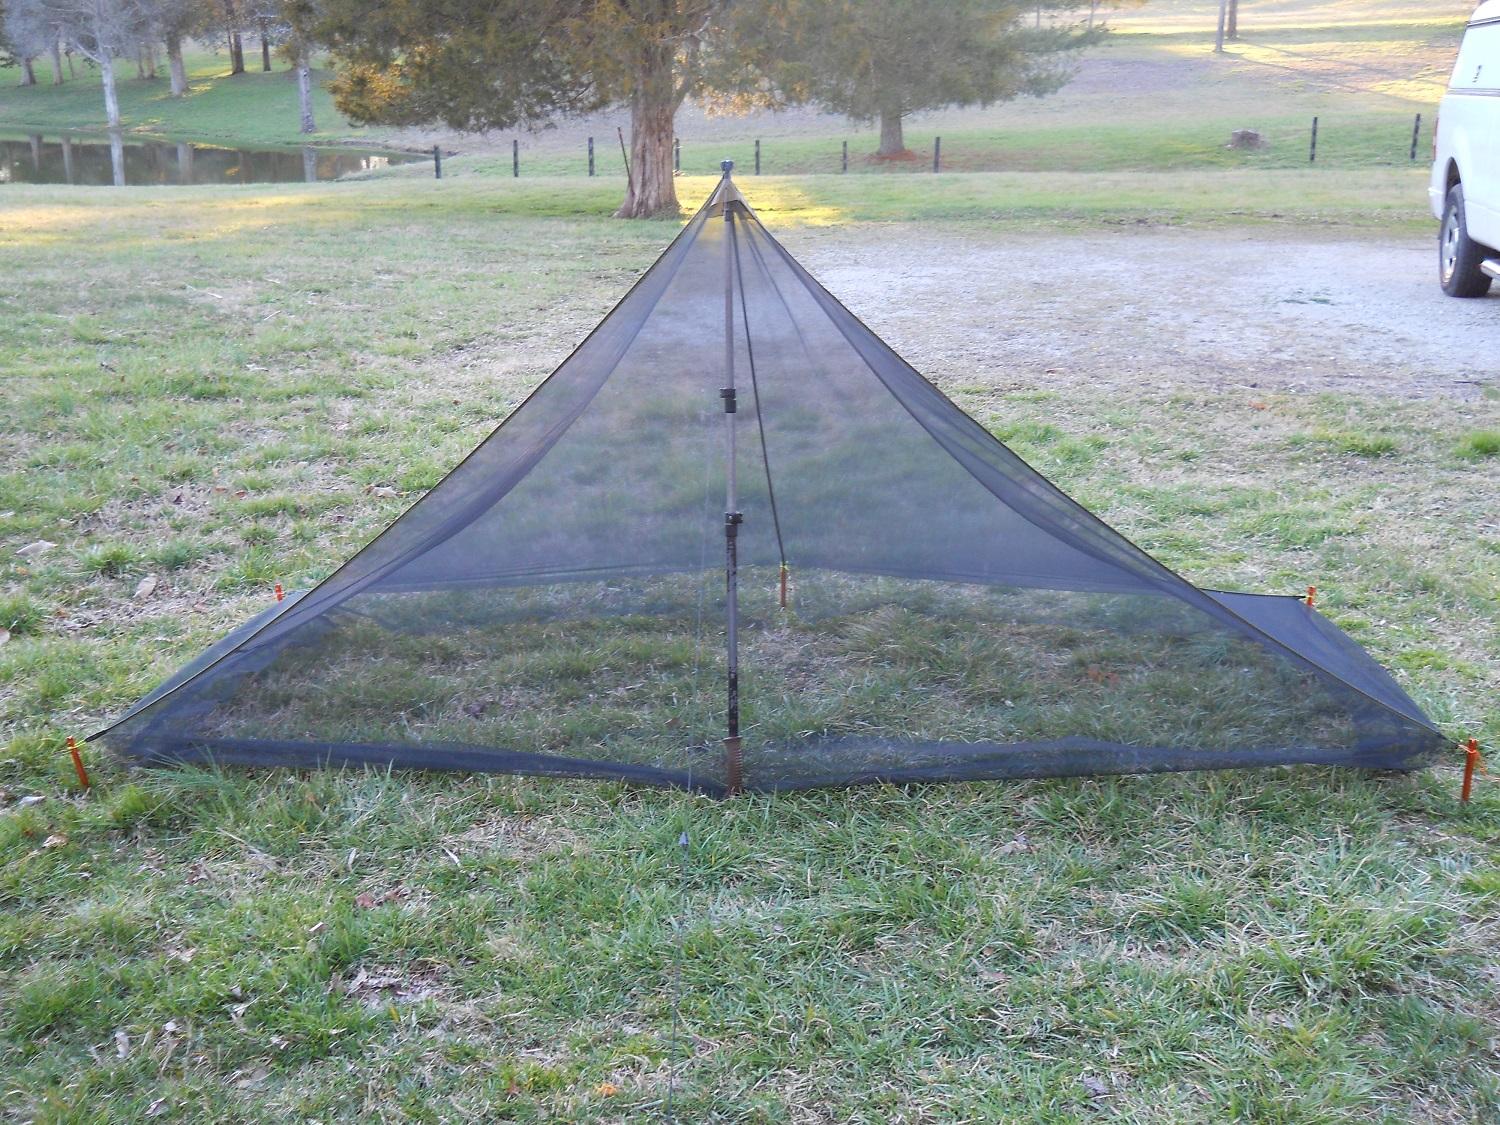
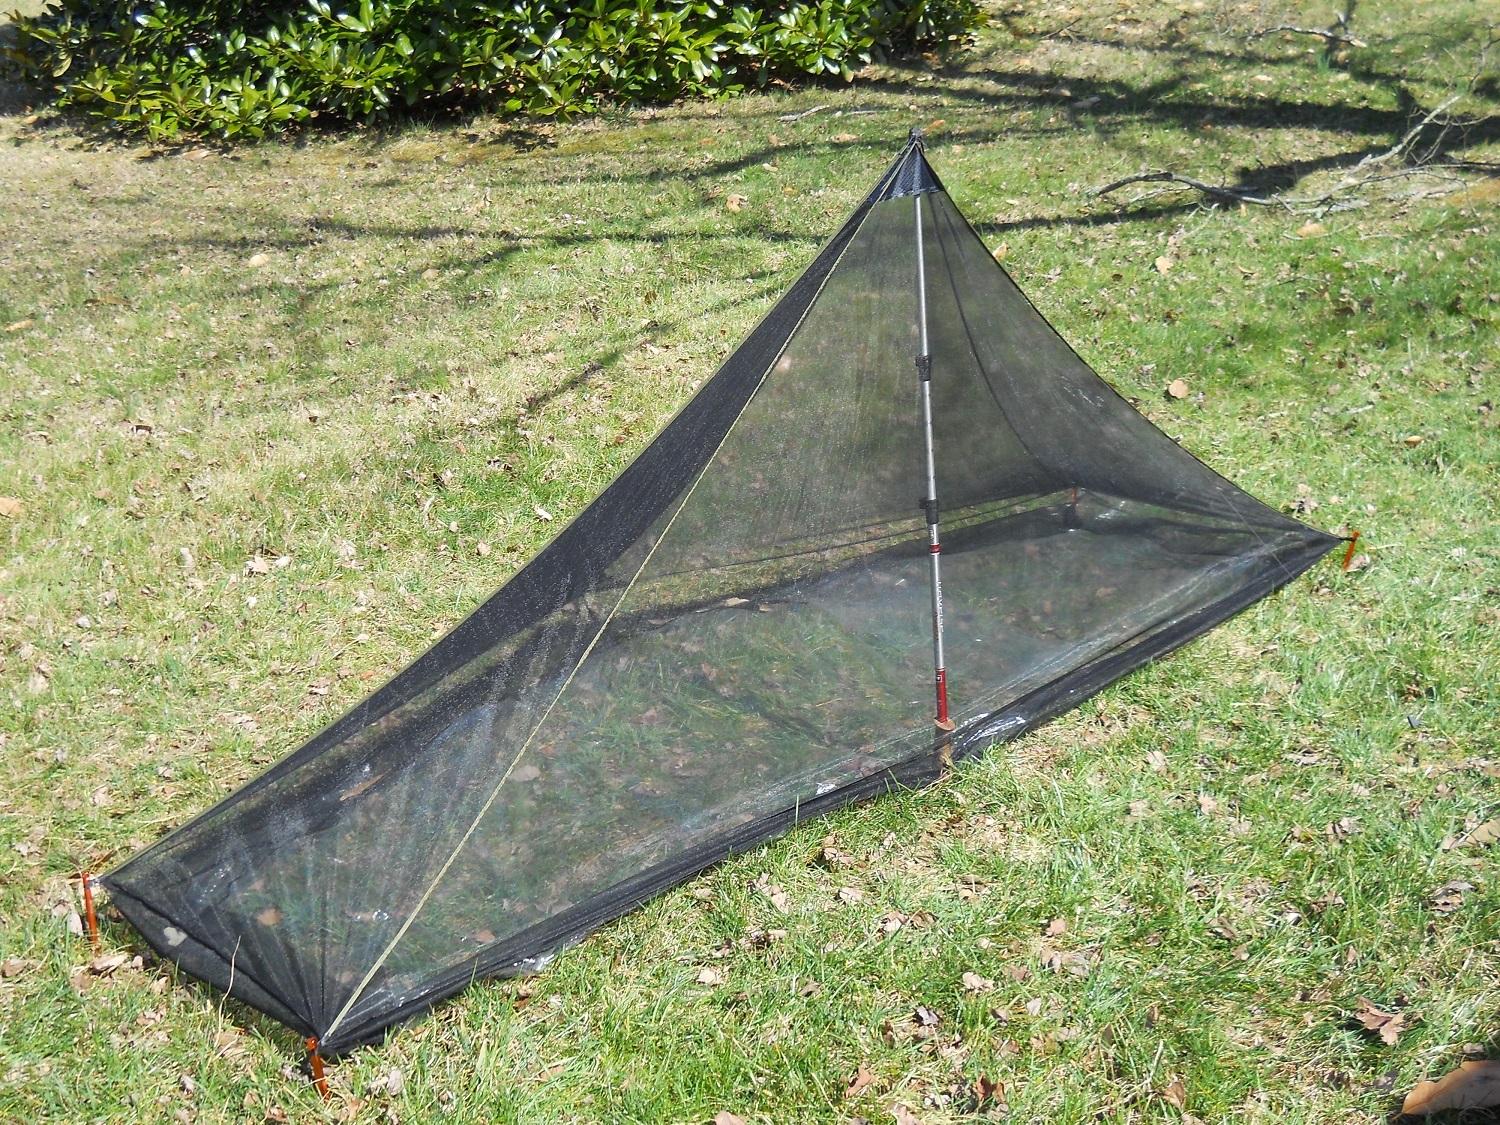
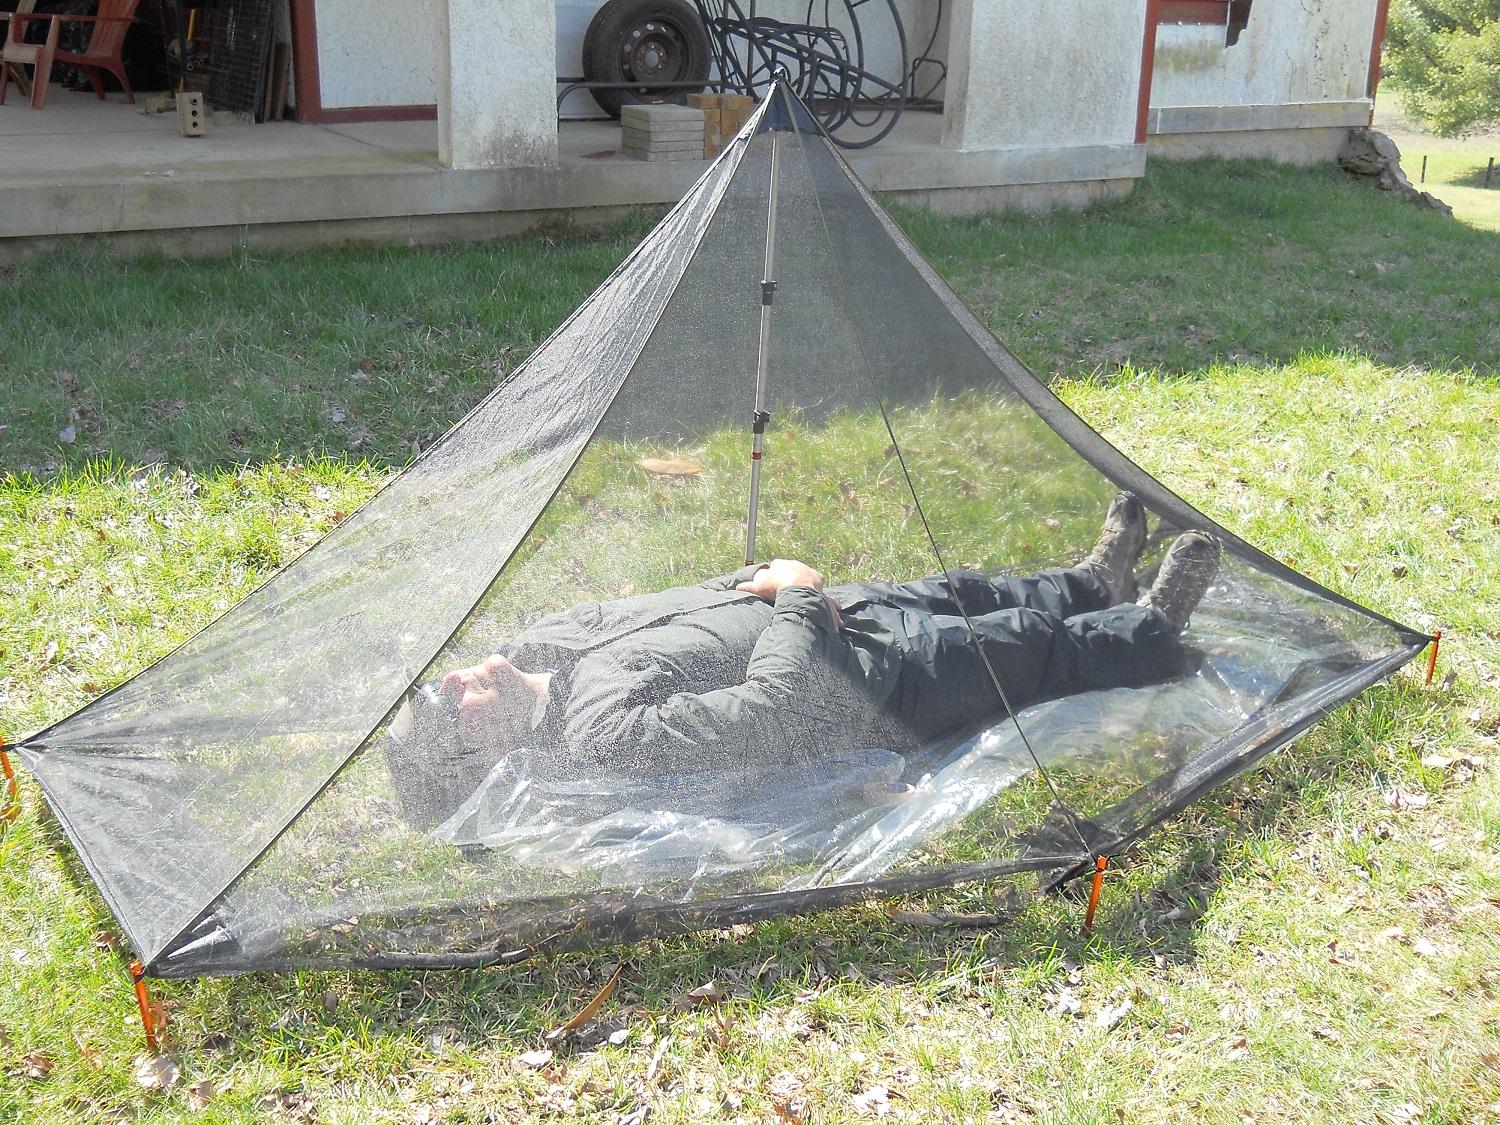
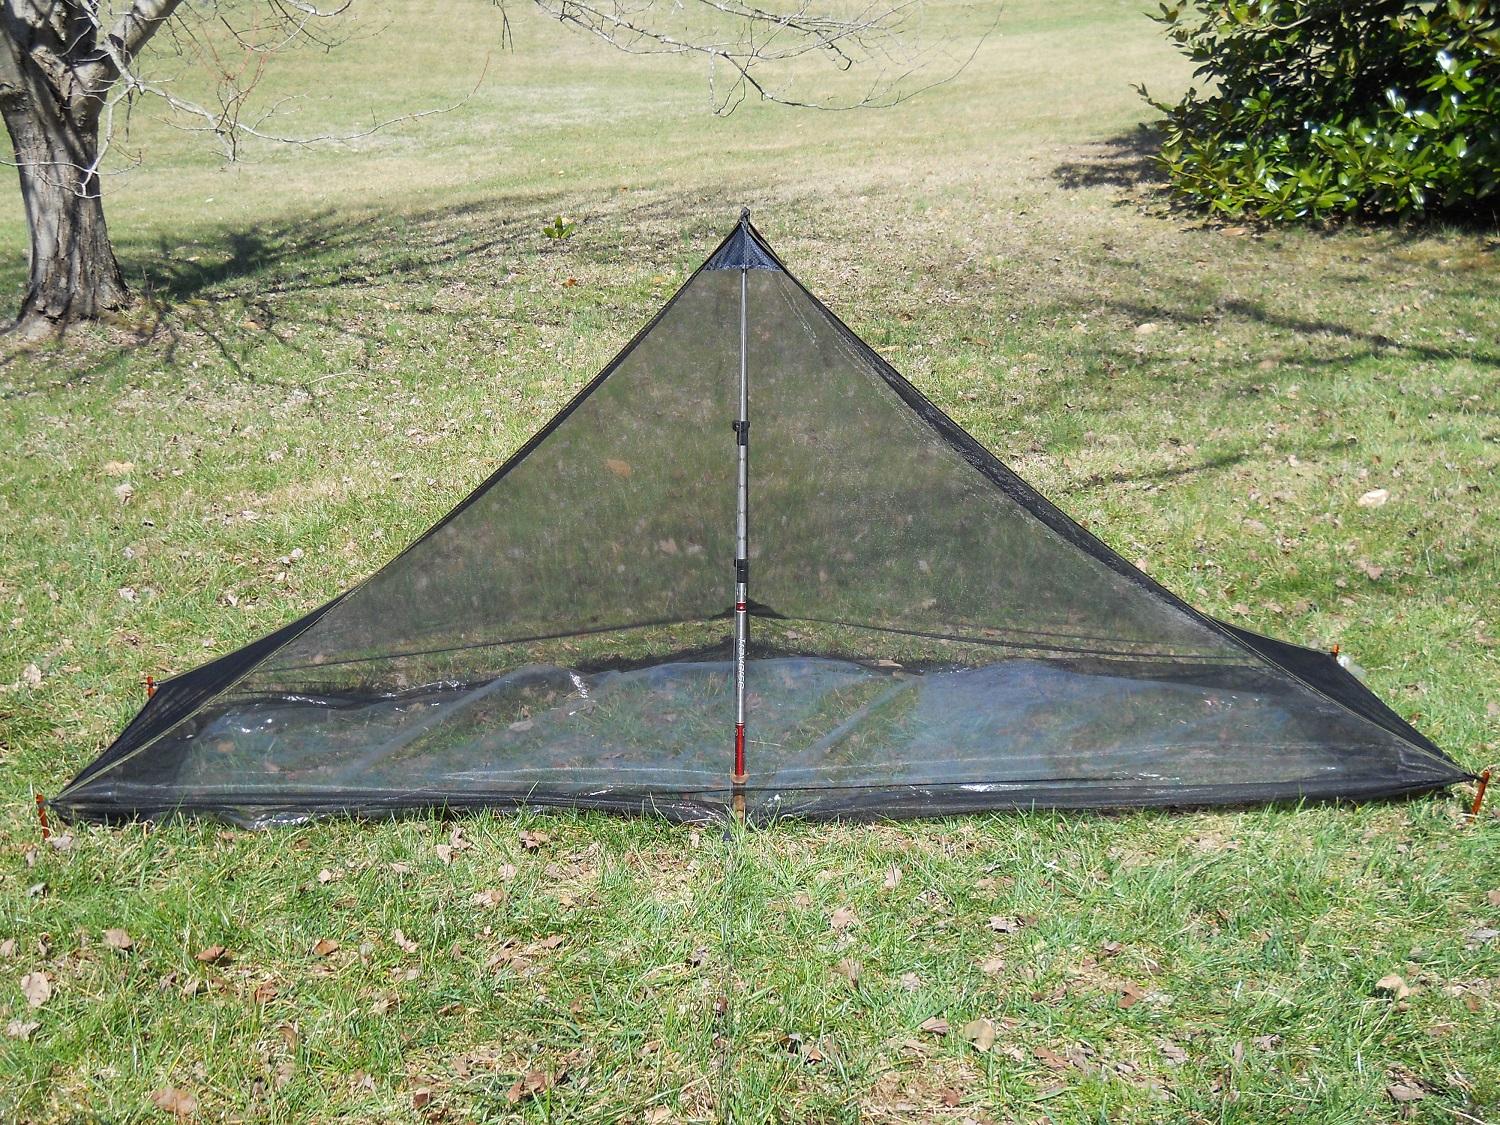
Mar 8, 2020 at 1:18 pm #3634855This is the latest iteration of the Pocket Net. It gained a little weight up to 5.7 oz because it’s longer and it now has double .9 noseeum reinforcements on bottom corners where vertical seams and horizontal stresses converge. I’ve made and tested about a dozen nets over the years and that’s where you start to see failure.
This net is 29″ wide on the ends so it will match up to the Pocket Tarp in width, but it is 109″ long from each front tieout, so maybe a little bit too long for the 107″ long Pocket Tarp. It’s still 46″ wide in the middle and 47″ high though. I have ordered a zipper for the net because getting in and out is a little tough. That will add about 0.6 oz. I also need to work on the under flaps more to consolidate them, but that won’t take much.
I’m 5′ 10″ and you can see that with my toes touching the foot end there’s still a lot of headroom available.
I use 300D pack material for top reinforcement so I can insert the handle end upright if need be. Or the net can be hung of erected with pointed end up like in the pics.
Mar 8, 2020 at 3:28 pm #3634883Dang. That is looking really great.
Mar 8, 2020 at 4:53 pm #3634894The way I get in and out of my floorless nets is to share the same stakes as the tarp and use elastic guylines on the net. Just stretch them out to the stakes and slip them over the top. To get in, I lift the net up, sit on my ground sheet, drop the net over me, and the whole thing springs back into place nice and tight. No zipper necessary.
Mar 9, 2020 at 10:22 am #3635008Ooh, can you post a video or pictures of that? (Elastic guylines/net in action)
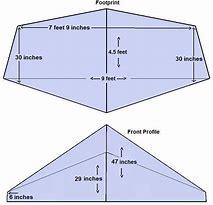
Mar 9, 2020 at 2:34 pm #3635031I finally located a dimensions diagram of the Pocket Tarp. It’s actually a Solo Hexamid, but I’m 99.99% sure they are the same exact template. I don’t see a Pocket Tarp diagram anywhere on ZPacks website. I own the Solo Hexamid tent with bug net sewed in, even across the floor and it uses the detachable bathtub groundsheet, just like the Pocket Tarp. Don’t have a Pocket Tarp yet. Wow, I’d forgotten how much shorter the back length is compared to the front length.
This morning I modified the 2nd prototype net by shortening the back corner seams 2″ and the front seams 1″. Left the one back center seam as is. It ended up being 107″ long on front and 100″ on the back. That’s 7″ too much on the back length.
-
AuthorPosts
 This is my first prototype. Made with .67 dutchware noseeum. It’s 8 feet long, 47″ high, 33″ wide on ends and 46″ wide in middle. Weighs 4.9 oz. I’ll make the next one 3 inches longer and 2 inches narrower on ends to match up better with the
  Pics didn’t upload ??? I’ll try again.

- You must be logged in to reply to this topic.
Forum Posting
A Membership is required to post in the forums. Login or become a member to post in the member forums!
Our Community Posts are Moderated
Backpacking Light community posts are moderated and here to foster helpful and positive discussions about lightweight backpacking. Please be mindful of our values and boundaries and review our Community Guidelines prior to posting.
Get the Newsletter
Gear Research & Discovery Tools
- Browse our curated Gear Shop
- See the latest Gear Deals and Sales
- Our Recommendations
- Search for Gear on Sale with the Gear Finder
- Used Gear Swap
- Member Gear Reviews and BPL Gear Review Articles
- Browse by Gear Type or Brand.
