Topic
Adding internal poles
Forum Posting
A Membership is required to post in the forums. Login or become a member to post in the member forums!
Home › Forums › Gear Forums › Make Your Own Gear › Adding internal poles
- This topic has 13 replies, 3 voices, and was last updated 2 years, 9 months ago by
 Sam Farrington.
-
AuthorPosts
-
Feb 26, 2022 at 4:57 am #3741622
I have a 3 poles floorless tunnel tent which i want to make stronger. Poles are inserted in external sleeves.
The most obvious option would be to add gromets at each end and double up the poles. I don’t want to go with larger poles as I already have a stock of spare 8.5mm sections.
There is another option I was thinking about and I’m looking for feedback on it. Let each side of the tent be A and B and each pole 1, 2 and 3. I was thinking about running one internal pole from the A1 corner to B2 and another one from B2 to A3
Each poles would insert into gromets at each end and be secured to the inside of the tent with three 3in tenacious tape round patches with sewn velcro loops. The fly fabric is pu coated poly
Feb 26, 2022 at 4:42 pm #3741732First Q: why do you want to make it stronger?
I ask because a properly anchored tunnel can take pretty horrendous winds.
The weakest part of your tent is probably the PU-coated poly. The PU coating actually makes the fabric weaker. Preventing ANY fluttering will be crucial.
2nd Q: what are the ends like, in shape and for anchors?
Photos of the details would help here.Cheers
Feb 26, 2022 at 5:25 pm #3741737The tent is a 3f ul tanghang2.
I was camped on a very large lake and winds picked up overnight to 35-40 kmh and gusts of 55, 45 degrees to the tent. It was flexing a bit too much to my taste. I did not use any guylines mind you (facepalm). I guess the guylines should take care of it next time. The following night the wind was still up and we had the angle right this time, so we had no issues whatsoever. I use parachutes and trucker hitches to anchor it.
Feb 26, 2022 at 6:16 pm #3741747Photos?
How was the windward end anchored – details?
How much tension did you have along the tent?
Cheers
Feb 26, 2022 at 10:54 pm #3741772Both sides of a tunnel tent are much closer to vertical than horizontal as the walls get closer to the ground. Even when the tent is pitched with the rear facing the wind, and even with lower wind velocities closer to the ground, in a severe storm winds can be unpredictable and can vary in terms of strength, direction and distance from the ground.
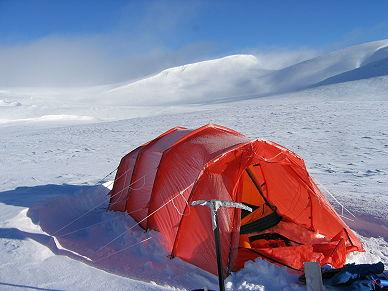
The lightest and also most effective way to address the vulnerability this creates is the one Roger is already using, and that is with side guylines from the poles to the ground. With external pole sleeves, guys are anchored at the base of the sleeves, as is the case with Roger’s tunnels as I understand it. Also, in severe winds it may be necessary to anchor guylines to the front and rear of the tent, one typical method being to string the guys in an A shape, allowing room to get in and out at the front and rear of the tunnel. Roger has a nice photo of a tunnel anchored in this fashion.
There are also various ways to string internal guys, used for example in the Warmlite tents for many years. I understand this can be very effective; however, it also impedes movement inside the tent, and IMO, side-guys that are well anchored on the outside of the tent, at both the stake and the pole ends, make more sense. If you are going to reduce space with internal guys, why not just change the arc of the poles into a gothic arch with an elbow at the top that will make for a pole that is stronger than a hoop. This reduces space inside, but for me anyway, is not so irritating as internal guys.
A concern with tunnels is that the sidewalls present closer to vertical faces to the wind than some other designs. A truly aerodynamic shape would present more sloping faces in as many directions as possible. The trick is to accomplish this without creating a lot of wasted tent space sloping close to the ground, and resulting extra weight.
Also, any tent, tunnel or otherwise, should be constructed so that it pitches and maintains walls that remain taut, in order to prevent flapping fabric that increases the likelihood of stress damage, and also to limit balooning if wind blows into the canopy, as can happen with tarps and even some tents that do not come all the way to the ground. I once visited a New Balance outlet north of Sebago Lake in Maine, USA, where they were having a tent sale, and a huge tent had been erected. But they had neglected to place walls on the sides of the tent, and it was ballooning so badly in heavy winds that it looked like it was going to take off and fly at any moment. A very dangerous situation with such a large tent made of heavy canvas and supported by heavy timbers.
These comments may sound like some pretense to an engineering background, but not so. These are just observations derived from observing tents over the years, with a bit of common sense added.
Feb 26, 2022 at 11:27 pm #3741773I do use internal guys in some situations, and yes, they can get in the way inside the tent. But they work, brilliantly.
Consider a tent with arched poles in a storm with lots of snow coming down. You can get a big load of snow on the roof, and few tents are designed to handle that. Then add in a complex wind pattern which thumps down on the top of the tent. You can exceed the strength of the poles and see them break, half way down to the ground.
But look carefully at what is happening. The top of the tent is being depressed so the sides of the poles get bent outwards, beyond their strength or maximum curvature. External guy ropes are good, but they are powerless to handle that.
Now add one little bit of string across the inside, connecting the two points of attachment for the external guys. AH! Now the top of the pole arch can not be pushed down: the string will tighten and stop the poles from bending outwards.
Look inside any large barn or old-design railway station, and you will see horizontal tension members. They stop the walls from buckling outwards. Same thing.
I have to admit to some experience of such pole breakages – in the snow too. It was the last night of a summer trip though!
Cheers
Feb 27, 2022 at 4:28 am #3741779You’re in luck. I also have a video.
Here’s how we set up the tent at night.

There are two loops at the bottom corners. Parachute anchors were dug 8 inches deep, around 3 feet away from where we wanted the tent and spaced roughly 2 feet wider than the end of the tent. Same thing at the other end. So four parachutes is all I used. I estimate tension was 7-10 pounds.
This is in the morning.
https://youtube.com/shorts/cwPwNz4ZN10?feature=share
My idea of adding internal poles going from one corner of the center pole to the opposide corner of another pole felt as a clever way to support fabric spans between hoops.
Feb 27, 2022 at 1:56 pm #3741841Hi Martin
Good video!
Good tent.My thoughts are that you should have about double the lengthwise tension, plus I would add one or two guys from the top of the 1st pole, just to add some bracing.
I use Ti deadman anchors poked into stomped snow. They have held very well at 100 kph. See
https://backpackinglight.com/make_your_own_gear_titanium_snow_stakes/
and
https://backpackinglight.com/myog_ti_snow_stakes_part_2/Cheers
Feb 27, 2022 at 10:33 pm #3741894Martin,
Without a diagram, I’m not sure: but your A-B, 1-2-3 idea sounds like internal guying. But it also limits use of internal space, and I’m not convinced it is much better than using elbows at the peak of each pole; thus creating three parallel gothic arched poles instead of hoops for support of the tent. The heavier of the 2 Easton carbon poles, sold by Quest Outfitters, is very strong, and lighter than alloy poles. When the poles are slightly arced to create a Gothic arch, I think you would have plenty of strength, especially since the arch will shed snow much more readily than a hoop. And the arch will create much more space inside than an A-frame design, upon which so many folks rely. Still, agree that side guylines remain essential for a tunnel tent if you are going where heavy winds occur. Roger also has a nice photo of a Gothic arched tunnel.
You also asked about reinforcement of your tunnel with internal poles, not lines. There was an interesting thread on BPL about a “quadratic” tent. The design is well described and illustrated at its website, here: https://www.thetheoryworks.com/quadratic-tent-system/
There was some fairly harsh criticism of the quadratic design on this site; but if you want to get into the fray about adding internal poles to tunnels, it might be of some interest.
I get that you may not be looking to build another design from scratch; but want to reinforce a tunnel tent you already have. If the smaller of the two Easton carbon poles I mentioned would fit into the same pole sleeves with the alloy poles you have, that might work. You state that your poles are 8.5mm, or .335″ in diameter. The heavier Easton carbon is .346″ dia.; but the lighter one is .296″ dia. It is still pretty strong, and might be able to fit into the same sleeve and mate with your existing poles. You could also glue some felt rings on the carbon poles to keep them from rubbing against the alloy. Or even scab other pole sleeves onto your existing ones. Quest also sells the inserts/ferrules, plus tips drilled to accept shock cord. For carbon poles, suggest not to use crazy/cyanocrylic glue, not epoxy, as the latter can dissolve the adhesive in carbon layups. The fact that the carbon and alloy poles are different poles should not affect the shape they assume when flexed into a hoop of the same height, length, and width at the base of the loop.
And you might want to also install some loops for internal guys, just in case you run into those overhead thumps! that Roger mentioned. How low you install the internal guys depends on how good a limbo dancer you are.
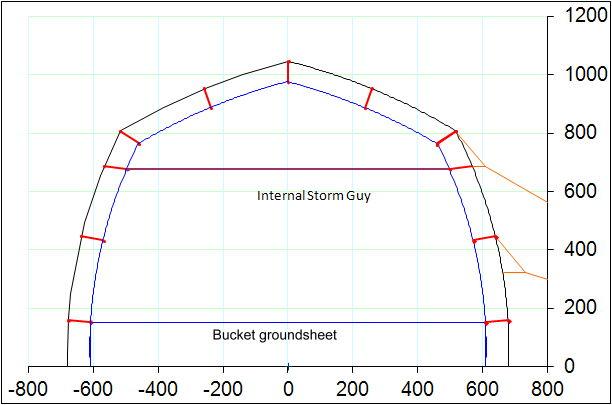
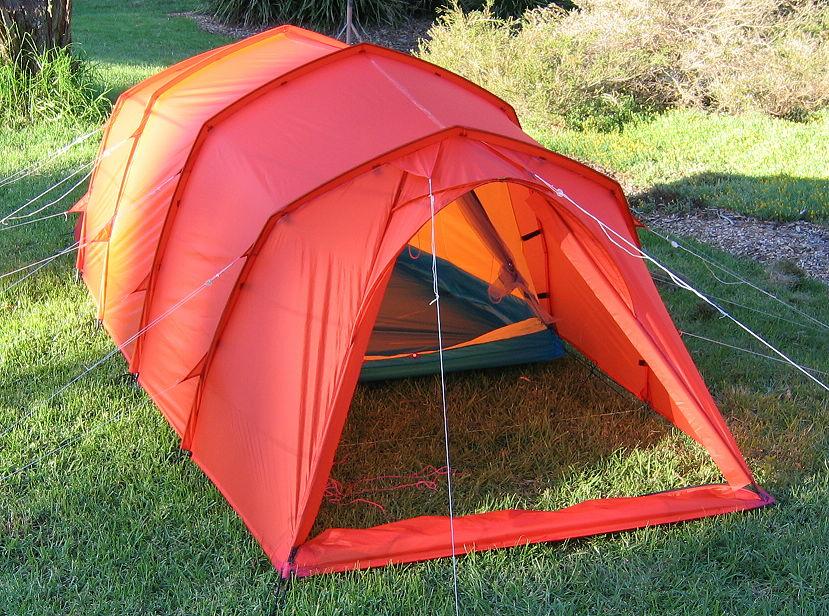
Feb 27, 2022 at 11:20 pm #3741897I have attached a pic of the internal storm guys I use. Note that they connect to part of the external storm guys.
Now imagine that all guys are ‘tight’. How can the poles move? They cannot move sideways.The ‘quadratic’ tent system seems to me to be trying to replace the external guys with the poles running the length. My quite biased opinion is that they are of very little use compared to proper external guys.
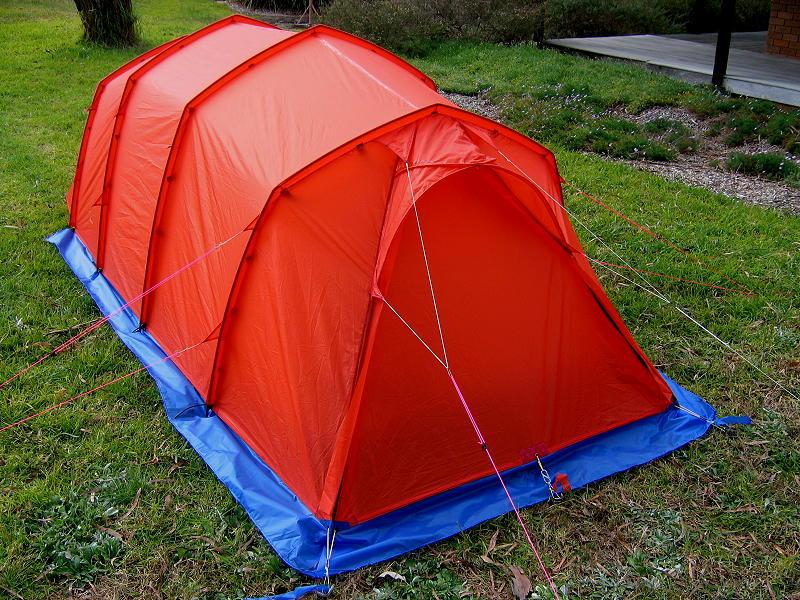
The second photo is of my winter tent fully rigged with guys. In addition to the double guys at each pole, you will see some end guys which help tension the roof. But this is the downwind end, which does not have to take the full force of the wind.
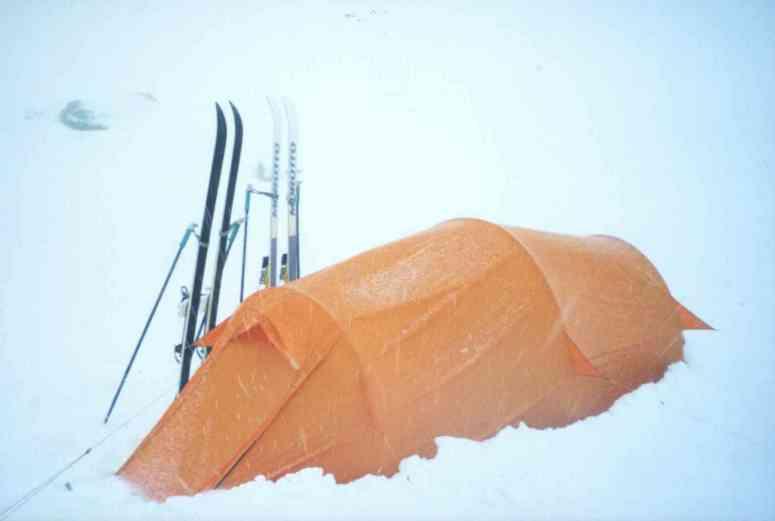
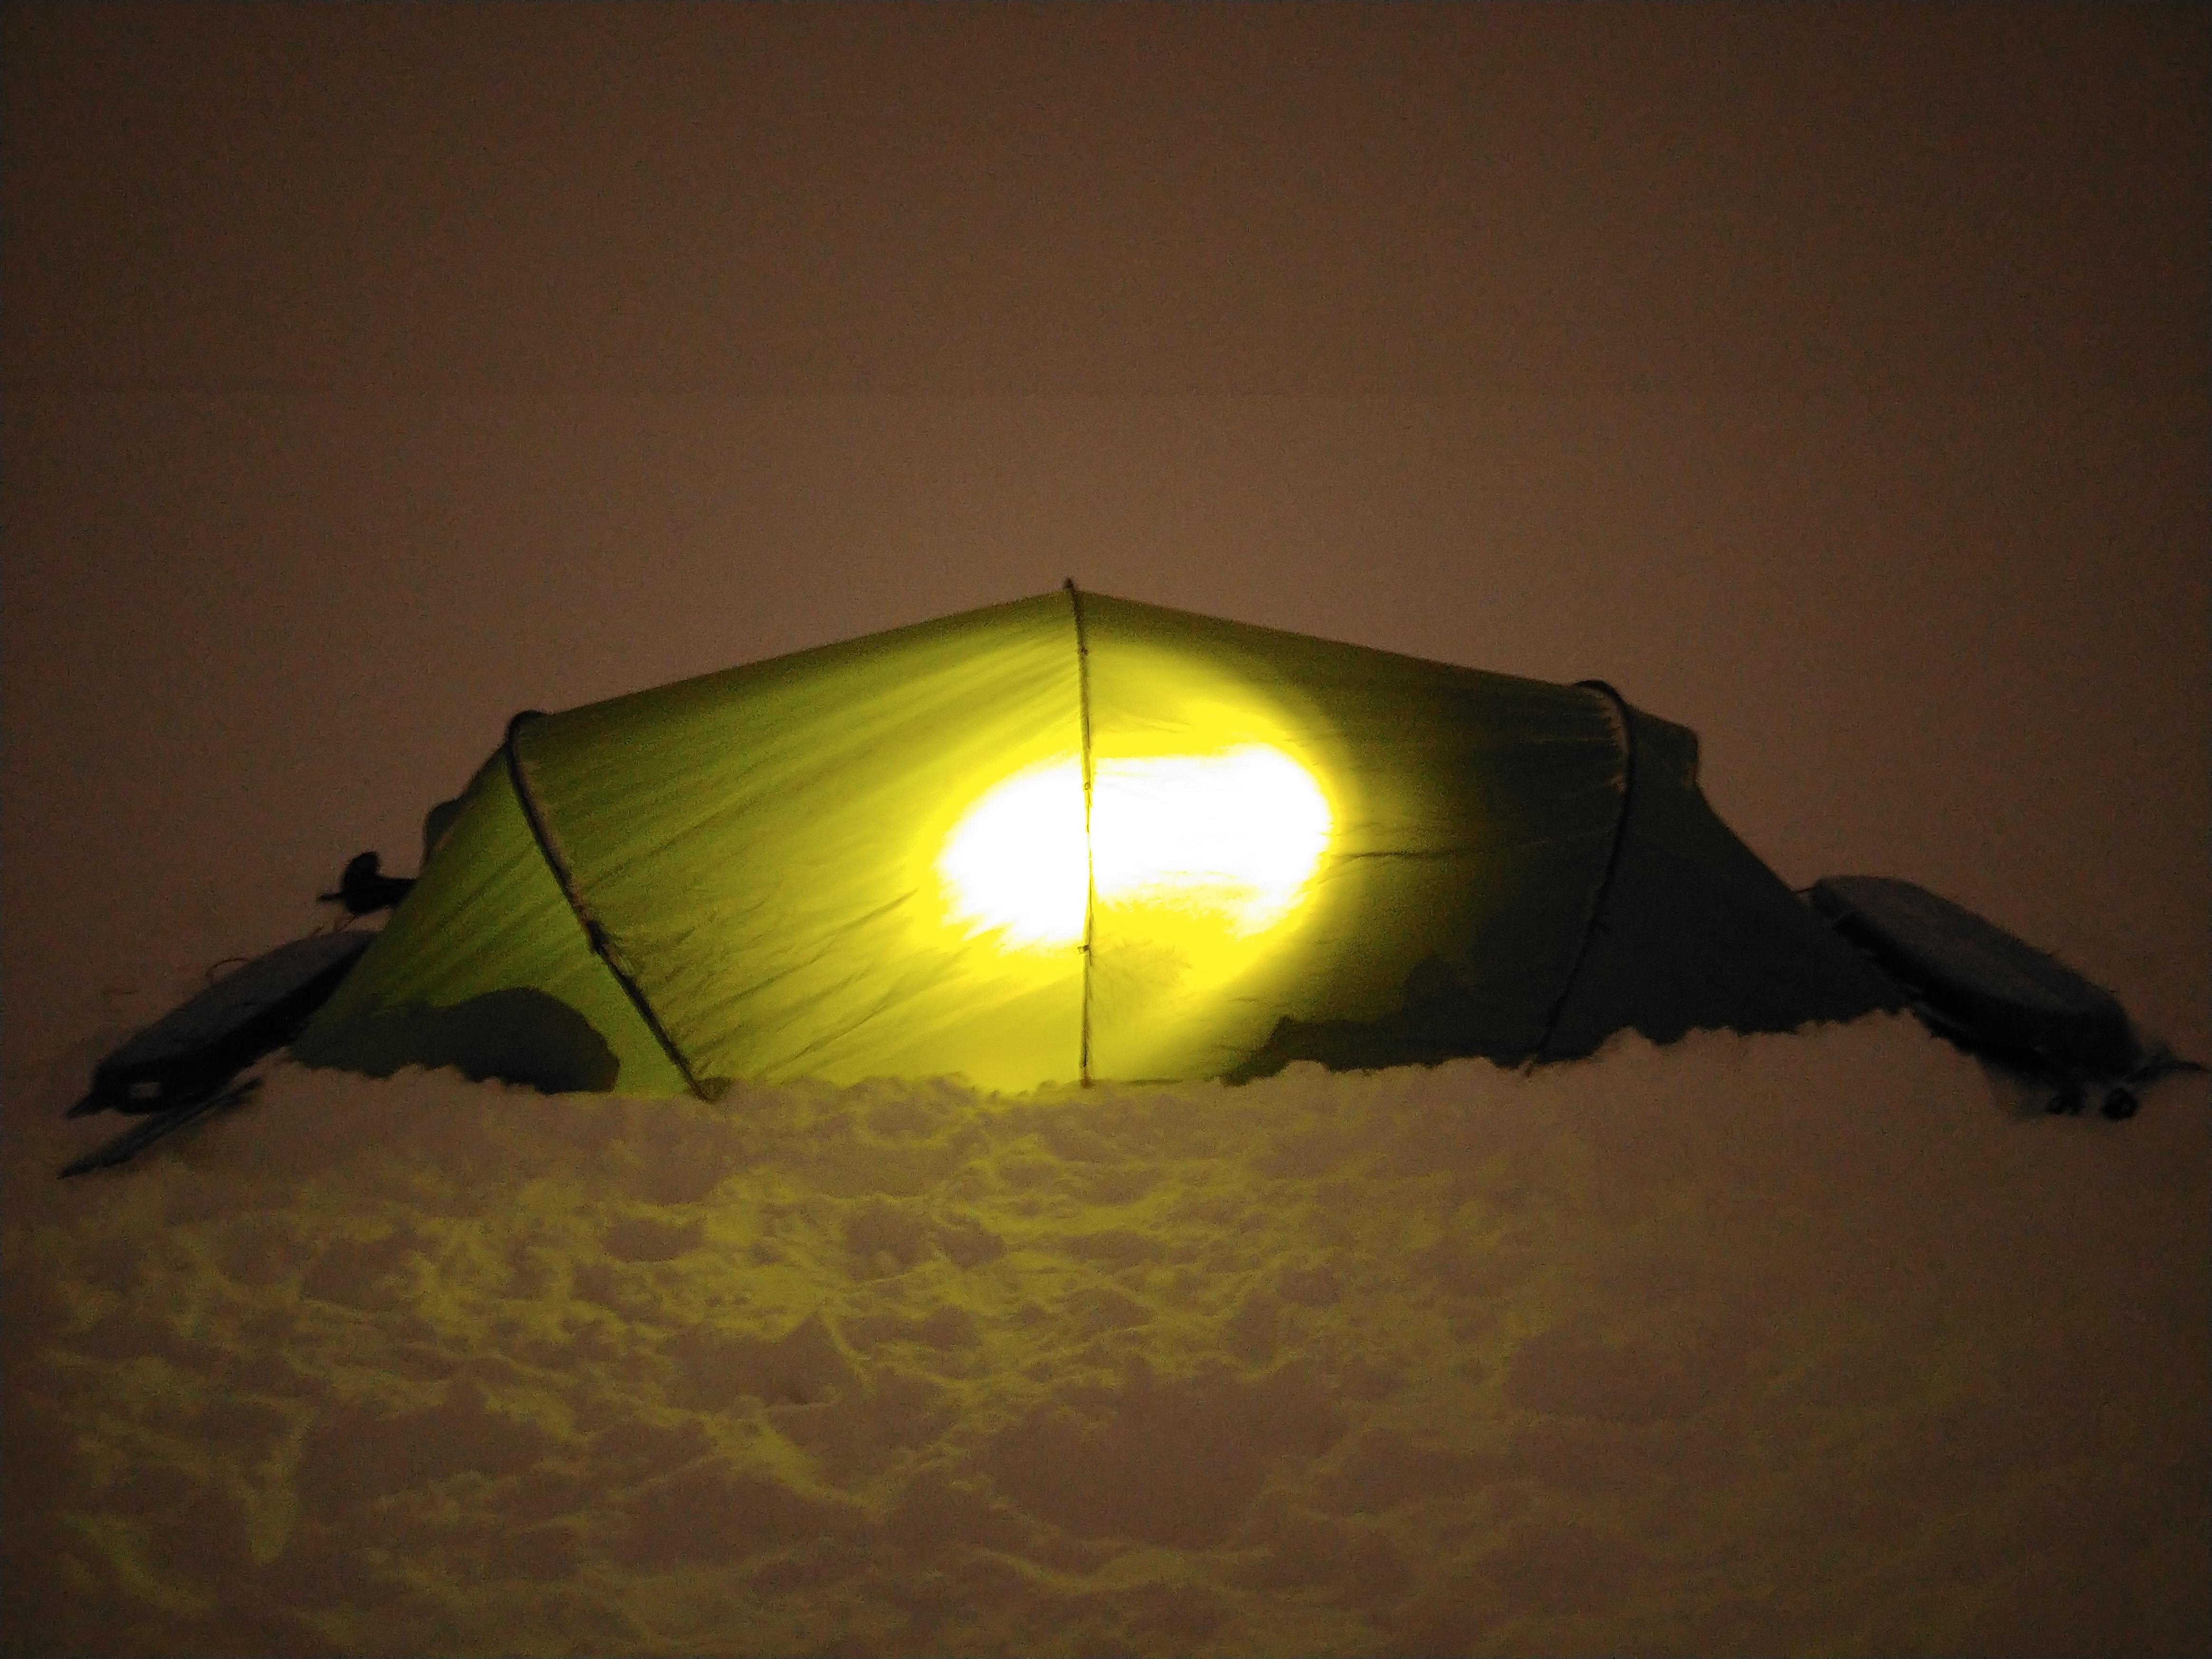
The third photo is of the windward end which does have to take the full force of the storm. You will see slightly more in the way of guy ropes. Rigged like this the tent has taken a 100 kph storm all night with barely any movement. Yes, it did have the internal guys in place. Sigh: we can get that sort of weather any time: a matter of landscape and wind direction. So we travel equipped.
The guy ropes are (from memory) 1.5 mm Spectra inside a woven Dacron sheath. The Spectra is for strength; the Dacron is for grip in the ClamCleat toggles. The pink string in the third photo was only for the photo, not for use in the field!
One extra crucial point. The corner anchors in the second photo are ~120 mm loops of heavy (4 mm) bungee cord, pulled rather tight. But the anchors in the third photo, at the windward end, are SHORT loops of 3 mm nylon cord. You never ever use bungee cord at the windward end: it must NOT move.
Cheers
Feb 28, 2022 at 3:57 am #3741898Thanks for the guidance and ideas everyone.
Sam, I don’t know that my sketching skills would be of any help here, but think of it as full size internal diagonal hoops going from one end on an external hoop to the opposite end of the adjacent hoop. This effectively turns the tent into a 5 hoops tent. Now that would not be the most efficient way to go about making a 5 hoops tunnel as the two diagonal hoops are longer than parallel hoops would be, but it certainly is the easiest to retrofit and allows for mostly clear the side entry door.
Feb 28, 2022 at 6:03 pm #3741971Martin, OK I get the internal diagonal poles, but not sure you’ve actually done that so that you know you can incorporate the new poles into your tunnel tent, and that this will make the tent more stable in wind. Have no idea what your tunnel looks like, and am not sure how “the side entry door” fits into the picture.
Looking at Roger’s second photo on this thread, let’s say your three hooped tunnel looks something like that. As you lay it out, the diagonal pole hoops will run from each end corner on one side of the tent and meet at the base of the original middle hoop on the other side of the tent.
But have you tried it by pitching your tent and then fitting the two diagonal poles inside the tent and securing their ends temporarily. Your two posts are not clear that this works without badly distorting the tent, so suggest trying that first before going further with that approach.
If the diagonal poles can be made to fit acceptably without distorting the tent, then the necessary fittings could be installed. But again, I think you should verify the fit before going further, because neither your tunnel tent nor most others are designed for what you have in mind.
If the internal diagonal pole idea does not work, then scabbing either one or three additional sleeves by sewing them on at the bases of the existing sleeves, as earlier suggested, might be a better option.
You could use your 8.5 mm poles, which I assume are alloy, but you’d be adding a lot of weight, especially if you reinforce all three of the original poles. That’s the reason for suggesting use of the lightest carbon poles from Quest.
Please let us know how things proceed.
Feb 28, 2022 at 6:52 pm #3741975I will try and report back Sam. Since my tent is not an even tunnel and it slightly slopes down from the middle towards the ends, taking the diagonal cross section of that indeed does not make an even arch. Otherwise it would just be a shallower arch like we see on all self standing two poles square tents. I’m hoping the distortion will not be major.
My poles are alloy. A full spare set of poles is 610 grams.
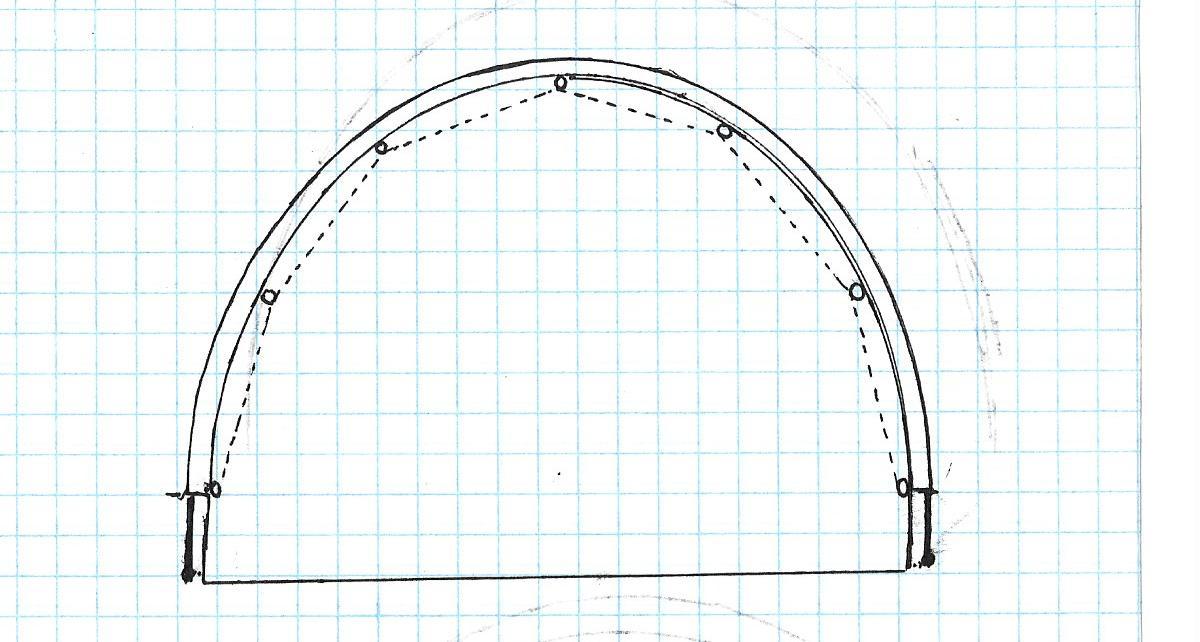
Apr 27, 2022 at 12:57 am #3747712My issue with internal guylines in a tunnel may have been shortsighted. Here is a sketch of a cross section of a tunnel tent, with internal guylines s represented by broken lines:
The poles are external, and attach with pole sleeves sewn to seams in the canopy; so the canopy is already reinforced along the lines where the guys are attached. The tiny circles represent fixtures that hold the guys in place. The fixtures could be some kind of closed snaphook, and the lines would not have to be threaded; but rather, just snapped into place. The ends of the internal guylines could also be affixed to snaphooks; but would use a tautline hitch or linelock fixture so that the guyline could be tightened on both ends after it was snapped in place. For a three hoop tent, there would be three lines in the kit that could be quickly snapped in place and tightened in the event of a storm. And without having to get out of the tent.
Though not an engineer like my Dad, I’ve often fooled around with kids’ bow and arrow sets, and learned that a line affixed in this fashion will greatly strengthen a bow; and with tent making or modding, have noticed how well such an approach can reinforce a hoop. Not sure if the pole sleeves would need to be reinforced at the points where the guyline hooks connect, but it would require only a minimal weight penalty.
And since the lines would obstruct only a small portion of the tunnel, they would be a welcome approach to keep the tunnel from collapsing. And as noted, they could be quickly unsnapped and put away in fairer weather.
Note: While the hooks used by TarpTent might be a bit clumsy for this use, I’ve noticed in researching McGizmo tiny snaphooks, that there are still a number of light alloy or plastic ones available for key chains and the like. Hope this is helpful.
-
AuthorPosts
- You must be logged in to reply to this topic.
Forum Posting
A Membership is required to post in the forums. Login or become a member to post in the member forums!

Our Community Posts are Moderated
Backpacking Light community posts are moderated and here to foster helpful and positive discussions about lightweight backpacking. Please be mindful of our values and boundaries and review our Community Guidelines prior to posting.
Get the Newsletter
Gear Research & Discovery Tools
- Browse our curated Gear Shop
- See the latest Gear Deals and Sales
- Our Recommendations
- Search for Gear on Sale with the Gear Finder
- Used Gear Swap
- Member Gear Reviews and BPL Gear Review Articles
- Browse by Gear Type or Brand.
