Topic

Harold / fleece stitch

  • This topic is empty.
Viewing 14 posts - 1 through 14 (of 14 total)
jimmy b BPL Member
PostedJan 27, 2015 at 12:30 pm

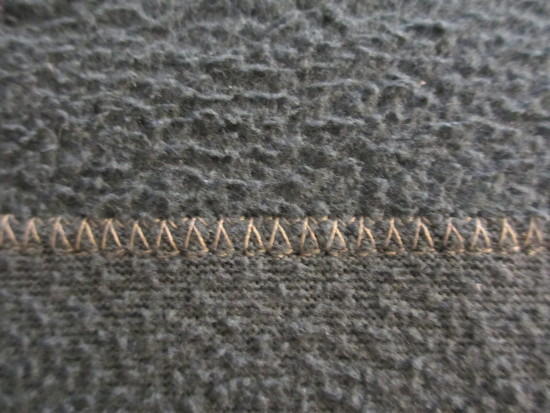
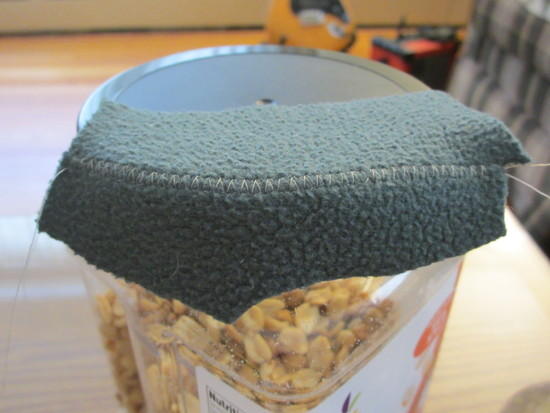
Harold, if you made it here I am getting ready to order up some fleece for some head gear and socks too. If you or others have a computer controlled machine that does a simulated serger stich you can but up two cleanly cut pieces of fleece and run them butted up against one and other centered in the foot and you will have a flat joined seam that is sufficiently strong for most fleece items other than maybe arm to body seams on shirts or crotch seams in pants. The nice thing about this is it lays perfectly flat with no inner seam allowance inside or out to rub. You can also sew curved 3D style items like form fitting socks and beanies, again with no rubbing seams, more like a knitted item. The stich must of course be tight enough to do the job but when done properly you can pull at it without seeing any daylight through it. Here is a pic of a few scrap pieces

fleece stich

stich 2

The fleece seems like something around 100 to 200 wt but it is actually some really sacked out stuff. Not sure how it will go with heavy stuff. I will see. YMMV Don't credit me for this as I see it more and more on fleece items where stretchy materials are joined in side by side for active wear for more movement and venting the garment. I thought I just might be able to use this particular stich on my machine to duplicate the factor look and application. So far so good.

jimmyb

PostedJan 27, 2015 at 3:09 pm

Yes, I just discovered that one too, fleece is ridiculously easy to sew and work with, you don't really even have to match the edges that much, just pull at the side that is shorter to match it to the longer one, there's a fair amount of stretch in it.

I used the flat method on one of the long seams on the roll down part of the hat I made because I wanted it to look ok when that part was rolled up.

No need for computer controlled, all you need is the zig zag stitch adjustment, standard on almost all machines made since I think the 60s.

I did most of the seams just stitching straight down which creates those inner flaps, but where I wanted it to lie flat, I used the zig zag type. I copied roughly the zpacks template for their (way too short) cap they sell made from 100 weight, that's a good pattern.

While sewing store fleece isn't as good as polartec type higher end fleece, it's basically just 200 weight fleece, probably pills more but you can get it in a lot of colors because it's such a popular material in sewing store circles.

fleece is by FAR the most forgiving material I've sewn, so there's very little need for anything fancy at all when sewing it. I wanted to avoid zig zags in too many areas since they will create a sort of cold spot where the fleece is squished down around the stitch.

I'm probably going to make more fleece stuff, I like it, a 1/4 zip vest with a turtle neck is next I think.

If you get the malden mills polartec stuff, that is definitely better quality but I wouldn't bother unless you really want the stuff to be nice and more long lasting, it's about $10 a yard for totally fine fabric store 200 weight fleece.

jimmy b BPL Member
PostedJan 27, 2015 at 3:26 pm

Excellent. I'm wanting some wind proof fleece for my caps and balaclava. I bought some fleece at Joannes or Hobie lobby with the idea of making some fleece PJ's but it quickly got repurposed as a throw on the couch. Time to get some more as its pretty warms stuff for the money. I would really like to see your projects if you get a chance to post a couple pics.

jimmyb

PostedJan 27, 2015 at 4:08 pm

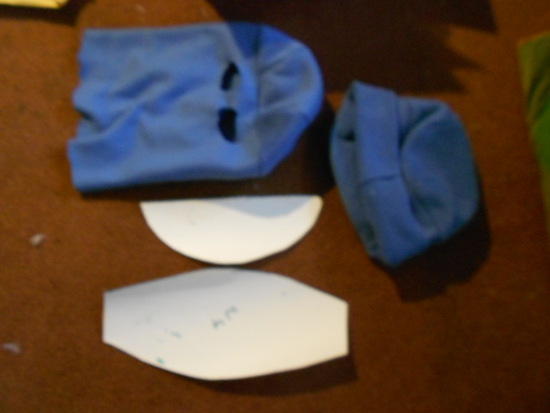
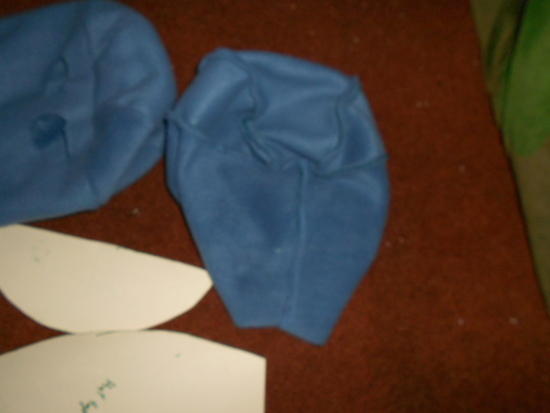
There is nothing fancy about this, I got the basic top template from a zpacks hat, tracing it out on plastic then moving it to pattern paper.

I don't use a pattern for the part that goes down the face/over ears because I make that based on the actual final dimensions of the top circumference.

The eye holes I just cut out with short scissors after finishing it, I just traced out my eyes with a pen then cut it out, ie, a fully custom fit, fleece doesn't seem to really fray, and I didn't want hard edges on them. That one is for sleeping, now maybe I don't have to sleep with a jacket on my head in cold nights anymore.

I had a windstopper balaclava, an old one, but I never liked its design, the single hole for the face, the elastic around the face hole, etc, always annoyed me at night.

If I were to modify this slightly, I'd sew in a few cord holders around the neck so I could use 1/16" elastic drawstring with a cord lock, but I don't see any real need for that at this point.

It took me a few tries to get the balaclava fitted, but because it's fleece, all I did was sew in a bit to make better angles, and cut it so it goes up a few inches front to back.
hat1
hat2

Basically with seam allowance the template should fit your head well, not tight, not loose. Being fleece, fleece stretches so it really doesn't matter that much how perfect it was.

Joe from zpacks clearly has a relatively short distance from eye/ear to top of skull, which made his hat, while typically well designed, basically useless as a multiuse item, and not even long enough to cover my ears, which actually always surprises me, if he just added about 6" of fleece to the bottom part, and made it roll up, and didn't sew in the brim/forehead part, it would be a really useful hat for backpacking, which is why I made mine the way it is, it's how I would do it if I were him, since he never did it, I decided to fix it, which is nice, and easy.

The one without the eye holes I made just to try it, it has a roll up cylinder that is a bit shorter than the balaclava one.

Note that when I measure out the cylinder part, I found that angling in works better, that is, you have your rectangle, then the part that will be behind you, neck, is angled in an inch or two to pull the front edge closer to the throat, this is easy to check sewing since you can sew the first loose angled, and then add more angle as you test it, then cut off the rest, that only works if you use a straight seam joining the two pieces, not the flat seam, which means you have to have it right when you measure that.

It's hard to see the stitching, sorry, I just sew the 3 top templated pieces together, one at a time, it's easy to manipulate the material as you sew, I pin it to make sure it doesn't stretch too far out of position. Once that is sewn together, you try it on after reversing it to be the right side, then once that's right (easy to sew it tighter, not really possible to seam rip I think), you have templates you can use forever.

Jerry Adams BPL Member
PostedJan 27, 2015 at 4:14 pm

most fleece stretches in one direction more than the other. You want the stretchy direction to go around your head, not up and down.

if you make the right and left side parallel, it will tend to stay on your head. If you make them angled, it will gradually slide off the top of your head.

To put it another way, you want the width of the hat the same at the bottom, as the top.

PostedJan 27, 2015 at 4:21 pm

that was what I thought too at first, width top and bottom same, but I found that was not the case, especially the balaclava fit better with the bottom less wide than the top. Because fleece is so easy to sew, it was easy testing and modifying it until it felt right, and I ended up with about 1-1.5" less in circumference on the bottom, angled in from the back seam, which pulls the front throat part in a bit, which is nice. I used the highly scientific method of sewing it straight at first, trying it on, then sewing it in to create that angle until it fit about right.

Mine are a bit loose on top.

I just checked, and you're right, the fleece does stretch more one way than the other, I must have just lucked out and accidentally gotten the right direction, thanks for noting that jerry.

By the way, if you want something to boost your sewing confidence, this is it, lol, fleece is so absurdly easy to sew it's hard to really explain, and it's hard to see mistakes, and you can get your fit exactly the way you want it.

Jerry Adams BPL Member
PostedJan 27, 2015 at 4:27 pm

that's a good point, bottom less wide than top would slip off head even less

time to make a new hat

yeah, sew it, try it on, sew it again, until happy

hard to rip out stitches though – you can only go smaller

but a hat uses so little fabric you can just start over

one thing bad about fleece, is I've found it difficult to mark a line where I want the line of stitches to go

another thing is to sew the row of stitches, try it on, repeat until happy, then cut off the excess. It's hard to sew a line of stitches too close to the edge of the fleece.

I have learned the hard way that fleece stretches more in one direction

PostedJan 27, 2015 at 4:32 pm

"if you make the right and left side parallel, it will tend to stay on your head. If you make them angled, it will gradually slide off the top of your head."

I had to read this twice, I think that's what I did, re the template I grabbed from the zpacks hat, which has the two side pieces, parallel, and then the part that goes over the top of your head. And it does stay on your head, after I made it, I lay in bed for a while seeing how it stayed, and it did, then I wore it around the house for a few hours, seemed good.

It makes total sense that the angled in way of making these would let it slip up, since the actual force is sort of pulling it up, go joe zpacks design! which I'm sure is an old design from way back, but it's a good one.

Still need to test it backpacking, a cold breezy night would be ideal, grr, time is the missing element here at the moment though. If I could just figure out how to get paid to not work, that would solve some problems….

Jerry Adams BPL Member
PostedJan 27, 2015 at 4:35 pm

during the day it doesn't matter, but when I wear the hat overnight, as I toss and turn, sometimes the hat will gradually slide up and not completely cover my head

PostedJan 27, 2015 at 4:37 pm

since I had no idea really how the bottom part would work, I just figured a straight cyclinder would be good, but that doesn't work very well, your neck is exposed.

So I looked at how the thing actually fell on my shoulders/neck, and I realized, and also compared with my old balaclava, that in fact, it angles up from front to back, to account for your shoulders, and it angles in a bit to pull the front in to your neck.

I thought I'd angled in it more but I just measured and it was only about a 1-1.5" circumference difference, ie, if you fold the piece in half, about 1/2" – 1" indented to the bottom, with the angle starting roughly where your back of skull starts going in towards your neck.

I found it kind of cool to realize that I could make this thing 100% custom fit to my head, unlike almost all balaclavas, which are usually one size fits all. Particularly with the eye holes. If you are wondering why there is no mouth hole, its to keep the air warm at night that I am breathing. I found the eye holes/neck opening have enough air flow to avoid feeling stifled, and since it's fleece, it can get a bit damp from my breath at night, no big deal.

PostedJan 27, 2015 at 4:45 pm

posting at the same time.

Heed jerry's words, everything he says is right about sewing it. Forget ripping it, start bigger if in doubt, it's super easy to sew smaller, then cut, as he notes, the edges, than it is to rip out from that fuzzy stuff.

Remember, if you sew a flat seam, you really won't be able to rip it easily, so make sure you have your template done and tested before you try that.

re making the lines, I used sharpies. I know, messy, maybe chalk is better, I know I had sharpie ink all over my hands as I sewed it, it didn't seem to stick very well to the fleece but it was very easy to see, unless it's black fleece of course, then chalk is probably the best bet. I don't recommend sharpies, it was kind of messy, but it did work and was easy to do, I was just trying it out to see if it worked so I wasn't worried about finesse.

As sewing projects go, this one was one of the more rewarding ones, since I went from no real template to a complete hat, to two complete hats, custom fit, in an evening, and the templates I now have make creating more trivial.

Jerry Adams BPL Member
PostedJan 27, 2015 at 6:53 pm

"Heed jerry's words"

Now if my wife just took that to heart : )

I use black fleece so sharpie doesn't work

White chalk sort of works

And do the best you can, then measure with a ruler, and if it angles a bit, just eyebal another row of stiches that angles better.

Next – fingerless gloves. Just trace out around your hand. Make the front and back piece the same. The fact that it's stretchy makes it easier.

jimmy b BPL Member
PostedJan 29, 2015 at 8:42 pm

Just getting back to this thread…

Thanks Harald for posting your projects.

Thanks Jerry for posting about the stretch properties of fleece. It certainly proves out with the freebie Montbell beany I have on right now. Will come in handy when I get started on my head gear.

jimmyb

jimmy b BPL Member
PostedJan 29, 2015 at 9:01 pm

Harald I must have a Big Head like the wife says I do. Most all of the store bought beanies don't fit me over the ears enough either. I like my old Lowe Alpine hat that is cut on the lower band section to curve far down around the ears and back of the neck. It covers nicely and I can double it up over ears or just roll it up if I want to vent my ears. I will probably just remake this design and add a 4 piece rounded top construction instead of two piece construction this one has consisting of two side panels. When my LA is on it kinda looks like an elf hat. Not that's a bad thing
:)

jimmyb

Viewing 14 posts - 1 through 14 (of 14 total)
Loading...