Topic

MYOG Lightweight tent full build.

  • This topic is empty.
Viewing 12 posts - 1 through 12 (of 12 total)
PostedJan 27, 2015 at 10:44 am

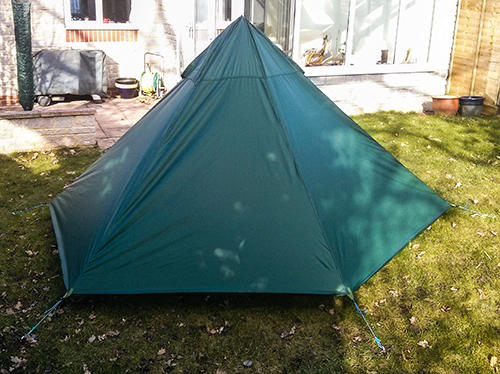
Well I have decided to take the plunge and build my own 4 season tent for light weight hiking.

Its not finished yet but decided to post a few pics in the mean time.
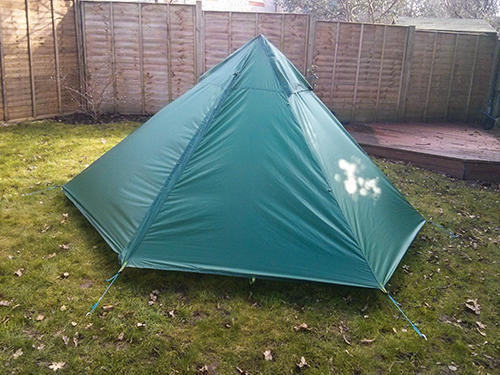
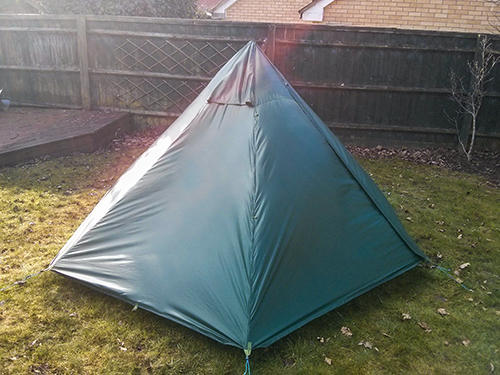
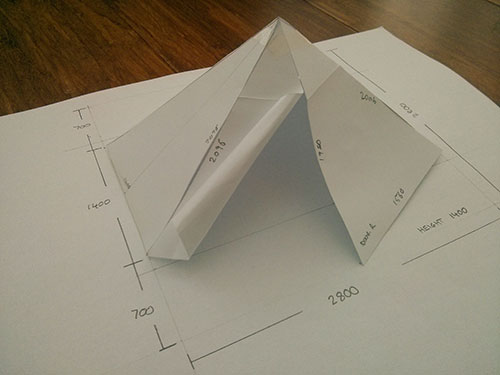
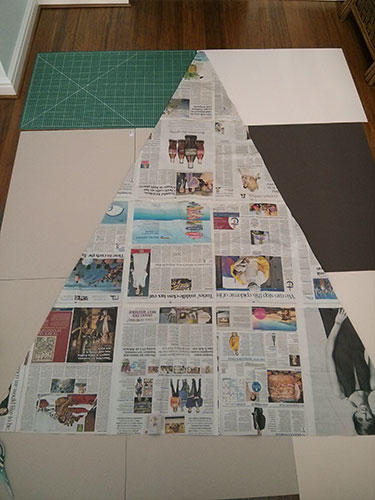
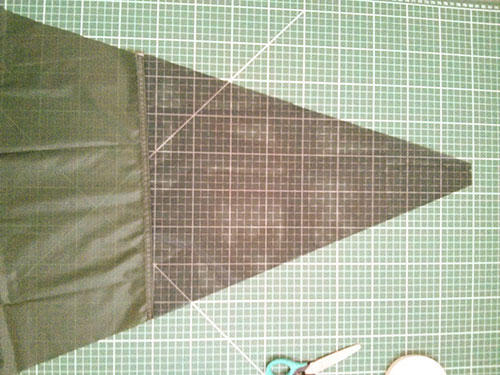
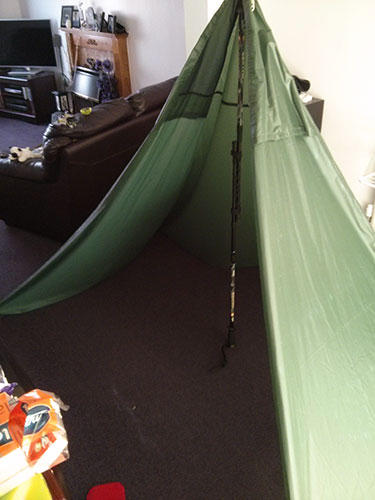
Went for a squashed hexagonal design, pyramid type tent using walking poles.
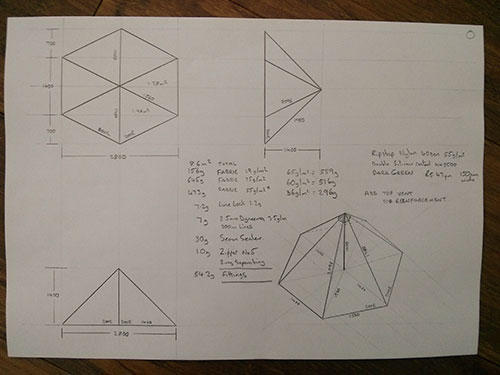
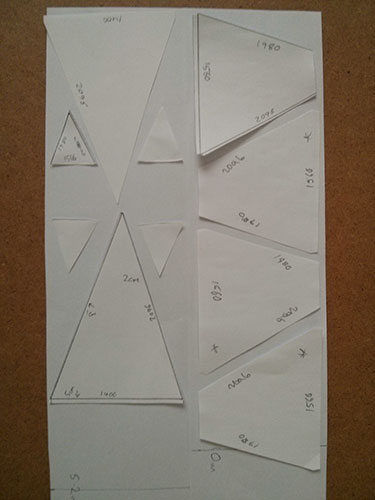
Using:
SilNylon 55g/sqm 40 denier double coating both sides 3500hh
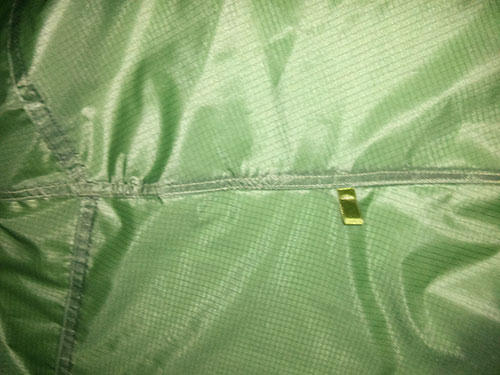
Grossgrain for tieouts.
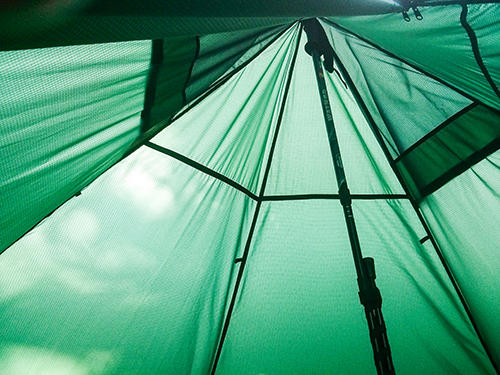
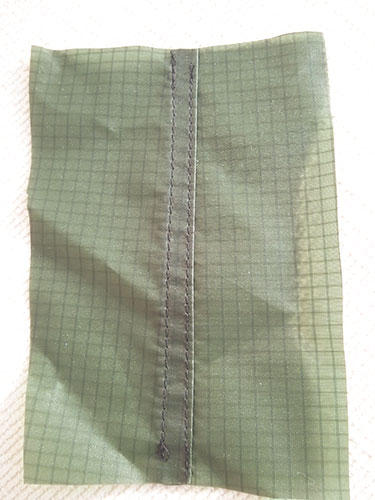
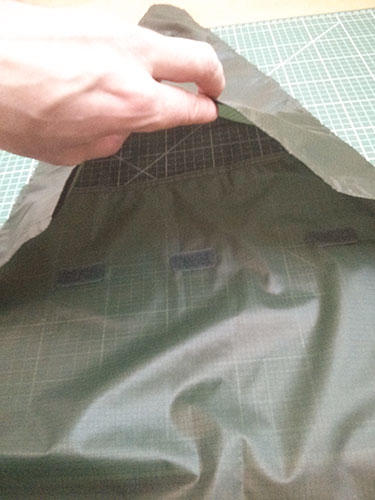
seam bias tape in all seams for strength and waterproofing,
beeswax melted into the stitching for waterproofing.
Dyneema 2.5mm cord
Mini Line Locs

Estimated about 580g – 680g weight
Size 2.8m square footprint.
Pitched height will be about 1.5m / 1.6m
Inner nest initially a polycro bathtub floor, and separate hanging mesh/pertex nest.

Also a separate storm rigging kit for extreme winds and weather :)

Some pics of how its going so far.

Tent Model

Tent Design

Tent Cutting Layout

Tent Template

Tent Seam Testing

Tent Main Seams

Tent Vent Mesh

Tent Vent

Tent Test Hang

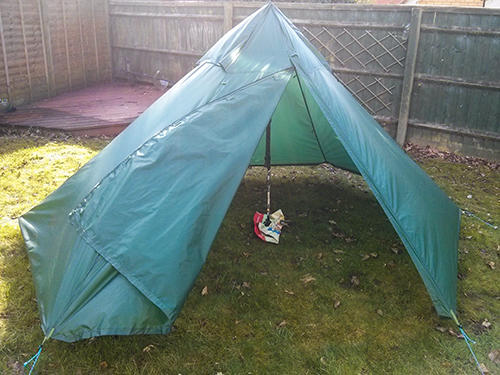
Next Step is creating the storm flap and installing the zip into the doors. Then attach the doors.

Jerry Adams BPL Member
PostedJan 27, 2015 at 11:07 am

Looks good so far

Nice to see another MYOG addict created. At least you're off the streets : )

J-L BPL Member
PostedJan 27, 2015 at 3:54 pm

I like the squished hexagonal design – looks like it minimizes the footprint but still gives a lot of interior room.

I've never heard of melting beeswax into the stitching. What is the benefit of that over seam sealing with silicone?

Regarding the polycryo, I have read here that it slips a lot on snow

PostedJan 28, 2015 at 1:28 am

The sealing is an experiment

I use bias tape in the seams so they are waterproof except for the holes and thread

I dont like using silicone or shoo goo for PU its such a mess,

So i rub pure beeswax (high melting point) into the stiches, heat with a hair dryer and the thread sucks up all the melted wax, done inside and out. Neat and tidy and flexible.

Not tested fully yet but working so far in small tests.

:)

HkNewman BPL Member
PostedJan 28, 2015 at 7:13 am

Looks sweet for about 600grams. What's the storm rigging plan (if you can share it)?

PostedJan 28, 2015 at 10:08 am

Well you will see it later

It will be a kit of cord,
Using special attachments inside
I will put a long loose length of cord between the stake out pegs on each panel using the existing stakes., and take it inside,
then run a cord from the loose line to the top of the support pole and tension on special attachments.
hard to explain, but it forms an inverted Y on the panel of fabric between the seams and strengthens the structures.
then three more lines on the outside from the top of the tent out on long lines to pegs.

you will see when its done.

Ben Wortman BPL Member
PostedFeb 6, 2015 at 1:07 pm

Looks good!

MYOG is like a drug. You try it once and you can't stop!

J-L BPL Member
PostedFeb 6, 2015 at 8:06 pm

Nice work. That first pitch of a MYOG tent is always exciting :)

Jerry Adams BPL Member
PostedMar 29, 2015 at 7:22 am

Nice looking tent, good job

630 g = 22 ounces isn't bad

You don't need the fabric strip behind zipper or velcro. Just takes a bit longer to make. But when my tent rips and yours doesn't I'll have to change my opinion : )

What's the peak height?

42 minute video???? I skipped through it a little : )

Mole J BPL Member
PostedMar 29, 2015 at 10:04 am

Very Tidy!

A lot of work. Most impressed. Looks very solid.

Have you tested the 'storm guying' method yet? – with and without
Is it your own technique or from somewhere else? Not seen it before.
Not entirely convinced by the interior lines. The outer long lines should help.

(Have had a similar looking Golite Hex for years and in quite wet n windy conditions)

Viewing 12 posts - 1 through 12 (of 12 total)
Loading...