I wanted a chest holster that would carry and protect my Sony Nex-6 without discouraging me from taking photos by being cumbersome. There are several options on the market that would have done it acceptably if I planned to use only one lens, but I wanted my camera to be equally supported and consistently located whether I was using my big telephoto or much smaller landscape lenses.
I considered just having the camera hang from my chest, with potentially some badge reels attached to the lens and my hipbelt to keep it from bouncing, but I didn’t like how exposed the camera was and or dealing with the badge reels.
I emailed Chris Zimmer about it making it for me, but he warned me that this sort of project would take quite a bit of his time and would therefore not be particularly cheap. He was right! (More on that later.)
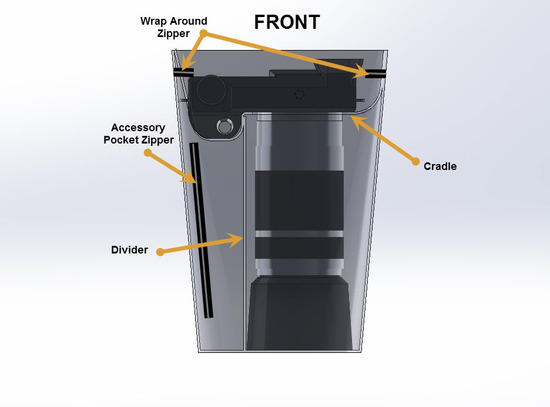
I decided to jump on the MYOG train and bought an old Singer and some fabric. I wanted a simple trapezoidal design with a cradle for the camera body and a lens “hole”. The rest of the bottom would be taken up by an accessory pocket. (See early design drawings below.)
I sewed a test version with some cheap fabric and realized that in order to keep the cradle (and therefore entire holster) from sagging I needed stiffen the walls. This was the beginning of the scope creep of the project…
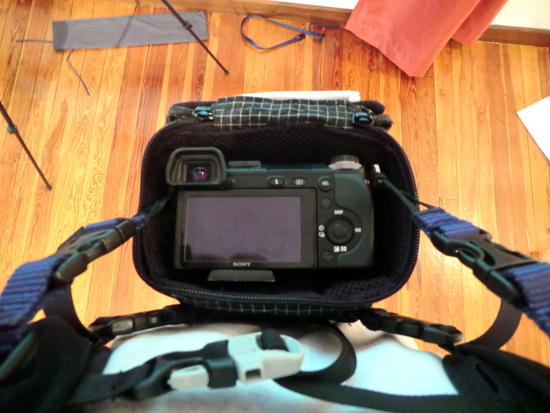
I bought a sheet of 1/32” HDPE and cut and formed it into the basic holster body and body cradle. I then sewed in 3D mesh for the lens “hole” and the cradle. (My sewing machine didn’t like sewing 3D mesh and HDPE.)
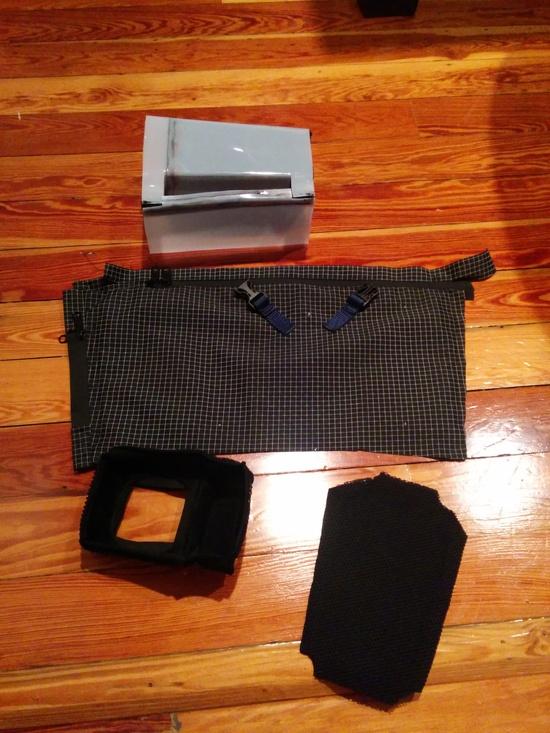
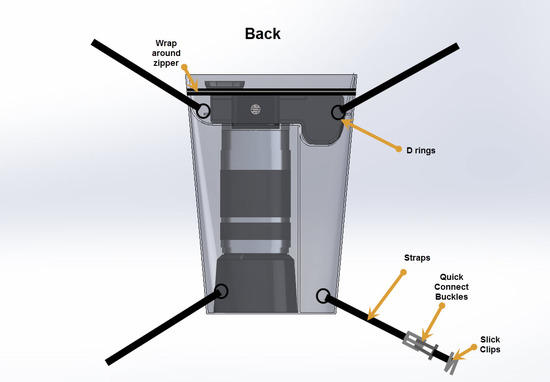
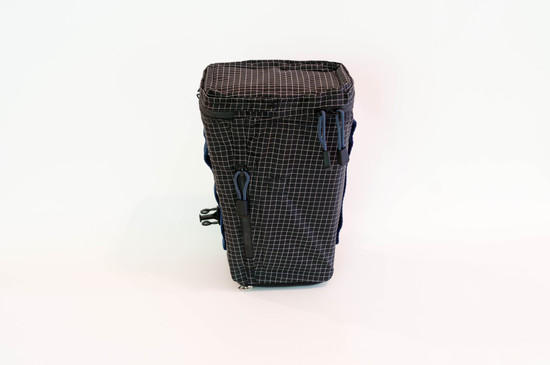
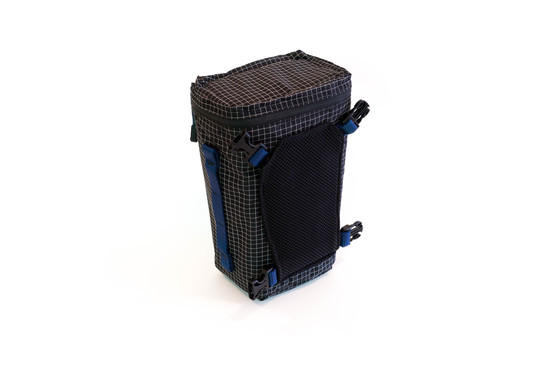
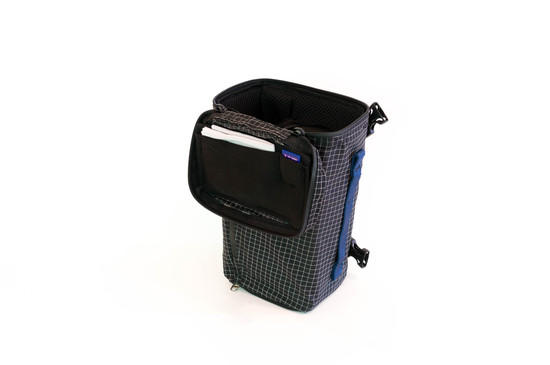
The body is made out of Dyneema X with a 3D mesh back panel and side buckle releases. I put daisy chains on the sides to allow for attaching lens pouches. (I doubt I’ll use this feature)
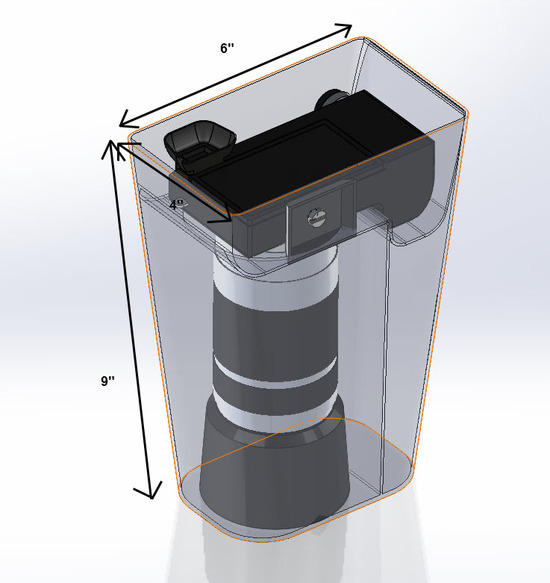
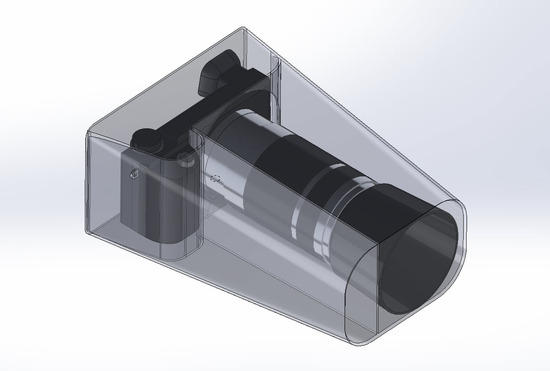
The cradle is custom fitted for my camera body and uses elastic around the lens hole so that it can handle my largest lens hood while still supporting the camera body.
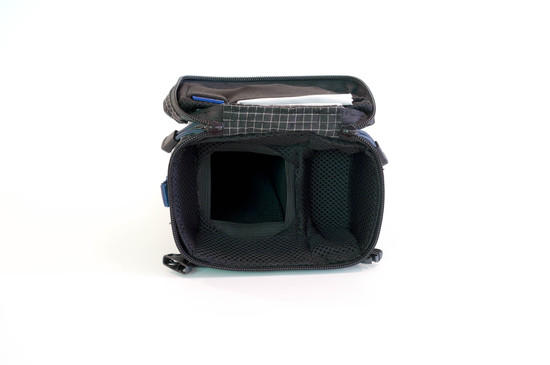
The lid (which will stay open most of the time) has a magnet to keep it from flopping around. I used a bit of old T-shirt to make a stretch pocket for a microfiber cloth and an extra SD card.
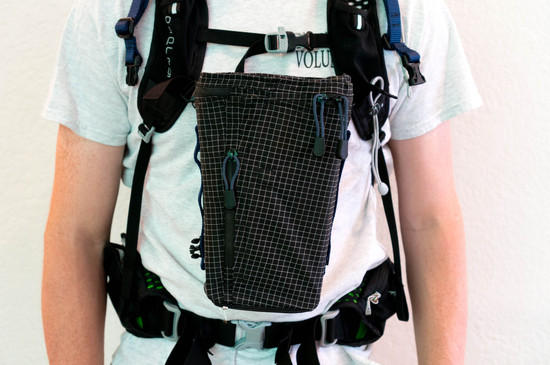
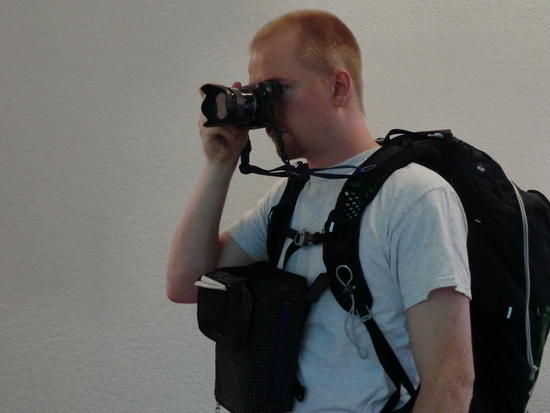
The holster attaches to my shoulder straps and is very secure with just two straps due to the way the weight is distributed.
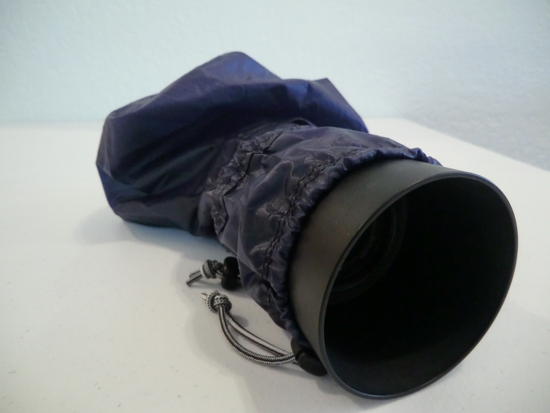
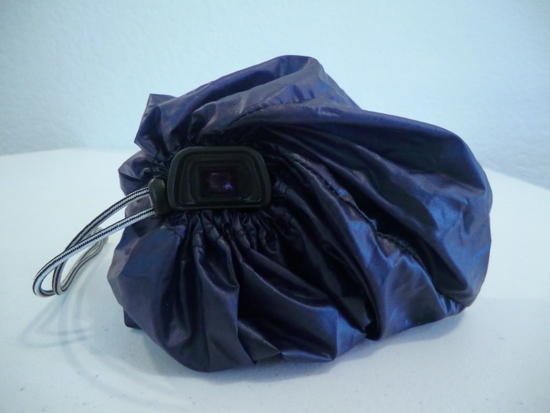
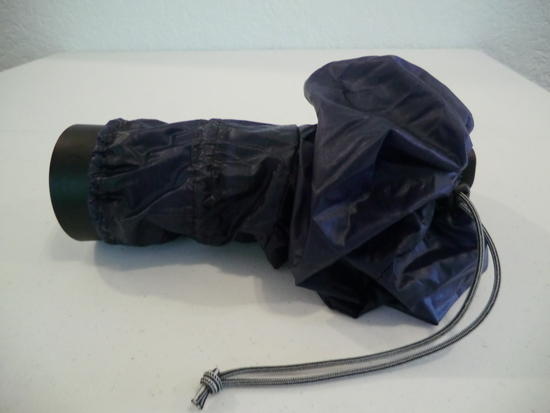
Finally, here’s a little pocket (with drain holes) on the bottom for a rain cover.
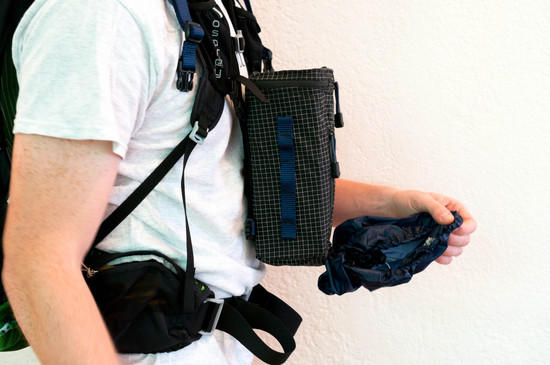

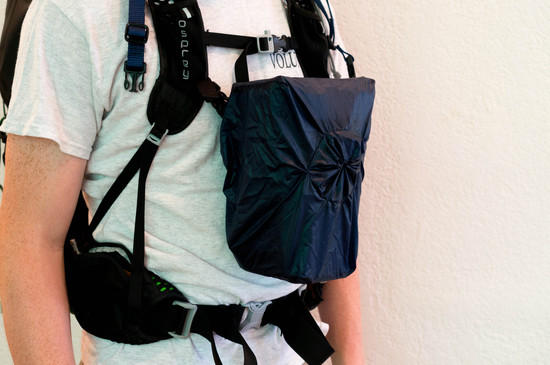
It looks a little funky because it doubles as a rain jacket for my camera. Because silnylon is so thin I can more or less successfully use the camera without being able to see any of the manual controls.
The camera will spend most of the time on adjustable straps that hook up to my shoulder straps and allow for me to move around confidentially with the lid open and hopefully allow quick access to my camera.
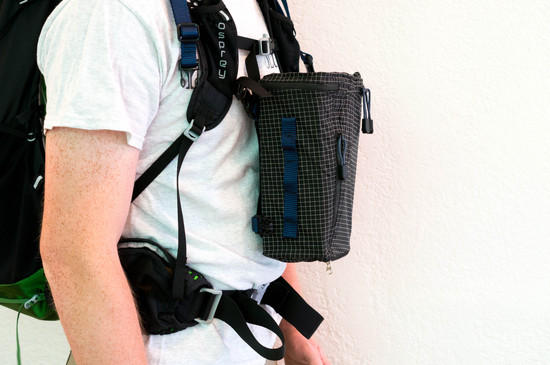
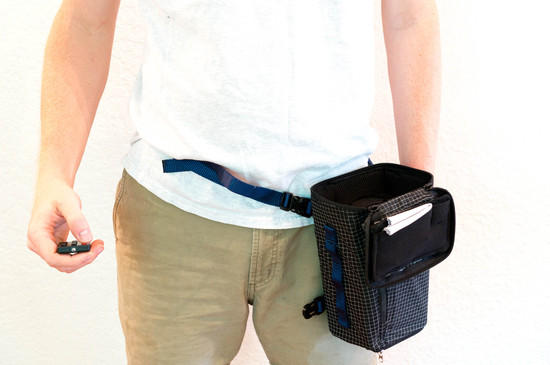
For when I'm not wearing my backpack, the holster rides surprisingly securely and comfortably on my hip attached to my belt.
It’s a bit overbuilt and therefore heavy, but overall I’m pretty happy with the way it turned out. It took me a LONG time (like 30-40 hours long) as I was doing some of the designing and learning to sew on the fly.
Lessons learned:
-Potentially use stiff 1/8” foam instead of HDPE for holster body
-Lose the daisy chains (unnecessary)
-Lose lower side release buckles (unnecessary)
-create body out of multiple pieces of fabric instead of one wrap around piece for easier construction (it’s hard to line everything up with a one piece design)
I think that with these and a few other changes I could make a case that weighed half as much and took less than half the time with similar functionality, but I don’t have the heart to do it over again at this point.
EDIT: Wow, the post got long!

