I know nothing of the Golite tent but am a happy owner of the Rainshadow which I have come to love –
Starting in 2010 I went looking for ways to drop pack weight. The heaviest item I was carrying was a 6-1/2 pound Timberline tent, so I figured I'd start right there!
After some false starts I got lucky and found a used TarpTent Rainshadow II for sale here!
I was long familiar with using tarps for backpacking shelters, but I was admittedly somewhat skeptical about the practicality of this shelter at first because it seemed somewhat flimsy and I was worried about the dreaded "spray" that is said may penetrate such tents in hard rain.
Thus it was with some trepidation that I ponied up my 200 clams. After all, if a tent leaks when you need it most, what good is it?
I set it up in my front yard several times to learn about the tent and introduce my wife to it ( See honey? We’re going to be sleeping in that! ).
I believe this practice is essential with any new tent, and besides I wanted to seam seal it myself.
The very first time I ever set it up. Simple, but still learning how to get the floor tight.

I was amazed at the light weight and space from the start. It has all the room two people and all their gear could ever want and then some.
It is listed as a three man tent and I feel that is an honest rating.
Only 43 ounces? This is less than half the weight of the tent I had been carrying, and it uses less stakes to boot!
This tent is very easy to set up. It uses a long multi-sectioned pole for the back arch, a trekking pole or two in front and just four stakes for the basic setup. It can be setup using one pole or two in the front. I have found that one pole is entirely sufficient and seems to leave more clear space to get in and out.
The front and back stakes are the critical. If these pull out, down comes the tent. The two other stakes are used to pull out the front corners. That’s it!
The tent does have two side tie–outs in the middle that are not ordinarily used. Get string, tie ‘em to these tie out points, and carry two extra stakes.
If you get any kind of high winds hitting the side of the tent, you’ll probably wish you had used these side tie outs. Two stakes and string is about an extra ounce, and with this tent you can afford the weight!
I believe the use of these side tie outs will greatly reduce the chance of getting rain blown in the sides of the tent through the mesh, because you can pull the sides out so they overhang the side significantly, and in practice I always use them.
I also seam sealed the tent. This is essential with Tarp Tent products. To save cost they don’t do this at the factory, and I couldn’t be sure the previous owners had done a thorough job of it.
I don’t mind, it is a good way to familiarize yourself with the tent. Seam sealing is done with Silicone sealant thinned white gasoline, and simply painted on the seams. Don’t scrimp, do it right or you’ll get leaky seams!
Some folk recommend painting a few stripes of this sealant mix on the floor – snail tracks – to prevent sleeping pad migration on the silnylon floor. I didn’t and haven’t had any difficulties with nocturnal pad migration.
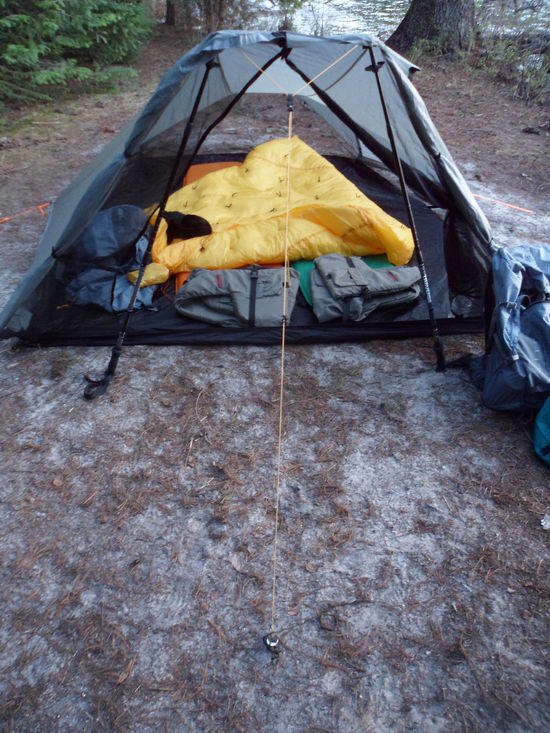
My wife and I always carry an eight inch one ounce aluminum snow stake for use as a potty trowel. Now it serves double duty as a magnum tent stake for use in loose soil.
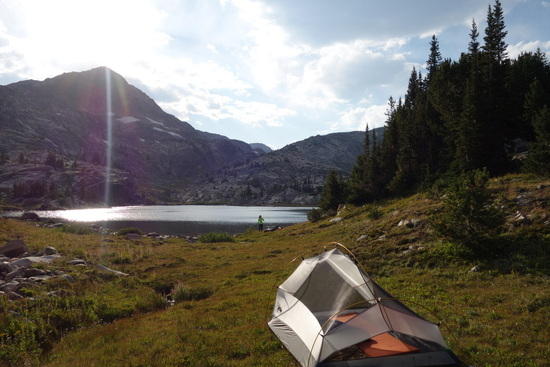
In the photo below we camped in sandy soil at a lake shore. The extra-long and wide snow stake firmly anchored the front cord, and I used two of the ordinary stakes supplies with the tent to nail down the back cord.

After several trips I stopped using a ground sheet with this tent. This saves an additional few ounces of weight but also saves setup and take down hassle. I am happy to report that the silnylon floor has held up perfectly well so far in various terrain. Tarp Tent says ground sheets are not usually needed and I believe them.
This is a big tent and at first I was worried about finding sufficient space to pitch it, but as I came to know it better such thoughts have faded away.
One time the only dry-ish flat spot I could find wasn’t quite big enough. No problem, I simply pitched the tent right up against a small fallen log, ran the back cord over the log and tied it off to the base of a small bush. Tying the front or back cords off to a bush is also a great way to solidly anchor them if the soil is loose and you don’t have a big snow stake handy.
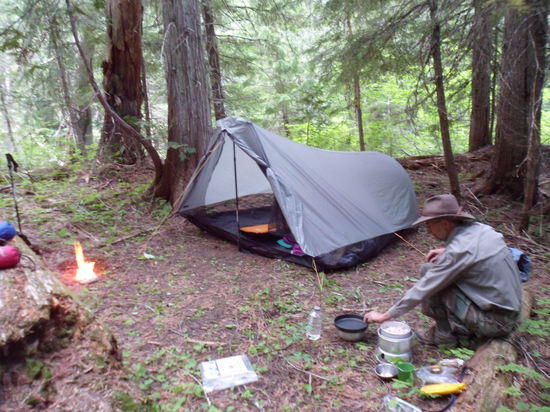
Another time we had hiked long and hard one day, and found ourselves nowhere near an established camp site at the end of the day. We simply moved off the trail to an area under mature trees with no undergrowth and with our boots scuffed, kick and built up a flattish area just big enough for our two sleeping pads side by side and pitched the tent over that. The tent itself was not at all level, but the little dished out area in the center was good enough to sleep in. Thus, like a true tarp you need not find a level spot big enough for the whole thing, just big enough for your bodies to occupy.
The floor is connected to the canopy only by mesh, and you have plenty of leeway to play with.
You cannot hang the tent over obstacles and bushes as you can with a true tarp though.
In the photo you can see one corner of the tent is hanging up in the air a bit and the opposite corner is bunched on the ground because of the uneven site. So? Worked fine anyway.
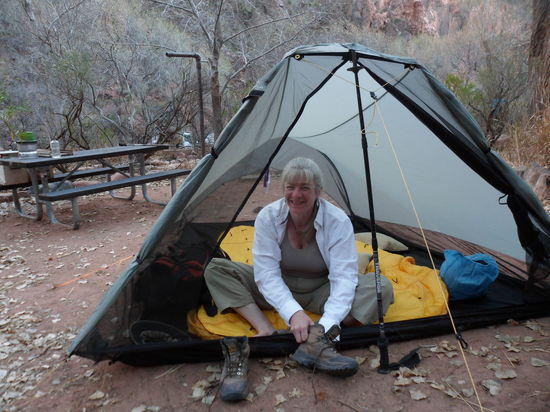
This shelter is somewhere between a tarp and a regular tent when it comes to privacy. Ordinarily this is of no concern to us, but on a recent trip to the Grand Canyon we found ourselves at a crowded camp ground. No matter, just face the tent in a private direction.
This tent has one entrance, unlike some fancy tents with two doors. We don’t mind as there is more than enough clear space for two people to use the one door without having to climb over each other. Lots of elbow room.
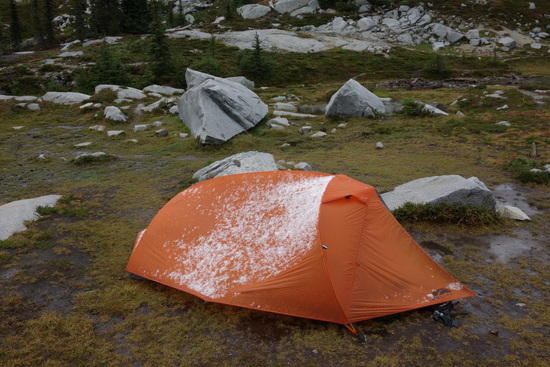
Last summer we spent two nights camped in an exposed location at 6,000 feet at fault lake Idaho, and one night a terrible storm blew in.
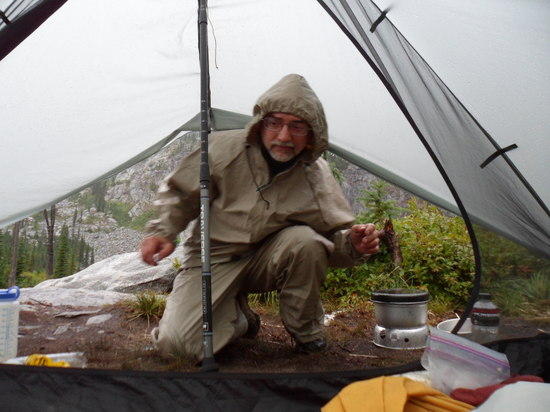
The performance of the tent in that nasty storm did a whole lot to boost our confidence in this tent. The high winds and rain hit the tent broadside, and the tent was pitched in an exposed spot on a ledge above the lake. This was the worst position this tent could have been set up in. We did ship a little water blown in the exposed side, but we and all our gear was bone dry. The silnylon floor with no ground cloth did not soak through, and the canopy did not mist in the heavy, wind driven, all night rain. This tent is serious shelter.
That morning I discovered the vestibule of the tent is plenty big enough to cook in, as I fed my wife and myself, then scurried out into the storm to feed the three other people we were with who were camped nearby. This is a big vestibule!
– I also own the smaller version of this tent, the Squall 2, and use that as a roomy solo tent. I think the smaller version is even more weather worthy than the Rainshadow.
Anyway, as I wrote, I know nothing of the other tent you are considering, but maybe all this will help you decide if a Rainshadow 2 fits yer bill.