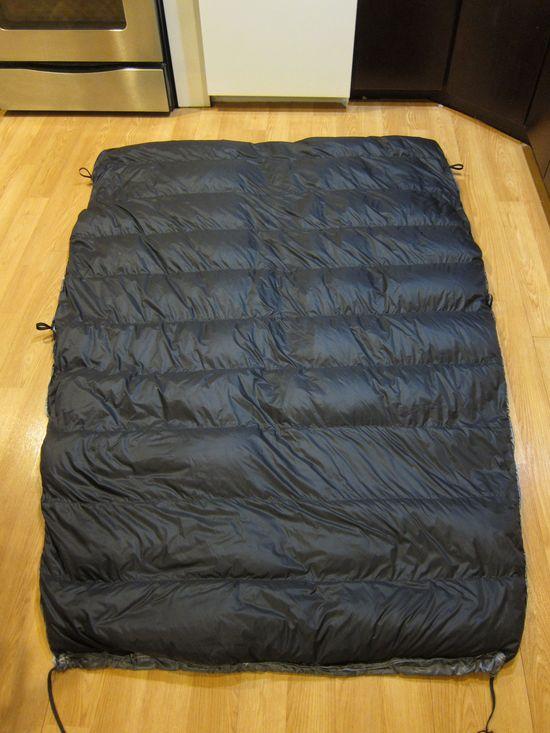
I am really happy to be finished! It looks like a 7yo sewed it, but it's awesome to me. This is my first thing sewed, except a few practice seams on scrap.
I'm writing as much detail as I can here, because reading a few good threads on here was the only way I could have managed this thing!
Specs/materials:
23oz with 14oz of 900fp down (http://www.downlinens.com/products/premium-washed-down)
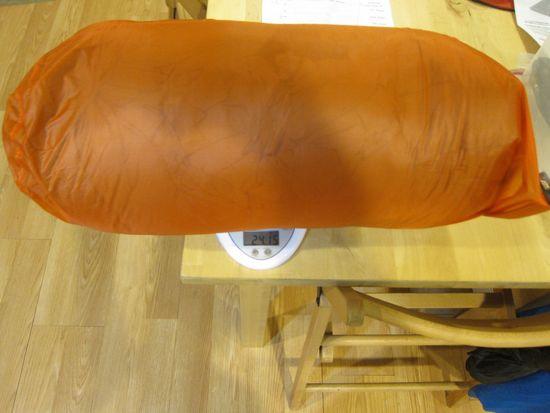
Just fits into a 13L S-to-S Ultrasil nano drybag with enough to roll top 3 times (weighs 1.07oz, scale not tare'd in photo). I'll use a trashbag after a few break-in trips.
Pertex quantum shell, gray
M-90T liner, black. Both from Thru-hiker quilt material-only kit (was enough fabric, but not much leftover, I should have left on most of the ~12" scrap I cut off)
2" nanoseum baffles (had some of this)
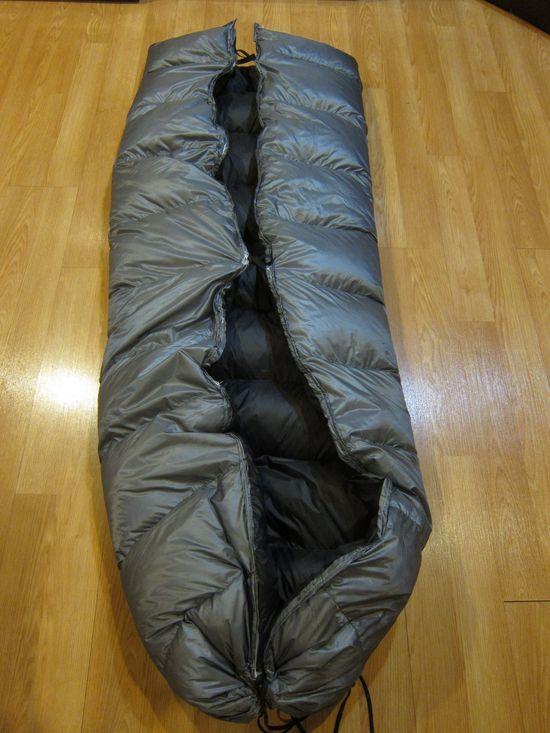
Drawstring footbox and 2 pairs of pad loops. I'm going to try it out first, but I plan to add some velcro closure for the lower few feet.
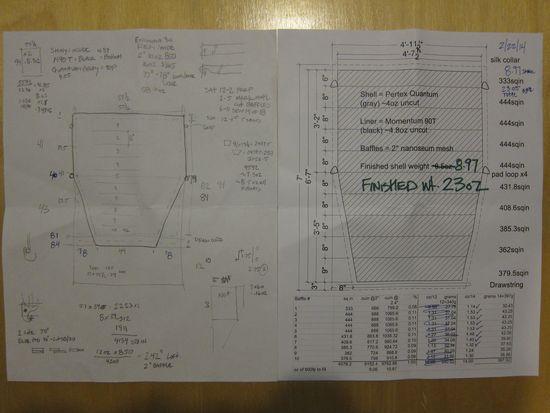
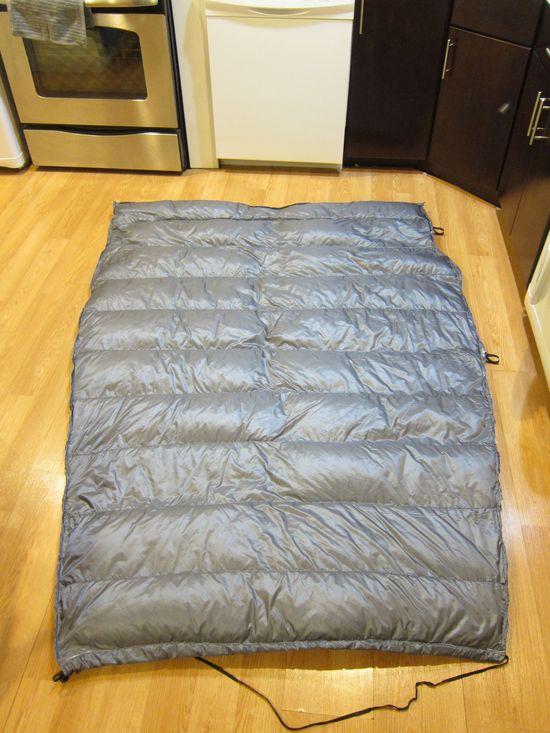
The dimensions on the drawing are before stuffing, baffle shrinkage is real! Next one I make (HA!) will be 6" longer.
I'm 5'11 and it comes up to my eyebrows without stretching, feet in footbox. I'll need to get sewing on a hood. Not tested on a pad yet, but width feels good. Footbox closes up nicely.
10 x 8" horizontal channels, 9 baffles (see the drawing).
Final cost $160 (+thread, scissors etc. another ~$20)
20 hours of labor, plus research design and purchasing (which I chaulk up to learning a lifetime skill). I saved at least ~$250 compared to a similar spec'd quilt (EE Rev reg/xwide 850fp 20f = $430), so saved $12/hr and enjoyed learning the process. I could make the next one in 14-16hrs, lots of head scratching time, setup/cleanup, trial/error.
I didn't measure loft since it needs to settle around, but the baffle height is exactly 2" (carefully measured thread-to-thread) throughout, and it's a bit overstuffed, call it 2 1/4" average loft. I'm hoping for 30*f in baselayers, 20*f wearing a puffy/etc.
This replaces/supplements a 29oz 35*f synthetic bag (EMS Velocity 35, way overstated temp rating for me), I plan to use the down quilt for 3-season, with the synthetic as a top bag below ~20*f. It's overkill for warmer nights, but I can't have all sorts of bags, so I decided to go for 3+ season, knowing I will carry a few extra ounces in summer. When funds allow I'll make/buy a 40f quilt closer to 1lb.
Process:
I used a waxy chaulk fabric pencil from a sewing store, with a straight edge drew all cut and baffle lines on both inside faces. For sewing the baffles, I taped (scotch tape) the baffles past the line, then sewed ON the line, not over the tape. 2.75" baffle material gave me some extra to overlap the line, then cut off after for a 2" finish. This worked beyond perfectly. Dead straight line, exact baffle height throughout. No pins! Scotch tape stuck without one inadvertent peel in 18 baffle sews, but peeled easily when I wanted it to. Single straight stitch thru only one layer of netting is plenty, a tested piece ripped threads before net or fabric ripped. Some guides I read said to fold this and double it up, this isn't needed in my testing. Baffle sewing is the hardest part, there's 18 sews x5' long, about 100 feet of sewing, lock a good process down and motor thru it.
I sewed all baffles to one face, then (with careful folding and binder clips) sewed them to the other face. Then sewed around the top, bottom and one side, then rolled the seam twice to cover the raw edge, and sewed thru all 6 layers (I got impatient and it shows). Then I stuffed the down, then sewed the last side, one or two channels at a time. Finished that edge off with the same rolled seam. Grossgrain loops were inserted in line with mini bar tacks, before the rolled seam so they roll in a bit. Used a wood dowel to keep the drawstring pocket tight while sewing.
To calculate the down, I measured each channel to find the area of each (I drew it in autocad, but it can be done by hand). Then multiplied by loft height to get volume.
You need this area/volume to also calculate how much total down you want, and also to decide on a baffle height. Sort of work the variables around til you settle on a height that gives you the temps you want, and the fillweight you can live with. The formula is volume*fillpower=weight ie LxWxH * 900fp = ounces of down. Fillpower means 1oz of down will fill at least that many cubic inches, FP=cubic inches/ounce. Once you know that the formula is obvious. Thruhiker has a longer description on this, if you haven't read his guide http://thru-hiker.com/projects/down_quilt.php
Then I made a simple spreadsheet which calculated how much each channel was as a percentage of the total. This cell was used to multiply by the total amount to fill. If you look closely at the drawing you'll see this worksheet, I won't give up mine, figuring it out is half the fun! My main cells were 1.5oz, then tapers reduced ~.1oz each to 1.2. You can approximate this, and it doesn't hurt to use a bit more for your legs, since its more common to wear a puffy jacket than pants. My calculations vs the loft results were right on, which leads me to believe the fillpower is not overstated (see here: http://www.backpackinglight.com/cgi-bin/backpackinglight/forums/thread_display.html?forum_thread_id=85972&disable_pagination=1 ) I also had almost 17oz though some of this could be humidity (my down took 3 cross-country trips due to shipping error, then sat around for a week).
To stuff the down (my process, there are others). I got set up in my (cleaned, dry) bathroom with scale, container (more below) and gallon ziplocks. I opened the down, and repackaged it into ziplocks, 2-3oz each. In the future I would combine this step and the next step, and weigh out the correct amount for each baffle into each bag, I was worried of losing the whole pound, which turned out to be an irrational fear. Then, I took a 3-4qt plastic container, with one dimension the width of my hand (to easily squeeze a 1/2oz into a fist). Container went on the scale, tare scale, then put in fistfulls til I had a round number, 1/2oz worked best. Squeeze that down into your fist, stuff it in the channel, repeat til you have the right amount in that channel. I binder clipped 2 of them at a time and made trips to the sewing machine. You could stuff and pin the whole thing, it stays in the baffle well, but I didn't. Top seam, bottom seam, drawstring, weighing, stuffing and final sewing all took 7hrs, including setup/cleanup. It goes quick. The actual stuffing itself took about an hour.
A vacuum with noseum net between two extensions works to collect errant down, or even to pull it out of the bag, but my vacuum hose is only 1" diameter so this only picked up ~1/2oz before the vacuum lost suction. If you have a shopvac, this would be the preferred method, I imagine it'd suck up several ounces right from the bag, with only a few feathers lost. Try to locate the vacuum outside the bathroom with the hose coming thru, it blows air out and can cause havoc. Working in a clean, dry shower/tub works well, most of the fluff settles for easy(er) gathering.
Photos:
–
–
–
–