Topic

MYOG 2 person Tarp Tent

  • This topic is empty.
Viewing 10 posts - 1 through 10 (of 10 total)
PostedDec 14, 2013 at 12:29 pm

My Goal:
Create a Tarp Tent that can be separated into a separated shaped tarp and inner net tent large enough for two. This will allow me to take either or both portions on any given trip depending on conditions, etc. It will also allow the weight to be distributed between two hikers.

The weight!:
Based on my napkin math, the Tarp Tent outer in 1.4oz SilNylon will weigh in at roughly 14.43 oz, and the Inner with SilNylon bathtub floor roughly 10.1 oz. So for the two together we arrive at 24.53oz. Because of my rounding and the way I did the Geometry Math, I expect that number to be a bit high, so I'm guessing I'll fall right around 24oz. The design takes 10 stakes, and 2 20" poles (or a second set of trekking poles). I expect to have a total pack weight under the 32oz (2lb) threshold.

All of that said, here are some pictures of my design progress:

The First step was creating a mock-up frame
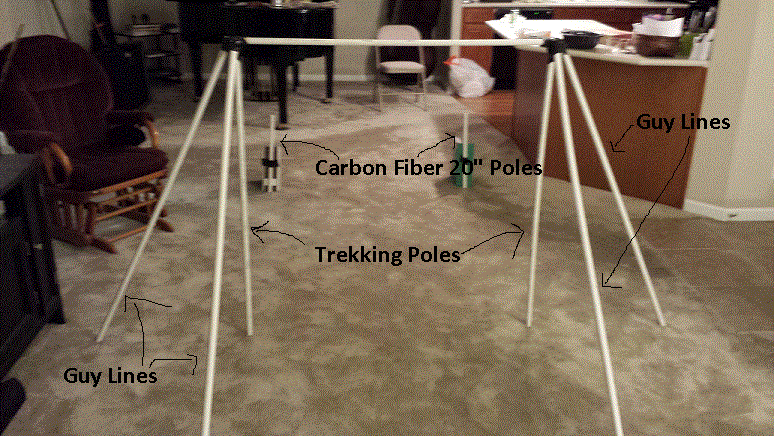
Tent Frame for Design

Then I covered it with plastic drop cloth to verify my math for the pattern.
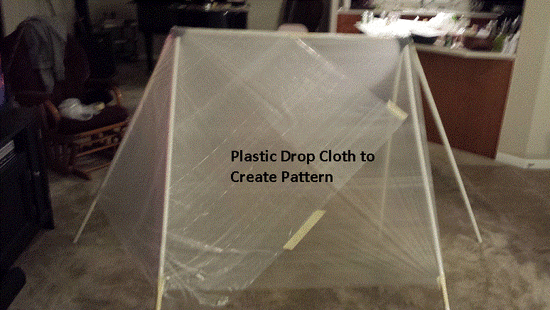
Mock up

Then I created a finalized pattern and used some scrap fabric to throw it together and ensure everything fit well.Front of Tent
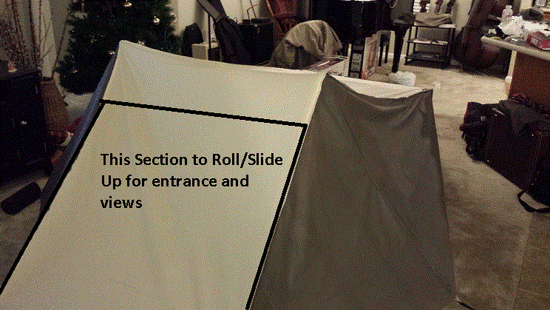
As you can see in the last picture, I plan to have the front vestibule portion slide up on the guy lines from the trekking poles. Has anyone done this before? In all of the threads I read, I don't remember having seen something like this.

So any comments, concerns, or outbursts before I move onto sewing the silnylon version? Should I add a vent into the design at the apex on top for ventilation?

More to come as I continue….

Josh
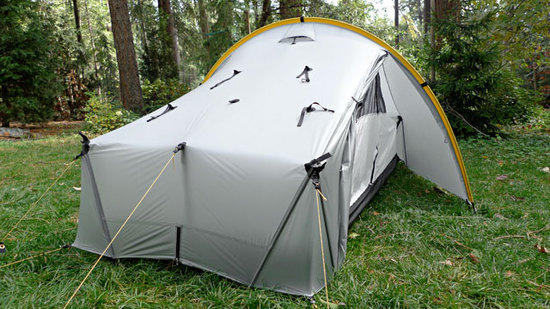
Roger Caffin BPL Member
PostedDec 14, 2013 at 12:49 pm

That flat top is going to fill up with water and collapse the tent. And condensation will collect under it and drip from the middle.

Cheers

PostedDec 14, 2013 at 1:46 pm

Roger!

First, thank you for all of the work, articles, and posts of yours that have inspired me to have a go at making my own tent. Clearly, I have more to learn!

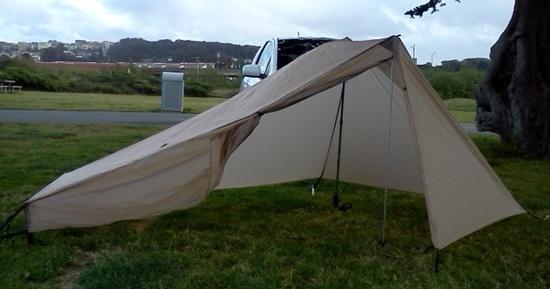
Is this flat top section issue simply because "flat section on top = fail" or is there an acceptable amount of slope that offsets this issue? Looking at the Scarp 1 Tarp Tent, does the tunnel front allow enough run off to the sides before it squares at the back to offset the issue?
scarp 1

In modifying my design, would a tunnel style at the rear create a similar enough effect? Another alternative could be to fabricate a peak between the trekking poles with carbon fiber arrow shafts and connectors, then sew a ridge line down the top and make a center guy line on the rear. That would conceivably eliminate a flat top completely.

Editing to note that the six moons scout seems to have a similar flat section on top adding more confusion for this myog'er.

PostedDec 14, 2013 at 3:57 pm

Seems like the photo with fabric makes the roof look flatter than it is, unless the frame configuration has changed from the shots where the frame is visisble. In the last shot it looks as if you have a real flat spot, where water has to run to the sides because it can't get off the end, while the earlier shots don't look as if that would be the case. More slope is generally a good thing, so raising your ridge and lowering your struts might be a good idea – what are the heights as shown?

Oops – just re-read and I see the struts are 20" – so how high is the ridge? 20" seems way high for the struts – more like 12-14" would be high enough to do the job and get you more slope.

PostedDec 14, 2013 at 4:11 pm

The ridge as of current designs is at 44" and the struts in the rear at 20" over a length of 5'10". I could definitely take the struts down to 12-14" if that helps solve the issue as well.

The second photo set may seem more flat based on a setup in the living room without the ability to tie it down properly. That setup was more to test my pattern to ensure the sides of the pattern would indeed work the way I had intended.

Edit: Having a go at a tighter setup with 14" rear struts and a better taught pitch and will post new photos.

PostedDec 14, 2013 at 6:08 pm

Apartment living… a lawn or yard would make this so much easier!

Best I could get at least….

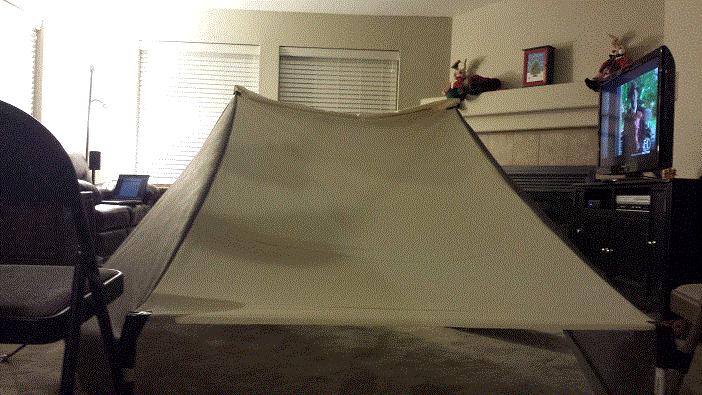
Straight View from the back, 14" strut height:
rear

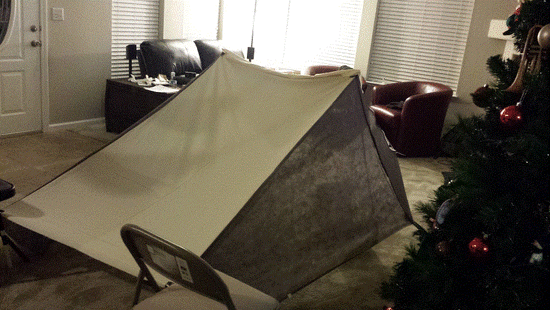
Angle from back:
side rear

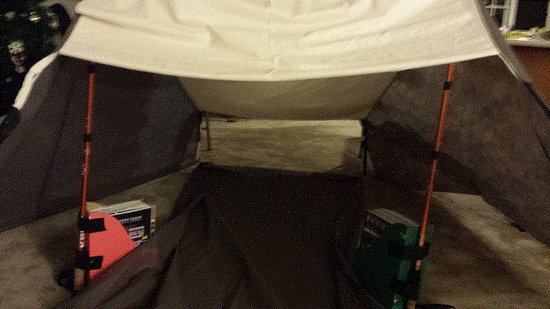
And the front with my bathtub floor mockup and secret carpet pitching tool:
Front View

Josh

Roger Caffin BPL Member
PostedDec 14, 2013 at 6:57 pm

Hi Josh

> Is this flat top section issue simply because "flat section on top = fail" or is
> there an acceptable amount of slope that offsets this issue?
A formulaic answer probably would not help. Best to think 'what if', like what if there was a strong wind blowing onto the roof, causing it to bulge downwards a bit, and fill with the heavy rain which just happens to accompany the wind. Or what if you got caught in a sudden cold front which dropped a foot of snow on the roof. The latter would be very bad.

If you think along these lines you can see how the Scarp 1 deals with the problem: the arch of the pole combines with the centre upright stick to create an almost-ridge-line down the middle. You might get a bit of a depession in the middle of the roof under a strong blast of wind, but that depression would clear as soon as the gust died down.

However, one has to ask what sort of conditions you hope to handle. I know that an awful lot of camping in America is done in a rain-shadow region where there just is no rain for 6 months of the year (or close). Under these conditions your design would fare much better. If you can get the centre to poke up a bit, that would help a lot. Always think 'what can go wrong' – it often does!

Edit: symmetry is great, except when it isn't. Had you thought of making one trekking pole stick up 6" above the other one? A built-in tilt to the roof for water-shedding.

Cheers

PostedDec 14, 2013 at 11:20 pm

Symmetry cuts both ways. I like Roger's idea of one pole taller, and I'd suggest going more symmetrical in the other direction by having the ridge centered front to back. I've put quite a bit of thought into a similar design that I have yet to sew up, and have come to the conclusion that a ridge at mid-point would be better for both slope and interior space reasons.

PostedDec 15, 2013 at 2:40 am

The design reminds me a lot of the SMD Vamp with a front entry point replacing the side entry/vestibules.
SMD Vamp
A problem I see with that is, that when you access the shelter in the rain you will get about 1/3rd your floor wet if the trekking poles are not in fact at the start of the floor area.

Also, I can't see how you could roll/slide the fabric at the front up enough to enter and have a taut shelter when the "door" is closed (if avoiding zippers is your goal)

BTW, you can divide the weight of any tent between two hikers, it does not have to be a double wall to do that.
(if the tent is two pounds, you carry the tent and give 1 pound of your stuff to the other person …)

PostedDec 15, 2013 at 5:08 pm

Roger,

I do have a tendency to think of things in a formulaic manner, thanks for the explanation and giving me a better way to think of the "what if's". I also like the suggestion on one pole taller.

Paul,
I think I follow what your saying with what would essentially be a diagonal ridge line from one trekking pole to the opposite side strut on the back, and that sounds interesting. I think I'll put together a small scale model to get a better visual. If one trekking pole was set higher, and the opposite rear strut was slightly taller than the other, it might be interesting. I hope you don't mind if I borrow your idea.

Franco,
I've got a couple ideas to try out to keep a taught pitch when it's closed. I'll make sure I show some close ups once i get it completed. The front vestibule should allow me to enter without soaking the inside. And thanks for giving me the slap my forehead moment w/r/t simply sharing other weight to essentially share the weight of the tent!

Viewing 10 posts - 1 through 10 (of 10 total)
Loading...