I got all inspiration from
this thread.
I’ll just break this down into steps of how this was done by me. Before you got straight to the steps, read all of this to maximize efficiency and not skip vital steps.
What you will need
-Scissors
-Gorilla glue (super glue should work also)
-Lighter
-Grips (Noted right below this)
-1 or 2 wine corks – (the kind with the glossy coating on the outside are the ones I used)
-(Optional Hand Loops) Amsteel and dynaglide to make continuous loops/soft shackles – Other cordage may work
-(Optional) Drill for hand loops
I went to mudhole.com and purchased two of these
EVA Foam Grips in size 5″x1/2″ which ended up costing $8.27 shipped (you can go with other options but this is one of the cheapest and gives a nice feel). The thread at the top used a different kind but also from mudhole.com. When they arrived, I trimmed off the thin part.
Gossamer gear has some nice, but pricey, cork grips as well.
While you’re waiting on the grips in the mail you can get started as long as you have the other materials above. If you are wanting to make hand loops as well then read #3 first to figure cordage lengths and examine your will to try this! Skip #’s 2 and 3 if you don’t want hand loops.
1) Removing the handles:
I did this a very inefficient way at first, with a Dremel, and ended up cutting through the aluminum in the pole – bad idea.
Later I found you can simply boil a pot of water and dip the handle ends for a few minutes until the adhesive loosens and just pull them off quite easily – Viola! This method was confirmed by trying with another pole.
2) Drilling holes for the hand loops (skip this step if you dont want straps/hand loops):
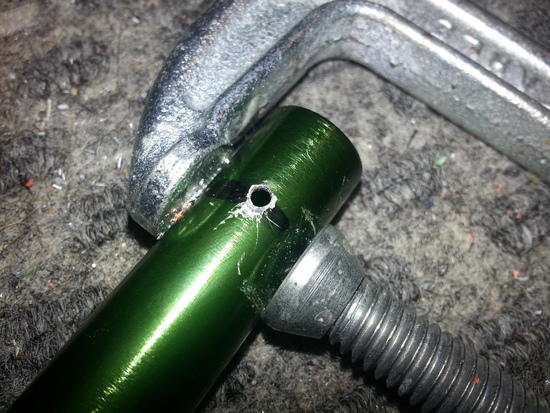
I used a drill for this with a bit about the size of a BB (i cant recall which thickness but just big enough to slip the dynaglide through).
Drill a single hole about 1/2″ to 3/4″ down from the tip of the shaft where you just removed the handles. Do this to each pole.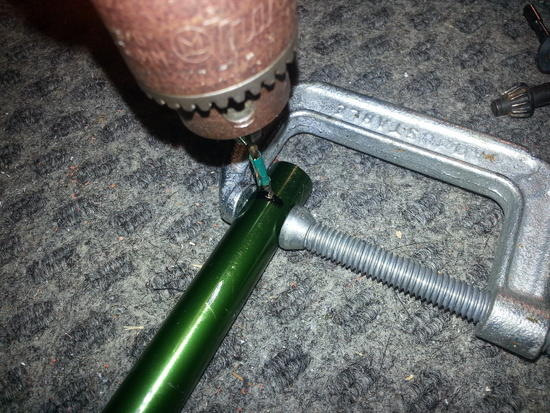
3) Splicing soft shackles and continuous loops (skip this step if you dont want straps/hand loops):
I learned to splice and make a number of different things from cordage over at Hammockforums.net.
Opie’s method of soft shackles &
Opie’s method of continuous loops are the ones I borrowed from for this. However, I used a guitar string for this part instead of any special tool – a G-string (no pun intended) should do nicely.
Unfortunately I did not take measurements of how much cordage I used for this so you will have to figure this part on your own – sorry! I’ll try to explain how to aid you with this.
I selected the following cordage to be able to hold a large load of body weight without breaking.
Soft Shackles:
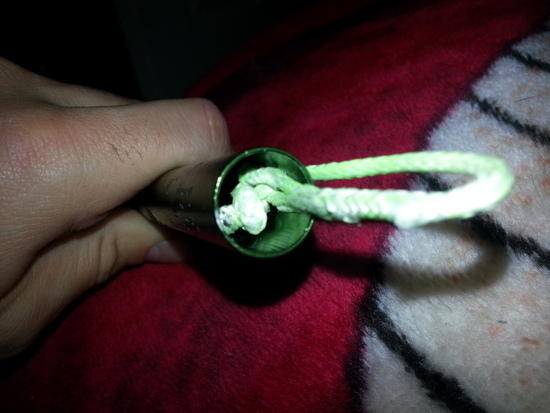
You absolutely need dynaglide for this part (mine is green here) – a strong, yet small and easily spliced cordage.
This is for the inside “soft shackle,” which is quite small. Use Opie’s method for making a soft shackle that I linked right above (perhaps do a practice run first) and do the math to make the finished length equate to 4-5″. This should be just big enough to leave a small loop coming off the top of the shaft (examine pics). The total length of my finished shackle was about 4″ (it could have been larger without any problems, but not smaller)
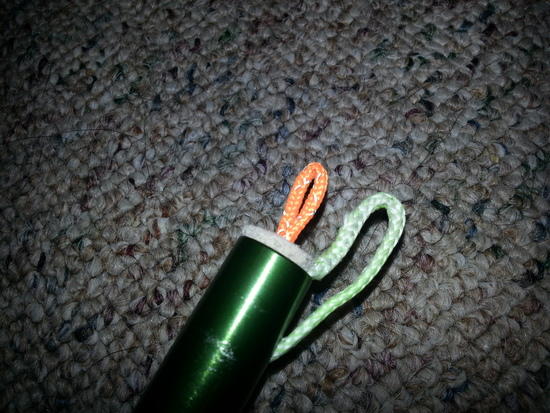
Continuous Loops:
I used 7/64 Amsteel (silver) for its strength, thickness, and comfort to wrap around the wrist – Dynaglide wouldn’t feel very good for this, but would work.
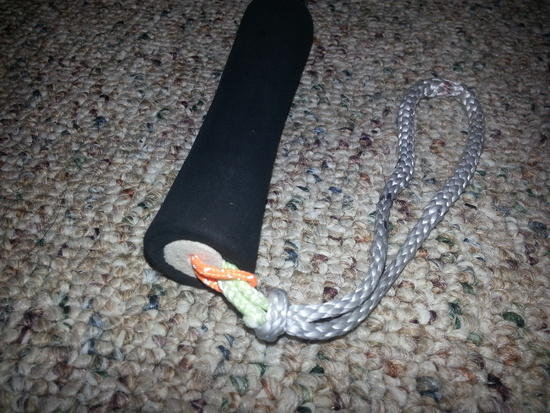
Simply figure how big you want your loops to be by what you think would be comfortable to fit around your wrist. Perhaps go a little bigger than you want, you’d be surprised how your perfect calculations get lost in the splice. :) (Pics of this will be in step #5)
4) Making removeable plugs from wine corks:
I’m not going to lie, this was painstaking! Perhaps someone can think of a better method.
I used the wine corks like the one in the picture below, they have a glossy (plastic?) coating on them and do not look like a traditional cork plug. I started by cutting one in half (to be used as both plugs) with a serrated knife – scissors or a straight blade won’t do you justice here, trust me.
With the smooth end of the cork facing up, set it on the top of your trekking pole shaft and start twisting back and forth, while putting lots of pressure on it. What will happen is the cork will become penetrated and fit perfectly inside the shaft. Don’t go all the way through the other side of the cork – leave a little lip on the end (examine pics below to see the lip). Now just trim the remainder of the plastic coating off the cork and you’ll have a smooth cork plug with a nice lip.
Now drill a very small hole all the way through the center of the cork (examine pics below to see this).
For the next part, I used lawsons reflective glowire, but most anything will do. I simply made a very small loop (just tie a knot, cut the excess and seal it with a lighter), just long enough to where it would go all the way through the cork and have a loop exposed on the other side (examine pics below).
Then I used a guitar string to bring the loop through the hole that was drilled in the cork (examine pics below).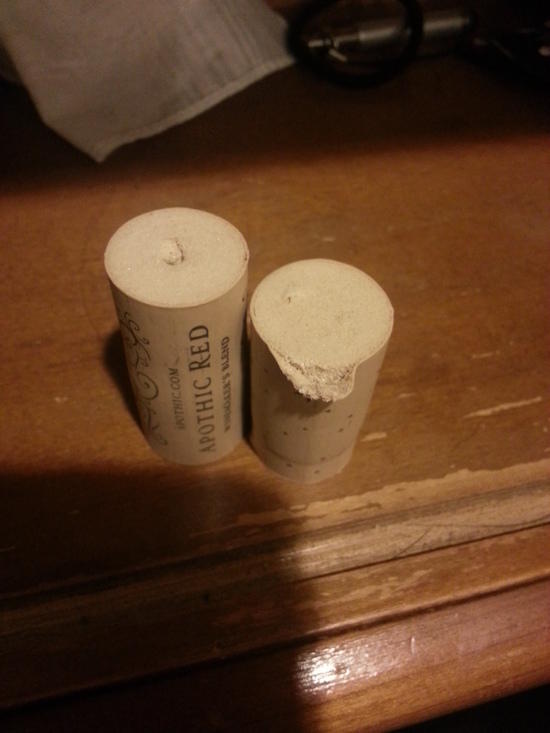


This part is done, good job if you made sense of all that because I’m not sure how well I explained it! You now have a removable cork plug for the pole shaft and you’re ready to slide on the grips!. :D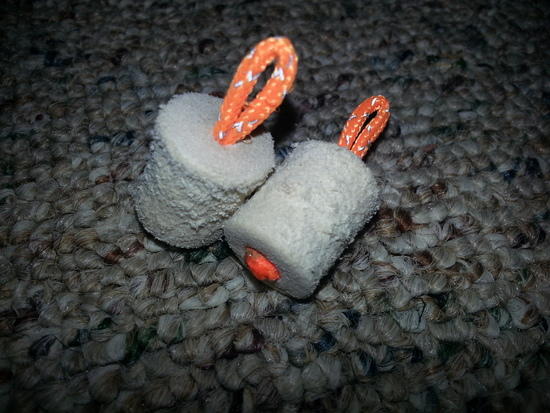
5) Putting on the grips:
If you made soft shackles then tuck them and plug the cork like this picture…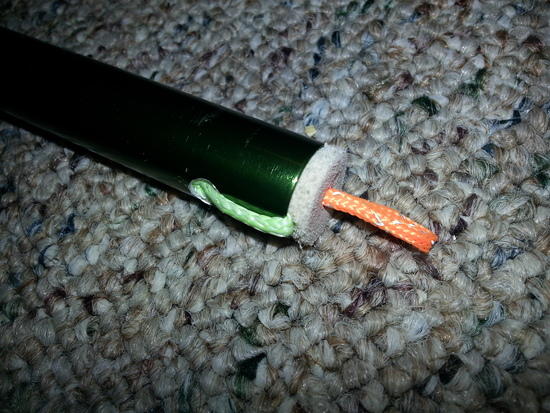
Now liberally apply gorilla glue on all over the shaft where the EVA grip will be and start to slide the grip on. I used a twisting motion while doing this with much success. Pushing it straight on wouldn’t work well. The grip I used was an extremely tight fit and any excess glue was pushed to the bottom where I could wipe it off with a rag.
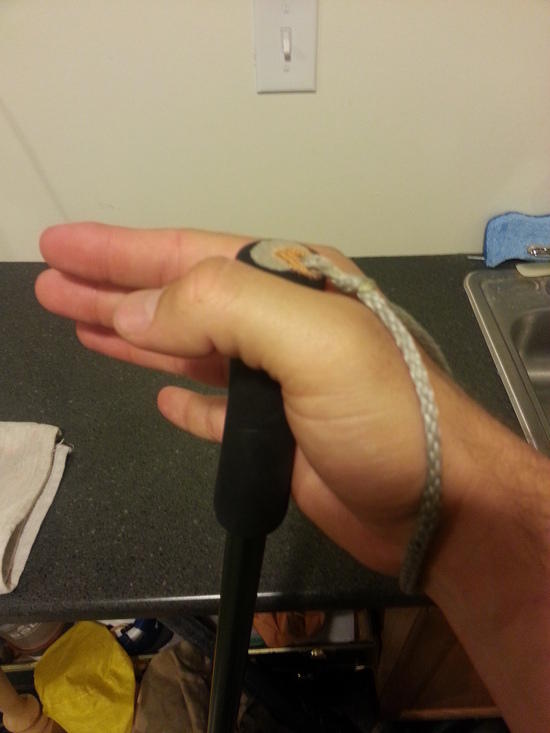
Now attach the continuous loop to the soft shackle and you have removable hand loops.
Congratulations, you have finished my tutorial. My finished weight for reference was 185g a pole, or 370g a pair – not too shabby.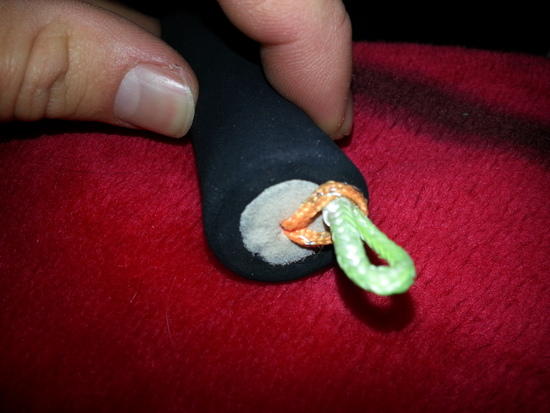
*Edited to fix a link.