While I love my Emberlit Mini wood burning stove, there are times when you just can't use wood to cook with because either it's banned in that wilderness area, it's been pouring rain for days on end and everything is absolutely soaking wet (and you don't feel like going there…), or you're just feeling lazy and want to light and cook. Either way, it's nice to have a good alcohol backup to any woodburning stove.
After searching the net for a while, I couldn't seem to find any ready-made solution for an efficient and lightweight alcohol burner to use in conjunction with my Emberlit Mini wood burning stove, so I decided to make my own.
My solution weighs 1.35 ounces (dry), or 3.00 ounces with the fuel bottle filled to the max with 2 fluid ounces of alcohol.
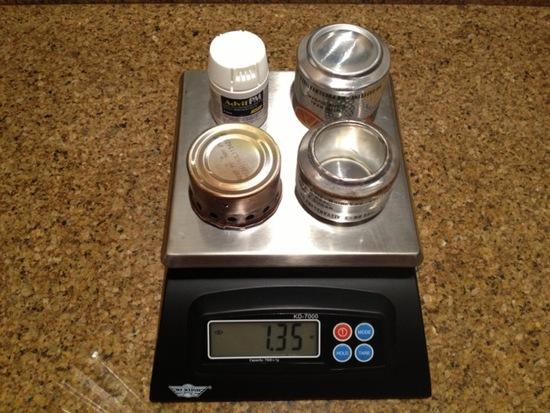
It consists of a pill bottle fuel container (with a capacity of 2 fluid ounces), an open jet soda can burner, a "simmer cat" base (that doubles as a stove in it's own right), and a snuffer cap so that you can put out the flame and collect unburned fuel.
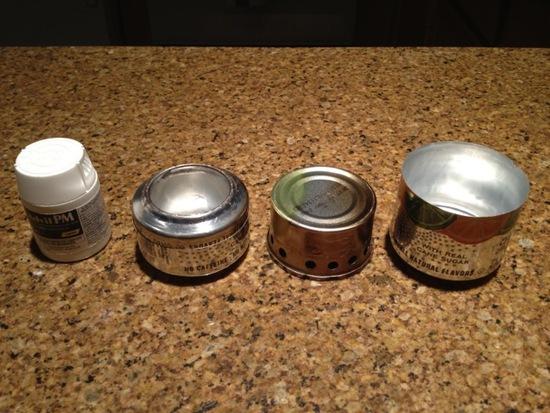
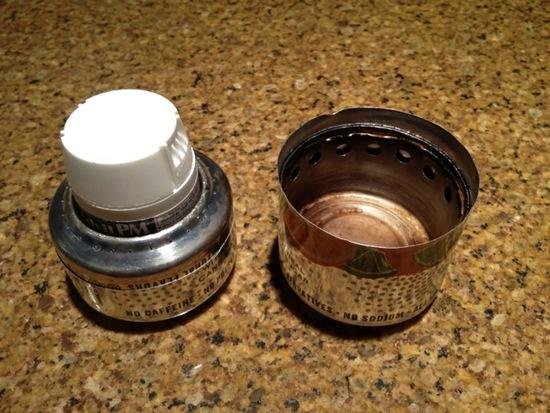
The best part of all is that I designed the components to nest into each other, so the fuel bottle fits perfectly into the soda can burner and the simmer cat base nests perfectly into the snuffer cup:
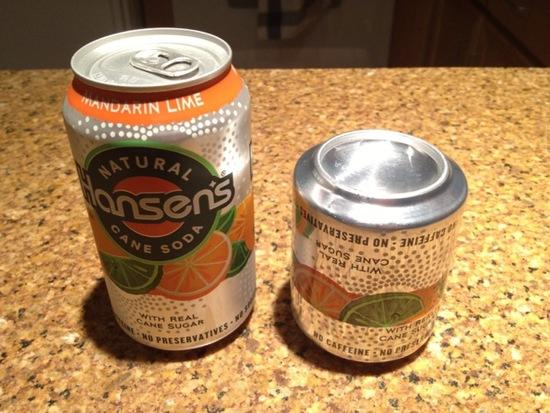
And finally, these two halves press together to form one solid, fully contained unit (an unopened soda can is shown there for size reference):
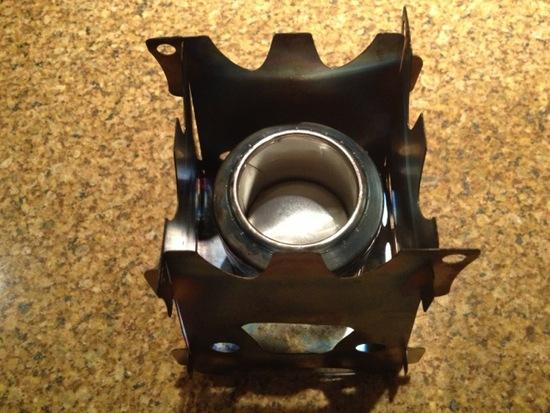
Here is what it looks like in the Emberlit Mini:
After burning through about 6 ounces of alcohol, I finally found that 1.5 inches is the optimal distance that this type of burner should be away from the base of my Open Country 2 Quart Aluminum Kettle (different pots might be better with different distances, but I personally doubt it would vary by that much). Anyway, it turns out that placing the open jet soda can burner on top of a upturned cat food can stove placed the top of the burner exactly 1.5 inches away from the bottom of the pot! I'd like to say I designed it this way, but it's just pure luck and I'm not going to complain. I should also note that, quite serendipitously, the round rim on the bottom of the soda can stove sits perfectly in a small groove on the bottom of a 3oz Fancy Feast cat food can, thereby further stabilizing the soda can burner and making this upturned cat can the ideal base.
So, since I was going to use the cat can as a base for the burner anyway, I figured I might as well make it a stove in it's own right, so I made it a "simmer cat" variety with only one row of 15 holes near the top rim (in separate testing, I found that this stove is pretty awesome in its own right when paired with my particular pot). This gives an additional back up alcohol stove (in case the soda can burner got crushed) for no weight penalty at all!
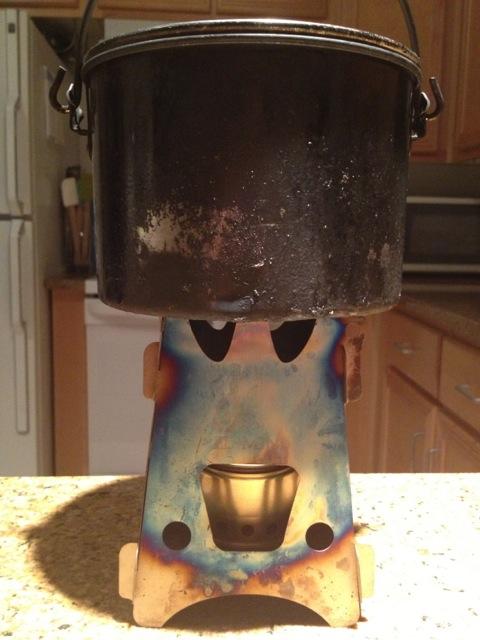
In the end, when testing the efficiency of the stove inside at room temperature, at sea level, using 70 degree water to start with, and using 200 proof lab-grade alcohol as the fuel: I found that I could get 2 cups of water to a rolling boil in about 4 and half minutes with less than 0.5 ounces of fuel, and I could get 4 cups of water to a rolling boil in a little under 9 minutes using less than 0.75 ounces of fuel. Even bearing in mind the ideal circumstances of the testing, that's pretty good in my book. I think the titanium walls of the Emberlit Mini help to funnel some of the heat onto the bottom of the pot, and they also act as a makeshift windscreen, though the head of the flames are still fairly exposed where they meet the bottom of the pot due to the ventilation slots on top of the Emberlit Mini.
Anyway, I'm really happy with my design and I thought I'd share it with the BPL community so someone else can improve on it :)
The whole system was really easy to make, with no specialized tools required. I hole punched the simmer cat with a standard run-of-the-mill hole puncher and a template from the Zen stoves website. I made the open jet soda can stove using a razor blade, a stack of paper, three identical cans (the third can was unopened and used to dilate the base piece of the stove), a sewing needle, a power drill, a jet template and an inner wall template (also from the Zen stoves website), some tape, a hole punch, and a pair of scissors.
The whole soda can stove is carefully pressure fit (no epoxy or JB Weld was necessary) and was modelled after the "Hannah Stove."
I would highly suggest this design to a novice stove maker. It's very easy, yet very high performance, and as I said before, requires very few tools. The pressure fitting is the hardest part, but really isn't even that bad. It's worth it in the end to not have to deal with epoxy and the whole can of worms that that opens up.
Lastly, I should note that the volume of the fuel bottle in this kit was dictated by my desire to keep everything very compact and my intention that this be primarily a backup stove to the wood burning Emberlit Mini. I feel confident that I could boil 1 quart of water twice with my 2 ounce fuel reserve, and that's all I really need. I can make a fire in all but the worst conditions, so I feel pretty comfortable going bare bones with my alcohol fuel reserves.
With that said, one could conceivably include a larger fuel bottle and simply make a taller snuffer cap to seal it all together in the end. The nested kit would be taller in height, but the concept would be the same. Alternatively, you could always just add another fuel bottle and store that separately. The Advil PM bottle that I'm using here weighs 0.5 ounces, so it's not exactly heavy. If I ever need extra fuel capacity I will probably just supplement this kit with an additional fuel bottle, but to each his/her own.
Anyway, I'll provide a full review of the design once I give it a lot of field testing to let everyone know how it holds up in real world use.

