Hello Rebecca,
I made a sewn insulated footbox on a quilt recently. It was my first time making a quilt, and I kind of just flew at it and designed it as I went rather than doing a lot of research and design, following my personal motto of "measure once cut twice". The goal of the quilt was as light as possible 3-season quilt while being very roomy.
My motivation for a sewn footbox versus a drawstring was to have as much legroom as possible while retaining warmth. I find mummy sleeping bags very restricting, and I wanted to feel like I had lots of room for my feet to stick out straight, without there being lots of empty space to cause cooling.
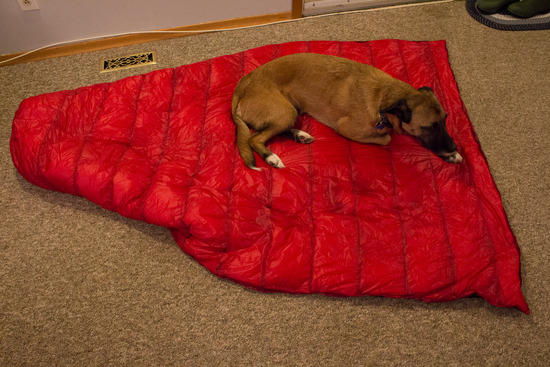
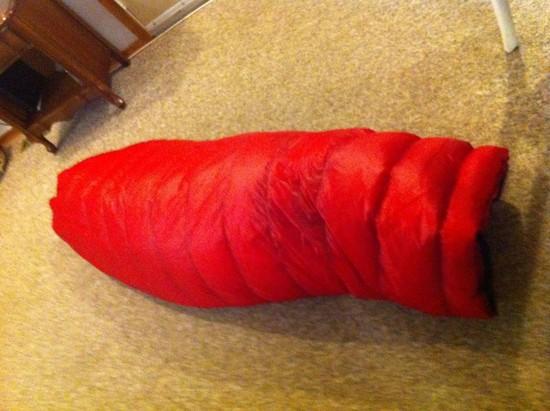
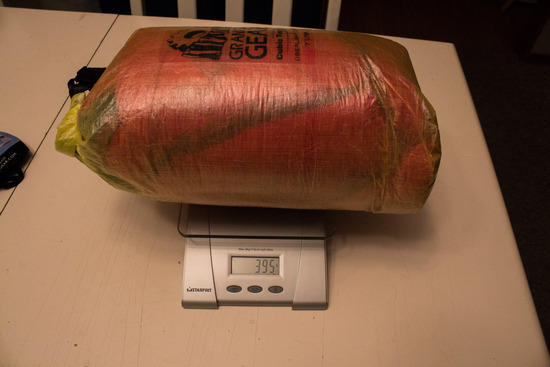
I am a warm sleeper so I skimped a bit on down. Materials are M50 and 900fp down from Thru hiker. Final weight is around 380 grams, I'm not sure how ounces/gram of down flil it came out to be in the end, I think between 7-9 ounces in the end. I wanted the quilt sized kind of large. I am 5'10" and I can wrap it completely around myself and over my head. If anything a few of the upper baffles are under-filled, and the baffles on the footbox are over-filled slightly.
I will try to describe what I did, but hopefully it is obvious from the pictures (pictures at the bottom).
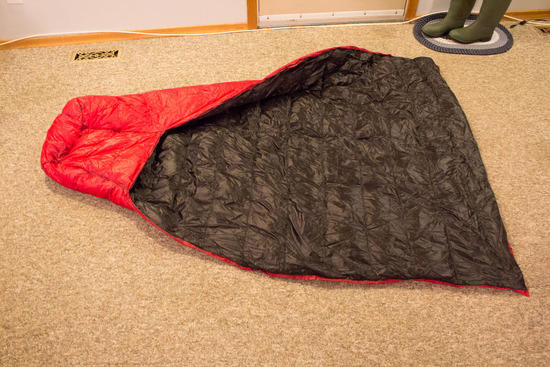
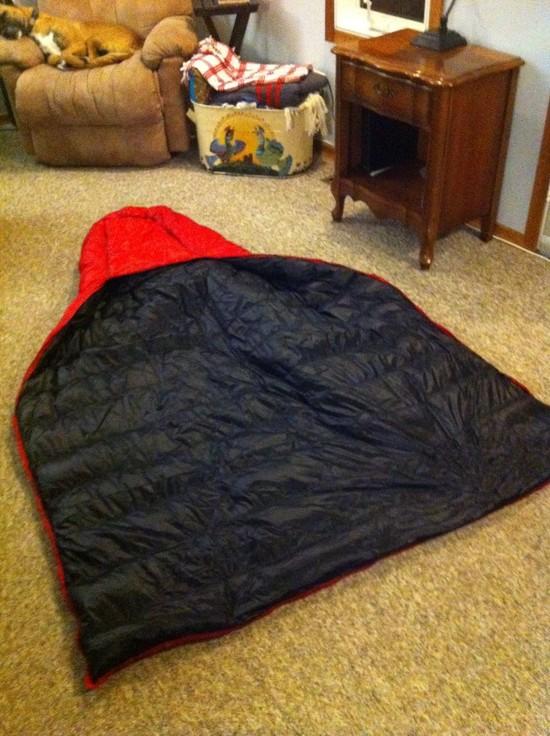
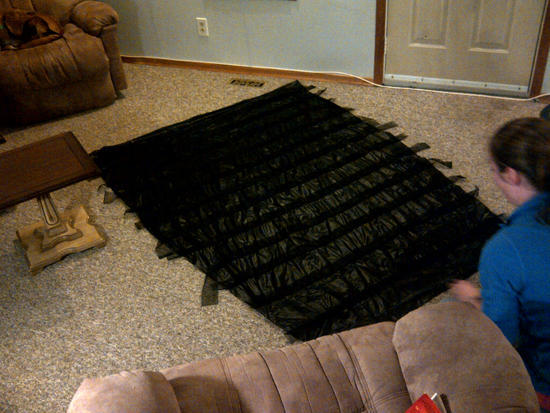
What I did was made a quilt as normal, you can see the pic with the baffles exposed during the construction/design phase to get an idea of the shape.
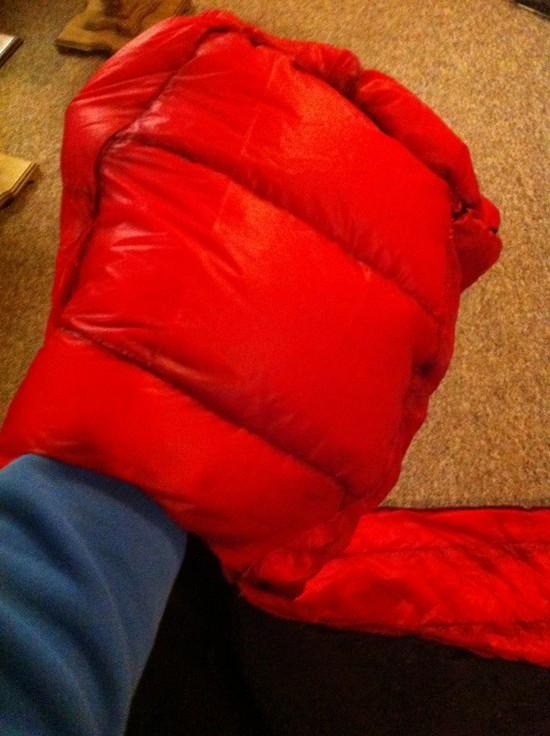
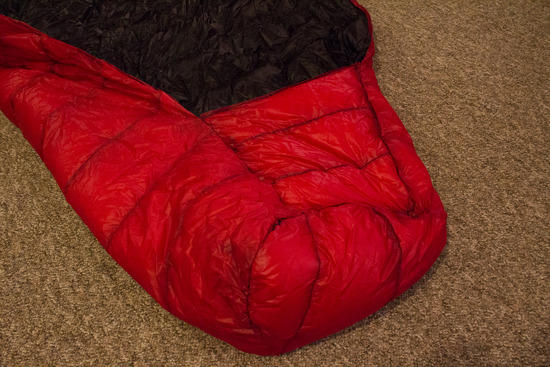
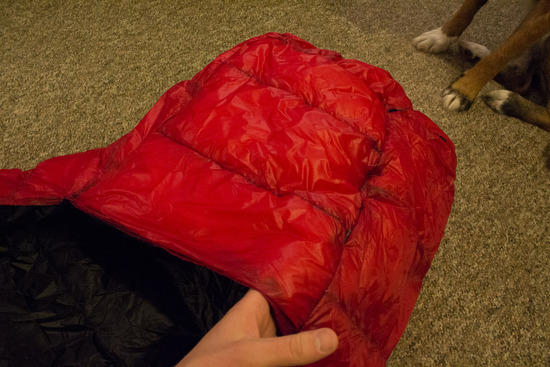
Then separately I made a baffled circle, with 3 baffles, with the diameter such that it would be able to be sewn to the bottom edge of the quilt and leave a 4-5" gap in the middle where the two sides of the quilt met. I then created a small separate rectangular section with 3 baffles that I attached between the insulated circle at the bottom and between the two edges of the quilt.
I didn't try to do anything fancy like having the baffles connect continuously: all of the edges are sewn through, and the pieces basically connect together at the seams. I think with a bit of forethought and design you could have it so that all of the edges would connect with the baffles not sewn shut and it would be warmer. I did try to minimize the "seam width" so to speak, so the baffles kind of fluff up and connect together, and it doesn't seem that cold.
I'm sure there are more elegant/warmer/better ways of constructing it, but for me building the sewnfoot box as 2 other pieces the way I did was very easy and is quite warm. If you want a warmer/tighter fit you could have the two outside edges of your quilt meet right in the middle together at the footbox rather than having a separate insert piece like I have.
I also ran out of red thread in the making of the quilt, so the baffles/seams/thread lines on the footbox portion look a lot "darker" than they might have with red thread.
I suck at inserting pics in BPL forum posts, I will try to add a few images at the bottom, but you can view all 12 images here (click the "next button")
http://imgur.com/a/dDBT5#0
Anyhoo, I hope this helps, if you have any questions I'd be happy to try to answer.
I actually just used this quilt on a 7 day very cold, very wet packrafting trip, with a few nights with temps down somewhere in the -5 to -6C range, and every other night around 0C, with very high humidity, right around the dew point, and the quilt functioned very well. I'll be honest that I did wake up during the night kind of cold, but these were probably the absolute worst conditions for a small tarp+bivy+quilt combo: windy, cold, high humidity, right at the dew point and/or freezing.
Cheers.