Topic
Sub 50z wood burning for nix
Forum Posting
A Membership is required to post in the forums. Login or become a member to post in the member forums!
Home › Forums › Gear Forums › Make Your Own Gear › Sub 50z wood burning for nix
- This topic is empty.
-
AuthorPosts
-
Apr 20, 2007 at 2:15 am #1222906
The Ultra Bushmate
The day after the Bushmate.
After extensive research and elaborate University tests, I have come up with the Ultra Bushmate stove. Yesterday I finally remembered why I dad switched to the taller can, that was to give me a wind shield and a larger (longer) stove. So first thing I improved the air flow on the Bushmate (bigger holes at the bottom of the stove and much bigger on the outside "pipe". That worked, I had a boil in 8 minutes, (1 quart)
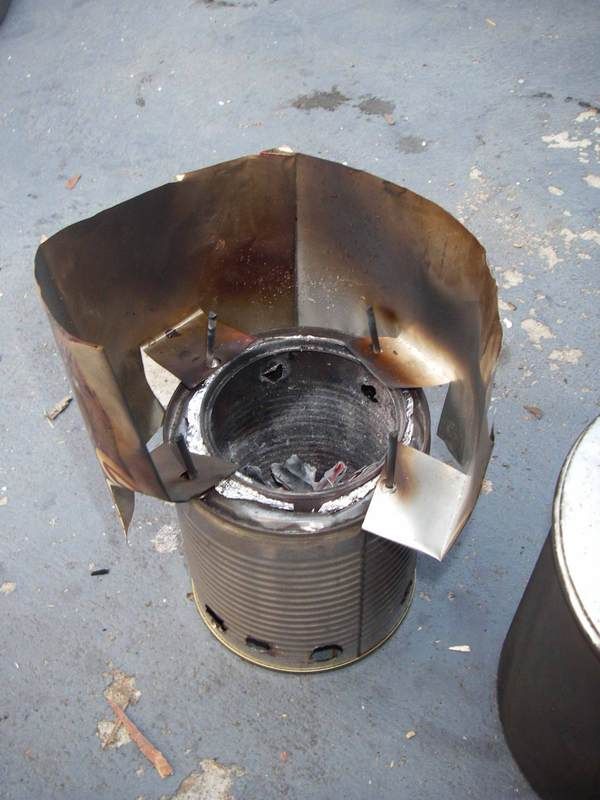
Next I put together a shorter version , back to the 4" high inner can, for more convenient storage.
This one has the outer can upside down, the hole for the inner can is cut with a pair of scissor, the inner can is kept a little bit above the ground to aid air flow and avoid scorching.
The first couple of tests resulted in a 10 min boil, so I fashioned a heat reflector/windshield out of some soda cans and now I am down to 8 min.
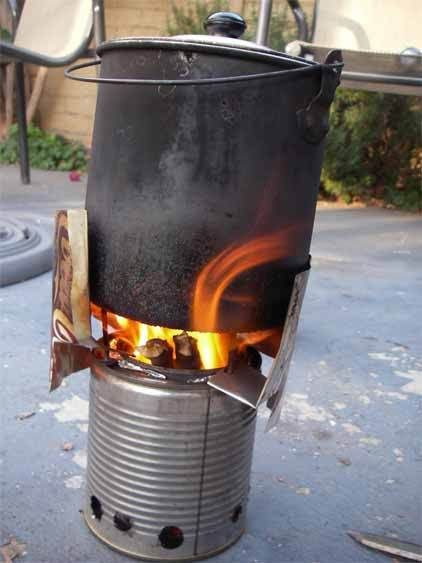
The most satisfying part of the project is seeing those flames coming out of the side of the inner can and going up at the center.
Tools and items needed
1x Stanley knife
1x pair of scissors
1x can opener
1x 4" wide can (9cm)
1x 2.7" wide can (7cm) our most common size
4x nails
Estimated time under 1 hour , possibly under 1/2 hour now that I know how
New weight 4.7 oz (135 g)
The wood needed was about the same as in my first test, not very much. I went around the neighborhood and picket up dead twigs.
It does need some feeding. The best way is to let it come up to full burn , when the flames come from the side, and then just drop in one little twig at a time not to snuff the flames out.
I use cotton wool impregnated with petroleum jelly to start it ( I have not weighed this ones but they are only a few grams each)
I will keep testing it, the expectation is for the inner can to last around 30 burns, much longer for the outer can. Because the inner can requires only some holes at the bottom, easily done with the pot holding nails, and some rough ventilation holes around the bottom and about 1" from the top, this could be done on the trail, so very couple of weeks maybe you would need to find a can.
Franco
http://i43.photobucket.com/albums/e389/Francophoto/odds/Ultra-Bushmate-1.jpg
http://i43.photobucket.com/albums/e389/Francophoto/odds/Ultra-Bushmate.jpgApr 23, 2007 at 3:11 pm #1387072Franco,
Any new developments in your design? Would you mind sharing a few more photos of your Ultra-Bushmate? Perhaps the building stages. I'd like to try building one.
May 5, 2007 at 11:39 pm #1388299Michael,
I had forgotten about this, short attention span.
After the Ultra Bushmate I made a single can stove that turned up looking very much like the Penny wood burning stove. ( so much for innovation…)The single can with the windscreen is around 4 oz. I used thick coathanger wire for the pot stand and added the top windscreen, as with the Ultra.
http://www.csun.edu/~mjurey/pennywood.html
The results are very similar to the Ultra.
In the next few days I see if I can make another ultra an take some pictures as I do it.
Franco -
AuthorPosts
- You must be logged in to reply to this topic.
Forum Posting
A Membership is required to post in the forums. Login or become a member to post in the member forums!
Our Community Posts are Moderated
Backpacking Light community posts are moderated and here to foster helpful and positive discussions about lightweight backpacking. Please be mindful of our values and boundaries and review our Community Guidelines prior to posting.
Get the Newsletter
Gear Research & Discovery Tools
- Browse our curated Gear Shop
- See the latest Gear Deals and Sales
- Our Recommendations
- Search for Gear on Sale with the Gear Finder
- Used Gear Swap
- Member Gear Reviews and BPL Gear Review Articles
- Browse by Gear Type or Brand.
