Topic

Modified Titanium Pot


Forum Posting

A Membership is required to post in the forums. Login or become a member to post in the member forums!

Home Forums Gear Forums Make Your Own Gear Modified Titanium Pot

  • This topic is empty.
Viewing 13 posts - 1 through 13 (of 13 total)
  • Author
    Posts
  • #1297772
    Colin Krusor
    BPL Member

    @ckrusor

    Locale: Northwest US

    I've had this 900ml BPL Firelite titanium pot for several years, and in that time I've tried a lot of different pot stand/windscreen combinations. I almost always cook with esbit or a small top-jet alcohol stove and these produce so little heat that a large windscreen is always necessary to do any cooking if it's breezy. I wanted a large (tall) windscreen without the weight penalty of a large sheet of 0.003"-0.006" thick aluminum or titanium. I also wanted to try making a light, adjustable pot stand that is wide and stable.

    I attached three pieces of aluminum hardware ("brackets"?) to the sides of the pot, made three 5 1/2" long Ti tent stakes, and a hoop-like windscreen to attach to the tops of the stakes. The pot height is adjustable in five 1/2" increments from 2" above the ground to 4.5". The Ti stakes weigh 3.5 grams (0.12 oz) each, the aluminum brackets weigh 2.9 grams (0.1 oz) each, and the windscreen weighs 11 grams (0.38 oz). So, including the tent stakes, I got a wide, adjustable pot stand and 6" tall windscreen for about 1 oz (or 0.64 oz if you consider the stakes part of the shelter).

    stand1

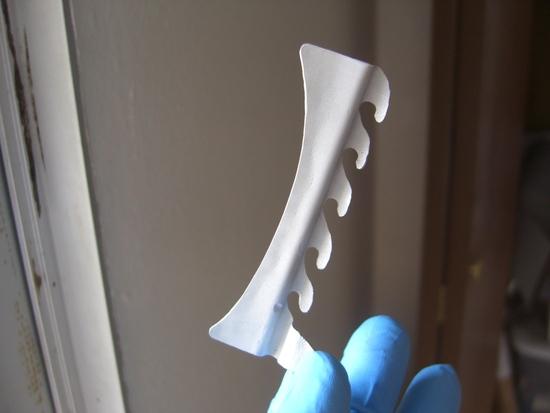
    I considered making the brackets from titanium and spot welding them onto the pot, but I don't have a spot welder, so I made them from cut and bent 0.032" 6061 T4 aluminum sheet, and bonded them to the side of the pot. I used a nitrile-phenolic high temperature adhesive called Plastilock 605-4. I got a pint can on ebay. It is used to bond friction materials like automotive brake shoes. Metal-to-metal bond shear strength is twice that of JB weld (2100 psi vs. 1040 psi), peel strength is three times higher (43 pli vs. 14 pli), it withstands much higher temperatures than JB weld, and it's flexible. It has a continuous service temperature of >600F and survives excursions to 1000F. I have wished in the past for a high-temperature silicone adhesive that magically has high strength, too. Essentially, this is it. Very similar products are sold under the brand names Anabond 230 and Aremco 570 (the Aremco stuff is slightly different and has a less demanding cure schedule):

    http://www.adhesivesandsealants.com/doc.mvc/High-Temperature-Adhesive-Bonds-Copper-0001
    http://www.henkelna.com/faceted-search-17046.htm?countryCode=us&language=en&BU=industrial&redDotUID=0000000JGR

    Using this adhesive is not straightforward, though, and it can only bond tightly mating surfaces that can be clamped. It can't fill gaps. I first sandblasted the side of the pot where the bond needed to be made using a stencil.

    stencil

    I then also sandblasted the aluminum brackets.

    bracket

    I applied the adhesive from the can with a brush to the sandblasted areas on each part, then drove off the solvent by heating in the oven to 200F for 30 min. I then pressed the parts together, and taped the bracket in place with Kapton tape.

    tape

    Then I clamped the taped part to the pot (with some padding), and baked it at 400F for one hour to cure the adhesive.

    clamps

    part

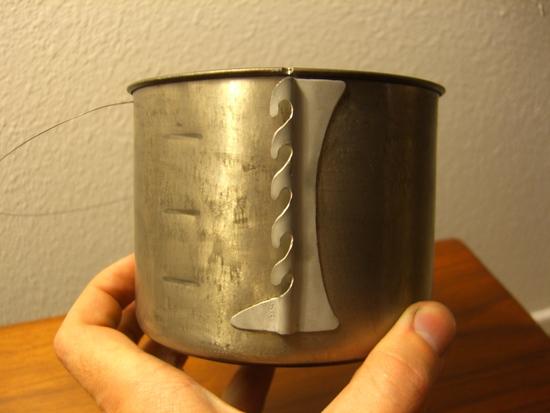
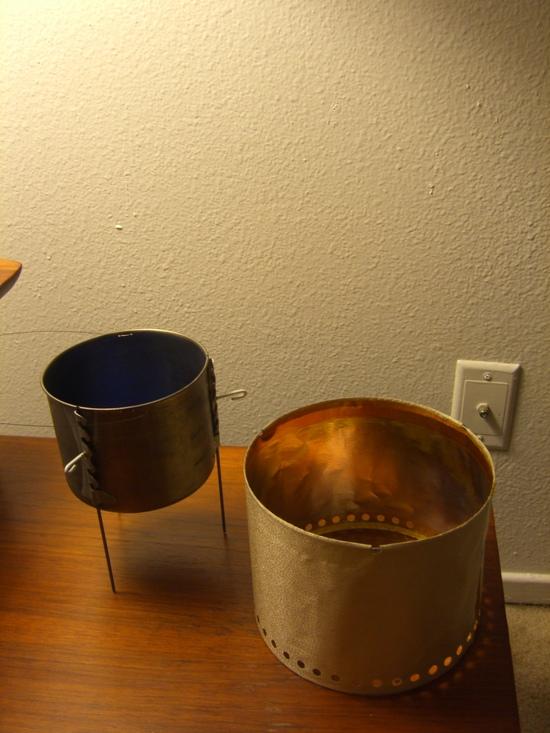
    In the photo three horizontal lines are visible on the pot. Those are graduations (1 cup increments) that I added by pressing a piece of wire into the side of the pot from the outside. They are visible on the inside. The inside of the pot happens to be blue because I anodized it, on a lark.

    graduations

    I made the stakes from 3/32" Ti wire. They are 5 1/2" long. The alloy is "Timetal 829" :5.5Al-3.5Sn-3Zr-1Nb-0.25Mo-0.3Si. It has higher room temperature strength than 6Al-4V Ti (or any CP alloy), lower thermal conductivity, and it retains much more of its mechanical properties at elevated temperatures. I got several pieces from Titanium Joe about a year ago. I found it very difficult to bend with a propane torch (unlike 6Al-4V). I anodized these blue as well, on a whim, and I painted the tops with white stove/exhaust paint so I don't loose them in the dirt.

    stakes

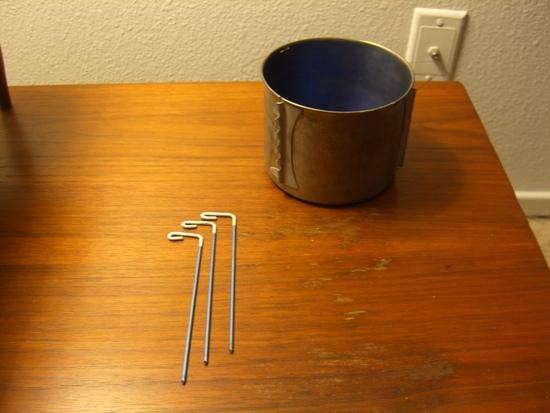
    The stakes slip into the brackets from the top and fit snugly enough in each pocket to not rattle around or fall out.

    pocket

    pocket2

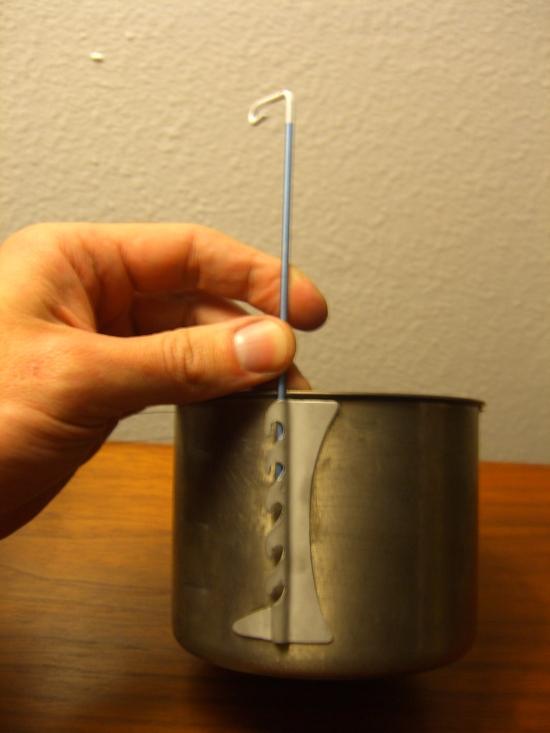
    This photo shows the height relative to my alcohol stove:

    height

    The tops of the stakes stick out 1" from the side of the pot. The windscreen attaches to the ends. The windscreen is Kapton film with a mirror-like aluminized inner surface laminated to a light fiberglass fabric on the outside. It can't withstand sustained contact with direct flame (neither can aluminum), but hot stove exhaust is fine and radiant heating is minimized by the aluminum surface. After six trials burning esbit and alcohol there is no sign of harm to the windscreen yet, despite two flare-ups that caused the windscreen to be in contact with vigorous flames for several seconds. The hoops in the bottom and top edges are Nitinol wire. The windscreen collapses, twists into a figure-8, folds over into a smaller hoop for storage in the pot, and pops back into shape when unfolded. The inner surface looks copper-colored in the photo below because it's reflecting the wooden surface of the coffee table.

    both

    sidescreen

    topscreen

    Height adjustment using the brackets just lifts or lowers the pot. The windscreen stays in the same position relative to the ground. I assemble it, start the stove or esbit cube, and lift the whole thing onto the stove using the pot's wire bail.

    bail

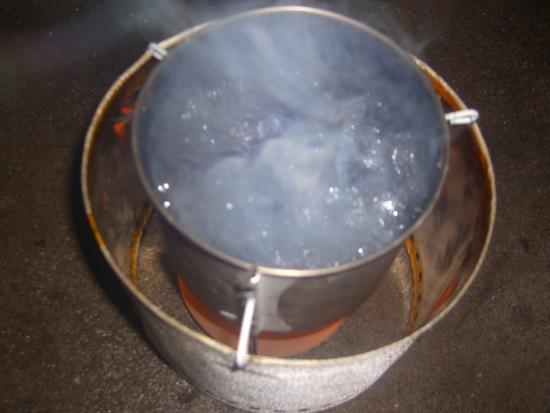
    Below is test #6: boiling two cups of water with an esbit tab.

    test

    Sorry for the long post. Any feedback is welcome.

    #1941708
    Nick Gatel
    BPL Member

    @ngatel

    Locale: Southern California

    Colin,

    That is ingenious.

    I take it you aren't married. I used the family oven once for an industrial project. Came to find out it was not a family oven; it was "her's" and baking metal goods is apparently not part of the wedding vow script, as interpreted by her — even though I purchased said oven years before we met. Good news is she allowed me to purchase my own oven for use in the garage, although it is not nearly as big as "her" oven.

    Anyway, great creativity on your part.

    #1941711
    Bob Gross
    BPL Member

    @b-g-2-2

    Locale: Silicon Valley

    It seems like the whole key to this is the adhesive. That is one serious adhesive.

    –B.G.–

    #1941745
    jason quick
    Spectator

    @jase

    Locale: A tent in my backyard - Melbourne

    Bloody brilliant. Well done.

    #1941746
    David Thomas
    BPL Member

    @davidinkenai

    Locale: North Woods. Far North.

    Colin: Great post. Very helpful info, details, and back info. I've already bookmarked your adhesive links.

    Nick: a friend called the inventor of the microwave oven the Patron Saint of single people. Maybe also of DIYers? I knew that it was well worth the $40 when I was pilot-testing a thermal treatment on diesel-contaminated soils.

    #1941757
    Gary Dunckel
    BPL Member

    @zia-grill-guy

    Locale: Boulder

    Colin, that's the most impressive MYOG project I've seen here in quite some time. Very creative of you. Congratulations!

    #1941770
    Jim Colten
    BPL Member

    @jcolten

    Locale: MN

    @Colin: One word reaction …. WOW!


    @Nick
    : How does your "industrial project" match up with heating up piston cylinders and connecting rods (to make frozen wrist pins easier to insert)?

    #1941832
    Ryan Smith
    BPL Member

    @violentgreen

    Locale: East TN

    That's excellent Colin!

    Ryan

    #1941840
    Nick Gatel
    BPL Member

    @ngatel

    Locale: Southern California

    "@Nick: How does your "industrial project" match up with heating up piston cylinders and connecting rods (to make frozen wrist pins easier to insert)?"

    Apparently baking newly painted motorcycle parts in the oven is a potential health hazard according to the boss :)


    But lets not drift too far from Colin's achievement; that would be my fault.

    I am impressed with his design, the adjustable stand, the materials he researched, the attention to detail, and the look of the final product. There are some really smart, talented, and innovative people here at BPL, and this product puts him up there with the best of BPL.

    #1941879
    Ben H.
    BPL Member

    @bzhayes

    Locale: No. Alabama

    wow… really impressive project. After the amount of effort you went through to glue that thing on, I think I would have went down to a weld shop and had them spot weld it on for $20 or so.

    I wonder what the fiberglass fabric adds to the windscreen…. abrasion resistance?

    #1941895
    Tad Englund
    BPL Member

    @bestbuilder

    Locale: Pacific Northwest

    Colin, this is excellent. I was just saying to myself (while waiting for a BPL page to load) it has been a while since a technical MYOG piece like this has been on here. This should have been an article!

    I was thinking- because the Plastilock 605-4 doesn't fill gaps and If I tried this there would be some major gaps; would using JB be a big problem?

    Or, are you planning on marketing this? Put me on the wait list.

    #1942386
    Colin Krusor
    BPL Member

    @ckrusor

    Locale: Northwest US

    Thanks for the responses.

    Nick, I am married, but my wife is a scientist and she gets excited about experiments in the kitchen involving chemicals. She made me tell her all about it.

    Ben, yes, I guess the fiberglass adds a bit of abrasion resistance. I bought a small roll of that stuff and another roll of lighter aluminized Kapton (thinner film) with a fiberglass ripstop grid (about 1/4” squares) on ebay about two years ago. I finally found time to try using them for something. I chose the stuff that is laminated to the fabric partly because it seems more durable but also because I’m not crazy about the brilliant gold color of the other stuff.

    Tad, I think JB weld would probably work fine if you rough up the surfaces first. I would guess that the thermal conductivity of JB weld is higher than the Plastilock, so the bonded area would be more efficiently cooled by the water in the pot. I might be a bit wary of using it over a wood fire, though, or for frying fish over any stove (because there isn’t water against the pot sides). Even with the higher temperature adhesive I used, I don’t plan to do any frying or cooking over a wood fire. I would only be comfortable using it for those kinds of cooking if the brackets were titanium and spot welded onto the pot.

    #1942976
    Sean Rhoades
    Member

    @kingpin

    Locale: WV

    So very innovative, I love it! Personally, I think this design would do great on the UL market. (hint, hint) :)

Viewing 13 posts - 1 through 13 (of 13 total)
  • You must be logged in to reply to this topic.
Forum Posting

A Membership is required to post in the forums. Login or become a member to post in the member forums!

Get the Newsletter

Get our free Handbook and Receive our weekly newsletter to see what's new at Backpacking Light!

Gear Research & Discovery Tools


Loading...