Hello folks!
Happy to hear from all of you! Thanks for the suggestions and encouragement. I've been busy hunched over the sewing machine for the past week, and I've been largely successful.
:P” height=”822″ src=”https://dpcr19kltm61a.cloudfront.net/backpackinglight/user_uploads/1340469986_64760.jpg” width=”550″ />
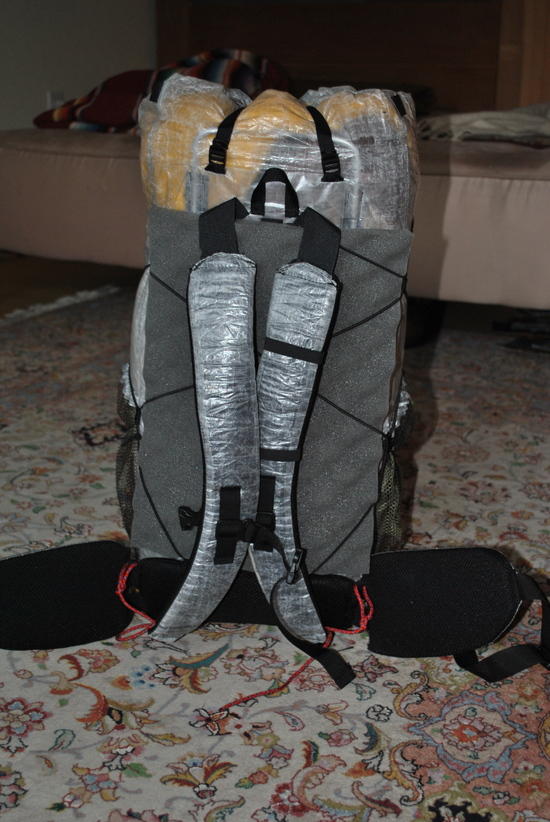
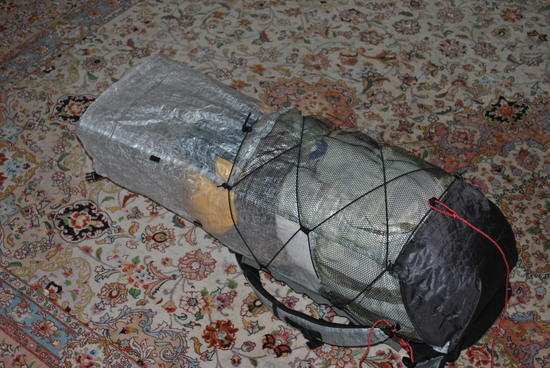
The crown jewel of my DIY-bent hermitage is my cuben fiber backpack. I haven't found a good way to weigh it yet (my only scale is a lil' digital one), but it's incredibly light (maybe 8-12oz with all the extras)[see later posting for weight]. Made with a 1.5oz cuben body, a curved cuben hybrid abrasion-resistant bottom, and a removable hip-belt system (which made sewing the bag together easiest, and may prove useful for upgrading). A shout out goes to Andy at Sea to Summit who shared his cuben backpack-smithing insight (http://seatosummitultralight.blogspot.com/2012/04/cuben-fiber-hybrid-backpack-with.html). I'm using the Gossamer Gear internal aluminum frame, and all the cuben fiber came from ZPacks. The seams, as you'll notice are all done with french-seams sewn flat, while the reinforcement areas are held on with 3M transfer tape (9485 I believe, whatever ZPack sells). Coming in a 60 yard roll, I've got a lifetime supply of that transfer tape now.

I call her Solaria, because she's probably going to cook my gear like a lil' oven. :P I'm thinking of using a white plastic bag as a pack liner. Note the curved bottom panel. That's the product of hours of contemplation, design, and fine stitchery, and IMO well worth it. When packed a bit tighter than it is here it looks stunning and professional, not to mention keeping the pack weight in just the right spot on my back. PM me if you want the lo-down on how to do that yourself. Be prepared to scratch your head a little.
Integrated with the Gossamer sit-pad (cut down a little to accommodate for the large hip-belt lower back pad).

Close-up of the removable hip belt. The hem you see is the boundary of a piece of 3D mesh wrapped around a piece of black hybrid cuben fabric. Against the pack body is a piece of velcro that matches a similarly sized piece on the belt. Slide it in with your hand between the velcro pieces, remove the hand… and voila! Connection and security.
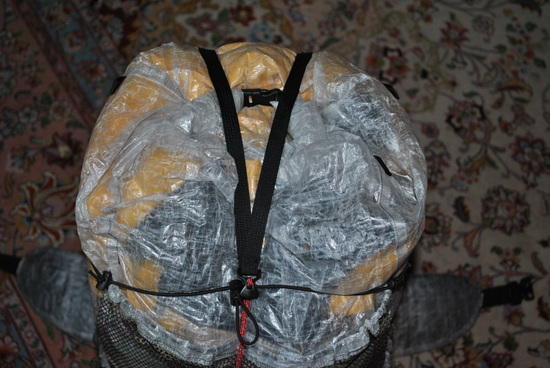
You're seeing the roll-top closure system I used, identical in most respects to a dry-bag. Just tuck the opening into a fold to fit the space between the two buckles, and roll. Then over the top you're seeing my top-strap. I designed this to be removable, as you'll see in the next photo, and it both compresses the bag and adds a space to strap on additional bulk. Also, it divides the large back mesh pocket, in-case I prefer smaller areas to organize gear.
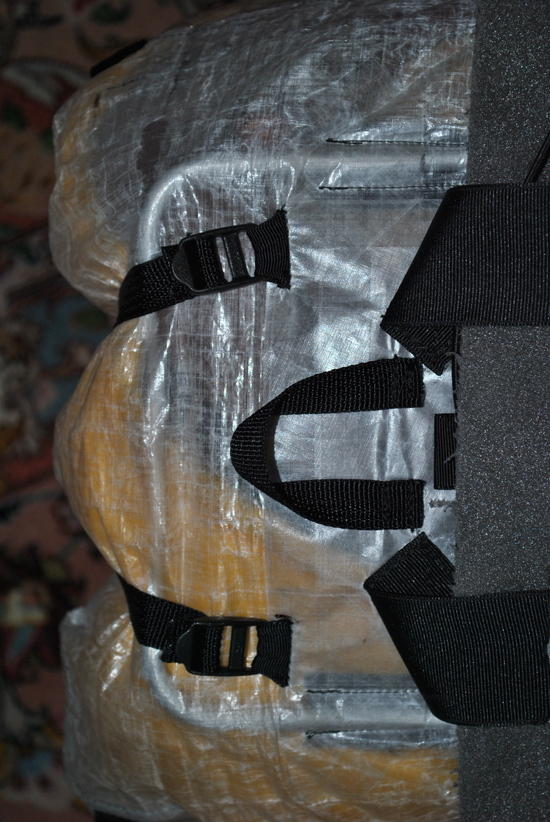
The top-strap is held on by two 1/2" ladder locks. At the end of the webbing I just sewed two stops as you'd see at the end of a webbing strap. These are quite easy to remove with a little effort, but very secure under pressure.
Lastly the volume:
Plenty of space in there. I didn't even run the bungee all the way up the sides because I just won't need it. Nice to know that I have the option in the future.
Other successes include a Primaloft (6oz/yard, the thicker stuff) "Minima" insulated vest (kit from Thru-Hiker), in canary yellow at 6.5oz, a brown wool tunic, weighing in at 13oz, a ripstop (1.1oz/yard, because I'm a 135lb feather-weight) hammock (48" wide) with amsteel guylines and nylon tree-huggers, all adding up to 8.8oz, and I'm working on my tarp/poncho today. The tarp/poncho is made of PU coated digital camo seconds I grabbed from backwoodsdaydreamer.com at under $3 a yard, but I'm paying for it in weight. This stuff weights something like 2.5oz/yard and my "UL" hammock set up will probably hit the 2lb mark by the time I'm done. If I had the cash left I'd shell out for a cuben tarp, but for now I think I'll make this work. As Ryan of BPL mentioned on a blog post he wrote last year, it's about getting out there; and I quote: "Spreadsheeting is interesting, pivoting means you have some amount of intelligence, but trust me when I tell ya: walking is where it’s at."
My big failure: the Libery Ridge wind-breaker from Thru-Hiker. I thought after I'd survived the annals of cramming heavy-weight Primaloft into french-seams (the vest) that making a simple wind-breaker would be a walk in the park. Just ordinary french-seams right? Nope. For some very intelligent reason, no doubt, the pattern is truly interesting, with about every seam being a curve that weaves back and forth. I took my time and made very careful seams, but in the end the seams wouldn't lay flat on my body (as they should have) and it seemed the sizing was way off. My vest, also from Thru-Hiker was a size extra-small, and even with the additional heavy batting and my thicker-than-intended seams, fit me like a charm. The shell was size small but seems to be incredibly off, too short at the sleeves, too short at my waist and tight around the shoulders. Granted I'm a funny shaped guy (tall, lanky, very slender) but I'm not sure that these unique seam locations make for a better breaker if it's hard to keep them true to the pattern, by the time you're done sewing them twice around alternating curves. This is all just a defense of my skills. I'm sure this pattern works wonders for some people.
My sleeping bag has been postponed until the start of next week, as I change out the color of my shell material (from evergreen to coyote brown, it's an OCD thing). I give my gratitude to Paul (AYCE) at Thru-Hiker who made dealing with them very easy and who gives great advice about gear-smithing. Truly the best price on materials if you want to make your own high-end down quilt, of any variety, is to buy it from Thru-Hiker IMHO. For about $200 I have 5 yards of .6oz/yrd Momentum fabric (water-resistant, ultra-light, and down-proof), and 18.6oz of 900-fill down. The down is the big ticket item, and 18oz is a whole bunch of it. My design, at 4inches of loft, will still only use about 15oz and is over-sized as both a quilt and a sleeping bag. 3oz will probably end up imbedded in the mesh of the tent I'm planning to do my down-stuffing in.
So excited to get more pictures up on here. One big question I have is for the lightest way to clip my under/over-quilt and a splash guard (to go below the hammock if it starts raining hard) to my suspension. I need something I can put together from pieces at the hardware store, inexpensive, and light weight. Any ideas?
Thanks friends!


