Incredible, jaw dropping creations! You could easily start a business if you wanted to.
Topic
First MYOG project – longitudinal baffles quilt
Become a member to post in the forums.
- This topic is empty.
Alexey,
Your work is top notch! I would love to make an attempt at something like this myself. How tall are you? Just to clarify, did you use the pattern for the top of the shell of the "longitudinal baffles quilt" for both the shell and liner of this quilt and eliminate the differential cut? Thanks
-Steve
Thanks for kind words!
S Collie > How tall are you? Just to clarify, did you use the pattern for the top of the shell of the "longitudinal baffles quilt" for both the shell and liner of this quilt and eliminate the differential cut?
Steve, I’m 177 cm / ~5’10” tall and my weight is 75 kg / ~165 lb. More or less average.
Yes, I used the shell top / back patterns for both the shell and the liner. No 16 cm / ~5” differential cut as is for the black quilt. Original pattern curves were calculated at 52 mm / ~2” steps / increments. The points I marked on scale paper before connecting them by pattern lines were still visible so I used them as reference points for karo step baffles. 3 “steps” for buffle and 2 “steps” for spacing between baffles. It’s for lengthwise baffles. To draw widthwise baffles I connected middle points of lengthwise spacings of adjacent baffle lines by a ruler and draw a line from 4 to 9 cm marks.
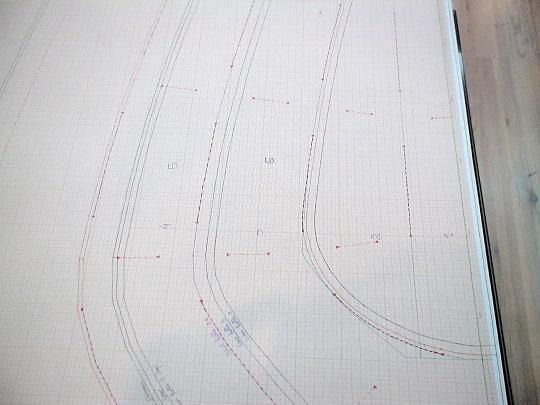
Here how the pattern looks like now (unfortunately it is a mess now since both the shell top and back pattern as well as the liner top and back plus karo steps lines are drawn on the same piece of scale paper). Red and magenta lines are for the shell, black and blue ones are the liner and green lines are for common shell and liner lines.
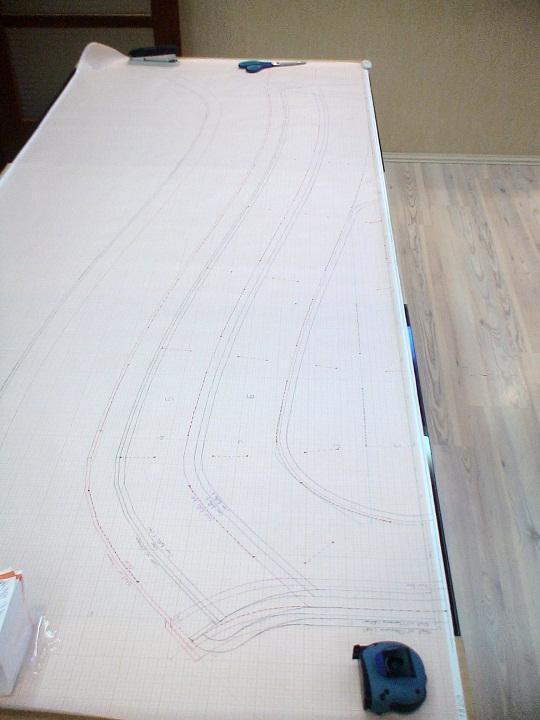


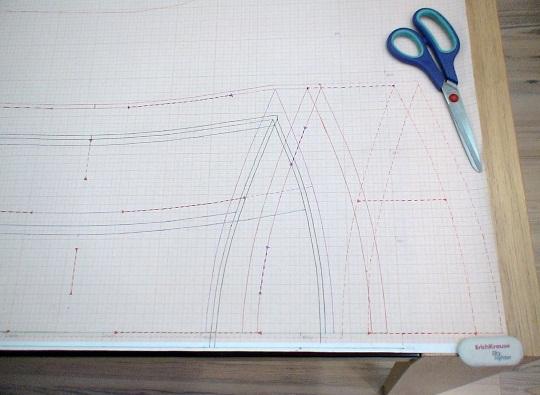
I added additional 15 cm / 6" of length at the foot end to compensate for drawstring closure. The red border lines at the middle of the last photo are for old quilt end and the ones at the right are for new one. I would add even more length but as you can see the paper was cut too short to do it.
Everything else was much easier than it was with the black quilt. No need for trace paper, orange M50 is transparent enough to just put it over the pattern and redraw pattern lines on it.
1. Cut equal pieces for the shell and the liner (top half and 2 back quarters for each one).
2. Then put the liner quarters on the liner half face to face (it is hard to separate face and inner sides of M50 but I found that a pencil draws on face side much better than on inner one). Pin and run a stitch along left and right edges.
3. Repeat for the shell pieces.
4. Sew an omni tape strips on the face sides of the shell and the liner (same side, left or right).
5. Then put the shell inside of the liner with its inner sides still facing out and pin and sew them together along the backhole edges down to the foot end so the only one (neck) side is left unconnected.
6. Turn it inside out.
7. Put a drawstring to the foot edge, sew its ends to the omni tape ends, attach the cordlock and take drawstring loop out through the cordlock then run a stitch along the foot edge to divide drawstring channel off the down chamber.
8. Sew the baffles.
9. Stuff down through still unsewed neck edge.
10. Pin and sew a line 25 mm / 1’’ off the neck edge.
11. Put a shock cord inside this 1’’ opened strip and finish shock cord channel just like it was done to drawstring.
Hope it will help.
Nice pattern
Simple, yet effective
I like it and I want one now!
Phenomenal.
You put a few cottage quilt folks to shame from an aesthetic standpoint.
Great work.
are real works of art. Especially the karo one. I've actually been considering making a karo quilt (with baffles). Your example will really help with that. Are there things about your quilts that work really well or is there something that you would do differently if you had to do it again? Would you change some details for side sleepers?
Mark, this shape is better suited for back or belly sleepers (I'm of the latter ilk). The wideness of shoulder area is bought by relative narrowness of hip and foot area. If you are of those side sleepers who usually bend 'higher' leg at knee and hip to 'bring it closer to stomach' when you could feel restricted. In this case you probably need wider hip girth at expence of shoulder girth. The backhole should be narrowed too.
As for things I would do different as I previously wrote I would do spacing between karo step baffles wider by one 'step' as well as the length of foot area longer by at least 10 cm / 4". Not that the quilt is too short but I plan to use both quilts as a 'system'. The orange one alone in the summer, the black one alone for early autumn and late spring, both quilts (the black one inside of the orange one) for late autumn and early spring and both quilts plus down parka, pants and booties in the winter. So I need wide girth of both quilts at shoulders to hips to accommodate parka and longer length of the orange quilt so I can ‘dress’ it over the black one.
Become a member to post in the forums.
advertisement
Garage Grown Gear Hidden Gems
Discover under-the-radar ultralight gear from small brands.

